Showing posts with label Christmas Tags. Show all posts

Saturday, November 29, 2025

OH WHAT FUN LARGE SHAKER TAGS | with Conny

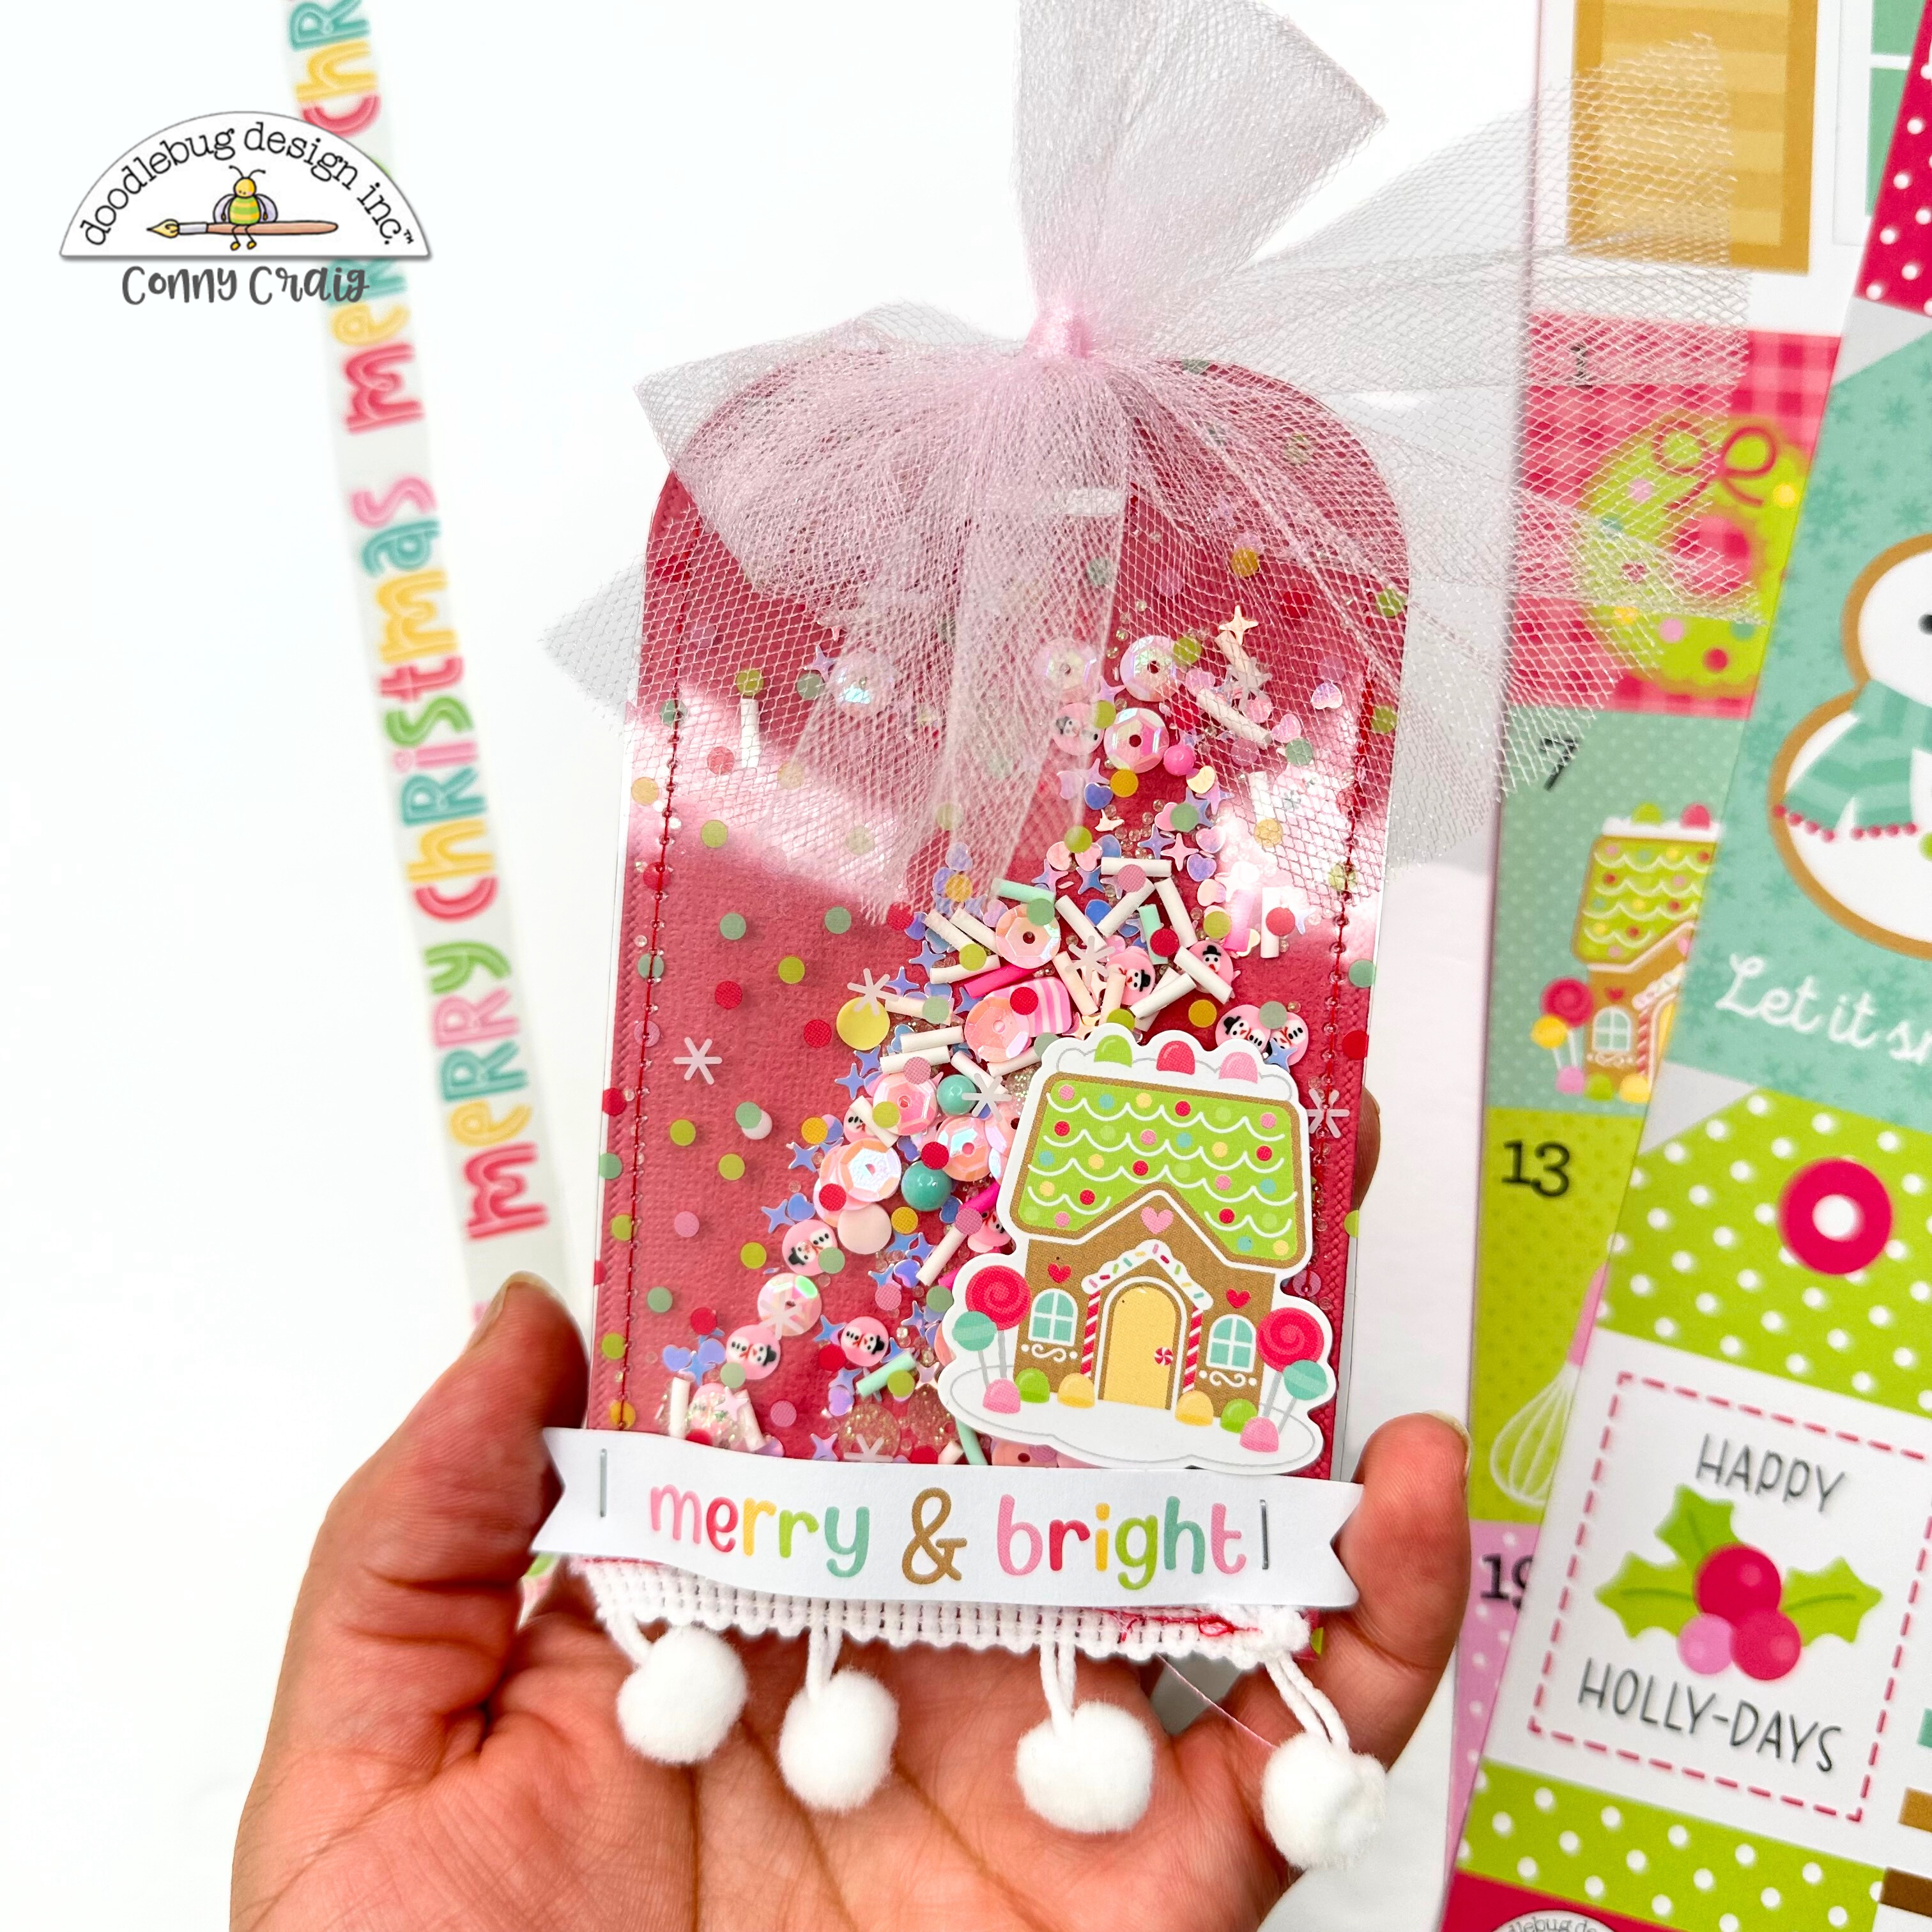
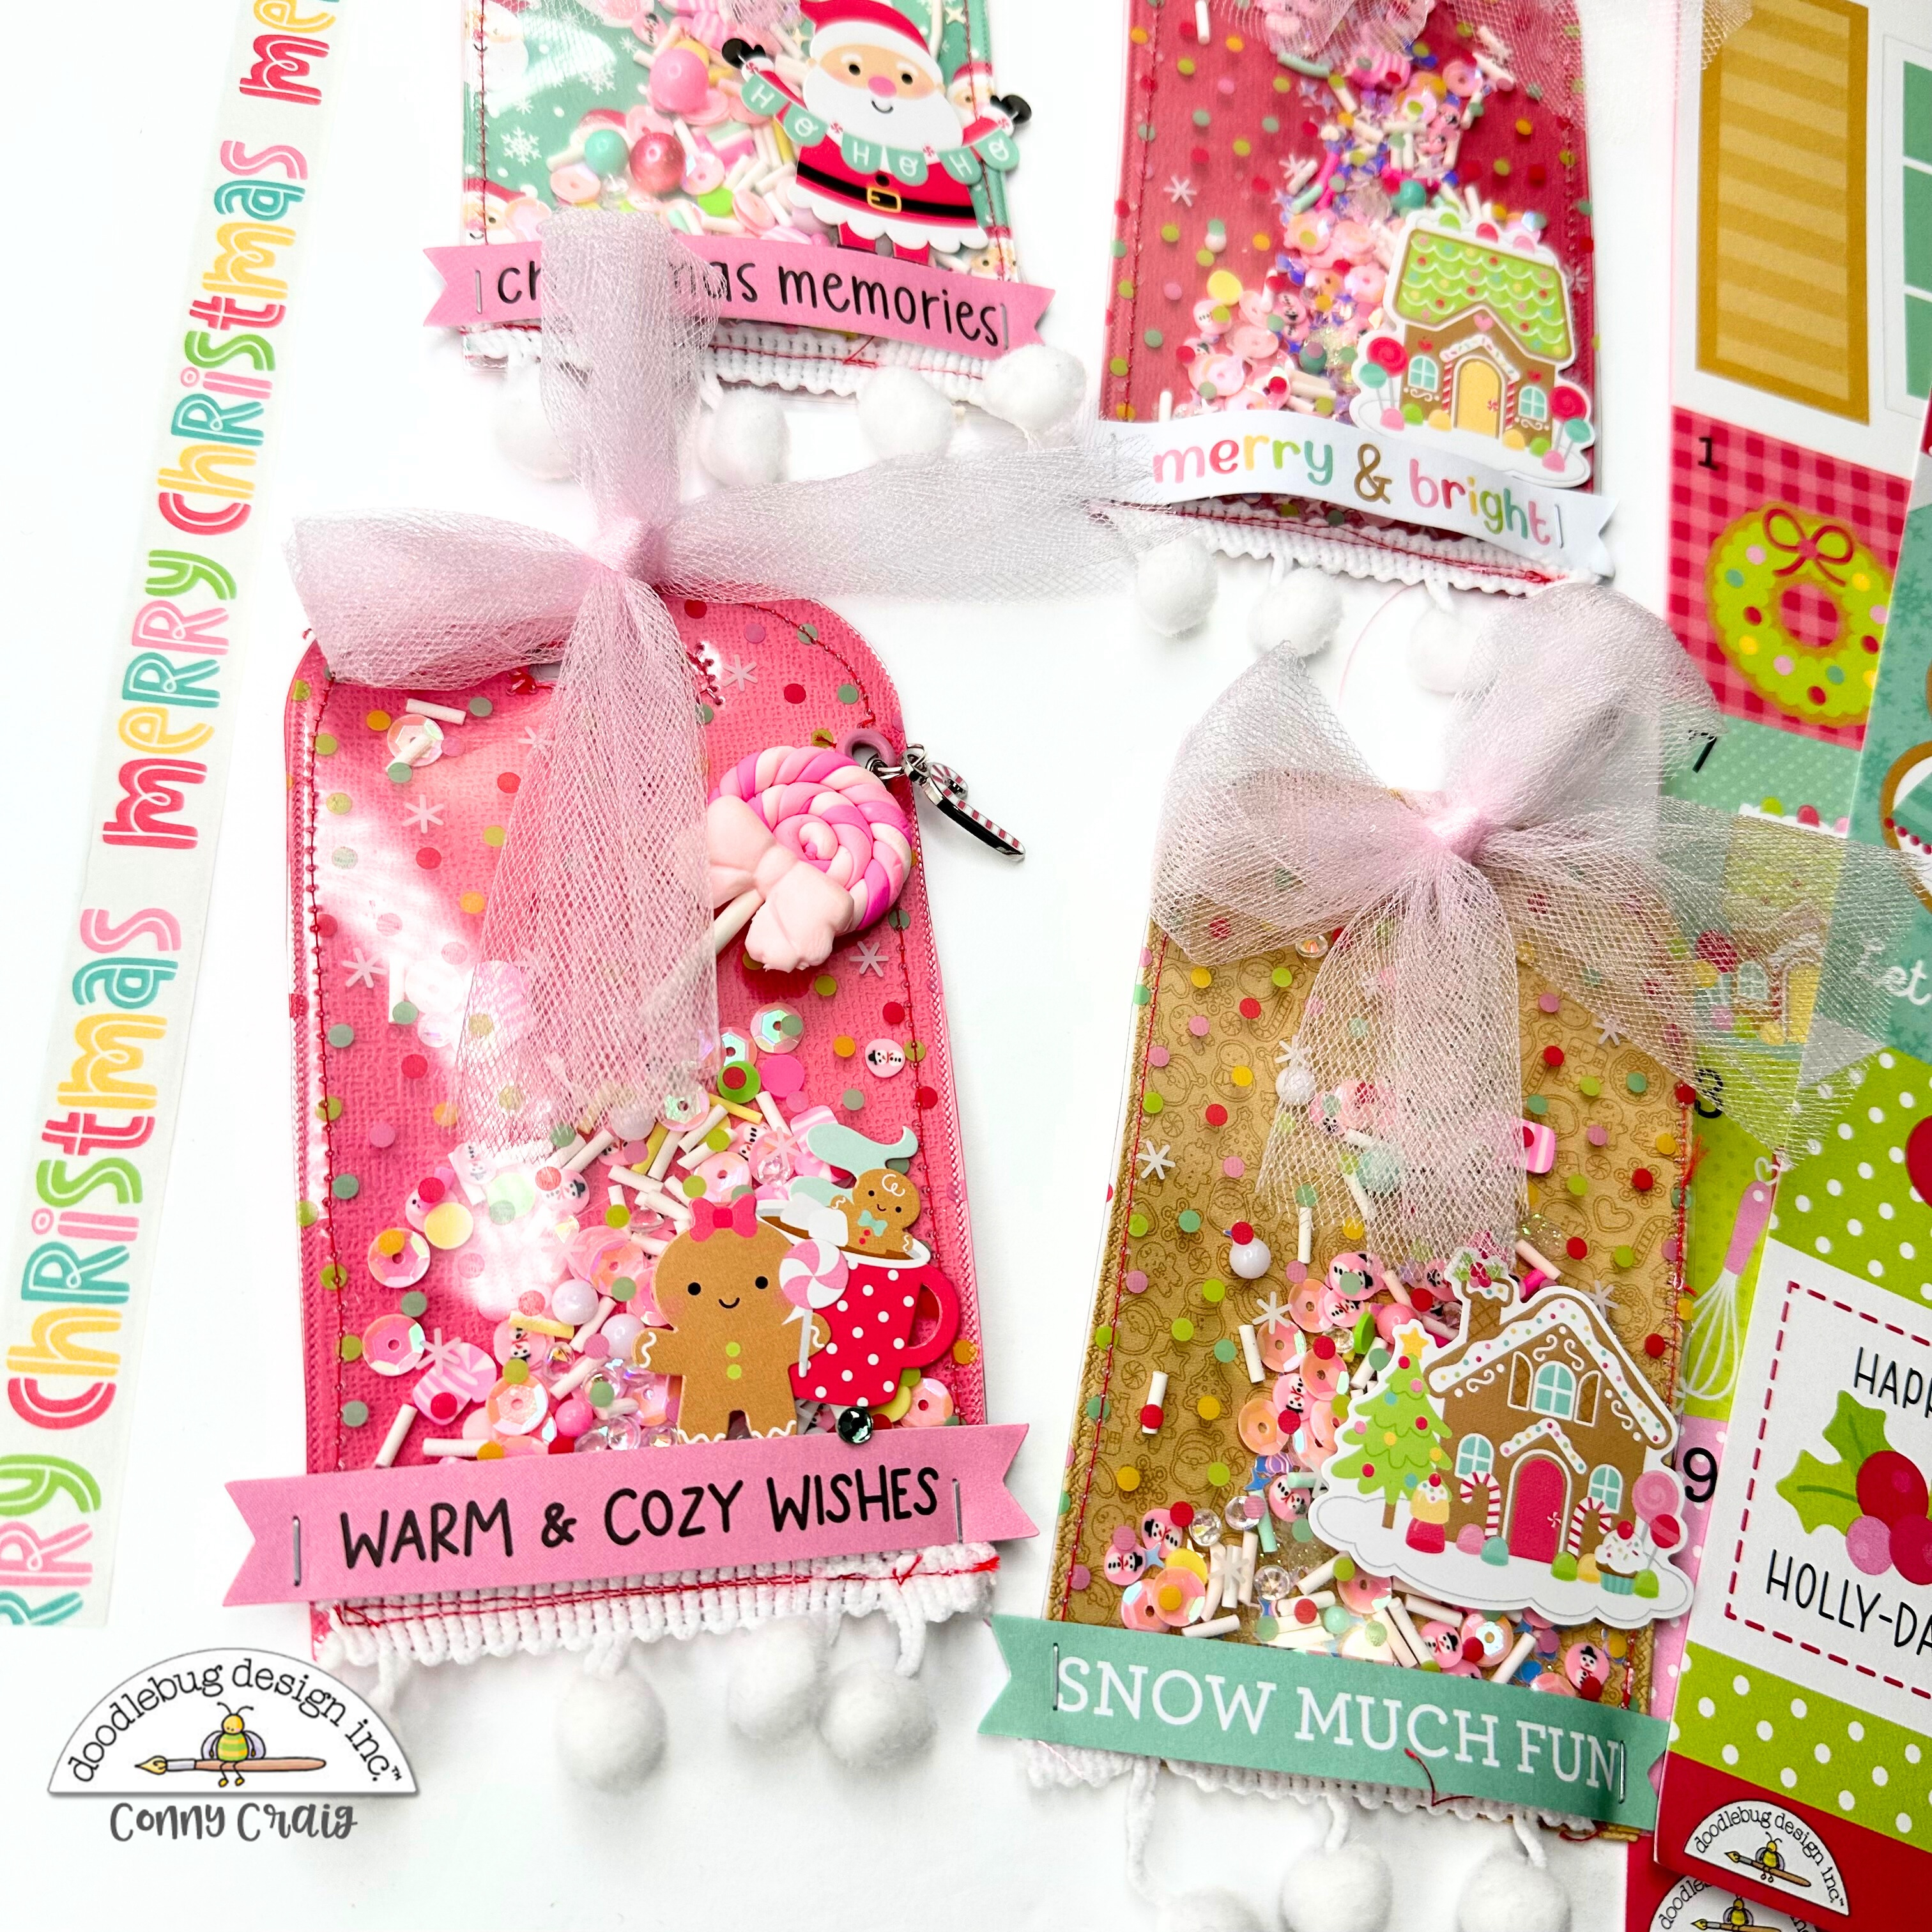
Hello crafty friends! It’s Conny here from The Daily Life of Creativity, and today I’m sharing some jumbo shaker tags that feel like little Christmas gifts all by themselves
If you followed my last project—my Oh What Fun mini album—then you know I created that album mostly using the 6x8 paper pad. I ended up with a few leftover sheets… and instead of letting them sit, I turned them into these festive tags! If you haven’t seen the album yet, I have a full process video you can watch right here:

Those leftover pieces from the pad were honestly the MVP of this tag project!

Lets get started! Each tag measures 8 1/4” x 2 3/4”. This longer, slim shape gives you space to layer embellishments while still keeping everything clean and elegant. To make them sturdy, I matted each one onto 110lb. white cardstock, cut slightly larger at 8 1/4” x 2 3/4”. This leaves a white border frames the patterned paper beautifully and makes the tags feel “finished.” I trimmed each patterned paper 8" x 2 1/2". I used two types of acetate depending on the patterned paper.


  • The Christmas Magic acetate from the collection (SKU 8987) - full of tiny multicolored stars.
  • Heavy clear acetate - great when the paper is already bold or busy.

Both are cut at the same size as the matting, 8 1/4” x 2 3/4”, to fully cover the front. Once the patterned layer is adhered to the white cardstock, I place the acetate on top and take everything to the sewing machine.


I stitch around three sides, the two long edges and one short edge - leaving the top open. This creates a little pouch for you to add your mix of sequins and shakers.


Here’s the mix I used:

  • Christmas confetti
  • Peppermint bits
  • Mint ball shaker pieces
  • Laminate balls
  • Iridescent sequins
  • Snowflake sprinkles

I love when the shaker mix matches papers but it also stands out. Don’t be afraid to combine textures and finishes - sparkle on sparkle is always a win during the holidays. Once filled, I stitch the top edge closed to seal in everything.  I punched a hole in the middle and to protect that opening, I used standard eyelets. They close completely, so none of the shaker pieces can sneak out. I used aqua eyelets. Then I tied each tag with a sparkly iridescent tulle, which pulls the reflected light from the sequins and fills in any empty space. It looks like a bow on a present.


Even though shaker tags are already showstoppers, I still like to add soft layering:


  • Doodle Pops
  • Odds & Ends
  • Chit Chat phrases
  • Mini Icons
  • Puffy Icons
All of the embellishments sit on 1/16” foam adhesive, just enough to lift without overpowering the shaker. You’ll also find a process video for these jumbo shaker tags on Instagram! Make sure you’re following:

@thedailylifeofcreativity
@doodlebugdesign 

It should appear as a collaboration post so it’s easy to find. Creating tags like these reminds me why I love paper crafting, simple pieces of paper transforming into tiny bits of joy. They’re perfect for gifts, treat bags, mini albums, stocking stuffers, and even tucked into planners.
Thank you for spending a little creative time with me today. Happy holidays, happy crafting, and sprinkle a little magic everywhere you go, Xo Conny.


DOODLEBUG PRODUCTS USED

8984 oh what fun 6x8 paper pad 
8965 oh what fun Mini Icons
8966 oh what fun Puffy Icons 
8980 oh what fun Odds and Ends 
8980 oh what fun Chit Chat 
8964 peppermints shakers
8963 christmas confetti shakers
8410 limeade balls shakers
8411 mint balls shakers
 
Other 

Double-Sided Adhesive 
Liquid Glue 
Sewing Machine
Score and Trim Board 
Standard Eyelets 

Monday, December 23, 2024

TINSEL TIME SHAKER GIFT TAGS | with Kathy

We are officially down to the wire!  It's time to get all of those Christmas gifts wrapped and put under the tree!  I decided to add some fun Tinsel Time Shaker Tags to some of my gifts this year... take a peek...


I started with some Tag Dies from my stash.  I cut them from some Tinsel Time Coordinating Textured Cardstock.  I lined the bottom tag piece (without the window)  with some fun papers from the 6x6 pad.  I love the smaller prints, they work perfectly for projects like this.  I covered the open window of the tags with some Heavyweight Acetate.  I added some double sided 1/8"foam tape to outline the window, filled it with some fun shakers then attached the top tag to the bottom!  All that was left was to decorate which was easy with all the fun Puffy Stickers, Shaped Sprinkles, mini Jewels, Icon Stickers, Odds & Ends and Bits & Pieces!  Here are some close-ups...


On the "B" side of the Happy Holly Days 6x6 paper are word strips that are great for cards & tags.  I used them for sentiments on my tags.  I also added some fun Glitter Sprinkles from the Christmas Assortment to some of the ornaments.


In addition to Doodlebug Shaker balls, I also used the Happy Holidays and Jolly Holly Shakers.  I also added some shaped sprinkles from the Christmas Candy Shaped Sprinkles.

To top my tags I stapled some grosgrain ribbon using my tiny attacher stapler.  They are all set to be added to my gifts!

Here's a little video of my tags.... it's always more fun to see things in motion!

I hope that everyone has a wonderful, safe & healthy Holiday season.  I'll be back in the new year with some more Doodlebug projects!  Thanks for stopping by to peek.


BLOG | INSTAGRAM | YOUTUBE

DOODLEBUG PRODUCTS USED

Tinsel Time Collection
Heavyweight Acetate
Shakers (Ladybug, Cupcake, Limeade, Silver, White, Mint & Bumblebee)
Happy Holidays Sprinkles
Jolly Holly Shakers
Ice Crystals Shakers

OTHER

Tag Builder Blueprints 5 Dienamics
Sizzix Big Shot
Grosgrain Ribbon
Tiny Attacher
1/8" foam tape
1/8" double sided tape
Foam Squares


Monday, December 18, 2023

GINGERBREAD KISSES TRUFFLE BOXES & GIFT CARD TAGS | with Kathy

I can't believe that Christmas is one week from today!  I think I am almost done shopping... well maybe... This year I am giving a few gift cards, and I wanted to make them a little more personal so I made some chocolate truffles and packaged them up with cute gift card tags using the Gingerbread Kisses collection.  Take a peek...

I started with the box cut file I found in the Silhouette Store that was designed to be cut from acetate, it is a "no-glue" box.  I cut it from the Sugar Sprinkles Heavy Acetate. The little boxes were the perfect size to hold 2 truffles, and I just love the colorful dots on the acetate!


To dress the boxes up a little I made a belly band and cut a bow using another cut file. 


Next I created the gift card "tags" that I tied to the bows on the box with some Doodle Twine.  I started with a couple of tags from the Bits & Pieces pack.  I embellished them with some Odds & Ends, chit chat pieces and some sprinkles.  I glued them to a small envelope sized just right to hold a gift card.


I love how it all turned out!  These would also make fun teacher or neighbor gifts.  The hardest part of this whole project was to not eat the truffles!  That's it for me today, I will be back in the new year with some more Doodlebug Fun!  I wish all of our Doodlebug Friends a very Merry Christmas and a Happy and Healthy New Year!


DOODLEBUG PRODUCTS USED

Gingerbread Kisses Collection
Sugar Sprinkles Heavyweight Acetate
Doodle Twine

OTHER

Silhouette Cameo
Acetate Box (no glue) Cut File  (Silhouette Design ID 423268)
Bow Cut File (Silhouette Design ID 25162)
Tuck- In Envelope Cut File  (Silhouette Design ID 441630)


Saturday, December 16, 2023

GINGERBREAD KISSES SHAKER TAGS | with Conny

Happy Holidays!
 

Hey there! This is Conny from The Daily Life of Creativity and I wanted to share with you some really cute tags I made using the Gingerbread Kisses Collection. With the holiday just around the corner, it's the perfect time to add a special touch to your gifts or baked goods. These tags can really add that extra bit of personalization. I personally love making shaker tags!


To get started, you can create tags in any size or shape that you like, depending on how you plan to use them.  For this example, I used a 3 x 5 metal die, but you can use any shape you like, this one example would work great. You can add a shaker in the front and place a special note in the back pocket. It's a really fun and unique way to finish off a gift!


First, start by picking out the papers that you want to use for the shakers. I suggest using the Sugar Sprinkles heavy acetate for this purpose. You can also add cute sequins or create your paper sequins using a punch hole. This way, you can quickly match the collection and add some sparkle to your shakers.


If you want to add some extra cheer to your holiday gifts, I suggest using tulle, Sweet Santa Little Charmers, mini icons, and chit chat die cut pieces to decorate your tags. This collection is perfect for crafting unique and adorable tags that will put a smile on anyone's face. Let's get creative together and make some beautiful tags!


Thank you for reading, We can't wait to see what you create using the Gingerbread Kisses.


DOODLEBUG PRODUCTS USED

Gingerbread Kisses Collection
Sweet Santa - Little Charmers
Doodlebug Sequins
Sugar Sprinkles Heavy Acetate

OTHER

Tulle
Sewing Machine

Tuesday, December 15, 2020

NIGHT BEFORE CHRISTMAS TAGS | with Traci

Hello friends!  A few weeks back I shared a box that I made for storing my Christmas gift tags.  In that post, I promised to come back and share some of my tags once I had them finished.  I love making tags when I feel like playing in my craft room, but only have enough time to finish a small project.  


To make my tag projects even easier, I gathered the following supplies and keep them in a plastic box:  
DoodleCuts Large Tag dies, white card stock, black ink, my Misti stamping tool, glitter gel pens, jewels, ribbon, and the Night Before Christmas Doodle Stamps.


Once I finish a tag, I store it in my tag box until I'm ready to wrap gifts.  In the meantime, my box of tags looks really cute sitting out on my coffee table!


I matted each white tag on cute pattern paper from the Night Before Christmas collection, and added fun details like mini heart sprinkles, border stickers, and pretty ribbon.


For the "Christmas" on the reindeer tag, I just cut out the word from the Dasher & Co.  pattern sheet.  I love those mini jewels!  They give the tags a little festive sparkle and shine!


So if you find yourself with 10-15 minutes of crafty time, make some gift tags!  They are fun and easy to make, and you'll feel such a sense of accomplishment and joy.  Merry Christmas everyone!
 
Blog * Facebook * Instagram * Pinterest

DOODLEBUG PRODUCTS USED
Night Before Christmas Collection
Night Before Christmas Doodle Stamps
Doodle Cuts Large Tag

Saturday, July 20, 2019

DOODLE-POPS CHRISTMAS IN JULY TAGS | with Nathalie

Since I have been having so much fun with the Christmas Town collection this month, I am back today with another Christmas in July project. I decided to create a series of gift tags featuring Doodle-pops which are truly perfect for cards and tags. Not only do they add instant depth to your projects but they are always super cute!

I started with basic cardstock in five different colors which I cut into tags manually (measuring 2.5x4.75 inches). I also picked 5 packs of Doodle-pops, one for each tag.
I then decorated each tags with a mix of patterned papers, all from the 6x6 Christmas Town stack, stickers, die-cuts from the same collection and various embellishments. I worked on each one individually as I wanted them to look different.


I also paid special attention to textures and dimension adhering some of the stickers and sentiments on foam dots, using sequins and heart Sprinkles, and adding cute paperclips or clothespin. My most used metal die is the hole reinforcer from the Pill Better set and I pulled it out again to cut some out of patterned paper (see above). I love them so much better than plain office ones!

Matching chunky twines finish the look. I am so happy with these tags! They will adorn simply wrapped Christmas presents beautifully! Of course, they would also make a great gift by themselves!

Thank you for stopping by! As always, if you have questions, you can contact me via my blog or Instagram account. Happy crafting!
Doodlebug Supplies Used:
Christmas Mini Clothespins
Grasshopper Textured Cardstock
Limeade Textured Cardstock
Blush Textured Cardstock
Raspberry Textured Cardstock
Swimming Pool Textured Cardstock
Sweet Spruce Doodle-Pop
Snow Buddies Doodle-Pop
Christmas Town Doodle-Pop
Dear Friends Doodle-Pop
Sweet Santa Doodle-Pop
Christmas Town Chit Chat
Christmas Town Mini Icon Stickers
Christmas Town Icon Stickers
Christmas Town This & That
Christmas town 6x6 Paper Pad
Baby Hearts Shape Sprinkles
Stars & Moon Cute Clips
Pill Better Doodle Cuts
Swimming Pool Chunky Twine
Ladybug Chunky Twine
Lily white Sequins Assortment
Swimming Pool Mini Doilies
instagram/blog

Saturday, December 8, 2018

Christmas Town Tags and Planner Pocket Storage| with Anabelle

December is one of those times of the year when gift giving is frequent! There have been many times when I've needed a quick gift and a card to go with it. So, I decided to create some little gift tags to keep on hand for just those times. And what better place to store them than in my December Planner. I created several tags and a pocket insert to hold them. I placed it into my Daily Doodle and now I'm ready to give them out at a moment's notice.
To create the pocket, I took a piece of patterned paper and cut it to 8 1/4 by 10 3/4 inches. Then I scored the bottom two inches to create the fold up flap. 

I added a strip of washi to finish off the edge and scored it down the center edge. I stitched the sides to seal off the pocket. Now it was ready to be placed into my notebook.
Now, I was ready to create my tags. I used my 6 by 6 papers for this. I like using small prints, or monochromatic colors for the tags so I can layer on top of them.
Each tag was decorated with the Die Cuts, some stickers and gems.

I love this little guy carrying the tree. I added some stickers and a gem pom pom on his hat!

This one uses one of the large stickers from the 12 by 12 sticker sheet. I love the little mice die cuts and thought they would look cute with it.
On this last tag, I created a little scene using a Doodlepop, some stickers and a Chit Chat. I love that adorable snowman. 
The tags look so sweet in their pocket home in my Daily Doodle. I almost don't want to give them away!
As you can see, these little tags will look great with any gift. Whether they are on a wrapped box, attached to a gift bag or tied to a bottle of wine, they are bound to steal the recipient's heart.
Thanks so much for stopping by today! Happy Creating!
Pin It button on image hover