Sunday, March 31, 2019

SIMPLY SPRING | Mini Album with Traci

Sunshine, flowers, butterflies and warmer weather! Spring has arrived here in Georgia and despite the incredibly high pollen counts, I'm ready! I've been having lots of fun playing with the Simply Spring collection so I'm excited to share my latest mini with you.

For this one, I used an acrylic cover, which I love for layering all of the cute stickers and die cuts!


In addition to the stickers and die cuts on the cover, I added Doodlebug's adorable envelopes and cards inside the album.  Here are a few pictures, but you can also take a better look at the album by scrolling down to my You Tube video!


I just can't get enough of this Spring collection ... the flower pots and cute little critters are ADORABLE! Check out my video below and, if interested, please subscribe to my You Tube channel where I'm starting to post more of my Doodlebug and Artsy Albums creations. 


Thanks for stopping by!

Doodlebug Supplies Used:
Simply Spring 6x6 paper pad
Simply Spring Odds & Ends
Doodlebug Cards & Envelopes
Shape and Dot Sprinkles
Other Supplies Used:
White Card stock
Acrylic Album Cover by Clear Scraps

Saturday, March 30, 2019

SIMPLY SPRING | Spring Wall Decor with Jennifer

Spring is finally here and what better way to celebrate than to create a "tweet" wall hanging. These cute lovebirds were made using the Simply Spring collection and a coordinating cut file.


To create the wall hanging, I first welded the birds, branch and flowers together,  to create a template. Then using the offset tool in my Silhouette software I created a border around the entire design which also included the heart and leaves. Both pieces were cut out of cardstock, as shown below. The cardstock templates were then used to trace the designs onto 1/8" mdf board. The pieces were cut out using a scroll saw and sanded to smooth the rough edges.  (Layers of chipboard or foam board could be used instead, if you don't want to use a saw.)
For the smaller pieces, like the flowers, leaves and birds I used layers of chipboard.
All the pieces were covered with patterned papers from the Simply Spring collection, textured cardstock or Petite prints. The chipboard pieces were stitched with embroidery floss for some added detail and then layered on to the wood cutouts. 
I loved the bumble bee Doodle-pop and added him to the chipboard heart. I also used some heart shaped sprinkles on each bird's chest and round ones for their eyes.  Below, you can see I used some larger sprinkles in the center of the flowers as well.

Some twine was used to tie my "Springtime" title in place. To finish off the project I decided to add a few colorful raindrops.
The chipboard raindrops were covered with cardstock on one side and attached to some thread. Once dry the other side of the raindrops were covered with cardstock and then both sides were covered in glitter.
Doodlebug Supplies: 
Simply Spring - Two Birds Cutting File
Simply Spring - 6x6 Paper Pad
Simply Spring - Playful Plaid 12x12 Double Sided Cardstock
Simply Spring - Chit Chat Die Cut Pieces 
Simply Spring - Bloomin' Bugs Doodle-pop
Simply Spring - Spring Sprinkles
Textured Cardstock (colors: Cupcake, Bumblebee, Grasshopper,  Limeade, Chocolate Chip, Cinnamon, Swimming Pool, Wisteria)
Dot-Stripe Petite Prints Cardstock - Pistachio
Doodle Twine - Lilac
Other Supplies: 1/8" MDF, chipboard, embroidery floss, glitter, thread, paint.

SIMPLY SPRING | Pocket Page Spread with Nathalie

I was inspired by the new Simply Spring collection to scrapbook a family gathering for which I had several outdoor photos. However, in the process, I realized that it actually works great for many types of photos!
This 6x12 pocket spread is now part of my year-long album:
I concentrated on the yellow and green elements of the collection along with a few touches of blue. I found perfect die-cut words and shapes in the Chit Chat and Odds & Ends packs. In addition, I used several stickers from the This & That 12x12 sheet including a long scallop border that I placed directly on the edge of my page protector. I love the result!


As you can see, I also created an insert for extra photos and it was easy with an envelope from the Simply Spring Create-A-Card pack. I trimmed the envelope flap so you can understand right away that there are photos to pull out. I added my journaling typed on strips directly on top along with some leaves from the Garden Flowers craft kit. Of course, I measured the space left for photos after punching the holes! Here's a look at the insert by itself:


If you are inspired to create pocket pages with the Simply Spring range, make sure to share a link in the comments (or tag me on Instagram @anounceofcreativity) because I would love to see them!
Doodlebug Products Used:
Simply Spring Collection - Odds and Ends - Die Cut Cardstock Pieces
Simply Spring Collection - Chit Chat - Die Cut Cardstock Pieces
Simply Spring Collection - Create-A-Card - Cards and Envelopes - Assortment
Spring Garden Collection - Craft Kit - Garden Flowers
Simply Spring Collection - 12 x 12 Double Sided Paper - Hoppy Spring
Simply Spring Collection - 12 x 12 Double Sided Paper - Bloomin' Bugs
Simply Spring Collection - 12 x 12 Double Sided Paper - Bee Happy
Simply Spring Collection - 12 x 12 Cardstock Stickers - This and That
Washi Tape - Beetle Black Swiss Dot
Alphabet Cardstock Stickers - Teensy Type - Beetle Black
12 x 12 Textured Cardstock - Cotton Candy

Friday, March 29, 2019

SIMPLY SPRING | Stamping with Kay

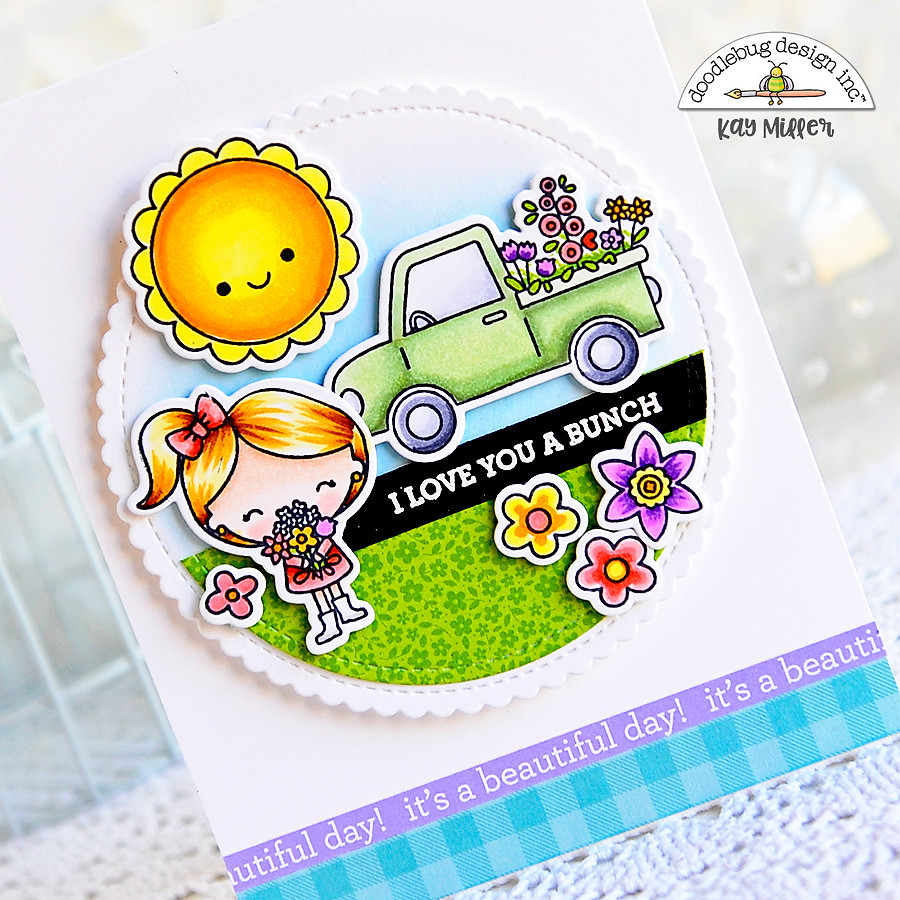
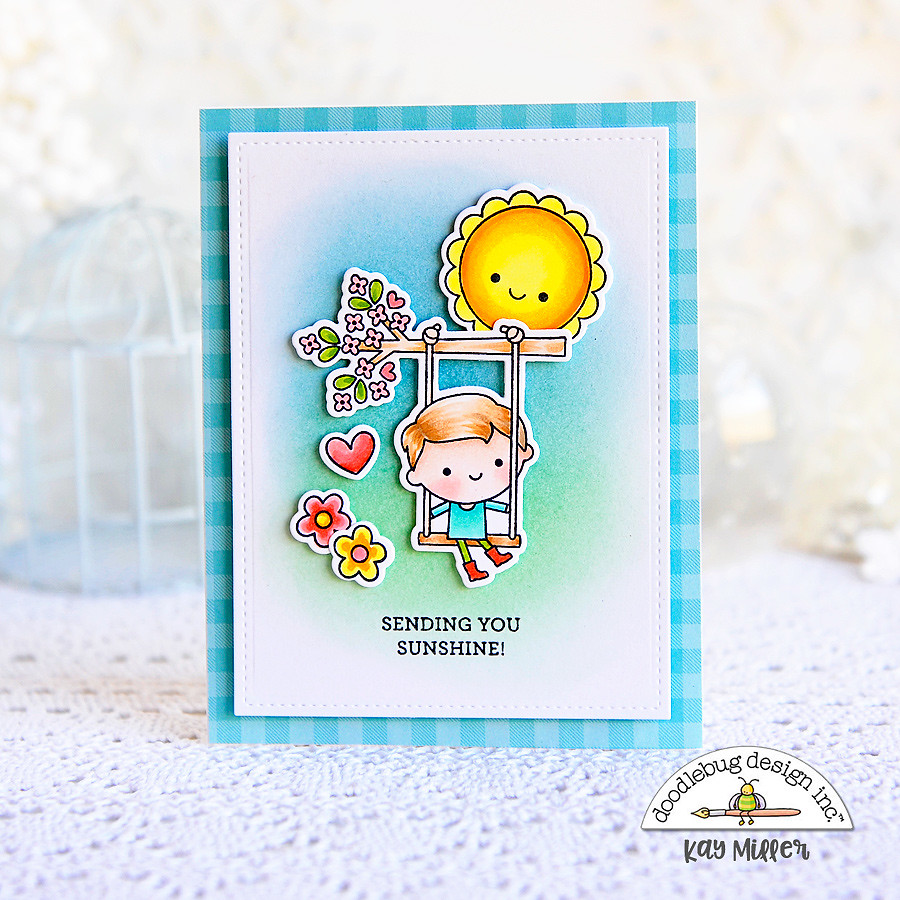
Hi there! I'm excited to share a couple of cards with you today that I created with the super cute new stamps from the Simply Spring Collection. There are two stamp sets, Flower Girl and Oh Boy! I made a card featuring each set, but used stamps from both sets on each of them. They go together perfectly!


So my first card is using primarily stamps from the Flower Girl stamp set along with the coordinating dies. I used a scalloped circle die to create a background. I blended some distress in along the top, and added some grass along the bottom by cutting out a half circle of green patterned paper from the Floral-Graph Rainbow Petite prints paper pack. 

The two papers along the bottom of the card are from the 6x6 Simply Spring paper pack. All of the cute images were colored with Copic markers, cut out with the coordinating dies, and added to the card with foam tape. The sentiment was heat embossed with white embossing powder.

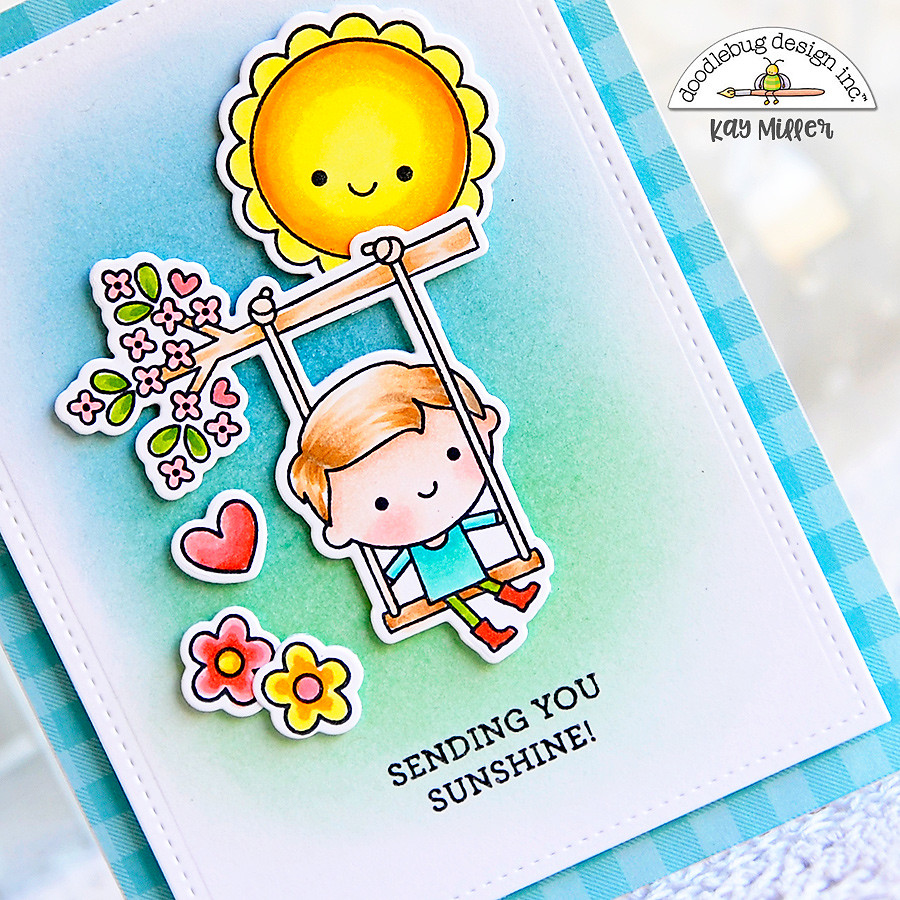
My second card features mostly stamps from the Oh Boy! stamp set. I created a soft background by blending some blue and green Distress inks onto my white background. I mounted this onto an A2 size card base covered with patterned paper from the 6x6 Simply Spring paper pack. 


All of the cute images were colored with Copic markers, cut out with the matching dies, and added to the card with foam tape. 


I hope you have enjoyed my cards today!
Thanks so much for stopping by!


Doodlebug Supplies used:
Flower Girl Stamp set
Flower Girl Dies
Oh Boy! Stamp Set
Oh Boy! Dies
Simply Spring 6x6 paper pad
Floral Graph Rainbow Petite Prints Paper pad


Thursday, March 28, 2019

SIMPLY SPRING | Spring BEEgins Layout with Virginia

Do you like to use beautiful flower blooms on your crafting projects? Check out these gorgeous pre-cut flower blooms in this garden flower set! The blooms and leaves are double-sided and so easy to assemble.  My layout celebrates some buzzing Spring activities in my garden and using the bee electronic cutting file is a great way to create the same embellishment multiple times to play up the bee theme.

I added some sugar glitter to the centre of the flower blooms for extra sparkle and placed some bees flying out the honeycomb paper revealed from a torn section at the top of the page.
Doodlebug Supply List:
Simply Spring Garden Flowers Kit
12x12 Simply Spring- playful plaid
12x12 Simply Spring- blooming' bugs
12x12 Simple Spring- bee happy
Simply Spring Odds&Ends ephemera
Simple Spring This&That stickers
Glitter Sprinkles
Sugar Glitter
Bee electronic cutting file

Wednesday, March 27, 2019

SIMPLY SPRING | Daily Doodles Pages with Anabelle

I was so excited to receive my Lots O' Dots Daily Doodle! It arrived just in time for spring. Then, when I saw the beautiful Simply Spring Collection, I knew they were a match made in heaven. I couldn't wait to set it up and have it ready for the beautiful warm days of April. At least, I hope it's warm here in the Mid-Atlantic. You just never know these days. I started off by decorating the front of my planner. This is definitely one of my favorite things to do. I love coordinating the front pockets and inserts. The colors and motifs in this collection made this an especially fun job. I adore all of the florals and the little creatures.

To decorate the insert. I adhered the Chit Chats directly onto the insert. I love using foam adhesive on part of the design. It really makes the whole thing pop. I decided to create a little banner on a large paper clip so that I could slide it off and onto the booklet. It is a perfect decoration, but can also be used on my weekly calendar pages as a book mark.
Here is a close up of the clip. I just folded the paper over and adhered it on the back. Then I added the die cuts from the Odds and Ends pack. Again, I used some foam adhesive for texture and visual interest.
Here is another view of it on the insert. I really love the adorable, smiling sun. It's such a sweet reminder of the warm days to come. 
The little Sprinkles always add another nice touch. I love the colors that match the collection so perfectly.
Finally, I set up my April calendar. I love the blank calendar inserts and how they have large enough boxes to decorate and write in. On this spread, I used the Abigail font stickers down the side of the calendar. Tracing them with a black marker really made them pop. I LOVE the Icon stickers and used a lot of them on here. They are so cute and whimsical. Having a calendar decorated with this adorable collection makes me want to open my planner and add plan!
Now, my Lots O' Dots planner is set up and ready to go. I'll be adding more fun pages onto my weekly spreads. Using the Simply Spring collection will give this planner such a happy and fun feeling!
Thanks for stopping by! Have a great day.


Doodle Products Used:
Lots O' Dots Daily Doodle
Cabana Strip Daily Doodles Travel Planner Calendar Insert
Simply Spring Icon Stickers
Simply Spring Chit Chats
Simply Spring Sprinkles
Simply Spring Odds and Ends
Simply Spring Jelly Clips
Simply Spring This and That Sticker Sheet
Signs of Spring Washi Tape
Little Ladybugs Washi Tape

Tuesday, March 26, 2019

SIMPLY SPRING | Paper Park Layout with Caroli

Last year I had the luck and joy of attending to a huge Latin-American scrapbooking convention held in Uruguay, the Paper Fest.
I spent 4 days with women from different countries of Latin-America and from Spain and we had a blast. the event included different workshops with teachers such as Amy Tan and Steffi Ried, and everything was oh so dreamy, plenty of fabulous photo spots, the scrapper heaven!
Of course I took a gazillion of photos, and the new Simple Spring collection was the perfect fit for some of them.

I used this beautiful collection to create a layout documents the gorgeous park in the hotel where the event was held. There were awesome photo spots and I had a blast with my friends taking fabulous pics.
I went for a super simple grid design and used plenty of diecuts from the Odds & Ends package.


I created my title cutting some letters with my electronic cutting machine and using this tutorial I created some time ago. The handwritten font it's called Sacramento and you can download it for free from the internet.

I love the little critter of the Shape Sprinkles in this collection, they are simply adorable in any way, and a perfect element for embellishing the title. 
I hope you like this layout, it has a lot of volume and texture but it is a very simple one and it documents such a happy memory.

Have a lovely day my friends!
BLOG  |  YOUTUBE  |  INSTAGRAM

Monday, March 25, 2019

SIMPLY SPRING Cards using Cut Files | with Brigit

I had so much fun putting these shaped cards together using the new Simply Spring paper collection and cut files. Love all the colorful flowers, adorable little insects and pretty papers!


The cut files come in svg format sold at Lori Whitlock's online store and studio format at the Silhouette Design Store.


For all the cards I used the svg files, laying out my design in silhouette studio business addition so I can save it as an svg to import into cricut design space to cut out on my cricut maker. I created an offset of the whole design this is the base of my shaped card. Sometimes I will mirror up the offset and nudge it down and weld to create the whole card but for very uneven tops I just duplicate the shape and score about a 1/2" down from the top and glue it to the other base piece.


I think this is my favorite, I love this bouquet in jar cut file. Doodlebug's colorful textured cardstock and the pretty plaid paper from simply spring 12 x 12 pack really makes this card pop!


I love this one too, instead of the lavender flowers going up I reversed them to flow down the can and added a couple more flowers to fill in the empty space.

Doodlebug Supplies Used:
simply spring 12 x 12 paper collection
simply spring 6 x 6 paper pad
simply spring chit chat die cuts
bitty critters sprinkles
spring assortment sprinkles
swimming pool twine
tangerine jewels
birthday girl assortment glitter sprinkles

Thanks for stopping by and have a wonderful day!

Sunday, March 24, 2019

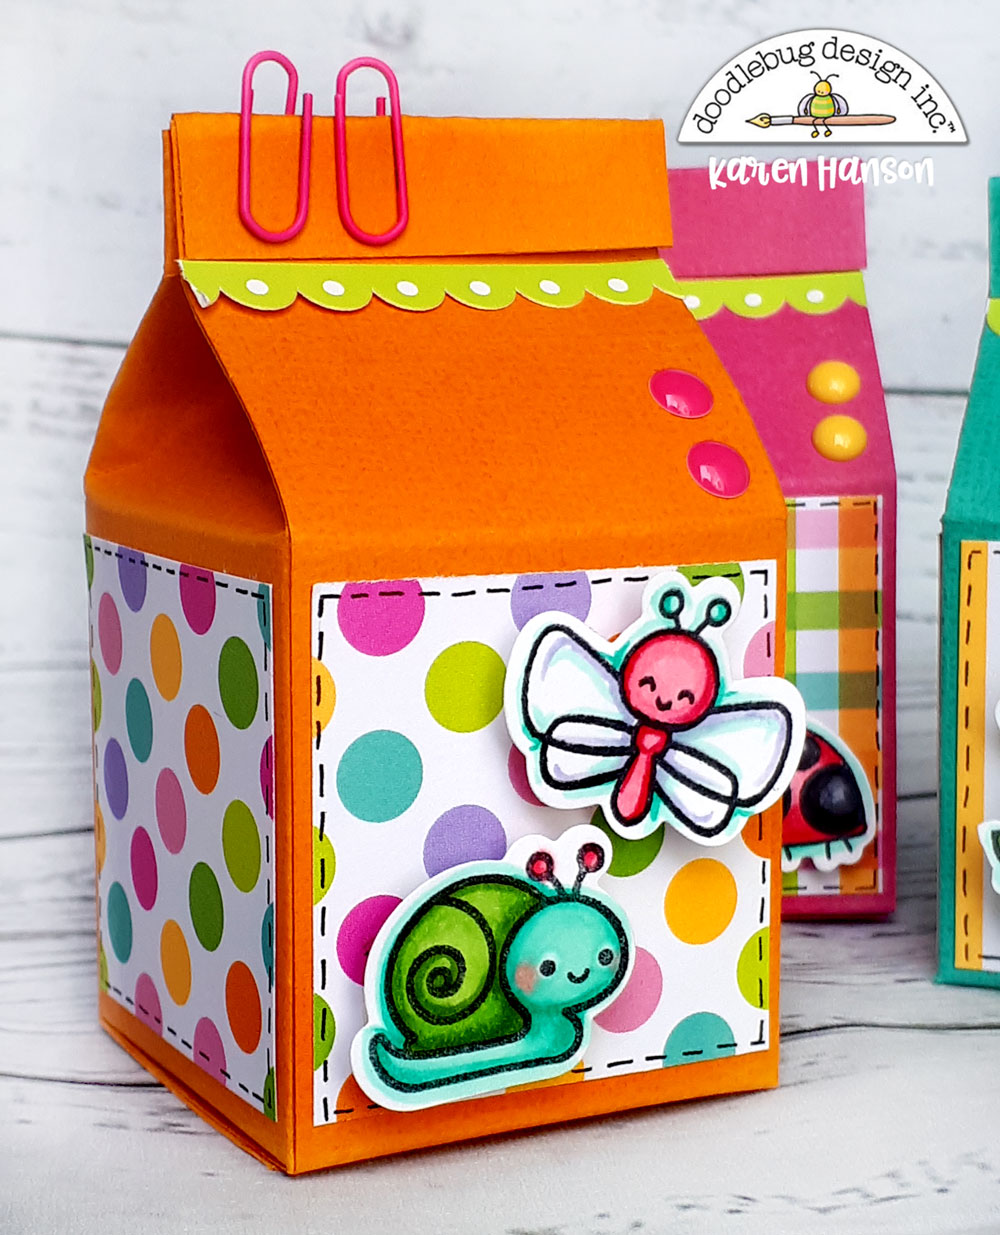
SIMPLY SPRING Treat Containers | with Karen

It's time. No really. It's time! It has been a long and coooooold winter up here in Canada (I know, I know, it should be a long and cold winter up here), so let's just say I am ready for spring!
So, when Doodlebug's Simply Spring collection arrived on my doorstep, this collection went straight onto the crafty table. It might still be white and bleak outside, but my crafty space is filled with the spring colours and cute spring icons that make me smile. Goodbye winter - hello spring!
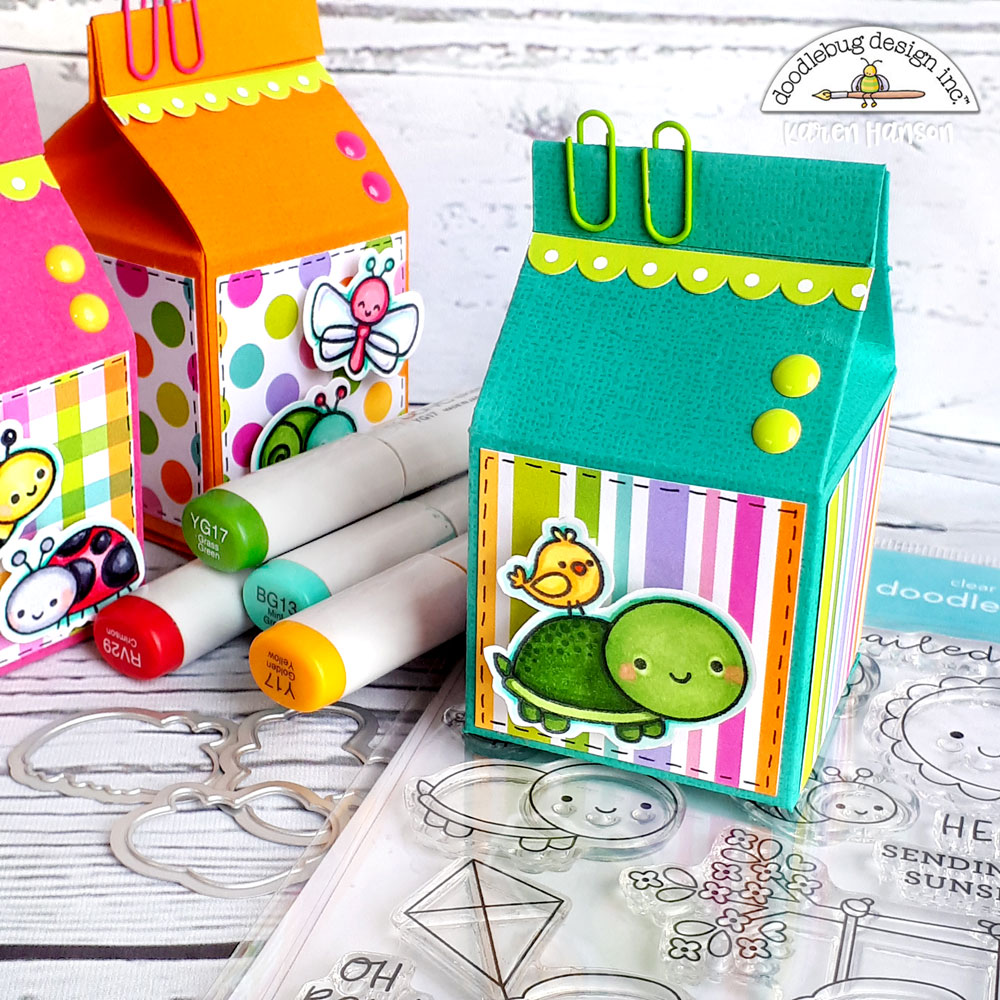
I decided to whip up a few treat containers for some of my colleagues - a little surprise for the first day of spring! With the new doodle stamps and doodle cuts, these were a spring breeze!
Each treat container is constructed out of textured cardstock and topped with patterned paper from the 6X6 paper pad. Because these treat containers are quite small, the scaled down patterns in the 6X6 are a perfect fit!
I used the darling "oh boy" doodle stamps for the little characters on each container coloured up with my alcohol markers. Each is adhered with a foam square just to give the containers a bit of extra dimension.
And the great thing about working with the new stamps is you can even play around with layering! This little bird is a separate stamp from the turtle, but I felt they were just meant to be together!
Hopefully these little creations bring a little spring smile to your face and inspire you to get crafty with this new collection!
Thanks for stopping by!
Doodlebug Supply List:
6272: simply spring 6X6 paper pad
12X12 simply spring this & that sticker sheet
6331: oh boy! doodle stamps
6332: oh boy! doodle cuts
textured cardstock (3372: raspberry; 3393: dolphin; 3380: mandarin)
mini paper clips (4499: bumblebee; 4496: bubblegum; 4500: limeade)
6225: spring assortment sprinkles 4008: bumblebee sprinkles
Other:
Copic markers
adhesive
Pin It button on image hover