Friday, July 31, 2020

BAR-B-CUTE WOOD DECOR | with Stephanie

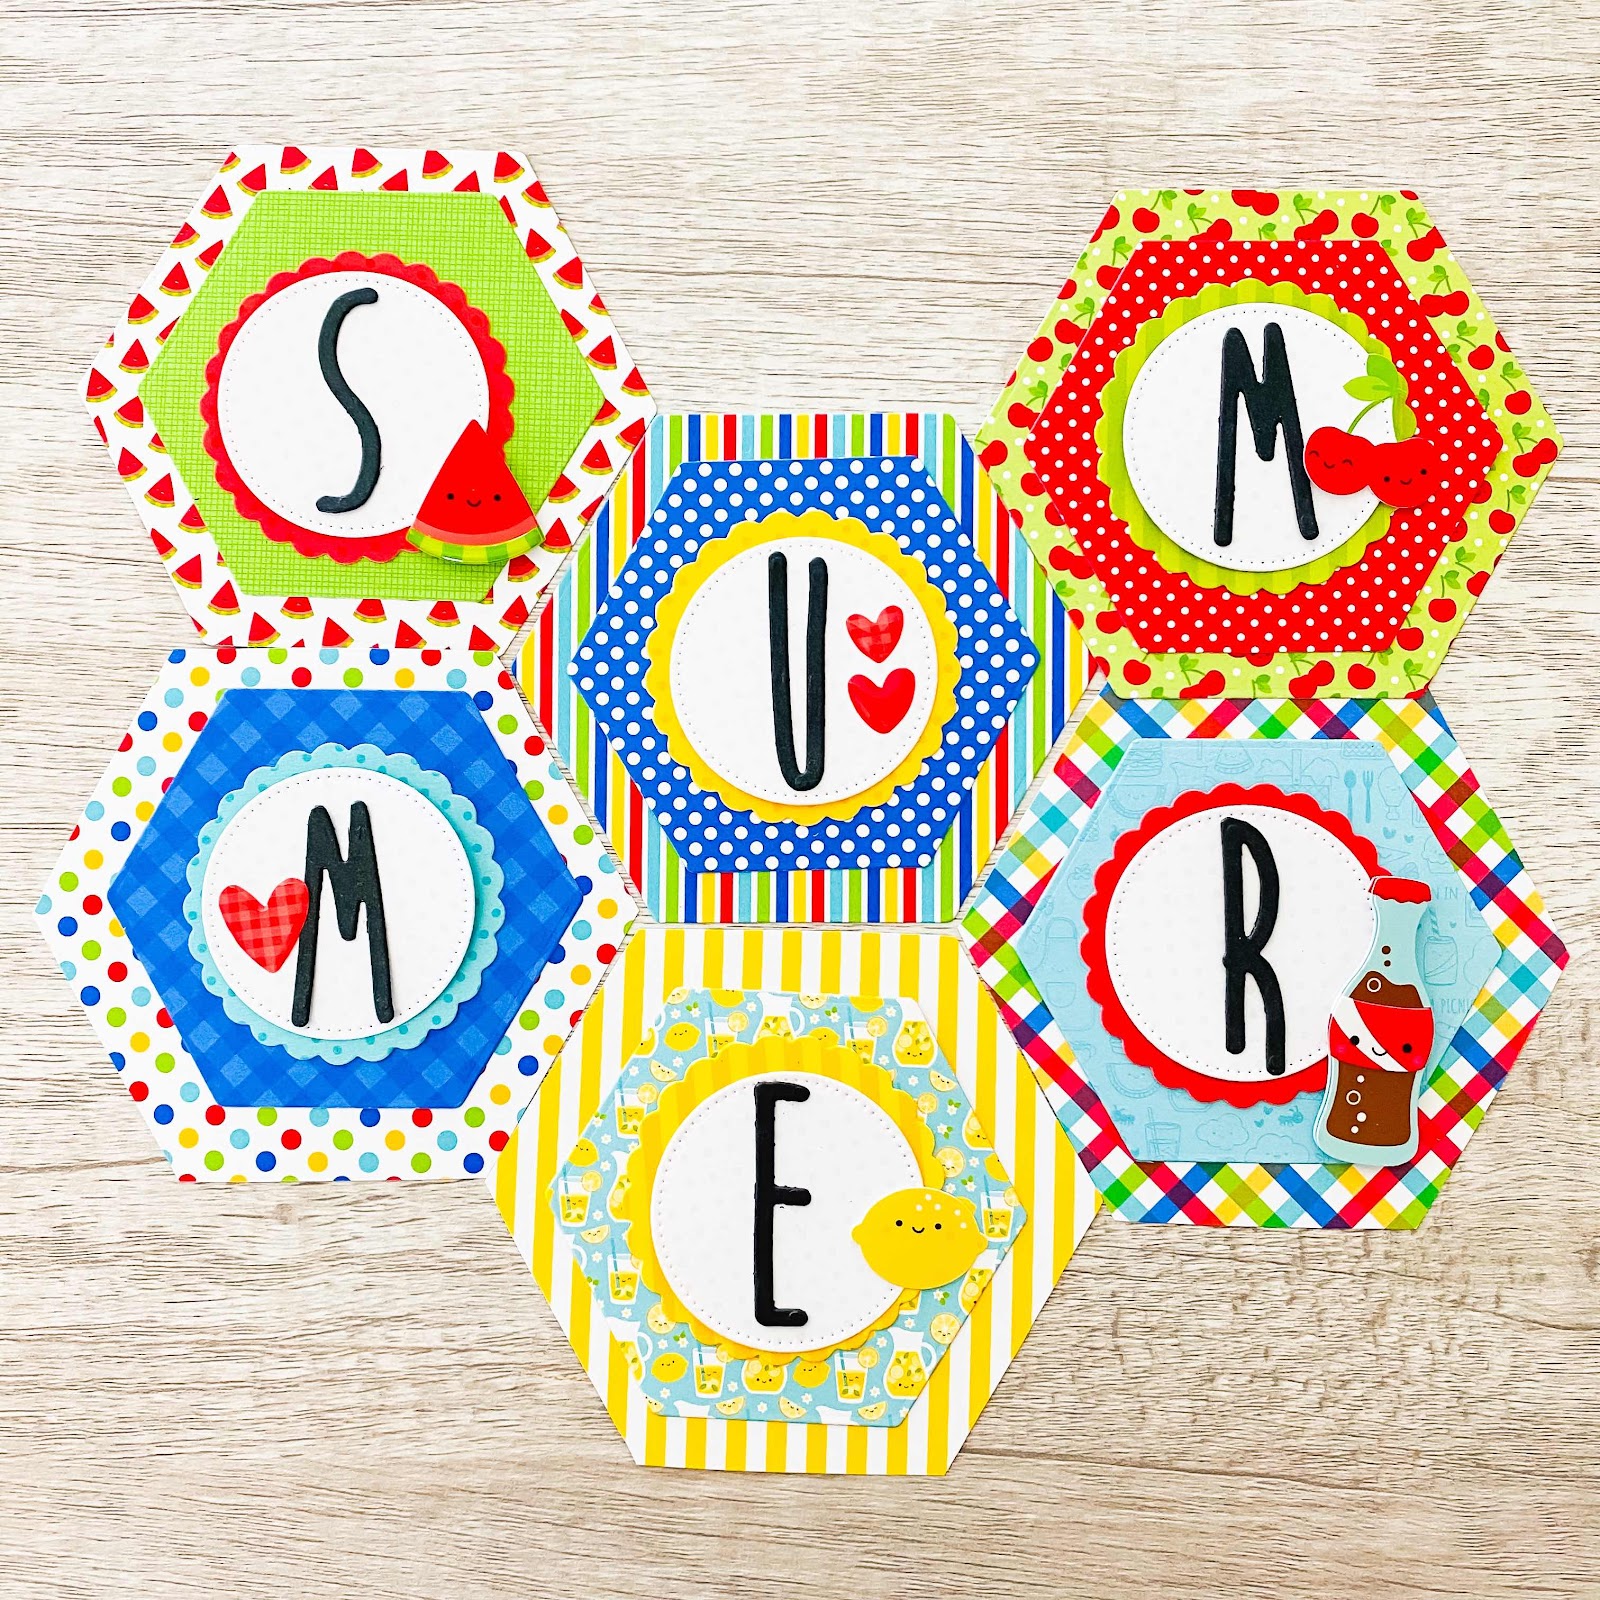
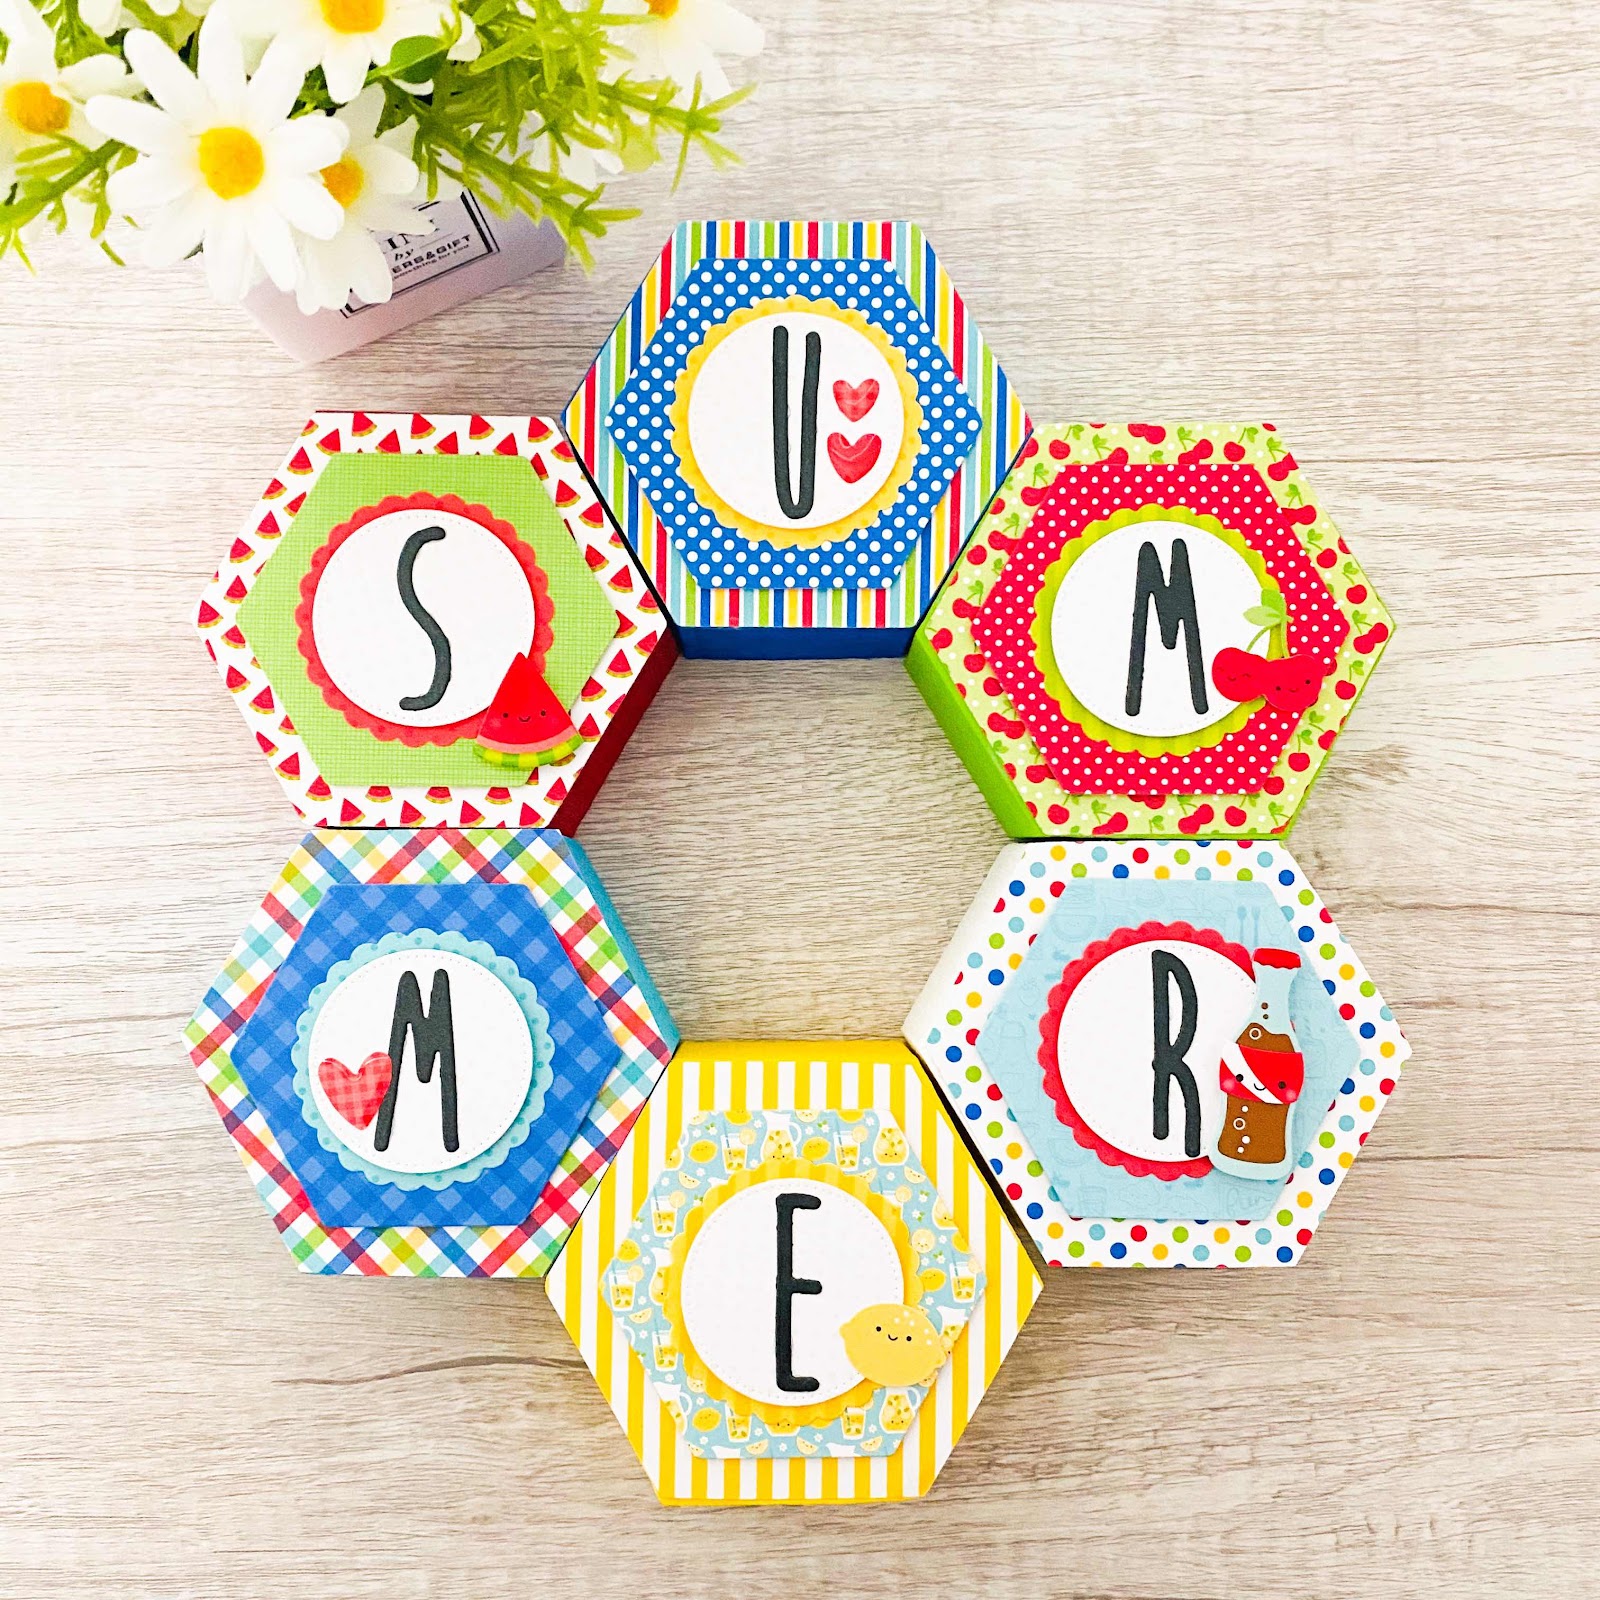
I love all kinds of papercrafting projects and that includes wood decor projects too!  I found these hexagon shaped wood blocks and thought it would be fun to paint and cover them with paper using Doodlebug’s Summer Collection Bar-B-Cute and the Alex alphabet Doodle Cuts.  I have six blocks, so just enough to spell the word SUMMER.  And if this project looks at all intimidating, it really isnt! It actually came together quite easily.
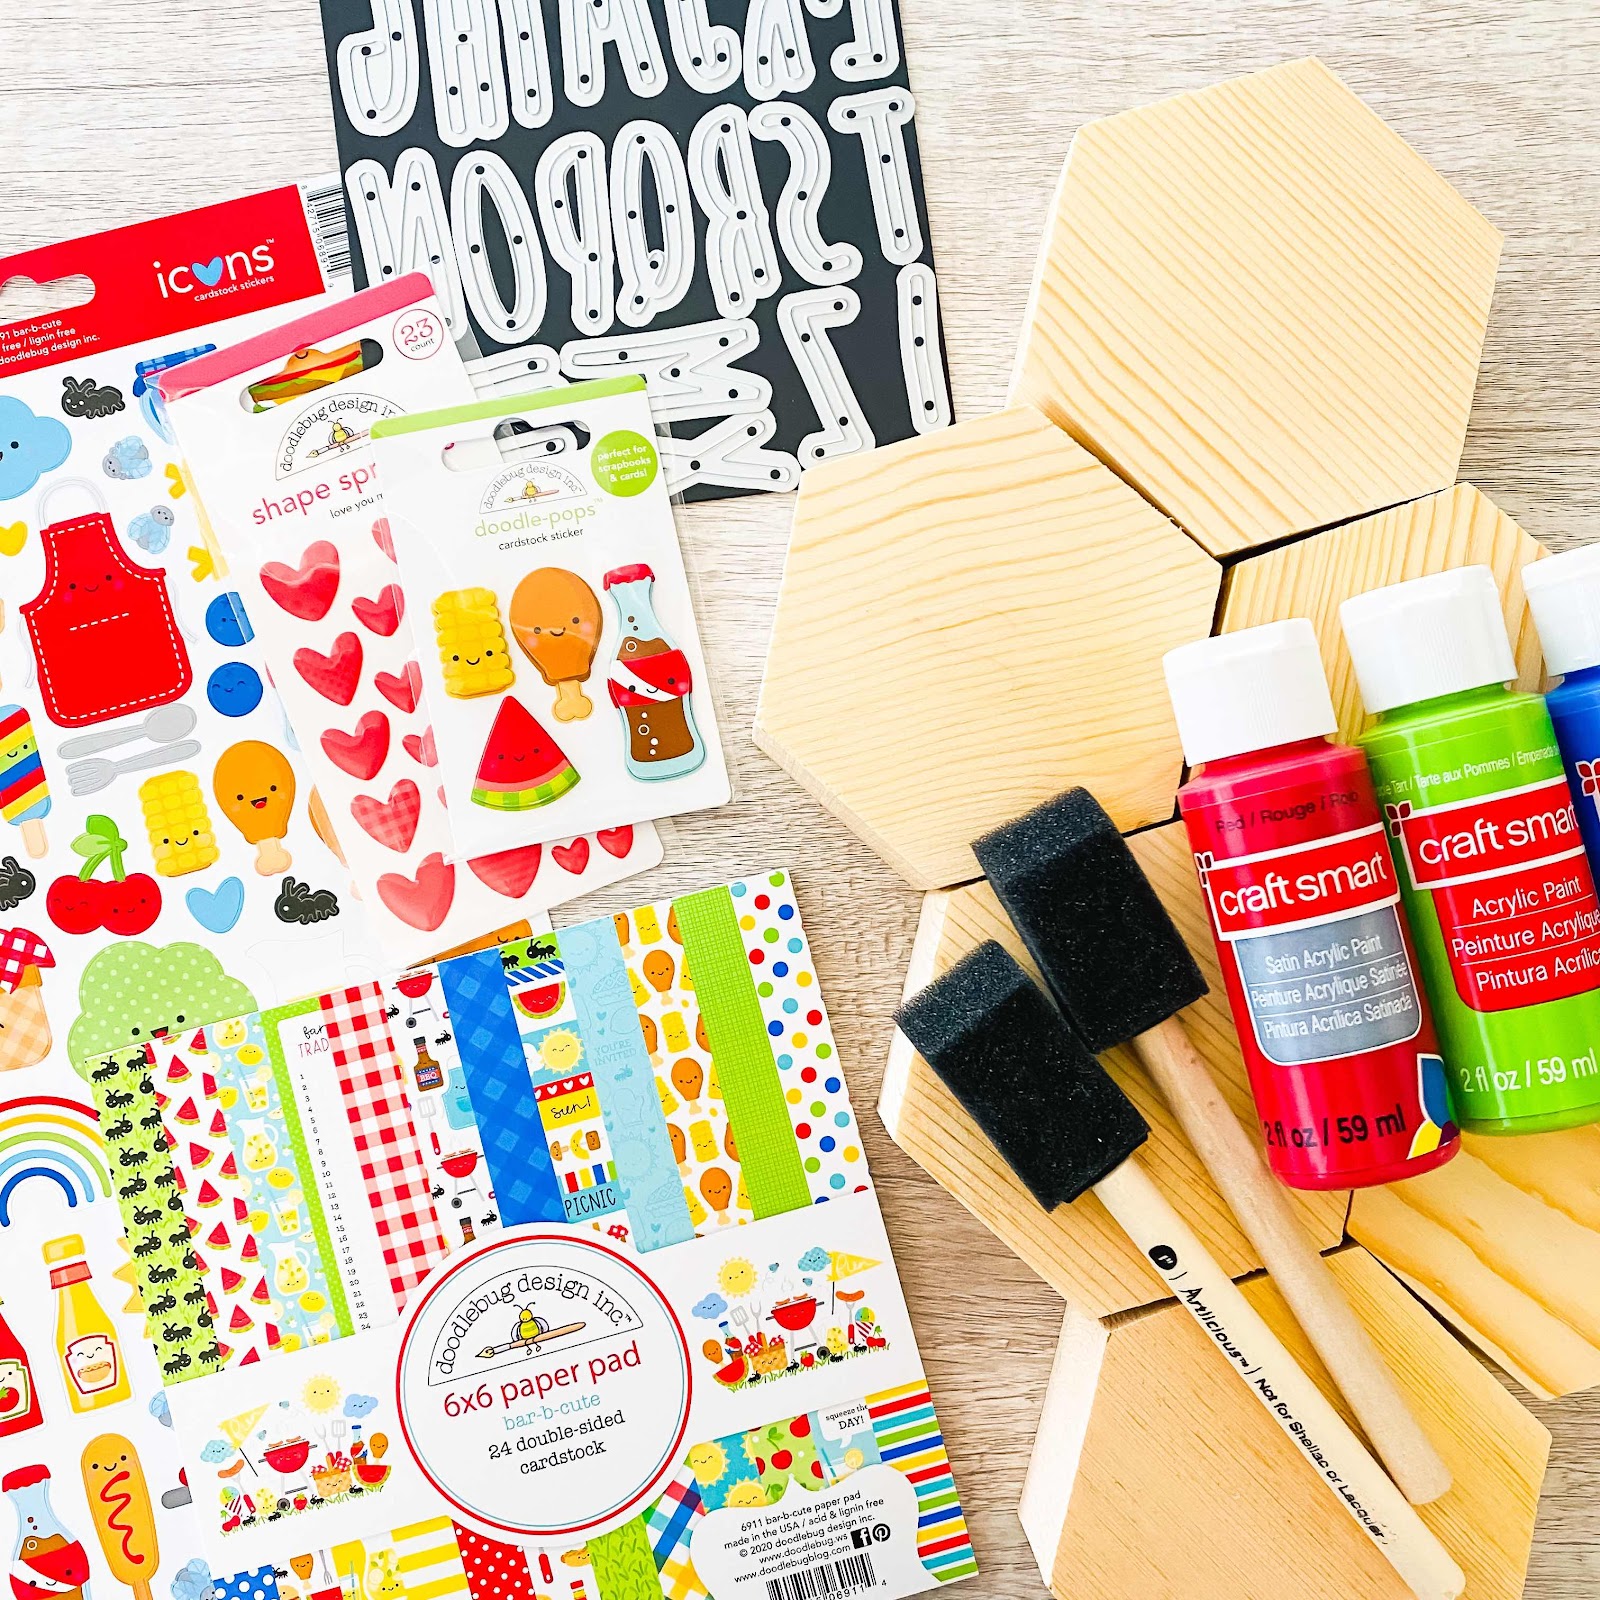
I traced and cut a few layers of coordinating paper for each block as well as die cut my letters in black, then chose some stickers to match my paper.  Here is how I layered my paper and stickers and arranged the letters.
Next I painted each block a different color to match the paper I was using.  I used basic acrylic paint that you can find at any craft store including red, green, yellow, white and two different colors of blue.  Once the paint was dry I glued my first paper layer to the block. 
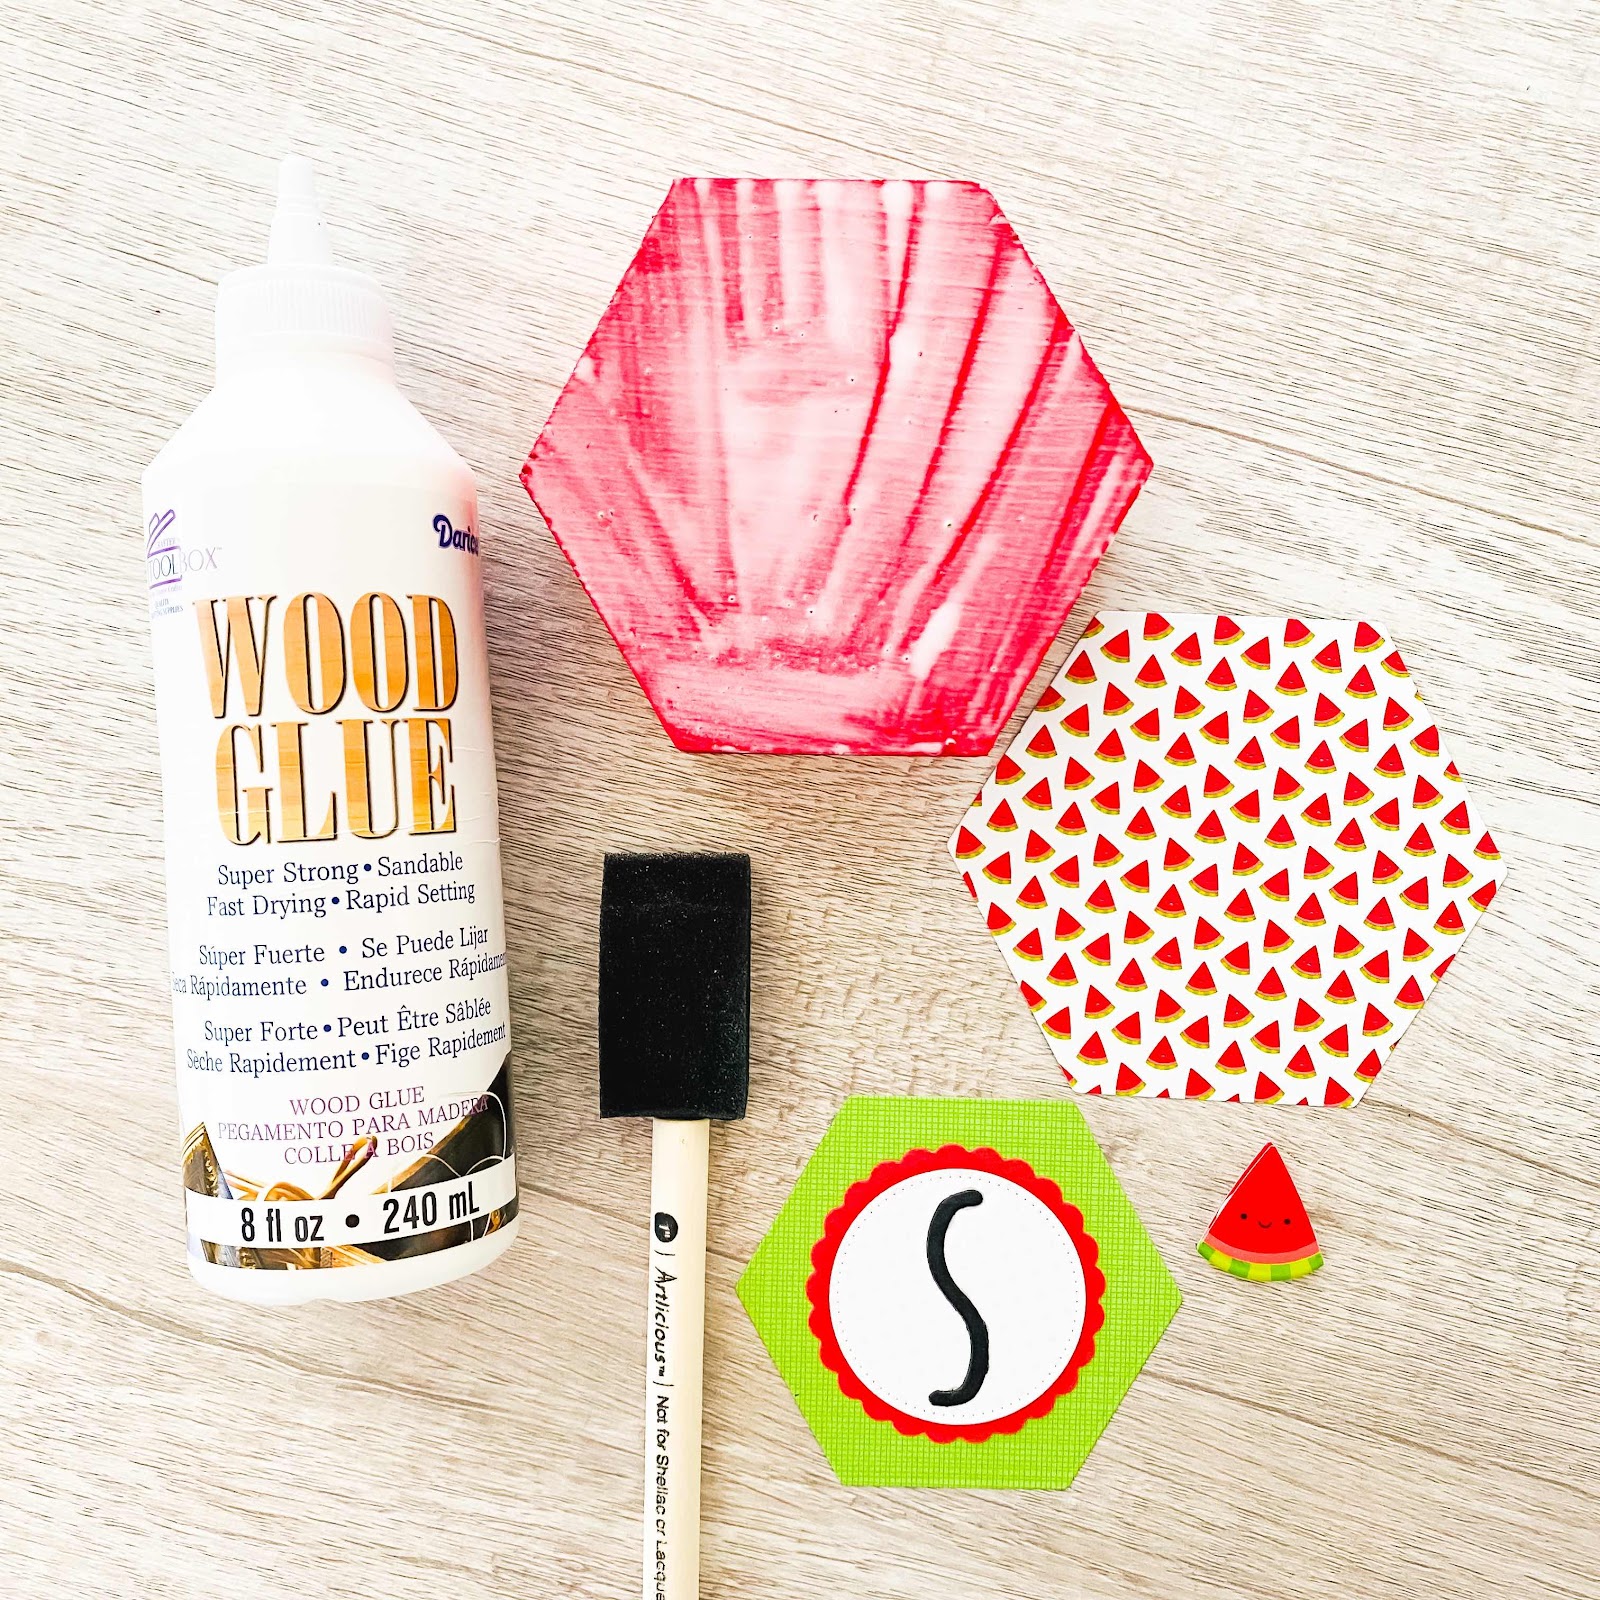
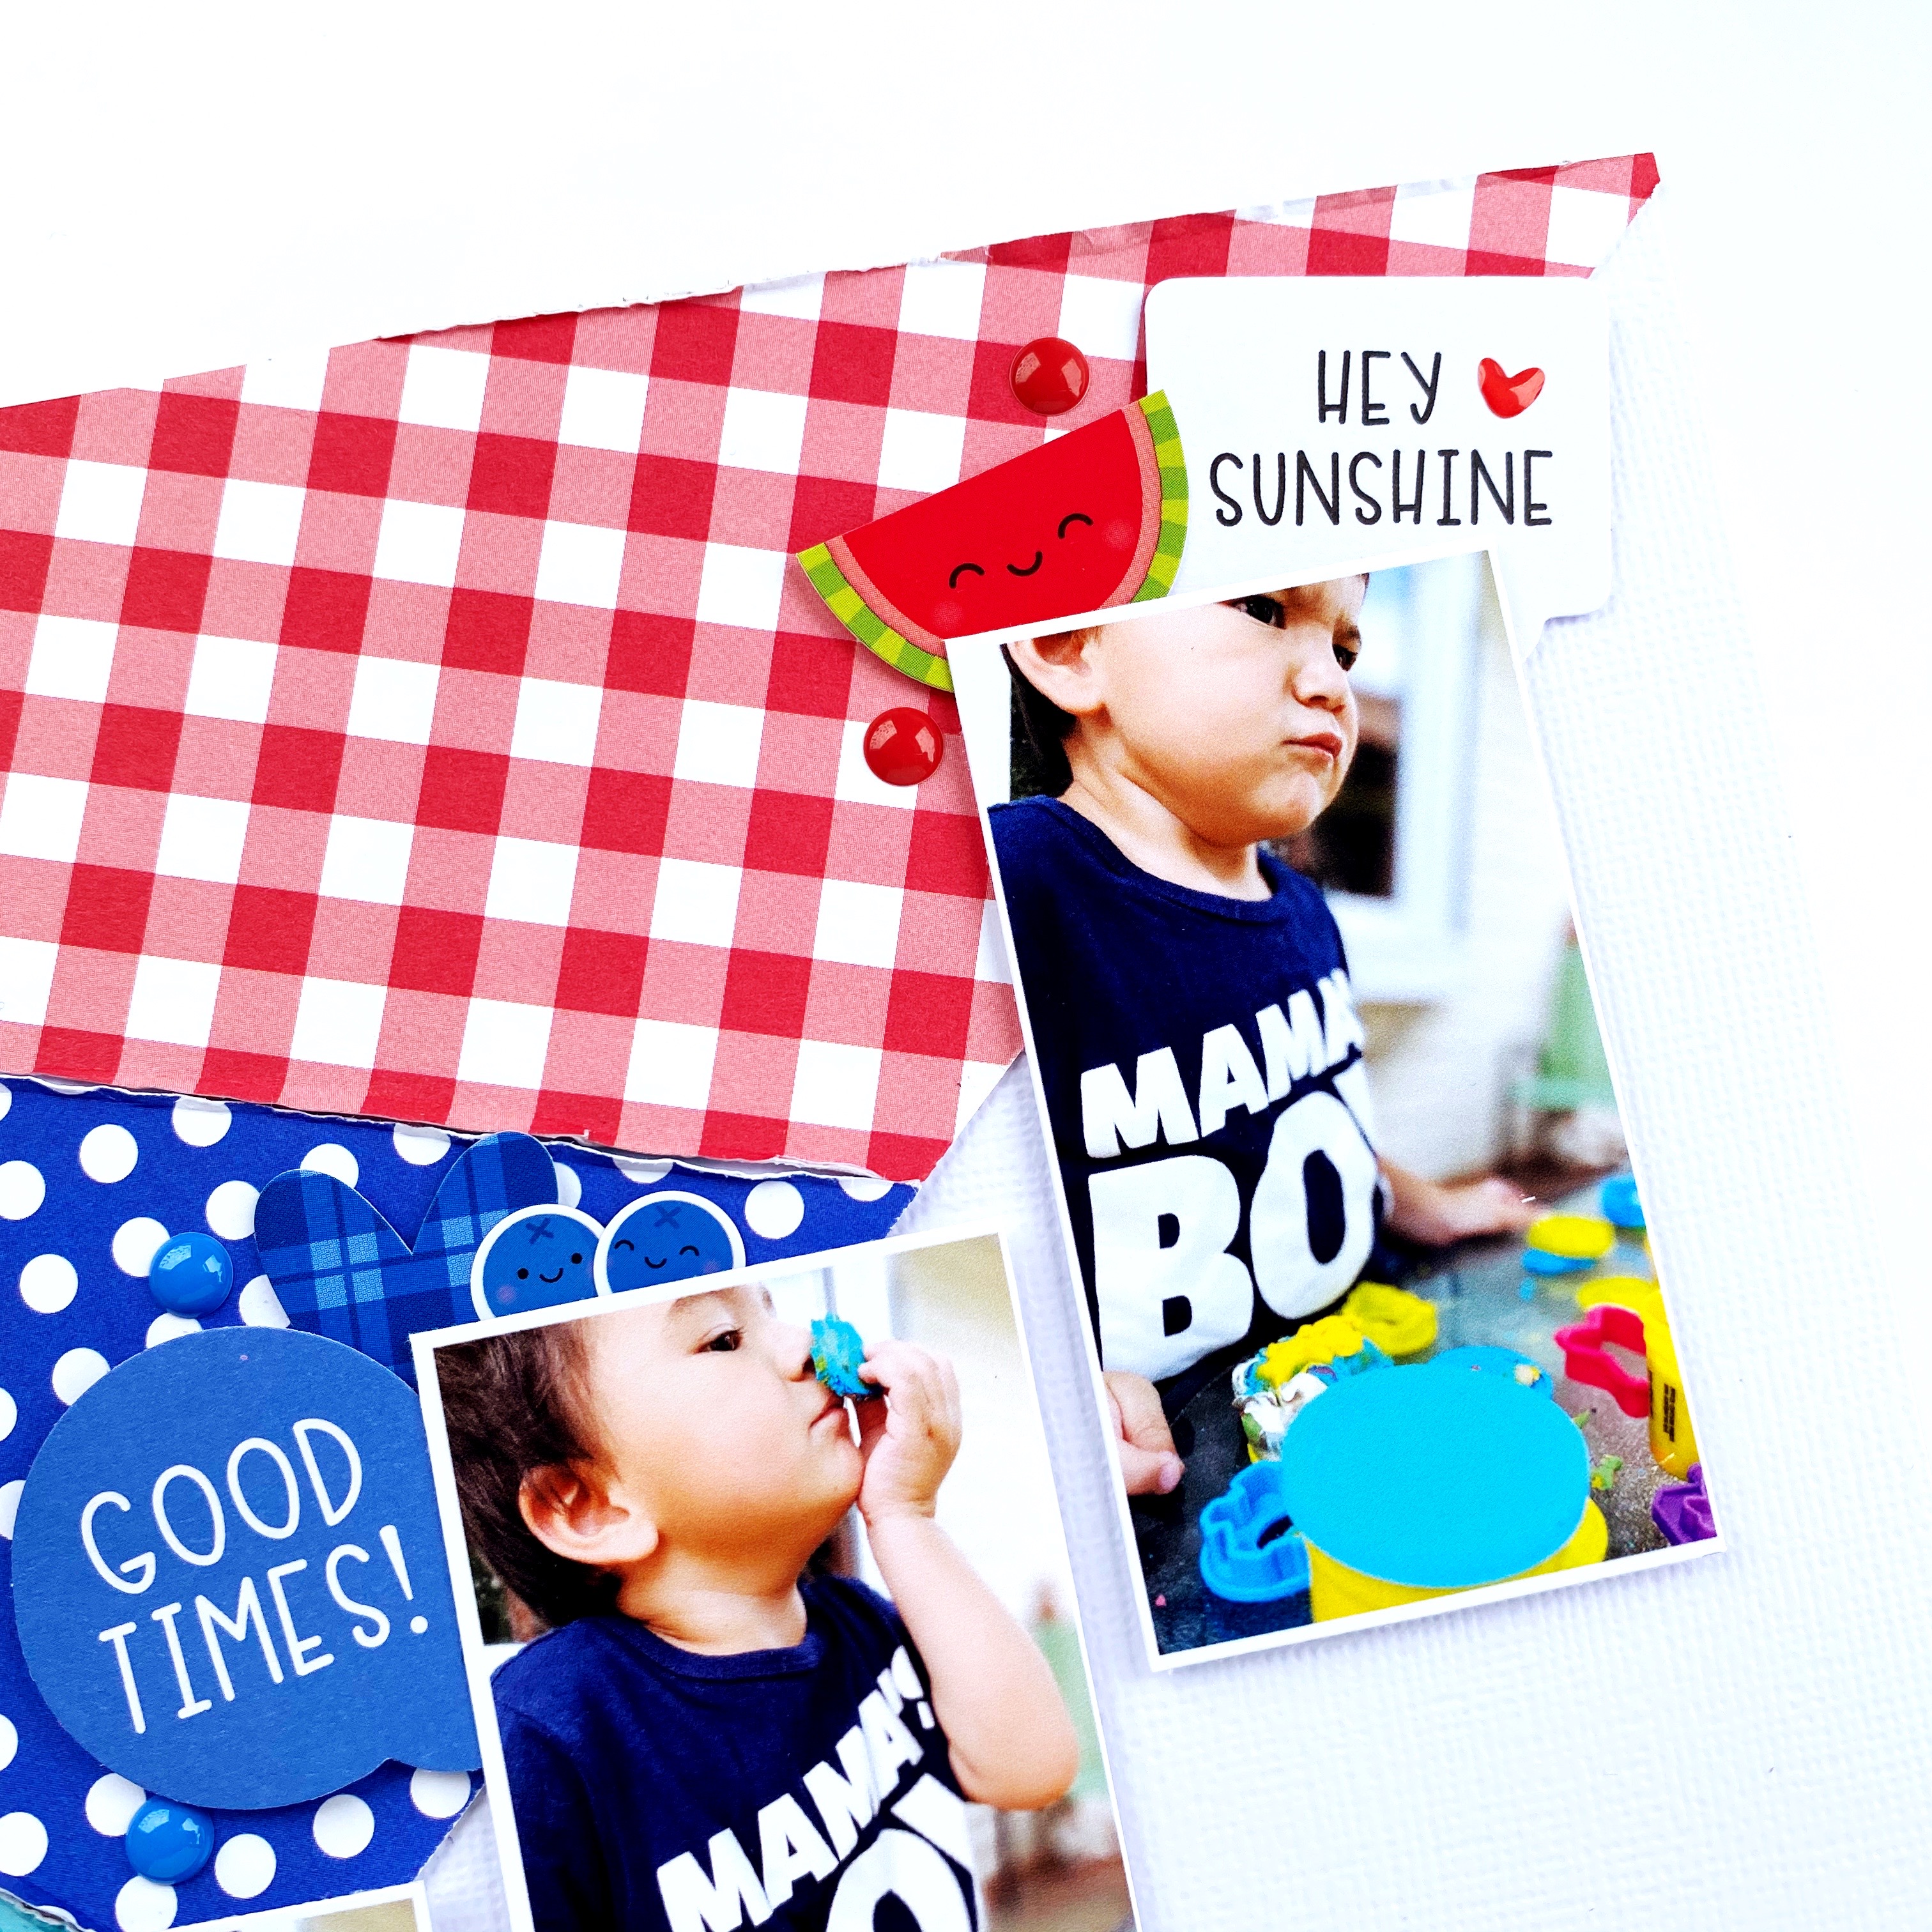
Once my first layer was glued and completely dry I added the other layers and letters. I used foam tape behind the scalloped circle for a little dimesion. This is how the finish project looks:
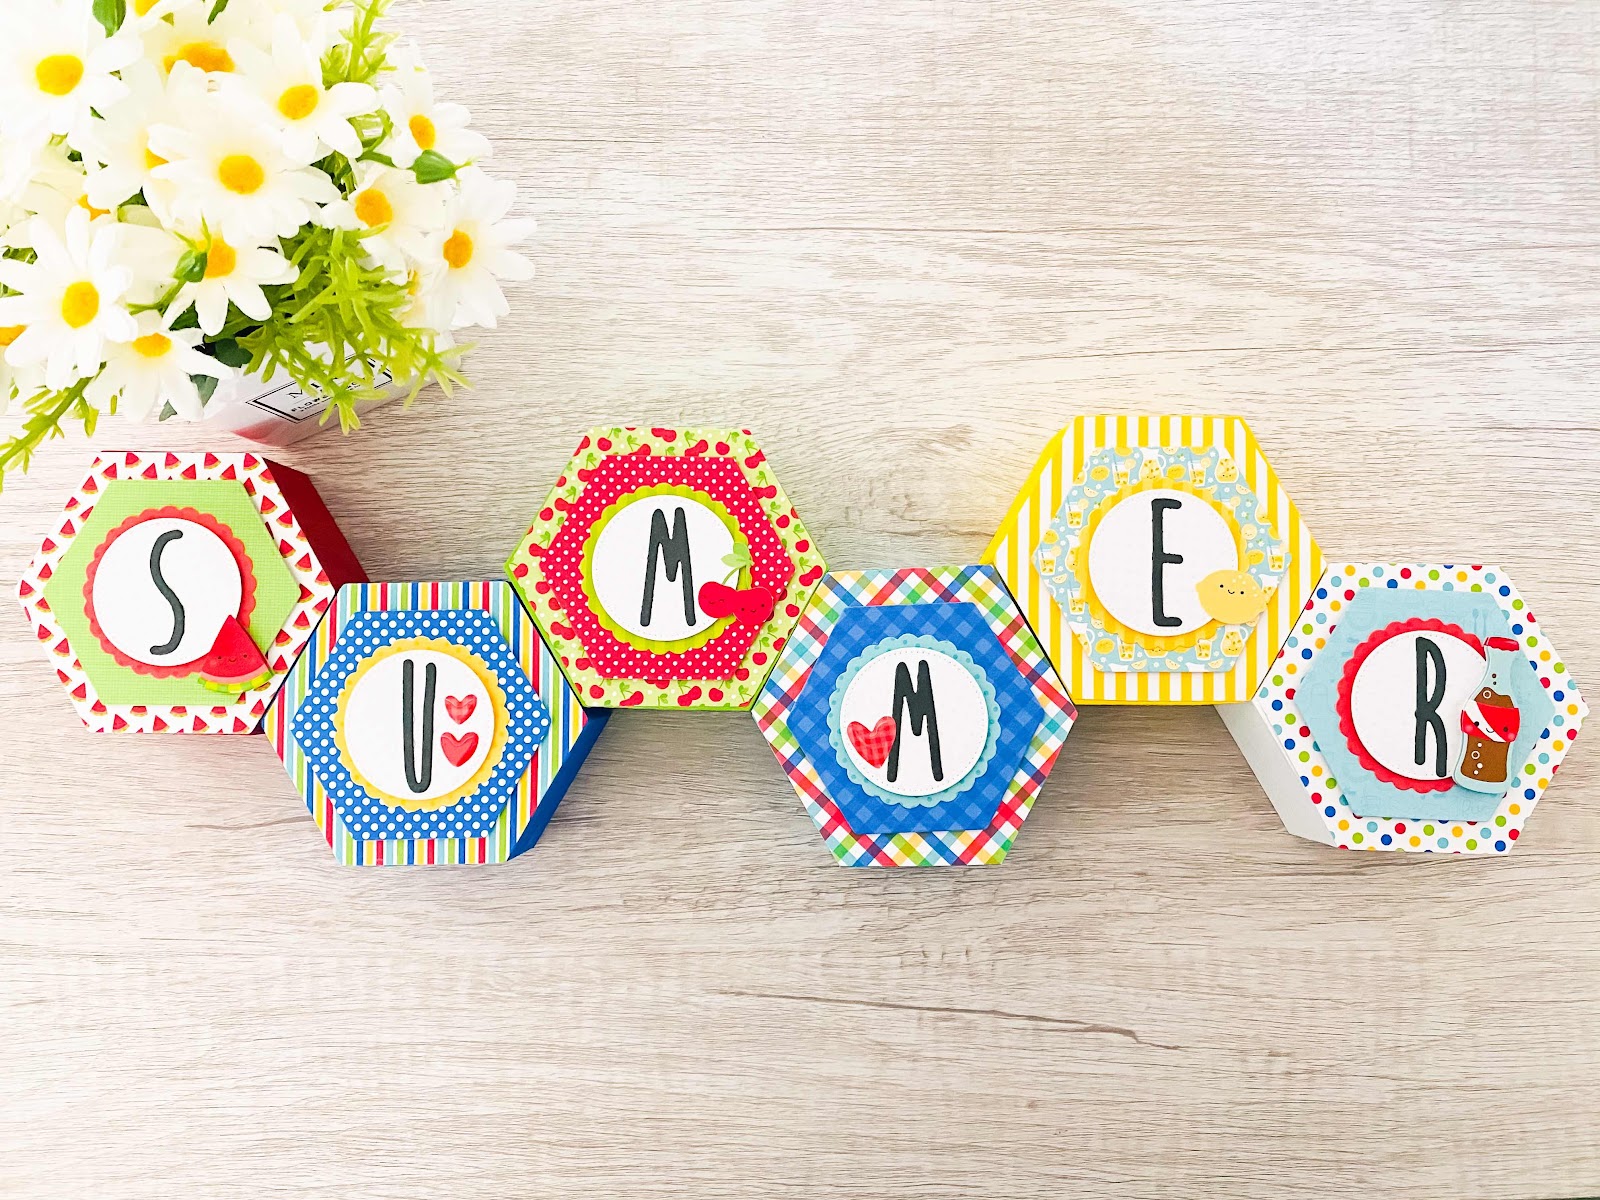
Hexagons are a fun shape with lots of options for arrangement.  The best part is I have a pop of bright Summery color to add to my space and preserve this cute collection for years to come!
One last thought I wanted to add, if you aren't necessarily into painting wood, you could always make a banner in a similar way, no wood required! I happen to love banners for all the Seasons and Holidays but that’s a project for another day!  Thanks for stopping by, have great day!  
 Doodlebug Products Used:
Bar B Cute Collection
 Doodle Pops/Icon Cardstock Stickers
Love You More Shape Sprinkles 
 Alex Alphabet Doodle Cuts


Other Products Used: 
Circle Dies
Foam Tape 
Wood Blocks
Acrylic Paint & Wood Glue

Thursday, July 30, 2020

BAR-B-CUTE SUMMER LAYOUT | with Traci

"What's better on a hot summer day than a juicy bite of ice cold watermelon?  Especially a watermelon that's perfectly sweet and seedless! Yum!

I couldn't wait to create this 12x12 page with the new Bar-B-Cute collection.  Those little watermelon faces make me smile every time I see them.  I printed 3 pictures at 3"x4", and then cut an extra one to fill in the right and left sides.  I had never done this with photos before and I like how it makes the photos appear to be moving across the page.
Isn't that title cute?  I used the new Sunshine alpha stickers in ladybug and beetle black. Love them!


I wanted to replicate the curve of a watermelon shape on the page, so I used a 12" plastic circle to trace and cut out my grass pattern paper.  I added a few adorable odds & ends, and a border across the bottom, and my page was complete!

I hope you're enjoying your summer!  Be sure to share pictures of your Bar-B-Cute projects and tag Doodlebug so we can see!  Thanks so much for stopping by!

Wednesday, July 29, 2020

BAR-B-CUTE SCRAPBOOK 8.5 x 11 LAYOUT | with Maryám

Have you seen all of the food-related icons from the Bar-B-Cute Collection? From french fries to hamburgers to pies and even fruits. There are literary illustrations for every taste! For today's layout, I'm going to be focusing on pies! Yes, you read that just right. I love pies and once I saw all the pie illustrations from the Odds&Ends set I immediately thought of my mom's pies because they are delicious and definitely needed to be documented in some way. 
To create my layout, I started by selecting some pieces from Odds&Ends Set. I didn't use all of them but this made the process so much easier. Next, I printed out my photos and journaling and started to play with different potential placements until I decided on one. 

I went with some sort of a grid design in the end, so at the top portion of my layout- or top row- I placed my first photo along with some embellishments from the Bar-B-Cute collection and also added some sprinkles for more fun.
On the second row, I added an apron with some hand-stitched details and a pie die-cut from the Odds&Ends Set. Just like in the previous row, I also added some sprinkles and a bubble text from the Chit Chat Set to complete my design.
For my title, I decided to go with "Time for Pie" and I used a mix of Abigail Cardstock Stickers and the new Sunshine Stickers, both in Beetle Black.
Let's take a look at the finished layout!

I had so much fun creating this layout and I think it also made me a little bit hungry too lol. I hope you guys enjoyed this post too and liked the ideas I shared. If you have any questions just leave a comment below or send me an email. I'll be happy to help you.

Have a wonderful day!


Doodlebug Products Used: 
Bar-B-Cute Collection
Sunshine Cardstock Stickers - Beetle Black
Abigail Cardstock Stickers - Beetle Black

Other Products Used:
Embroidery Thread
Vellum Paper
Foam Dots
Liquid Adhesive

Tuesday, July 28, 2020

DOODLE-POP ORGANIZER TUTORIAL | with Kathy

Hello my name is Kathy and I'm a Doodle-Pop Hoarder.  So much so that I had to create a storage solution.  My storage box was posted on the Doodlebug Facebook Page recently and I was surprised at the response!  So many of you asked, so I got my act together and put together a tutorial.  This organizer holds approximately 120 Doodle-Pops, or Doodlebug Sprinkles packs.


For my tutorial I'm showing how to make one without a cutting machine.  Originally I created an SVG file to make one.  It is available on my blog, along with a Silhouette version here.  The cut file versions are assembled in the same general manner.
Start by cutting the pieces.
From a good heavyweight cardstock cut the following (I used 80 lb. cover weight cardstock)
Cut 3    7 3/8 " x 11 ½ "
Cut 1     8 ¾ " x 7"
Cut 2     8 ¾" x 2 ¼ "
Cut 2     7" x 2 ¼ "
From Patterned Paper
Cut 2     6 ¾ “ x 2"
Cut 2     8 ½” x 2”
I recommend you put this together using a liquid glue.  I use Scotch Quick Dry, it works well and holds up when I over-stuff it with Doodle-Pops.

Start with the three 7 3/8 “ x 11 ½” pieces. Score each piece as shown above. After scoring cut where the solid lines are.
1)  I also cut a a bit off each of the tabs, starting from about 1/4" down the long side side,  and cutting up to the fold line.  This helps make the sides of the finished box more smooth and even.
2) This is what it looks like with all the fold/cut lines
3) Fold up the short ends and fold in the tabs.  Add glue to the tabs and adhere to the long side of the box.
4) Repeat with the other tabs/side until a box is formed.  Do this for the other two scored pieces, and let dry.
5) Glue the 3 boxes together as shown, make sure they are all aligned.  Let dry.
6)  Glue the 8 ¾ " x 7" piece to the bottom of the 3 boxes.
7)  Glue the 8 ¾" x 2 ¼ " pieces to the long sides, covering the seams.
8)  Glue the 7" x 2 ¼ " pieces to the shorter sides.  It gives the sides a little more strength.  Lastly, glue on the decorative panels (the patterned paper strips.)

As part of the Silhouette and SVG files, I've also included the divider tabs and labels (which are print & cut).  For folks who do not have a cutting machine, I've created a PDF you can use to print on cardstock and hand cut.  It's available here on my blog.
One last note... this organizer also works perfectly for all of the Doodlebug Sprinkles!  Discovered this by accident... now I need to make more!


How would you like to get some Doodle Pops of your own?  When sorting through mine for this post, I realized I had a LOT of duplicates.  I'm giving away sets of 5 random Doodle Pops to 9 of my Instagram followers.   Head over my Instagram Account to enter to win!  That's it for me today, thanks for stopping by to peek!


Monday, July 27, 2020

BAR-B-CUTE PICNIC BOX CARD | with Kathy

There's something special about a picnic... yummy food, outside in the fresh air, with friends!  That's what inspired this fun box card.  Even better, this picnic has no calories!  Take a peek...

I filled my basket with a bunch of the food icons from the Bar-B-Cute Odds & Ends pack, I just love the smiles,they really make me happy!    I used the red & white check paper from the 6x6 pad for my table cloth, and the sentiment is from the Chit Chat Pieces.  Here's a close-up...

And of course I had to complete the look with an ant from the Picnic Parade Sprinkles.  They are the only ants that don't require a call to the exterminator! 

Have you made any projects using the Bar-B-Cute Collection?  Be sure to tag Doodlebug Design on Facebook and Instagram.  We love to see your creations.  That's it for me today, thanks for stopping by to peek!


Doodlebug Products Used:
Bar-B-Cute Collection
Gingham Linen Petite Prints Collection
Beetle Black Sprinkles

Saturday, July 25, 2020

BAR-B-CUTE DIY MINI ALBUM KIT | with Traci

YESSSS, it's Fridaaaaaayy and I have good news! In early July I made an album for my Doodlebug Design team project called Life is a Picnic. Many of you asked if I could make it into a kit and .... VOILA! I made it into a 6x6 kit with a Prima chipboard album and it is adorable! Take a look!
This fun summer, picnic, BBQ themed mini scrapbook album is perfect for your cookouts, family gatherings, picnics, neighborhood parties or any sunny summer time adventure.

The cover is so cute with bright happy colors and a picnic basket stuffed full of goodies. Actually, the whole album is stuffed full of goodies with different odds & ends peeking up over the top. Love it!

While normally I prefer an outdoor meal with no flies & ants ... this is an album & Doodlebug makes everything too stinkin' cute so I stuck those lil' bugs right on the cover!


This colorful plaid flip-up page is awesome. I always love a good flip-up (or as I call it, a flippy) in an album.  I like having pages that people can interact with to see the next photo or writing. It's a little unexpected.

This cutie scrapbook has 12 pages (6 double-sided), room for at least 22 photos of various sizes and plenty of places to journal about your day, the menu or the people you were with.

Thanks for stopping by! Make sure you visit my shop and order this fun mini album that uses paper and embellishments from Doodlebug's Bar-B-Cute Collection. I think it should've been called Bar-B-Supercute. Just sayin'.


Doodlebug Products Used:
Bar-b-cute Collection

Friday, July 24, 2020

BAR-B-CUTE - CHATTER TELEPHONE | with Jennifer

Hello Doodlebug friends. I have been planning to make this little phone for some time now but was waiting on a collection to use on it. Even though my project isn't anything to do with BBQ'S the Bar-B-Cute collection worked perfectly.
The primary colors and fun patterns are exactly what I needed to create this "Chatter Box" inspired project.
Below is a quick look at how it came together.
  • To build the telephone a paper mache box,  foam board, and chipboard was used. It's basically two boxes stacked on top of each other.
  •  The dial was made in two parts. The top section was created and cut on the Silhouette from layers of chipboard. The second layer was cut from a layer of foam board.
  •  A handset was cut from 1" thick foam board and then covered with chipboard. 
  • Some wood pieces including 2-inch wood wheels were used to complete the look.
I paired 3 patterned papers from the collection with some coordinating petite prints. For the star die-cuts, I used a Doodle Cut die.  For the dial, round sprinkles, numbered with vinyl letters, and a chit chat die-cut was added to the center to finish it off.
Chunky twine was used to outline the face of the phone, on the handset/receiver, and also for the pull string.
Well, that's it from me. Thanks so much for joining me today and happy crafting!

 Blog | Etsy | Pinterest

  Doodlebug Supplies Used:
 Bar-B-Cute Collection
 Petite Prints
 Chunky Twine
 Doodle Cuts - Mini Tags (stars)
 Other Supplies:
chipboard,
 foam board,
 paint,
 wood wheels,
wood pieces.

Thursday, July 23, 2020

BAR-B-CUTE MULTI PHOTO LAYOUT | with Erica

Looking for a way to get multiple photos on a 12x12 layout! Try playing around with the size of your photos! 4x6 and 3x4 sized photos can take up a lot of room on your page. Try a fun size photo to help you get more photos on a page! I really like to use an app called PicFrame. I can create different sizes and they have ready made templates I can just drop my photos into. For my layout today I was able to get 6 fun sized photos on my page using the super cute Bar-B-Cute; collection! I really love to showcase the adorable papers so I created some rays of pattern paper coming out behind the photos! To do this....and it took me a minute to figure it out and I phoned a friend...I laid my photos out on a piece of plain cardstock how I wanted them to go on my final layout. I used my ruler to draw the rays from the corners of my photos to the corner of my cardstock. Next I cut out the rays and then traced them onto the different pattern papers I wanted to use from the Bar-B-Cute; collection. I distressed the edges of the rays a little bit and then adhered down to my white textured cardstock. I added foam adhesive to the back of all my photos to add some dimension. I pulled out the Bar-B-Cute; odds & ends, chit chat pieces and stickers to embellish around the photos. I tried to color coordinate the embellishments with the pattern paper as best I could. I really love how it came out! For my title I used one of the Bar-B-Cute; chit chat pieces and some alpha stickers from Doodlebug Design. The new Sunshine Alphas were perfect! Here is a look at my finished layout. Thanks so much for stopping by today! I hope you enjoyed my layout using the new Doodlebug Design Bar-B-Cute collection.

Wednesday, July 22, 2020

BAR-B-CUTE MINI ALBUM + TUTORIAL | with Shellye

If you have the "Bar-B-Cute" 6X6 Paper Pad, then you don't need much else to craft this crazy-cute Pocket Mini-Mini Album!

Along with the 6X6 paper pad, you'll also need: smooth white cardstock, twine, 12X12 sheet of patterned paper and any embellishments that you'd like to use!

I took eight sheets of different patterns from the paper pad and prepared them.  First, I scored each paper in half vertically; turning the paper, I next scored at 4".  Keep in mind that the bottom 2" will be folded up to form the pocket, so make sure the design won't be upside down.  

As above, cut a "V" along the bottom 4" SCORED line.  This will allow the pockets to fold up without bunching in the middle. 

Cut 1.5"X1" strips for each pocket; this will be the gusset.  Fold the strips in half so you'll have a 1.5"X0.5" strip.  Attach the strip to the outer edge of the pocket flaps.  


Once you have all of your pocket pages prepped, create an accordion strip to attach the pages to.  Cut white cardstock to 4"X8.25".  Score at every 1/4".  Use liquid glue or a1/4" tape to adhere to the pages (front and back) inside of the accordion folds.  Also, make sure to leave the front and back flaps open so that they can be attached to the cover. 


Next, I prepared the base cover from an 8"X4" strip of white cardstock.  I scored the cardstock at 3.25" and 4.75".  Above you will notice that I attached that front accordion flap to the cardstock.  
The white cardstock cover was then covered with a larger strip of patterned paper.  Using regular Doodle Twine, I stitched down three areas (of the accordion) to the spine to help hold in place.  

Now, let's walk through the pages!  Again, I used die-cuts, enamels, stickers, and leftover strips of paper to complete the pages. For the tags, I used the Large Tags Doodle Cuts to die-cut from the smooth white cardstock.


How much fun is that!  You could also think about building the album and letting the kids decorate and journal for a cute summer keepsake :)

Thanks for joining!


Doodlebug Design Product:
Bar-B-Cute Collection
Bar-B-Cute 6x6 Paper Pad
 Sprinkle Shapes
Sprinkles
Doodle Pops
Ladybug Twine
Large Tags Doodle Cuts

Pin It button on image hover