Friday, March 31, 2023

OVER THE RAINBOW MINI FILE FOLDERS | with Niella

Hey crafty crew! Can you believe it's the end of March already! So lovely to see you today :-) How about we finish the month on an extra cute, quick and fun project? This is super adorable and can go with any theme you like. These mini file folders can be used for birthdays, as love notes, to do lists and even as a store gift card sleeve to pop into a standard size greeting card!

I've used a die however you can easily use a piece of cardstock and fold in half or grab a template online and use that instead! Another great idea is to use pre-made greeting or note cards and add a hand cut tab on the top. Here I've used one of my favourite patterned paper packs: 12 x 12" paper pack buffalo check woodgrain rainbow petite prints. I love the look of woodgrain paper, don't you?


I love to create by colour, especially with the Over the Rainbow collection as everything goes so easily with each other! How sweet are the garden gnomies and their woodland friends? One of the greatest things about Doodlebug Design are the colours and the base products they have. On these mini file folders I've used the mini brads + paperclips too along with the odds & ends ephemera pack, this & that cardstock stickers and the icons stickers!


These mini file folders have a ton of use; the ideas are endless! Mini greeting + gifts cards, scrapbooking accents, love notes, school lunch reminders...what will you be creating them for?


To close the mini file folders, I've used the mini paperclips to add that extra charm feature. I adore paperclips!


Thank you so much for popping by today for a visit and I can't wait to see what you create! Keep crafting y'all! Until next time; doodle-dee!


DOODLEBUG PRODUCTS USED

Over the Rainbow Collection
mini brads
mini paperclips
petite prints buffalo check and woodgrain
sprinkles

OTHER

mini file folder die
foam dots

Thursday, March 30, 2023

OVER THE RAINBOW BEACH NIGHT MEMORIES LAYOUT | with Lisa

Did you ever use a themed collection to create a project that had a different theme? Well, that's what I did for this layout. I used the new Over the Rainbow collection and created a summery layout. Even though the photo I documented was taken in spring, the beach always screams summer, right?

I started by making a mixed media background using watercolors. I primed my sheet of cardstock with white gesso to create a barrier between the color and the paper. That way, you're able to play with the color a lot longer and it'll not sink into the paper right away.


Then I started with some aqua watercolors that I used with a lot of water. I like to create a big splatter and then turn the page in different directions to let the color run over the paper.


I then use my heat gun to dry the layer (actually, you can use it to make the color go where you want and create fun waves) and start again, until I'm happy with the result. I did the same, using pink and gold.


When my page was dry and ready, I continued with a Doodlebug cut file. I used the Fairy Garden Lightning Bug Jar file and pieced it together with Doodlebug Textured Cardstock.


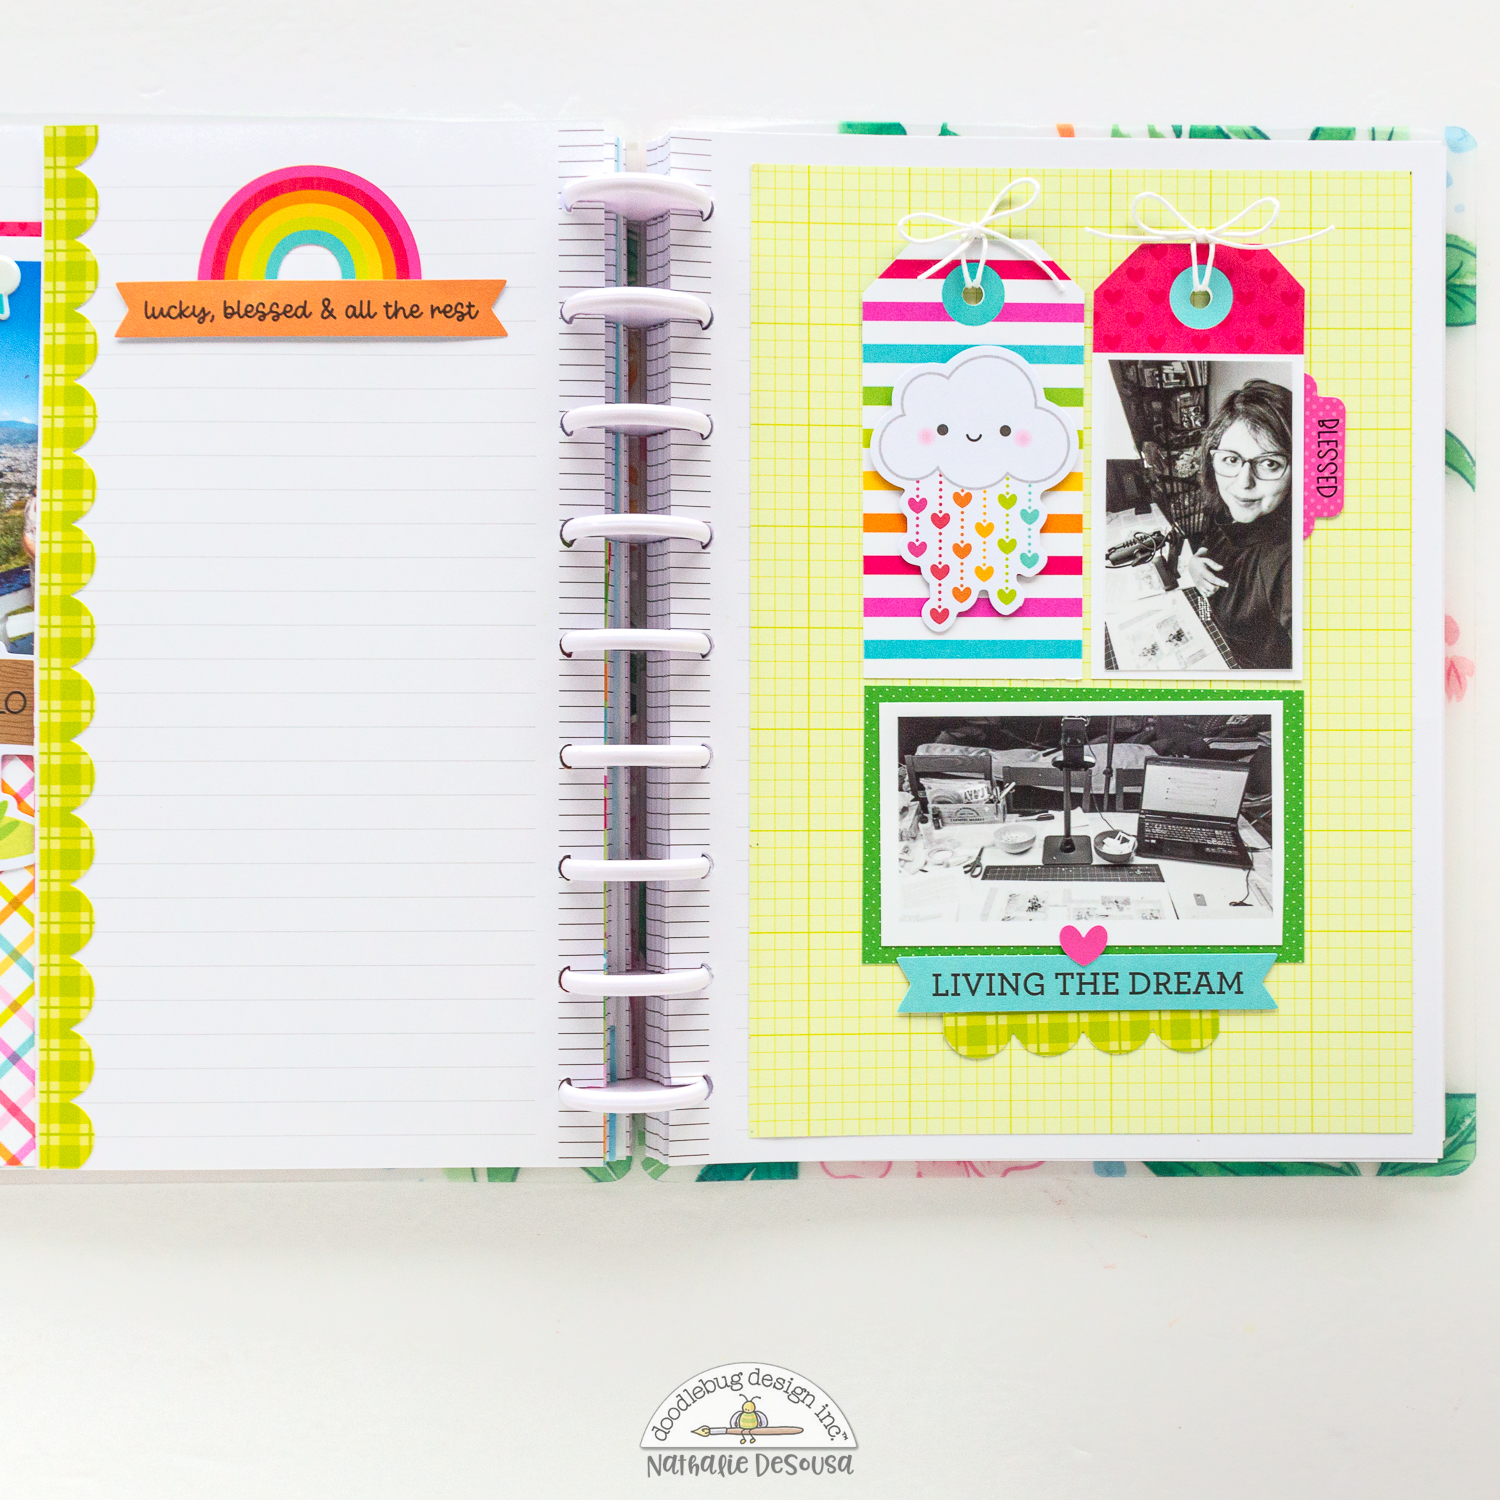
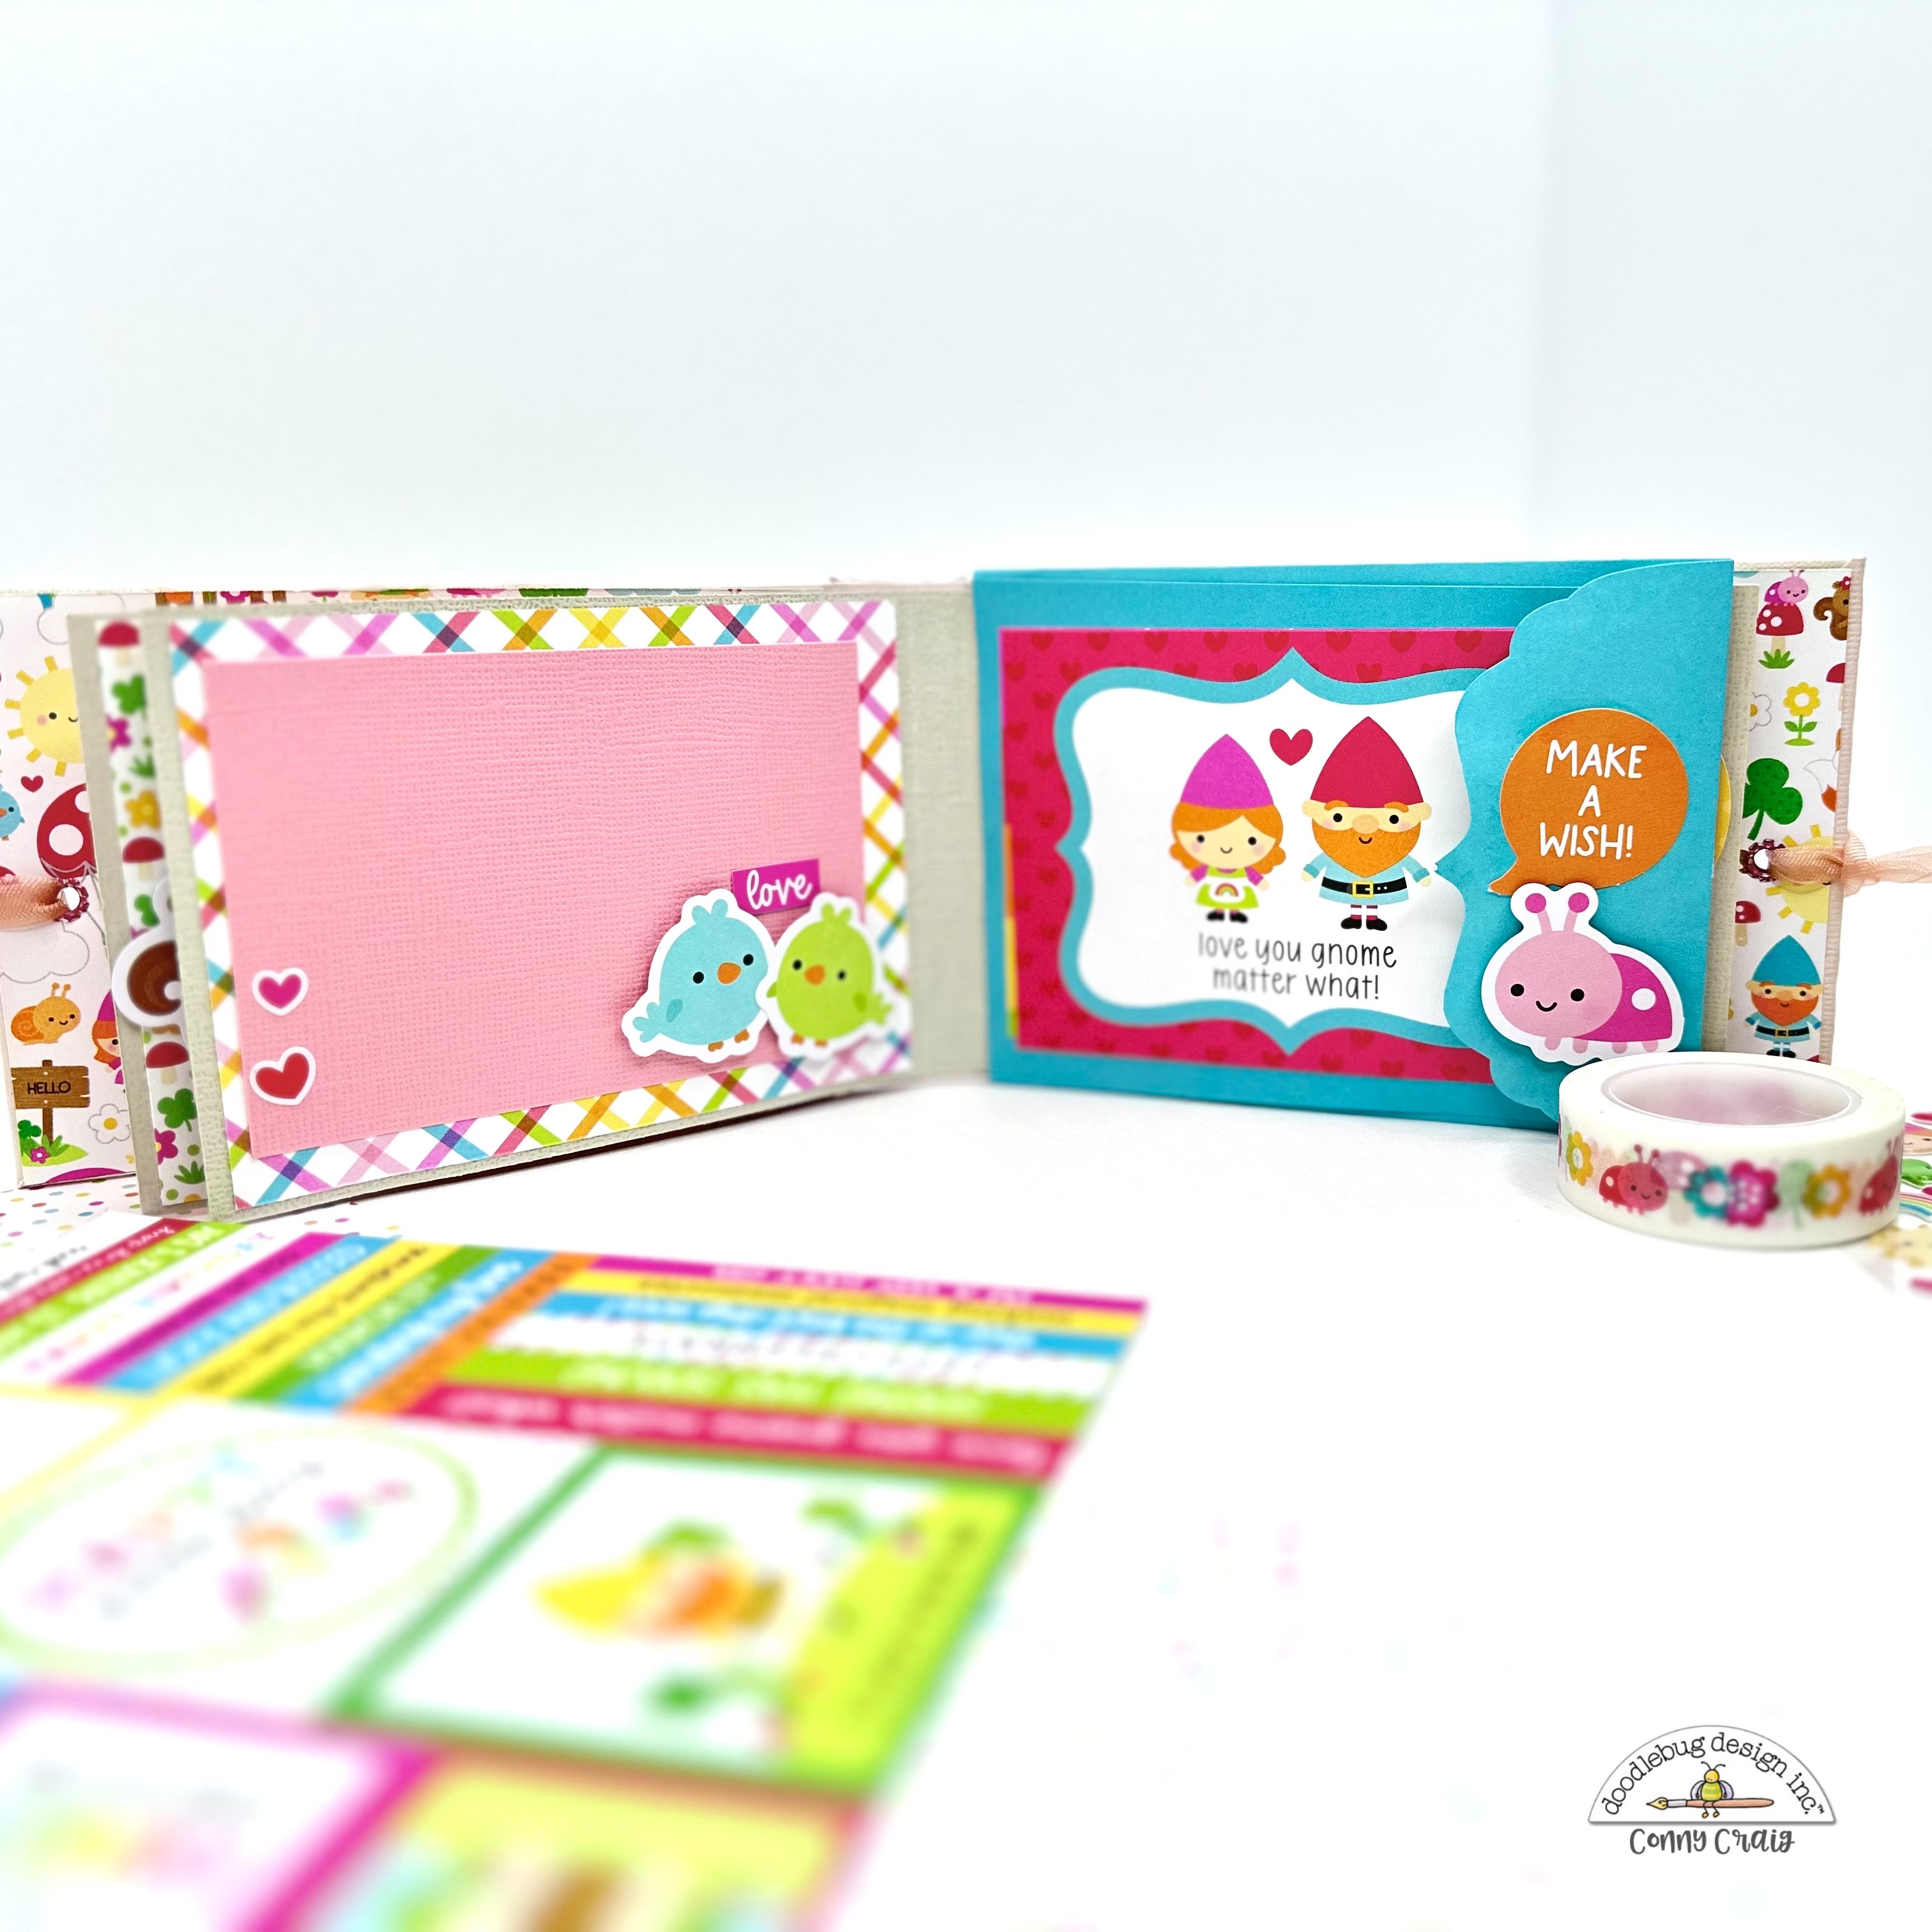
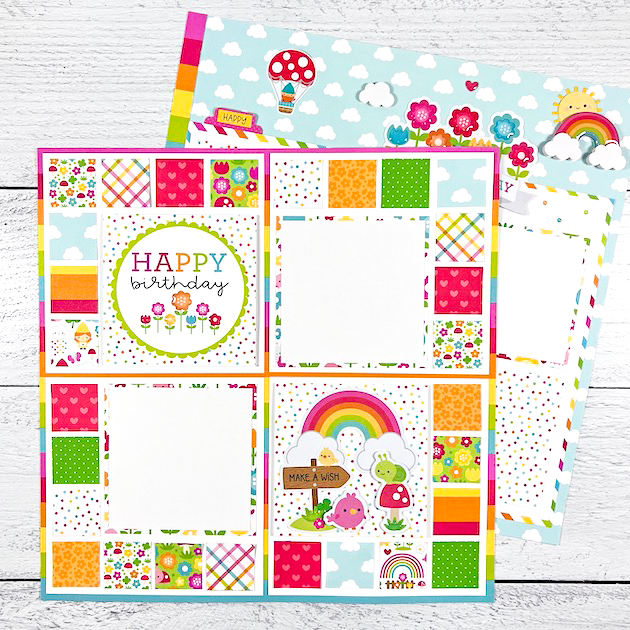
I love how cute this cut file looks... :) I matted my photo with two different patterned papers from the collection and the placed my two elements on the layout. I never really plan my mixed media background, so sometimes I need some time to see how to place my elements, so to not cover up too much of the color.

I adhered the cut file and photo and then went through the collection's embellishments to see what I could add.


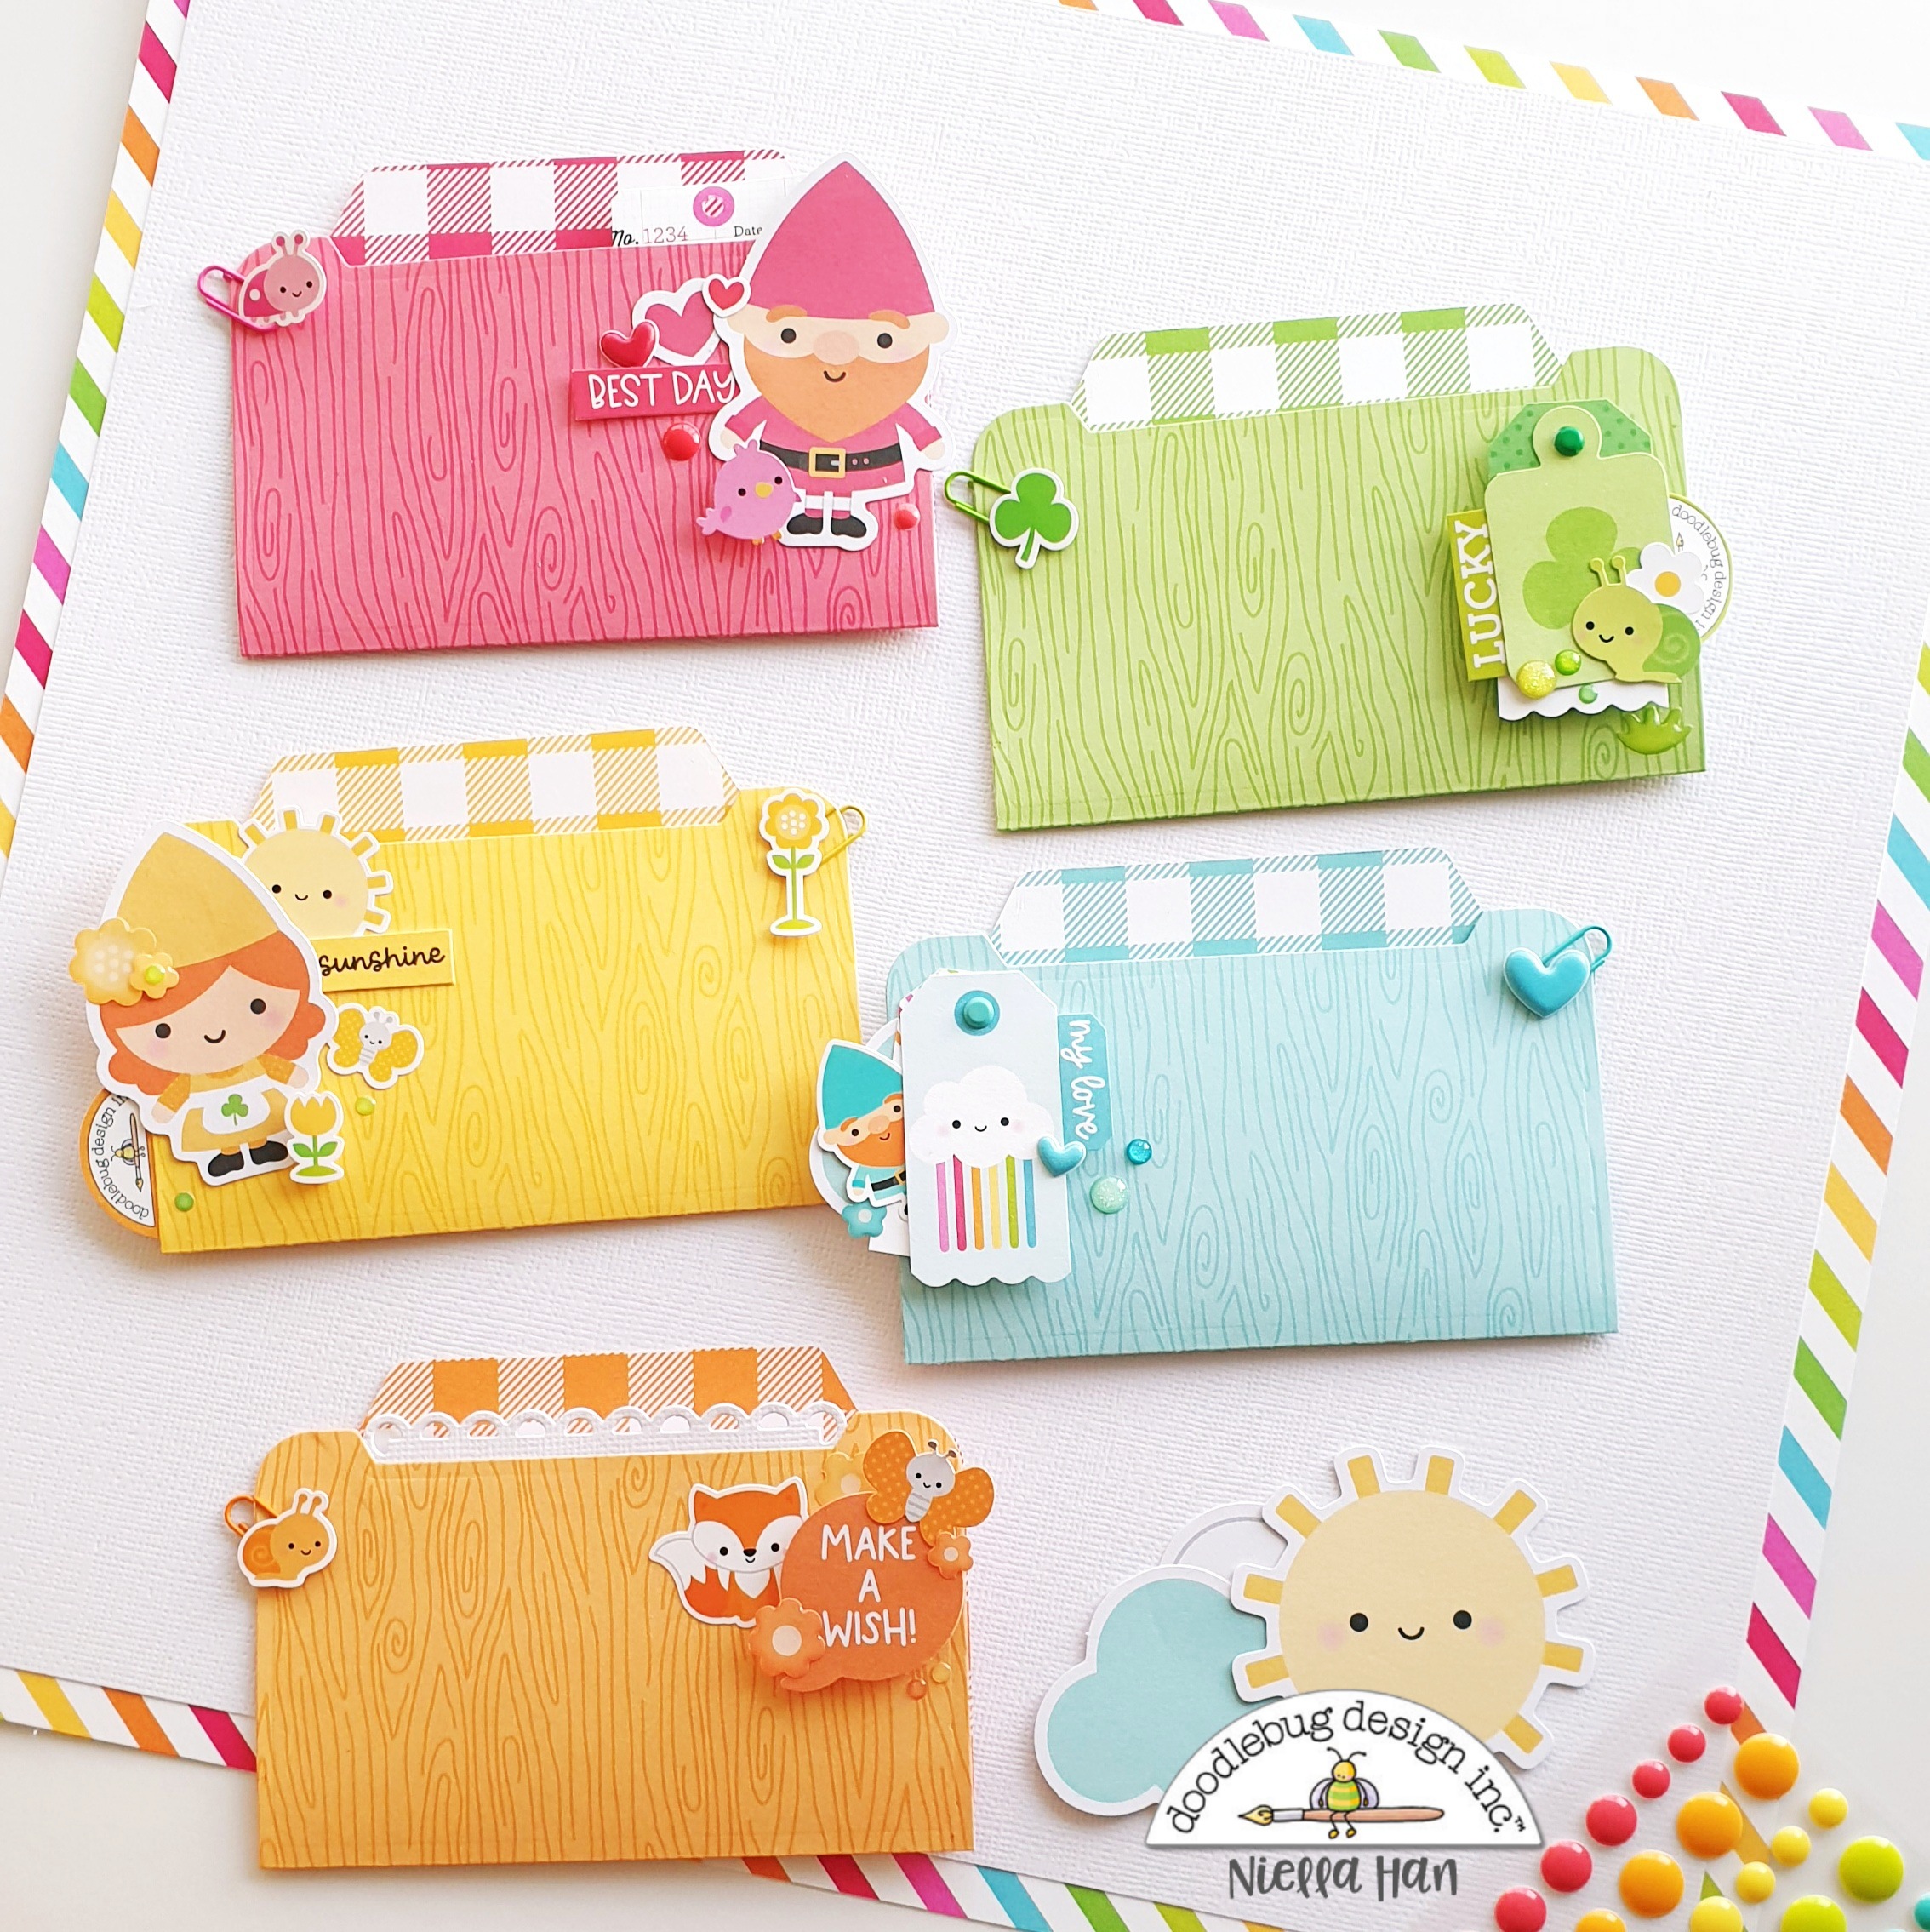
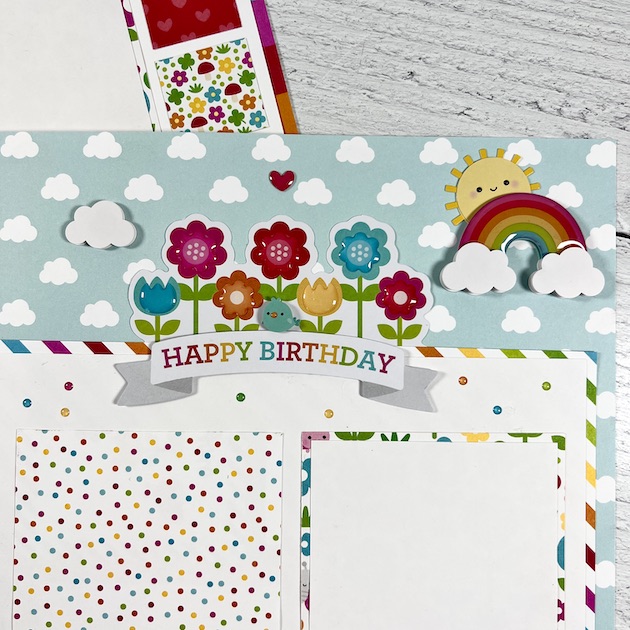
I chose some clouds and a sun from the Odds & Ends pack. To fill the jar a bit more, I used heart stickers and I placed a teeny tiny doodle pop bird at the bottom of the page.  Talking of that, I wanted to create some kind of base for my jar. Since the photo I took was on the beach, I chose sand-colored textured cardstock from Doodlebug and created three layers of strips to make it look like the sand on the beach.


For the title, I used a Chit Chat word and some Sunshine alpha stickers. For some more finishing details, I used a pencil and drew lines and shadows on the jar and fireflies, drew some white dots "in" the jar and I splattered paint around the jar.

That's it! :) I think it turned out cute!  See you soon scrappy people.


DOODLEBUG PRODUCTS USED

Over the Rainbow Collection

Doodlebug Textured Cardstock
Sunshine Alpha Stickers
Fairy Garden Lightning Bug Jar Cut File


OTHER

Gesso and watercolors

White pen

Wednesday, March 29, 2023

OVER THE RAINBOW TREAT BOX | with Miguel

Spring continues, so it's the perfect time to create with the Over the Rainbow Collection!  Just seeing all the cuteness and bright colors, makes my day! Today I used it to decorate this cubed shaped acetate box.

I used the gnome Doodle Pop to decorate the top of my box.  I also love using the washi tape as a ribbon to seal my box!


I also added lots of mini jewels to give it more sparkle and shine!


Inside the box, I added plastic rainbows with chocolates inside ! They go together beautifully!
 

Thank you for coming to see my project!  See you soon!

DOODLEBUG PRODUCTS USED

Over the Rainbow Collection
Washi tape
Doodle-pops

Tuesday, March 28, 2023

OVER THE RAINBOW GRATITUDE JOURNAL PAGES | with Nathalie

Raise your hand if you are loving all the happy feelings in the beautiful Over The Rainbow collection. It is just so perfect for all sorts of documenting, and today, I am using it to add a few memories to my Gratitude journal. Let me show you!


I love how easily these came together with the collection. All the color and the cute icons made it so easy to put them together.


For my first page, I wanted to keep the page simple and bring all the focus to the picture of some members of my family. A bit of rainbow is always a good thing for any page. I added a few pieces of Chit Chat for the title, and used stickers and icons to complete the spread.


To keep the focus of the page on the picture, I created a pocket to hold my journaling. All those cut apart elements from the back of the mini mushrooms paper are just perfect for adding all your stories to your pages.


For my next page, I took advantage of the tag pieces on the just for you paper to create a grid design for my page. I simply added a few extra stickers and Odd & Ends pieces to complement the story. All I have left to do is write it all down!


I hope these have inspired you to add a bit of rainbow, Over The Rainbow that is to your stories!!!  XO

DOODLEBUG SUPPLIES USED

Over The Rainbow Collection
Sprinkles
Petite Prints


Monday, March 27, 2023

OVER THE RAINBOW POP UP CARDS | with Kathy

Spring is definitely here in New England!  The warmer weather has arrived and the flowers are starting to pop up!  It's the perfect time for some fun spring cards!  I put these fun pop up cards together using the Over the Rainbow Collection, take a peek...


I love all the different sized embellishments and stickers available in Doodlebug collections.  The Odds & Ends, Icon and mini Icon stickers give you a great variety of sizes and images to use to make fun scenes, and they all go together so quickly!


For my first card I used lots stickers from the mini icons to create a spring scene.  The size of these stickers were perfect for my pop up base!  I also added a piece of acetate so that the gnome in the balloon and butterfly look like they are floating!  To finish, I added some sprinkles to the flower centers for some dimension and sparkle! For my sentiment, I used the Hello Sign from the mini icons.


My second card includes the rainbow from the Odds & Ends, the adorable squirrel from the Icons Stickers and other stickers from the mini icons sheets.  Of course I had to add a mini heart sprinkle for some shine! My sentiment is stamped and came from the Gnome Sweet Gnome Doodle Stamps.


I just love that cute little squirrel and ladybug!  They make me smile!  Hopefully the recipients of these cards will feel the same way!

Have you created any projects using the Over the Rainbow Collection?  Be sure to tag Doodlebug Design on Facebook & Instagram, we love to see your creations!  That's it for me today, thanks for stopping by to peek!


DOODLEBUG PRODUCTS USED

Over the Rainbow Collection
Gnome Sweet Gnome Doodle Stamps
Gingham Lined Petite Prints
Dot Stripe Petite Prints

OTHER

Platform Pop Up Dies
Cloud Dies
Grass Dies
Distress Ink
Sizzix Big Shot

Friday, March 24, 2023

OVER THE RAINBOW THANKS FOR BRIGHTENING MY DAY MINI ALBUM | with Conny

Hello Friends! It's Conny here,  and today I'm sharing a 5" x 3 1/2" mini album- titled "Thanks for Brightening My Day" using the Over the Rainbow Collection and textured cardstock.


Let's get started! I started with (2) 5" x 3 1/2 " and (1) 1.5" X 3 1/2" chipboard pieces and covered them with Blush cardstock. Next, using the same cardstock, I cut one piece measuring 3 1/2" X 7", and placed it in the spine in the middle.  I used my bone folder to score the spine. After, I added the chipboard pieces on top, leaving an 1/8" inch border.


For the inside of the album, you will need two pieces of cardstock, the first one 10 1/2" x 3 3/8" - scored at 4 3/4" and 5 3/4" and one piece measuring 9 3/4" x 3 3/8" scored at 3 3/4" and 5 1/8".

The cover page came together quickly with the So Lucky Doodle Pop, cardstock stickers- icons, bits and pieces, enamel dots a chit-chat title and puffy stickers.

Inside the album, I added a few envelopes from the collection and four pages embellished with icons and stickers from the collection. I hope this project inspires you to create a mini album and we can't wait to see the projects you make using this beautiful collection!


DOODLEBUG SUPPLIES USED

Over the Rainbow Collection
Textured Cardstock

OTHER

Chipboard

Thursday, March 23, 2023

OVER THE RAINBOW TWO-PAGE BIRTHDAY LAYOUT | With Traci

One request I get on my membership site every month is for more classes with double-page, multi photo layouts.  I get it ... as scrapbookers, we take lots of pictures and it's nice to be able to get more than just a few photos on a page.  So today I have an idea for an interactive, multi-photo, two page layout using the Over the Rainbow collection!


For this mosaic style page, I layered four white card stock squares (5.75" x 5.75") on the super colorful stripe sheet called Over the Rainbow.  Then I added 28 pieces of pattern paper (1.25" x 1.25") around the outside of each card stock square.  Don't all of those pretty colors just make you happy?!


Inside the border of little squares, I added two flip-up cards (I call them flippies) that are 4" x 8" and scored/folded at 4" to create cards that can hold 2-3 photos each.  For the front of this one, I added a few cute odds & ends and little Spring Garden shape sprinkles, but you could also add another photo here.  The flippie below is a 4x4 card from the Sprinkles of Color sheet.


In the other two center spots, I added two more photo mats that measure 4" x 4".


For the second page, I adhered a strip of the stripe paper down the left side of the Rainbow Wishes sheet to tie the two pages together.  This page has 4 more photos mats and a cute spot for journaling all about the birthday photos.


Finally, I tucked the Chit Chat flowers and Happy Birthday banner up in the right corner, along with the adorable Hello Sunshine Doodle-Pops.  A few more Spring Garden sprinkles gave this page a little shine.  Love those!  So with these two pages, you'll be able to get 10 photos on your layout!  I hope this inspires you to use the Over the Rainbow collection on your next multi-photo pages!

DOODLEBUG PRODUCTS USED

Over the Rainbow Collection
Lily White 12x12 cardstock
Hello Sunshine Doodle-Pops
Spring Garden Shape Sprinkles

Wednesday, March 22, 2023

OVER THE RAINBOW LUCKY YOU LAYOUT | with Erica

Hello friends! Erica here with you today sharing a colorful 12x12 scrapbook layout using the Over The Rainbow collection and a large cut file!

When I saw this cut file I knew it would be perfect with the Over The Rainbow collection! I cut it out on some white textured cardstock from Doodlebug Design and backed it with Petite Prints that match the collection. The textured white cardstock is my favorite white cardstock to use with my cutting machine!

For my layout base I picked two pattern papers from the Over The Rainbow collection. The Rainbow Wishes paper was the perfect background for this colorful cut file. I trimmed it down to 11x11 and matted it onto the colorful Shine Bright 12x12 paper. To add some texture and to help frame the layout I added some stitching with my sewing machine. I used some pink thread to match the collection and it helps add another pop of color around the page.

I used foam adhesive all over the back of the cut file to pop it up from the layout base. For my photos I created two small photo strips of Liam Jay with his shamrock headband! He was super excited to get this and even more pumped up because it lit up! He is our big ball of energy and there is never a dull moment with Liam! I added the photos to the left side of the rainbow and added a chit chat banner under the photos.

I kept the embellishments light because I really wanted the photos and the rainbow to shine on this layout! The cute cloud die cuts were perfect to add around the page and I had to use one of the hot air balloons! To add some more color and texture to the rainbow I added some puffy hearts in the center.

This layout is full of color and joy just like our Liam Jay! I hope you enjoyed this layout using the Over The Rainbow collection and some Doodlebug Design Petite Prints! Head on over to my YouTube channel to see my process video.

DOODLEBUG PRODUCTS USED

Over The Rainbow Collection
Over The Rainbow coordinating Petite Prints
Puffy Heart Stickers

OTHER

Silhouette Cameo 4
Sewing Machine

Pin It button on image hover