Thursday, April 30, 2020

PARTY TIME SCRAPBOOK LAYOUT USING MULTIPLE PHOTOS | with Erica

Do you love a grid design on scrapbook layouts? I find this design fun and easy to use when creating a layout. There are so many possibilities with grid designs. If you are ever stuck on where to start creating a grid design is my go to! You can use any shape, size and it is great for adding 2 or more photos.
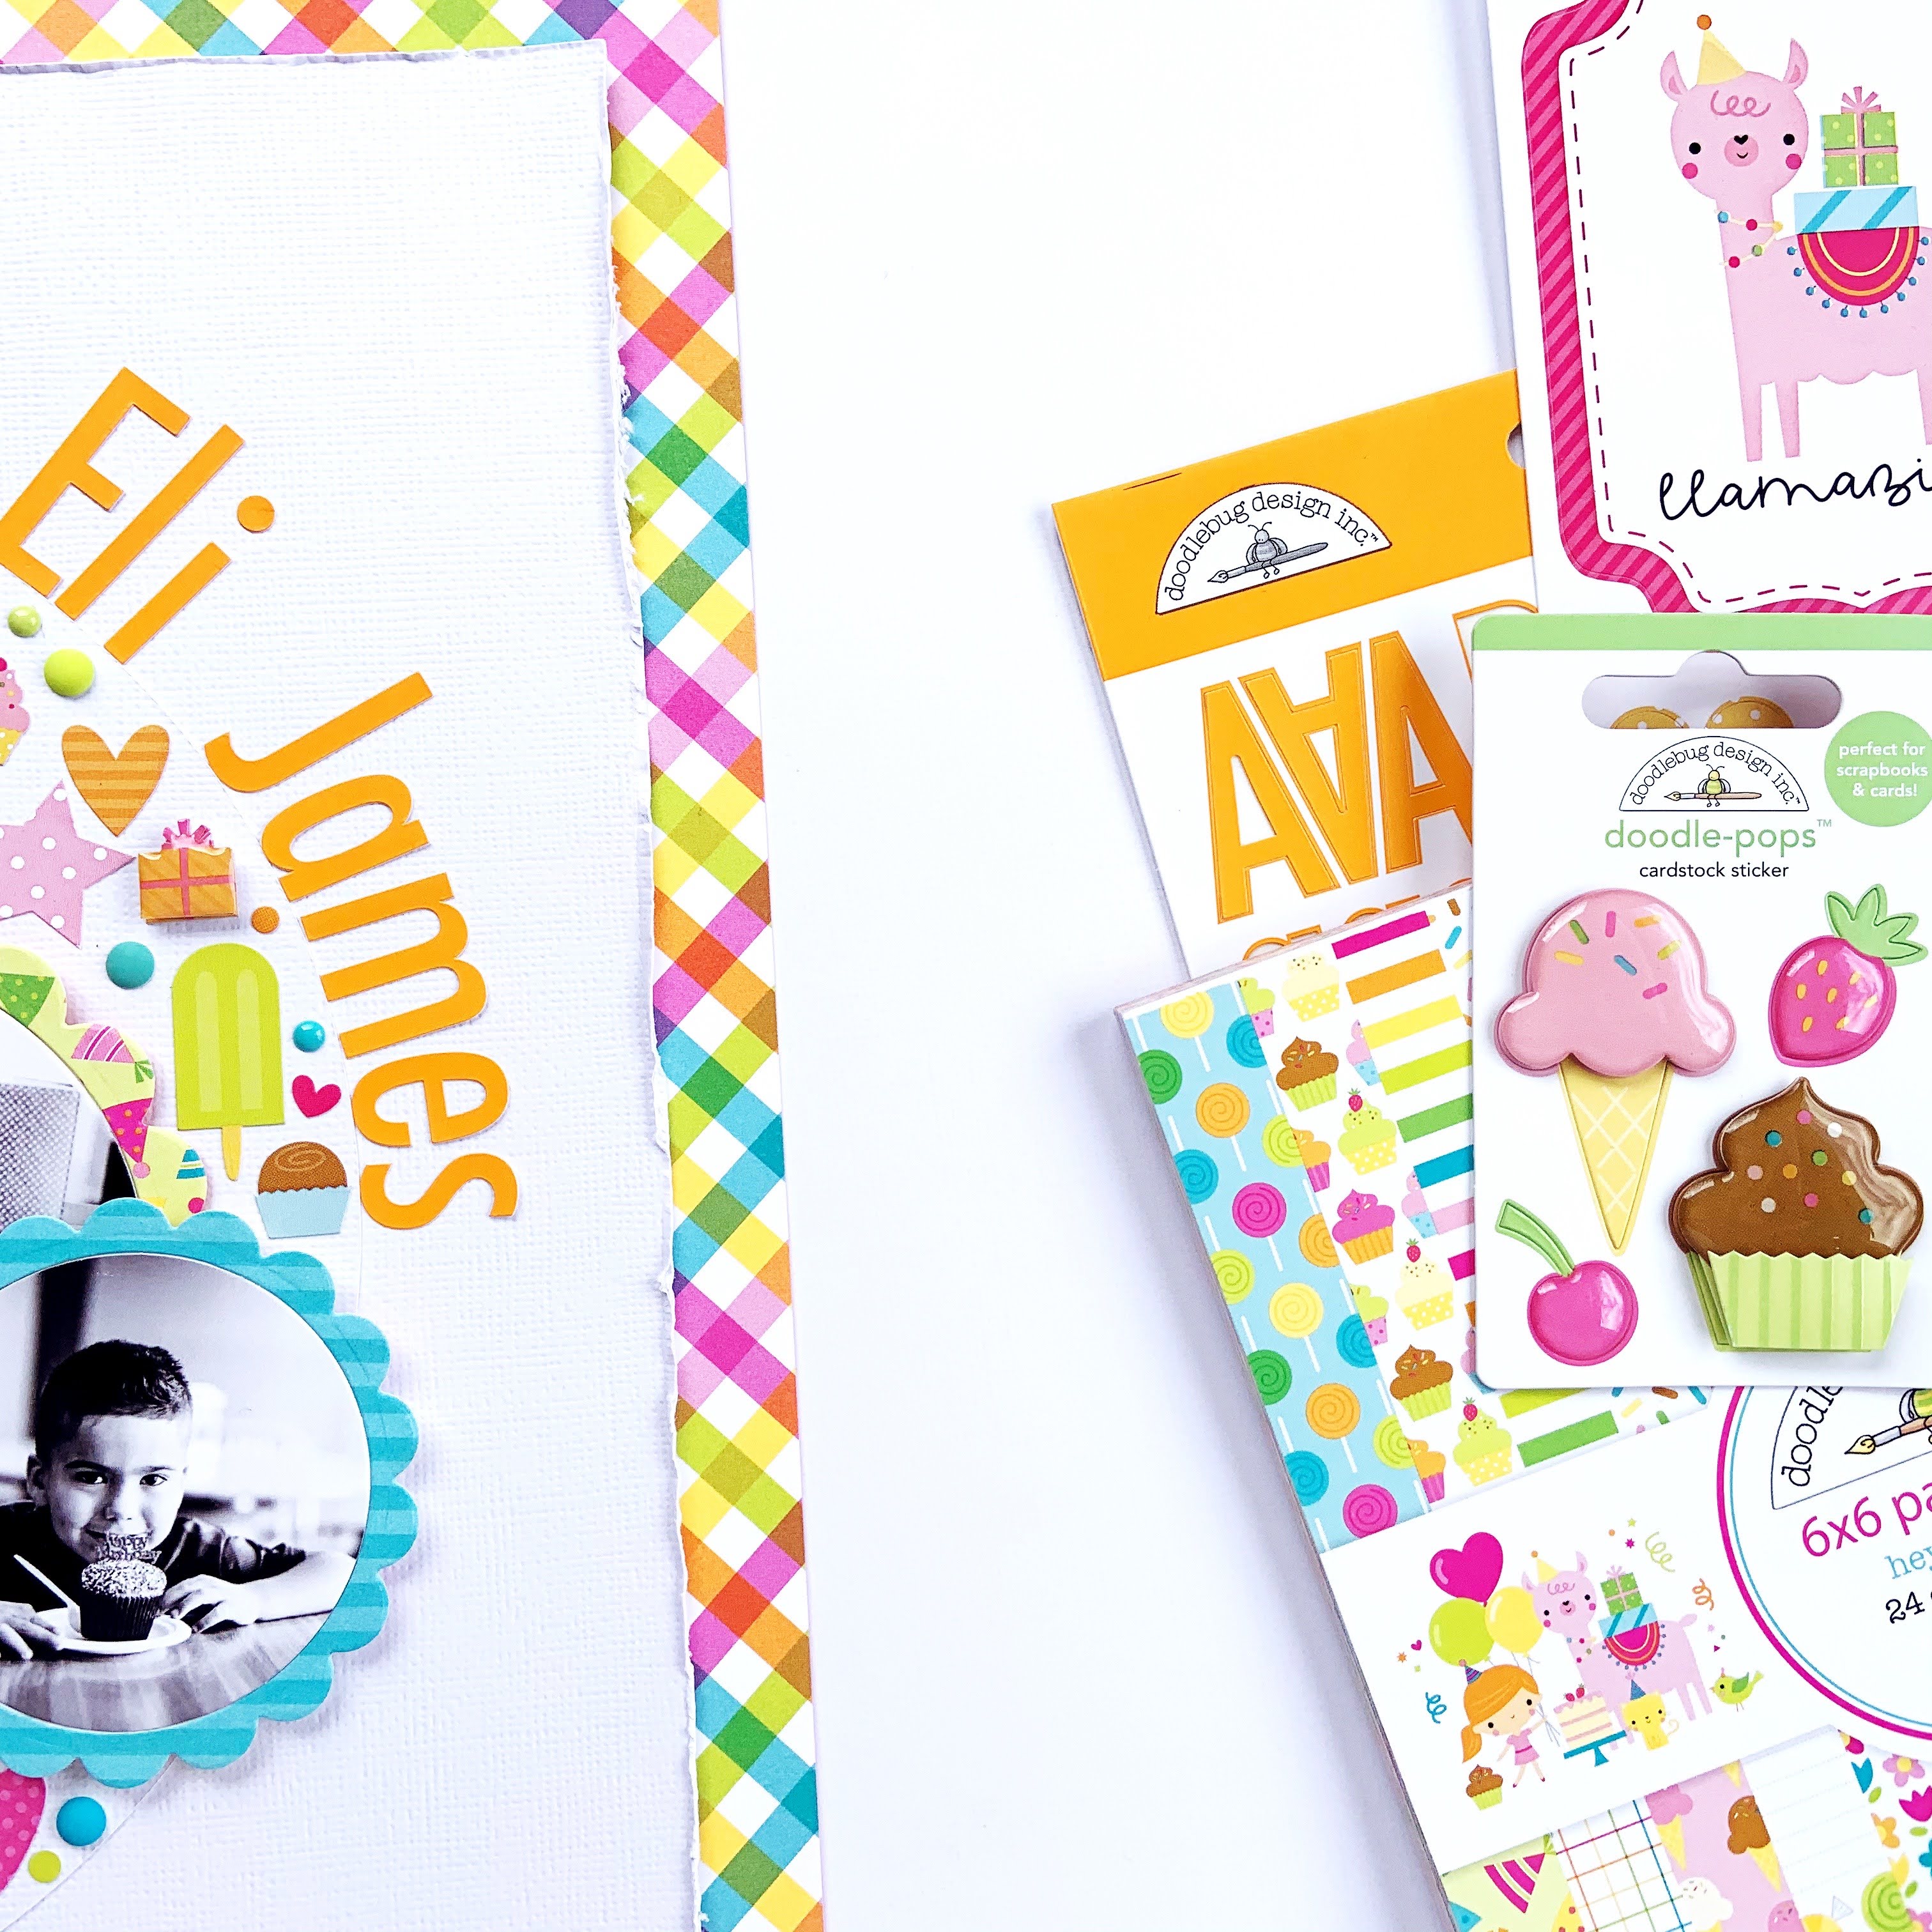
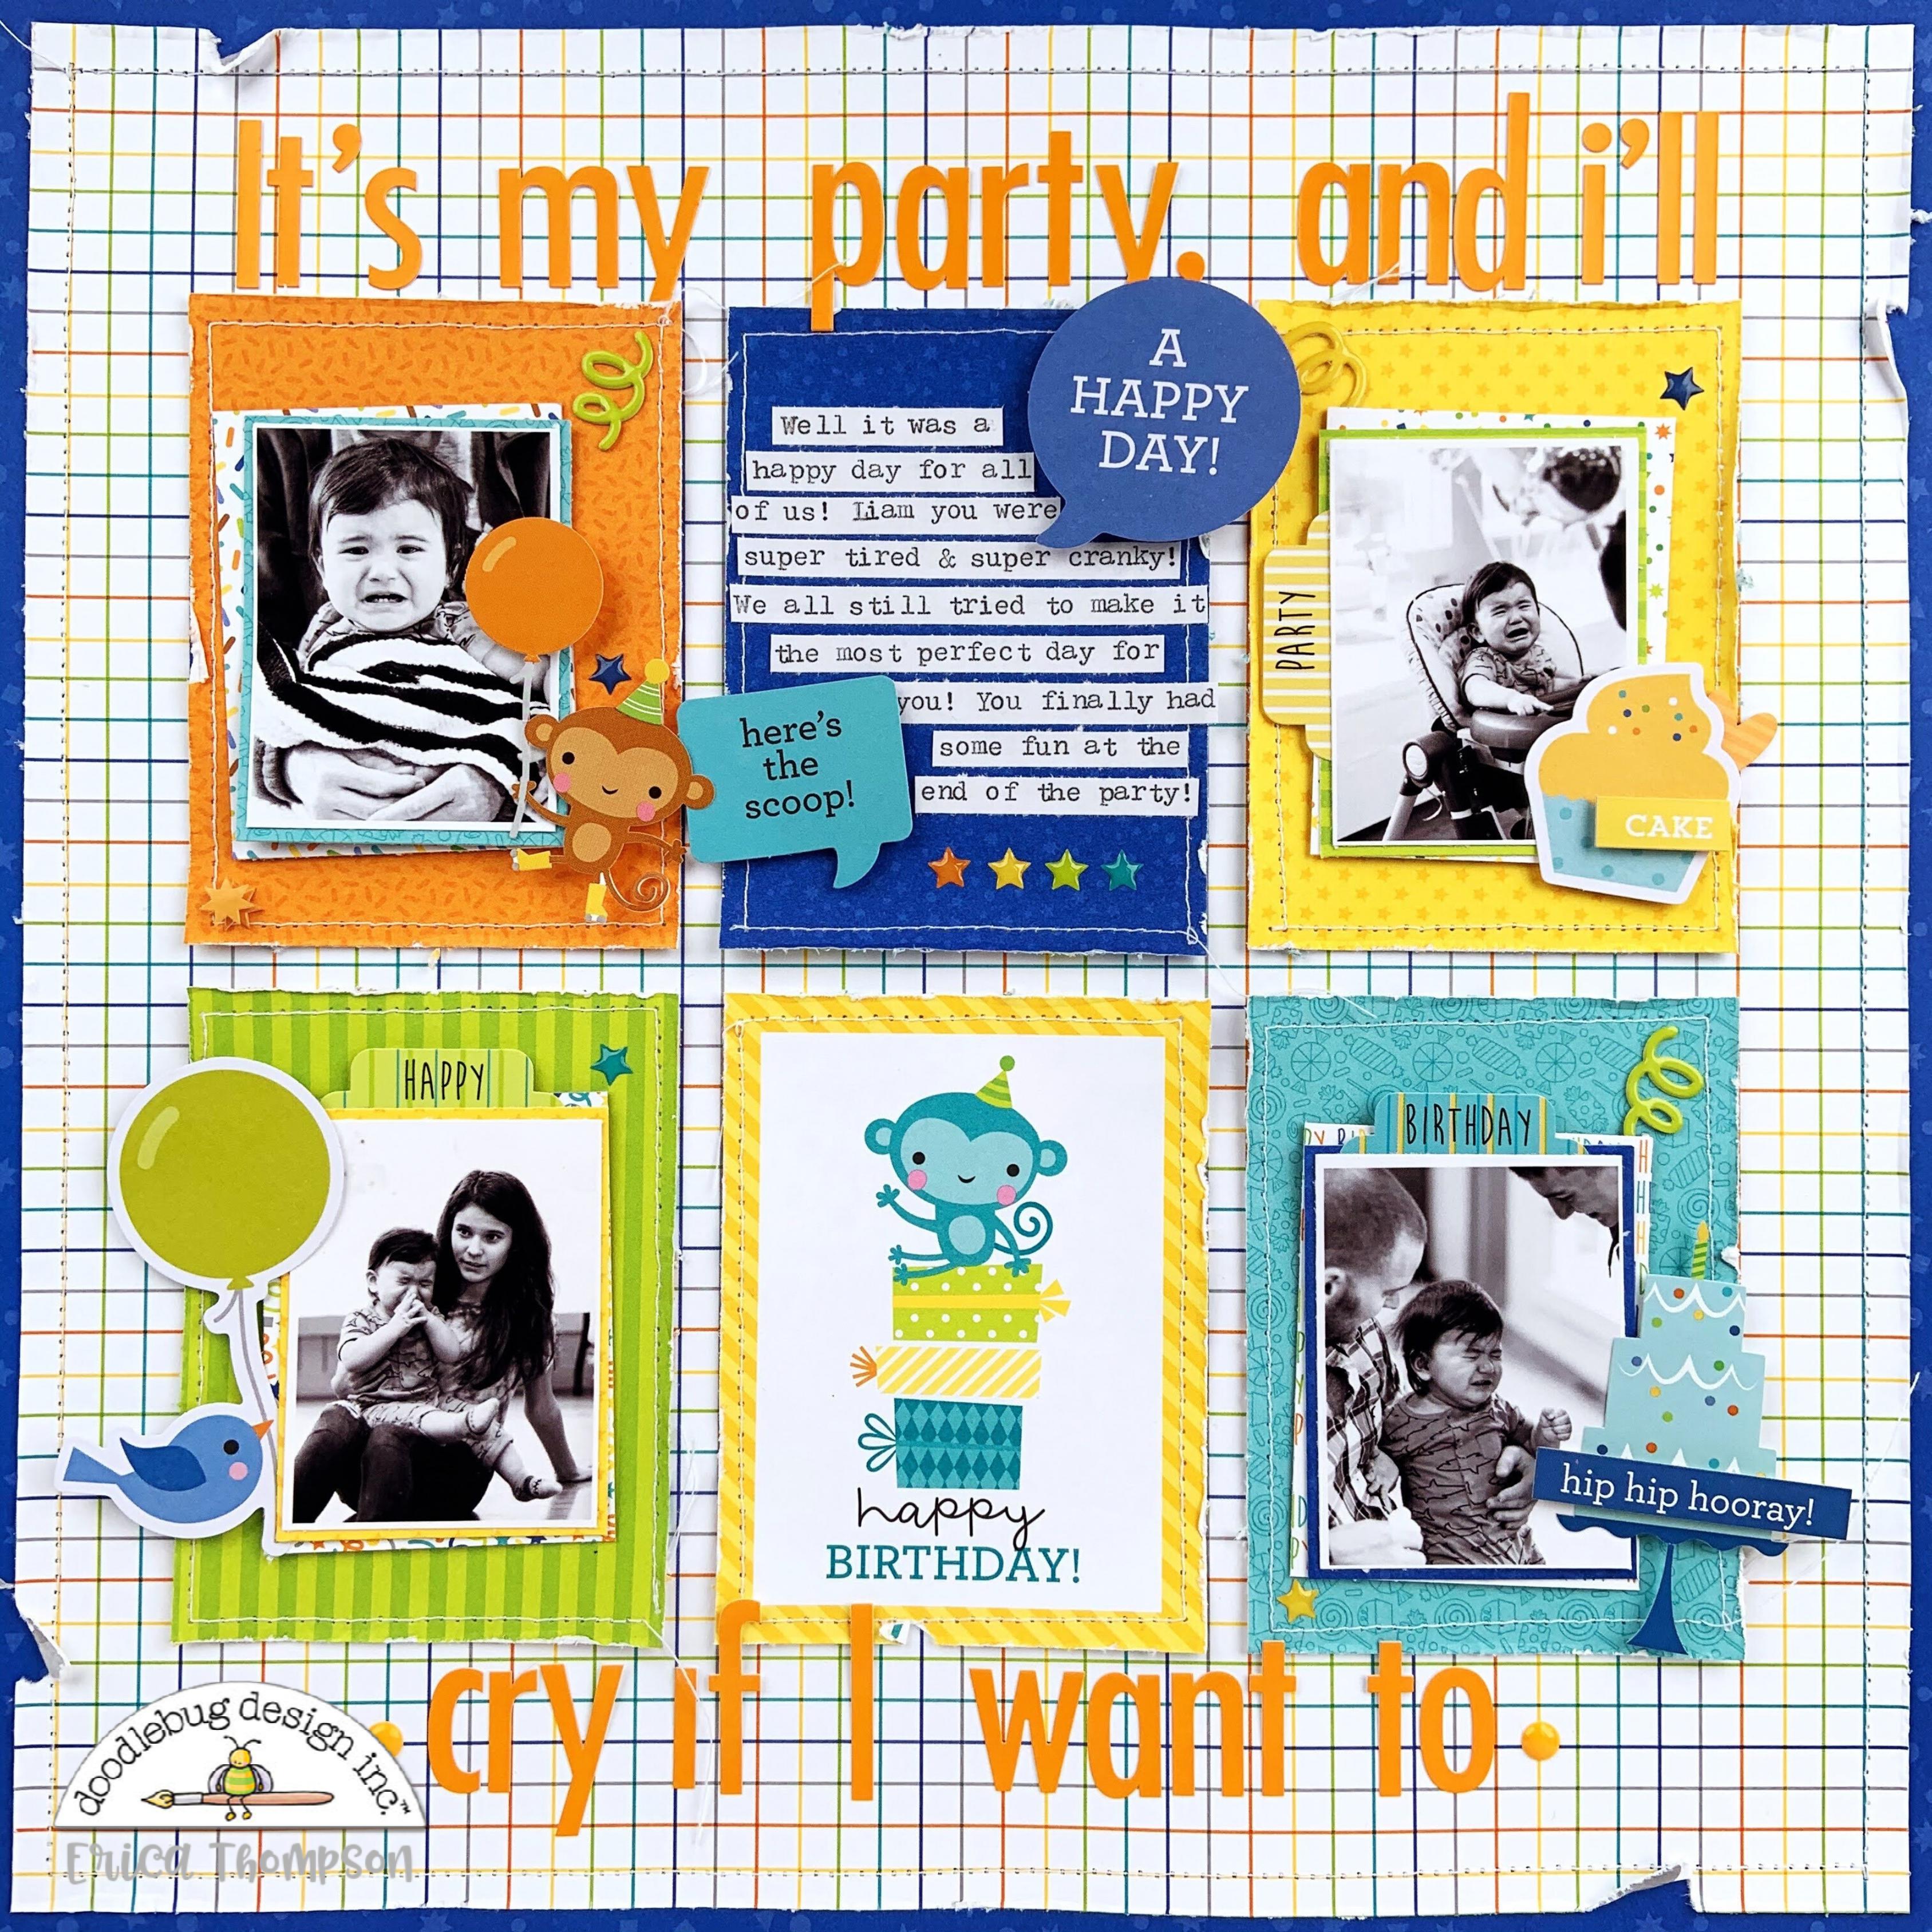
I am using the new Party Time collection for this layout and I started with the Big Celebration 12x12 paper. I trimmed it down just a little so I could mat it on the Hats Off paper! I wanted to add some texture to my layout so I distressed the edge of the Big Celebration paper with the edge of my scissors and then ran the paper through my sewing machine to add a border of stitching around the page.
I pulled out the; Party Time 6x6 paper pad and found some fun colors to use for my grid mats. I found 5 pieces of pattern paper and trimmed them down to a 3x4 size. I also distress the edges and ran them through my sewing machine. I printed 4 photos of our youngest son Liam on his 1st Birthday! He was not the happiest little guy on this day. He was super tried so in a lot of his photos he is crying.
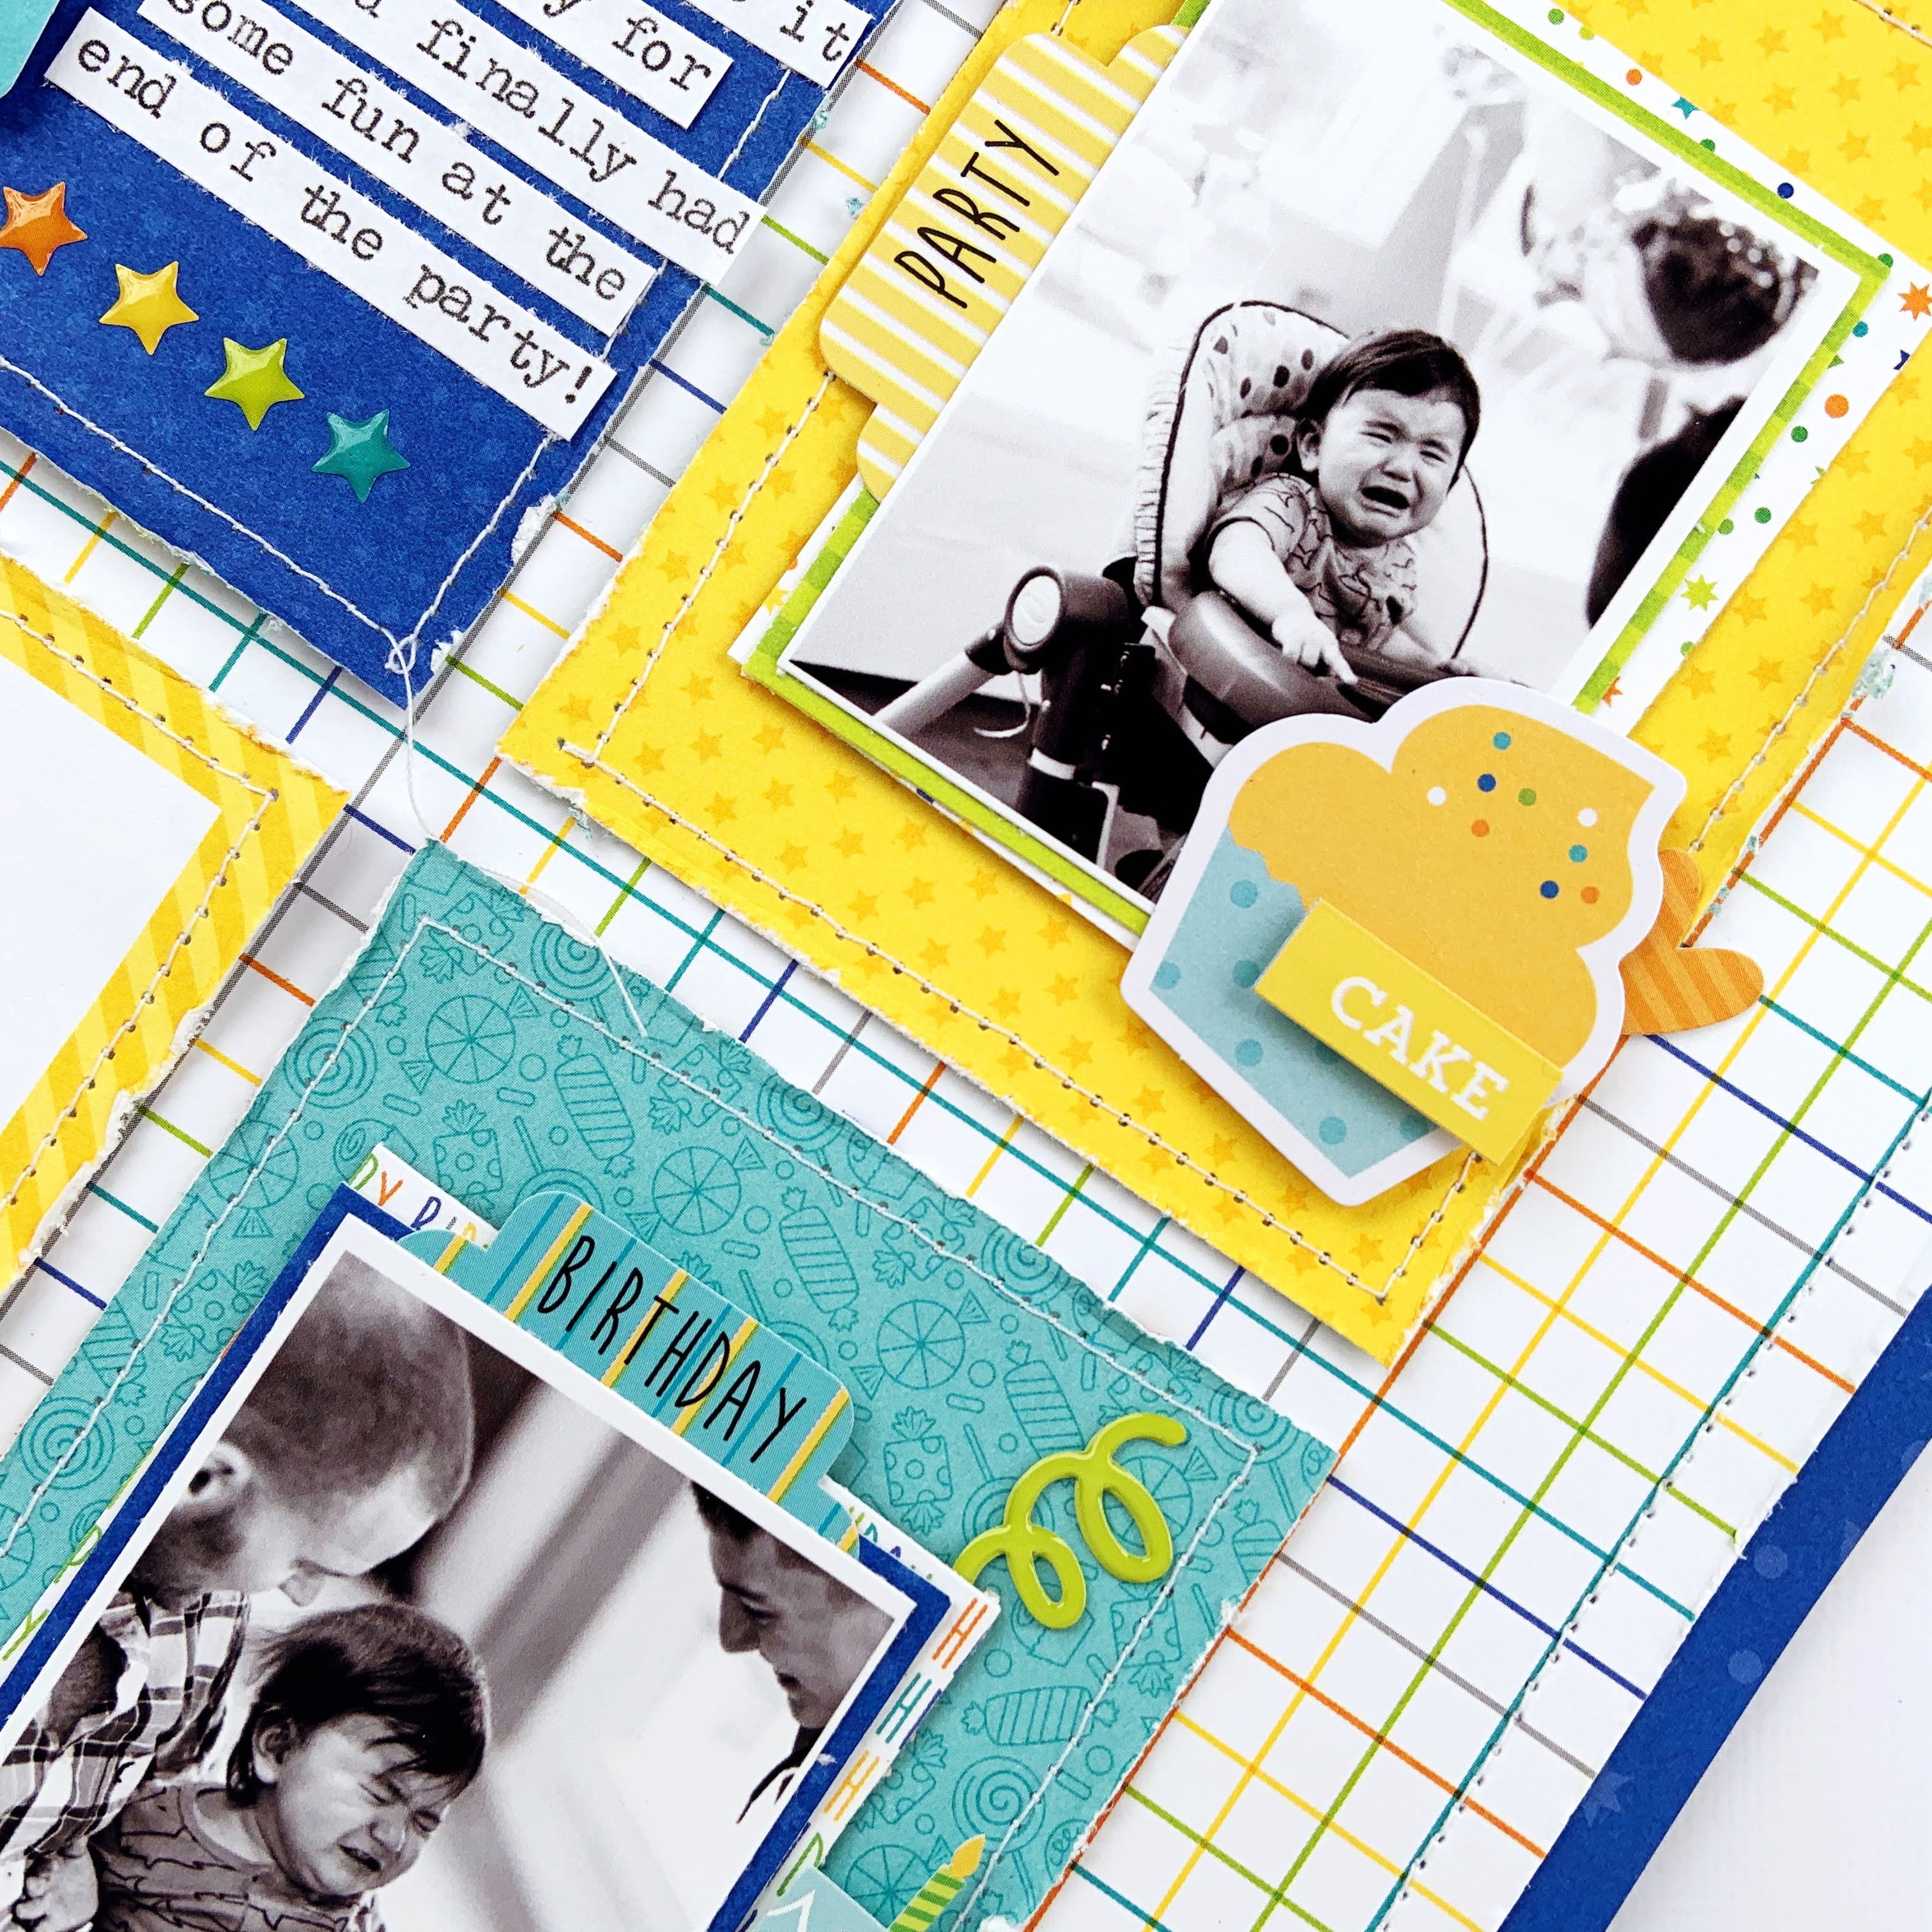
I matted the photos with pattern paper from the; Party Time 6x6 paper pad. I used papers that were white with colored patterns on them. I also layered them up a little wonky and not straight just for some added fun to the layout. For my 6th block I used one of the cut aparts from the Surprise; 12x12 paper.
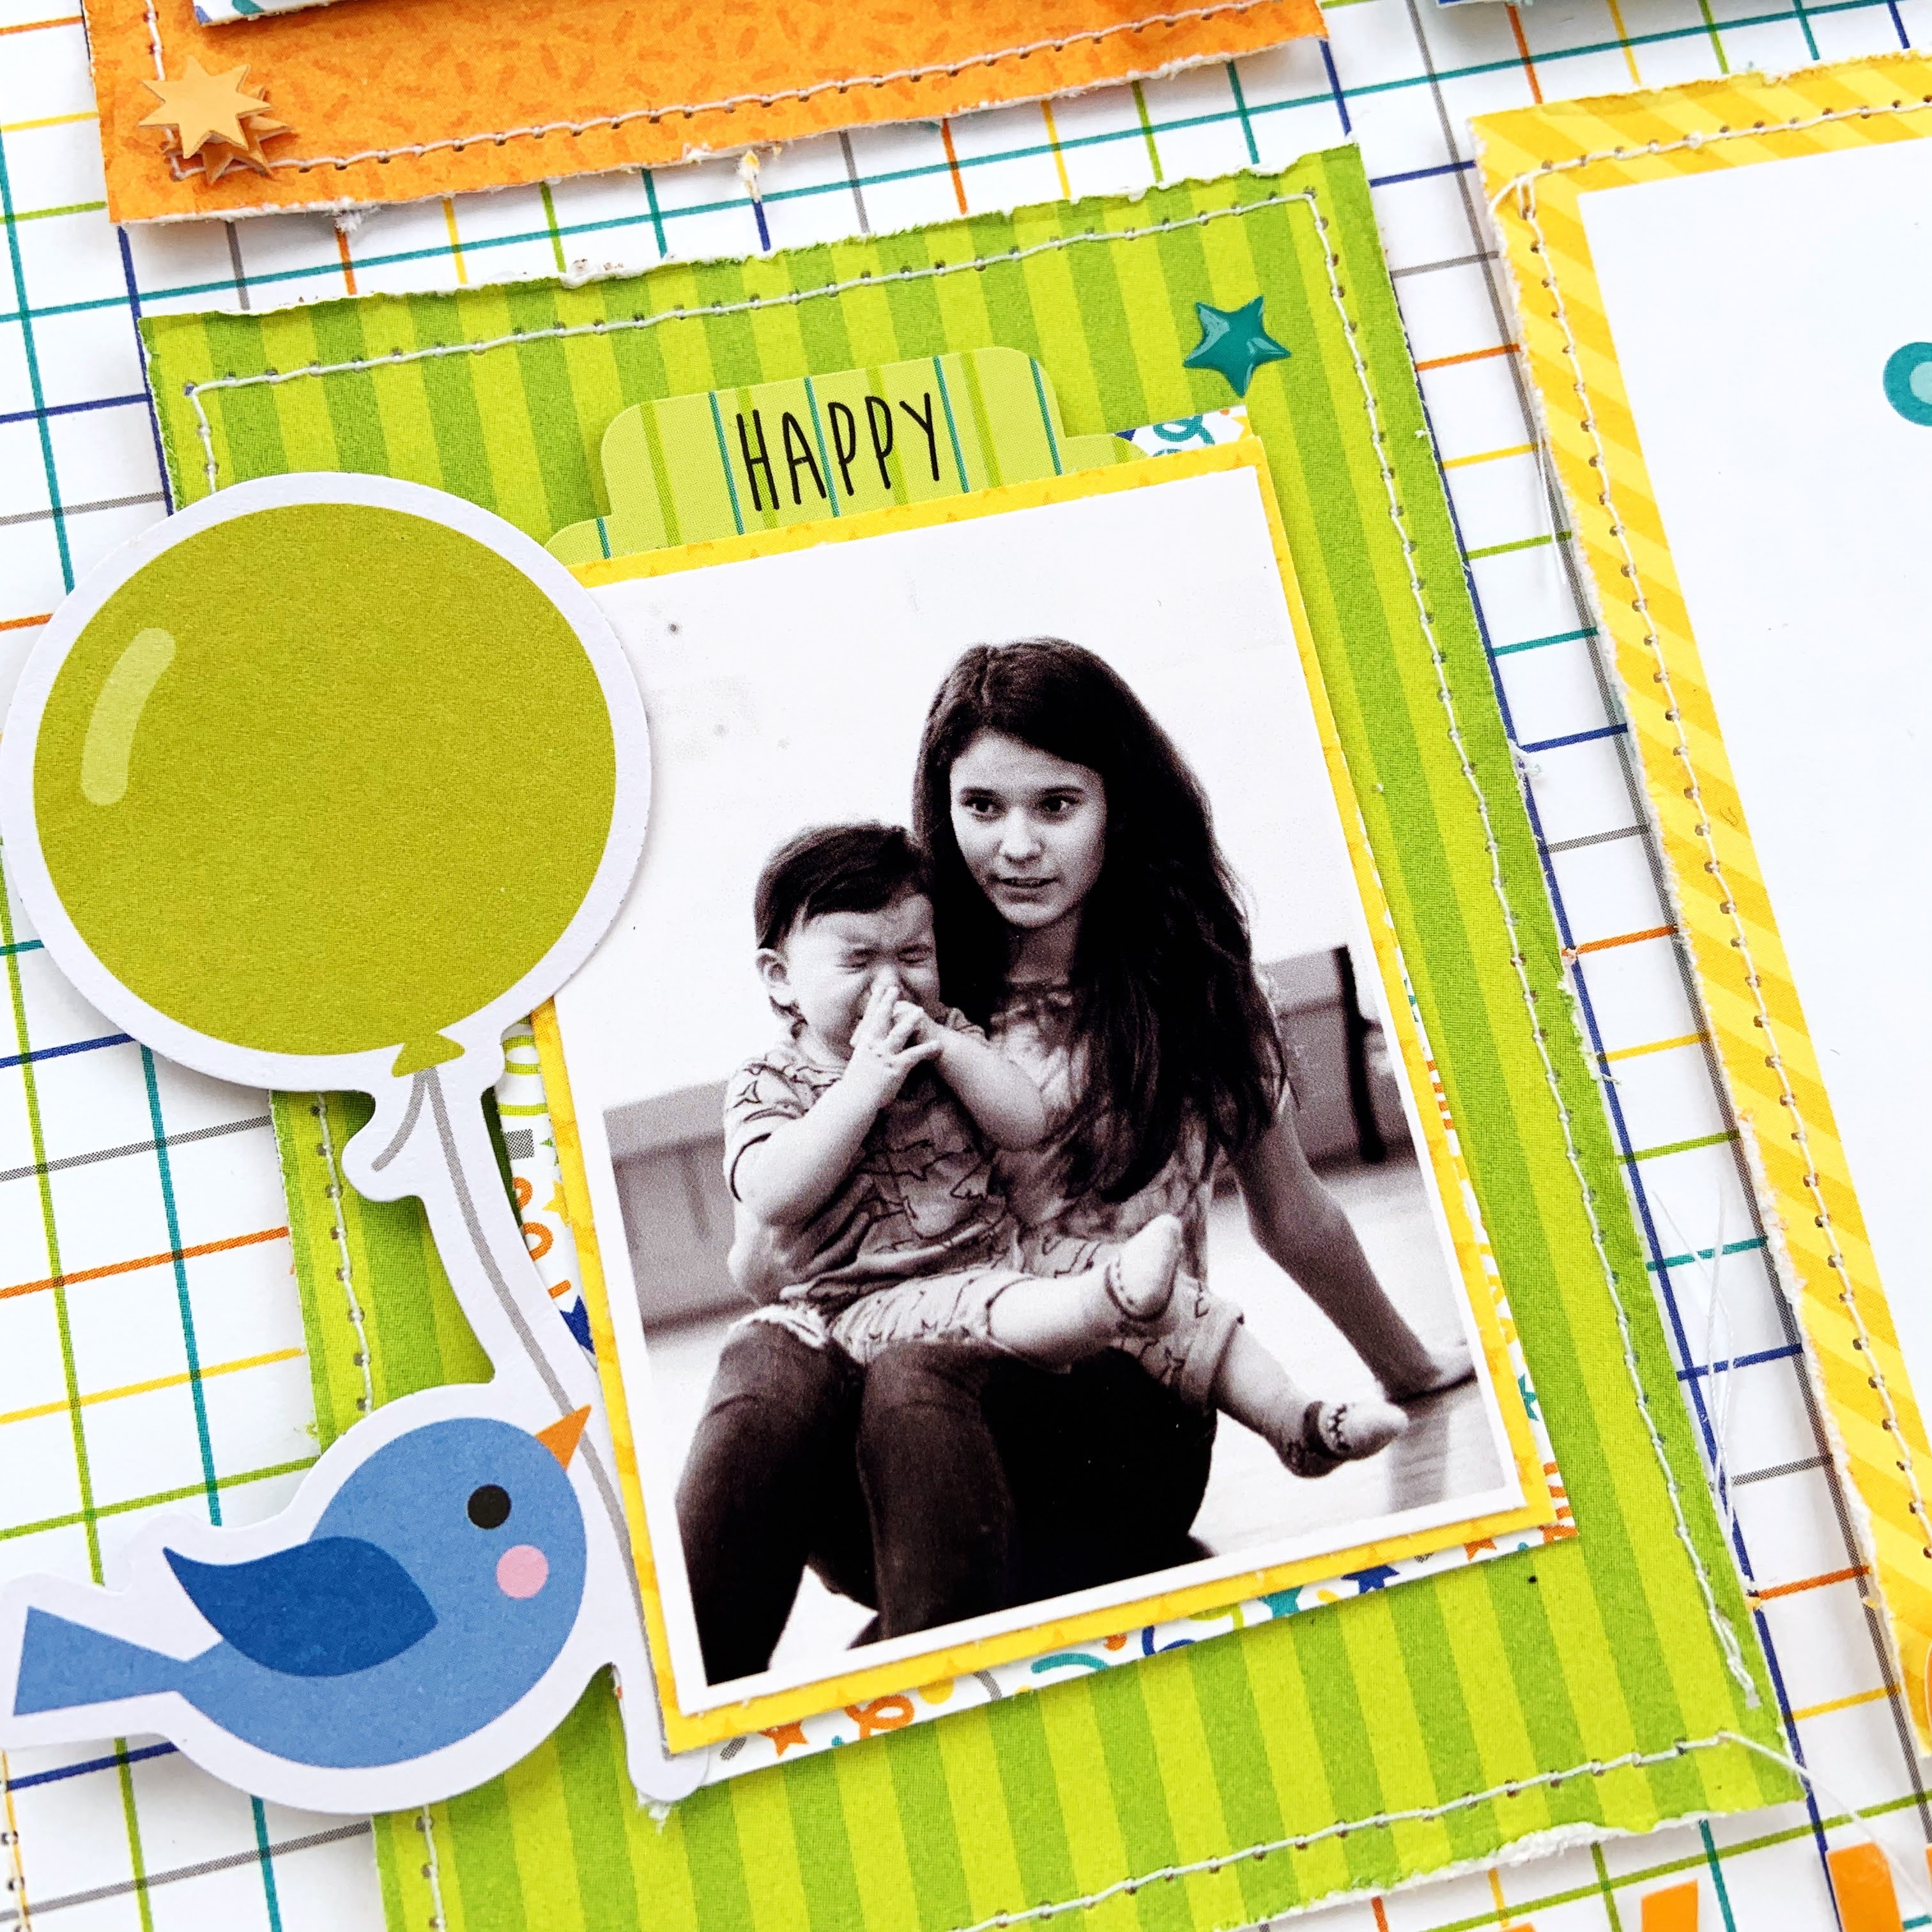
I used Party Time odds&ends;, mini icon stickers, doodle pops and sprinkles to embellish around each block on my grid. For my title I used the; Doodlebug Design Skinny Alpha stickers. I love how the title came out and I think it fits perfectly with my photos! To finish off my layout I added journaling to one of the blocks. I typed it out on my We R Memory Keepers typewriter and cut it down into strips. I adhered down with some wet glue. Here is a look at my completed layout using the Party Time collection!
I would love to see what you can do with a grid design! I hope you found some inspiration here today! Thank you so much for spending some time with me! I hope you have a wonderful day!

 Doodlebug Products Used:
Party Time Collection
 Other Products Used:
 We R Memory Keepers Typewriter | Sewing Machine

Wednesday, April 29, 2020

PARTY TIME TOKENS OF APPRECIATION | with Shellye

With the adorable new "Party Time" Collection, decorations, cupcake toppers, and party favors easily come together to create a smashing celebration!
For my project today I'm focusing on the tokens of appreciation: mini coloring books attached to a box of wrapped crayons. 
I've incorporated some of the new Doodle Cuts, Stamps and pieces from the collection to make these tag-style coloring books.
First, I die-cut the tag shapes from smooth, white cardstock and then stamped the images for each booklet.  I layered on smaller elements such as hats, balloons and wagons to the scenes.
Next, I crafted a front and back cover by adding a die-cut piece of patterned paper to two blank tags.  Layers of die-cut circles, stickers, ribbon and a stamped "thank you" were added to the fronts! A 1" ring was used to hold each booklet together.  
Next I made a wrap, from patterned paper, to cover the 24 count crayon box.  The coloring book was then attached to the box with a simple strand of chunky twine!
I also covered a 5" box with paper to create this sweet favor holder!  This alone (or even bigger for more favors!) makes the perfect centerpiece.

These would also make the perfect treats for back-to-school, Halloween or stocking stuffers!  

Thanks for joining us today!

Doodlebug Product Used:
Party Time Collection
Paty Time Stamps & Doodle Cuts
Borders & Edges Doodle Cuts
Large Tags Doodle Cuts
Boutique Buttons
Matte Sprinkles
Many Thanks Stamps
Party Animal Boy Stamps
Birthday Boy Stamps
Limeade Chunky Twine
Denim Chunky Twine
Swimming Pool Chunky Twine
Tangerine Chunky Twine
Bumblebee Chunky Twine
Bon Bon Chunky Twine

Tuesday, April 28, 2020

PARTY TIME LAYOUT | with Tegan

Is there anyone else out there like me that sometimes gets intimated by stamping, especially on a layout? Today I am showing you a fun and easy way to use stamps on your scrapbook page! I am so glad I dusted off my ink pads and set my stamping intimidation aside because I love how this layout turned out! 
I started by trimming a handful of 3 1/2" squares out of smooth white cardstock. I then just had fun creating inked backgrounds on these little white canvases. I liked the fact that I could start over if I messed up, but it was so fun and easy! I embellished this square with some Icons and This & That Stickers. Isn't that little elephant the cutest?!
No electronic die cut machine? No problem! I used the new Doodlebug Design Nesting Scallops Doodle Dies Set and my manual die cut tool to make a number of circles and scalloped circles to put inside my squares. Here I embellished them with some This & That Word Phrase Stickers and the adorable Monkey Business Doodle Pop! The fun 'party animal' stamp is from the Party Animal Boys Stamp Set. 
I used the party hat and balloon stamps from the Party Animals Boy Stamp Set to create a couple more small backgrounds. I used the Abigail Alphabet Stickers and an Odds & Ends Chit Chat piece (PARTY) to make my title. I love the mix of stamped backgrounds and patterned paper backgrounds, don't you?!

I love all of the stamped backgrounds! I can't decide on a favorite one, can you? I can't wait to try this idea on another layout!
Thank you for joining me today! I hope I have inspired you to grab the new Party Time Collection and Stamps and the new Nesting Scallops Die Set on your next layout! 

BLOG   INSTAGRAM
Doodlebug Design Products Used
​ Party Time Collection
​ Party Animals Boy Stamp Set
​ Birthday Boy Stamp Set
​ Nesting Scallops Doodle Dies Set

Other
​ Big Shot Die Cut Tool
​ Ink Pads 

Monday, April 27, 2020

HEY CUPCAKE BIRTHDAY CARDS | with Karen

I think it goes without saying that these are strange times. So, I find myself taking comfort in the small things in life that haven't changed. Sitting down to create a set of birthday cards seemed like old times - birthday celebrations may look different but a birthday card still remains to be a great way to reach out and show that you care! In all this uncertainty, that is something I can count on! And being able to create the cards with some colourful, happy Doodlebug product hot off the presses is just icing on the cake - birthday cake in fact! 
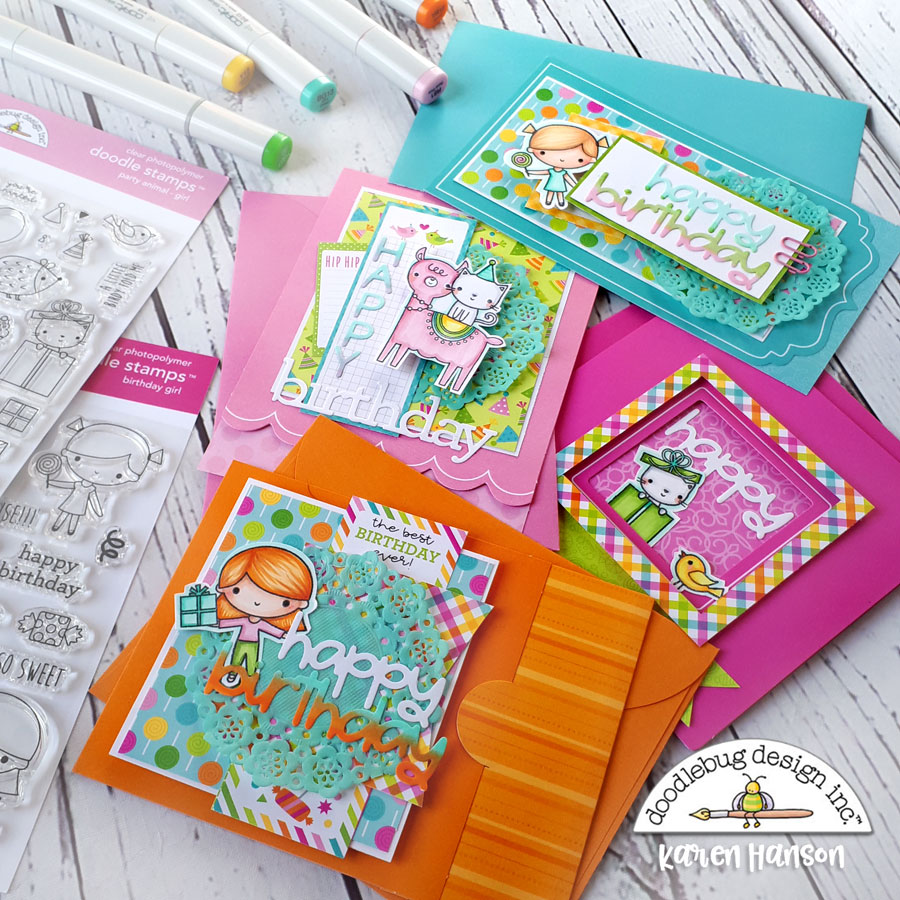
Hey Cupcake is one of Doodlebug's newest delightful collections and it has me seeing sprinkles and all things cute! It's a celebration of all the fun things about birthdays - virtual or not!
I decided the use the Cards and Envelopes that coordinate with this new collection not only because they make card creation easy, but because they add a pop of that Doodlebug colour that I find so hard to resist! Teamed up with the two new stamp sets - Party Animals and Birthday Girl, I coloured up the characters that made me smile the most and popped them on top of some of the fun patterned paper from the 6x6 paper pad. Oh, and if you haven't seen the new sets of Doodle Cuts that have hit the shelves, you are missing out! These sentiment die cuts are a game changer! While I like a great stamped sentiment as much as the next person, there is something about the dimension created with the die cuts ones that makes me swoon just a little bit!
So whether you know someone who has a birthday coming up soon, or you just find yourself reaching out for something familiar like I was, I highly encourage some crafty time making birthday cards! And then share away - because we could all use a little something we can count on right now and we always love seeing what you create!
Thanks for stopping by!
;
Doodlebug Design Product:
Hey Cupcake Collection
Birthday girl Doodle Stamps
Party Animals Doodle Stamps
Happy Birthday Doodle Cuts
Doodlebug Cards and Envelopes
Mini paper clips
Other Products:
White cardstock Alcohol markers Ink

Friday, April 24, 2020

HEY CUPCAKE MINI ALBUM | with Traci

What is more fun than a birthday celebration for kids?  I love the pure joy on their faces, the colorful decorations, and of course, the cake!  So why not save all of your fun memories in a cute little mini album ... or make one for a friend after you've attended their party.  The brand new Hey Cupcake collection is perfect for this project!
For the cover, I decided to add a 3-dimensional bow designed by Lori Whitlock.  You can find her cutting file here.  I also love the new Doodle Cut mini tags so I made one with a little Happy birthday sentiment from the birthday girl stamps set.  And those DoodlePops!  So stinkin' cute!
I used the cards and envelopes (Hey Cupcake Assortment) throughout the album too ... above is an adorable bubblegum card that open up for photos to tuck inside.

All of the die cuts above are from the Chit Chat pieces.  

These doodlepops with the layers and shine!  I just love them!


Well I know you are going to love Hey Cupcake as much as I do, so I hope I've given you a cute little idea for a fun birthday project!

Doodlebug Supplies Used:
Hey Cupcake Collection
Swimming Pool Floral Petite Prints
Bubblegum Petite Prints
Party Llama DoodlePop
Birthday Girl DoodlePop
Party Girl DoodlePop
Pink Strawberry Braddies
Other:
Cutting File by Lori Whitlock -- 3D Bows

Wednesday, April 22, 2020

SCHOOL DAYS LAYOUT | with Maryám

Looking for some ideas on how to document those days staying at home? Today I'll be sharing a fun layout I created to document the "school at home" situation during the quarantine using the School Days Collection.
To create my layout, I started by making some school supplies out of paper. I made two pencils and one paintbrush using Doodlebug's textured and Sugar Coated cardstock. I drew and cut each one of the pieces to build the elements I mentioned before, then put them together and adhered them to a sheet white cardstock. Next with the help of my Craft Pick, I punched holes around the elements and added hand-stitching with color coordinating thread.
Once I finished making the handmade school supplies, I pulled out all the embellishments from the School Days collection and put them over my desk. Then I selected the ones that coordinated with my photo and the story I wanted to tell and saved the rest for a future project. Next, I positioned the embellishments and the two pencils and paintbrush creating and "L" shape design.
Following this, I put my photo, title, and journaling at the top right side of the page. For the title, I used the word "school" from the Chit ChatTM Set and added "at home" with the Teensy Type Beetle Cardstock Stickers in black.

Last but not least, I added some shape sprinklesTM from the School Days collection around the page as well as some word stickers from the This&That 12 x 12 sticker sheet.

Now let's take a look at the finished layout.


That is it for today! I hope you guys enjoyed this post and liked the ideas I shared. Also, don’t forget that if you have any questions just leave a comment below or send me an email. 

Have a super awesome day!


Doodlebug Products Used: 
School Days Collection
Sugar Coated Cardstock Assortment - Bright
Teensy Type Beetle Black Cardstock Stickers
12 x 12 Texture Cardstock Assortment - Rainbow

Tuesday, April 21, 2020

HEY CUPCAKE WISH LIST BIRTHDAY BOOKS | with Nathalie

I am a bit sad for the kids celebrating birthdays during these social distancing days but today I have a cute craft to do with them (or for them) that might help. I think they will enjoy filling out these cute wish list mini books even if the party/presents only come later. I used the brand new Hey Cupcake and Party Time collections to create a girl and a boy version.
You will find a video tutorial below on how to build the base of the mini books. The younger kids can then draw while the older ones can handwrite their wishes on the blank pages. The rest can be decorated with patterned papers, diecuts and stickers.
You can create a book with just a 12x12 sheet of paper, white card stock (or even copy paper) and glue. Here is the video:

Now fill out the book using colorful pens or markers!


Finally here is a super quick video showing the inside pages of each mini book:


I hope you have fun with this cute project, whether you are 7 or 77! Happy crafting!
BLOG | INSTAGRAM

DOODLEBUG PRODUCTS USED:
Hey Cupcake Collection
Party Time Collection
Cardstock
Teensy Type Stickers in various colors

Monday, April 20, 2020

CUPCAKE BIRTHDAY SET | with Kathy

Have you seen the new Hey Cupcake Party Animal - Girl Doodle Stamps??  Seriously they are everything a girl could ask for....kitties, hedgehogs, llamas...  I'm in love.  As soon as my box arrived, I pulled them out and set to work!  I put together this sweet little birthday set... take a peek...


I thought it would be cute to put together a fun "social distancing" birthday card.  The kitty, hedgehog and balloon are from the Party Animal Girl stamp set, and the flowers are from the new Birthday Girl Stamp set. (I added some glitter sprinkles to some of the centers) I love how the happy birthday sentiment was the perfect size to fit in the balloon!  I used the new Borders and Edges Dies to make the curtain and the line for the grass below.


I also decorated a little gift bag as well to go along with my card.  Of course I had to pick another kitty stamp!  I love the balloon kitty on the Hey Cupcake Birthday Bash paper so I copied the look using the stamps.  The clouds are from the Rainbows and Unicorns Stamp set.


Aren't the stamp images just the cutest?  Would you like to make your own gift set?  I created SVG files for the Window Card and the Cute Bag and they are available exclusively in the Lori Whitlock SVG Shop.  If you create something with them, be sure to tag Doodlebug Design on Facebook or Instagram, we love to see your projects!  That's it for me today, thanks for stopping by to peek!

BLOG * INSTAGRAM *

DOODLEBUG DESIGN PRODUCTS USED:
Hey Cupcake Collection
Birthday Girl Doodle Stamps & Dies
Party Animals -Girl Doodle Stamps & Dies
Rainbows & Unicorns Stamps & Dies

Window Card SVG
Cute Bag SVG

OTHER:
Silhouette Cameo
Copic Markers

Thursday, April 16, 2020

HEY CUPCAKE LAYOUT | with Erica

Do you ever shy away from buying girl themed collections because you have only boys? Do you struggle with using pink on your little boy layouts? Today I am going to share how I created a layout using the Hey, Cupcake collection to document my boy Eli James on his 5th Birthday!
I started out by cutting a circle using my Silhouette Cameo 3. I wanted to create a large circular focal point on my page and fill it with lots of fun elements from this collection.
I used the Hey Cupcake icon stickers, chit chat pieces and some doodle pops. I also included some fun matte enamel dots and stickers from the Hey Cupcake 12x12 sticker sheet. It was really fun and easy to fill up this circle with super cute elements. For my photos I used some new Doodlebug Design dies to cut them out! The Nesting Scallops are a new die set and really fun to use and I just love how they look! I printed my photos out in black and white and used two different sizes. This collection is geared more for girls but it works for boys as well. I also add some pink elements on my page and it works well with this boy layout. For my title I used the Doodlebug Design Skinny Alpha stickers. I made sure to use a fun color that helps the layout really pop! You can check out my process video; HERE on my YouTube Channel. Here is a look at my completed layout using the Hey Cupcake collection. Thanks so much for stopping by today!
   
 Doodlebug Products Used:
Hey Cupcake collection
Doodle cuts nesting scallops
Pin It button on image hover