Wednesday, August 31, 2022

SEASIDE SUMMER - SUMMER SUN FUN LAYOUT | with Erica

What do you do when you have smaller pieces of pattern paper left after a project? Get out your punches and start punching shapes!

I pulled out some of my heart paper punches and punched out a bunch of hearts with my leftover pattern papers. I distressed the edges and layered some of them adhering together with my mini stapler.

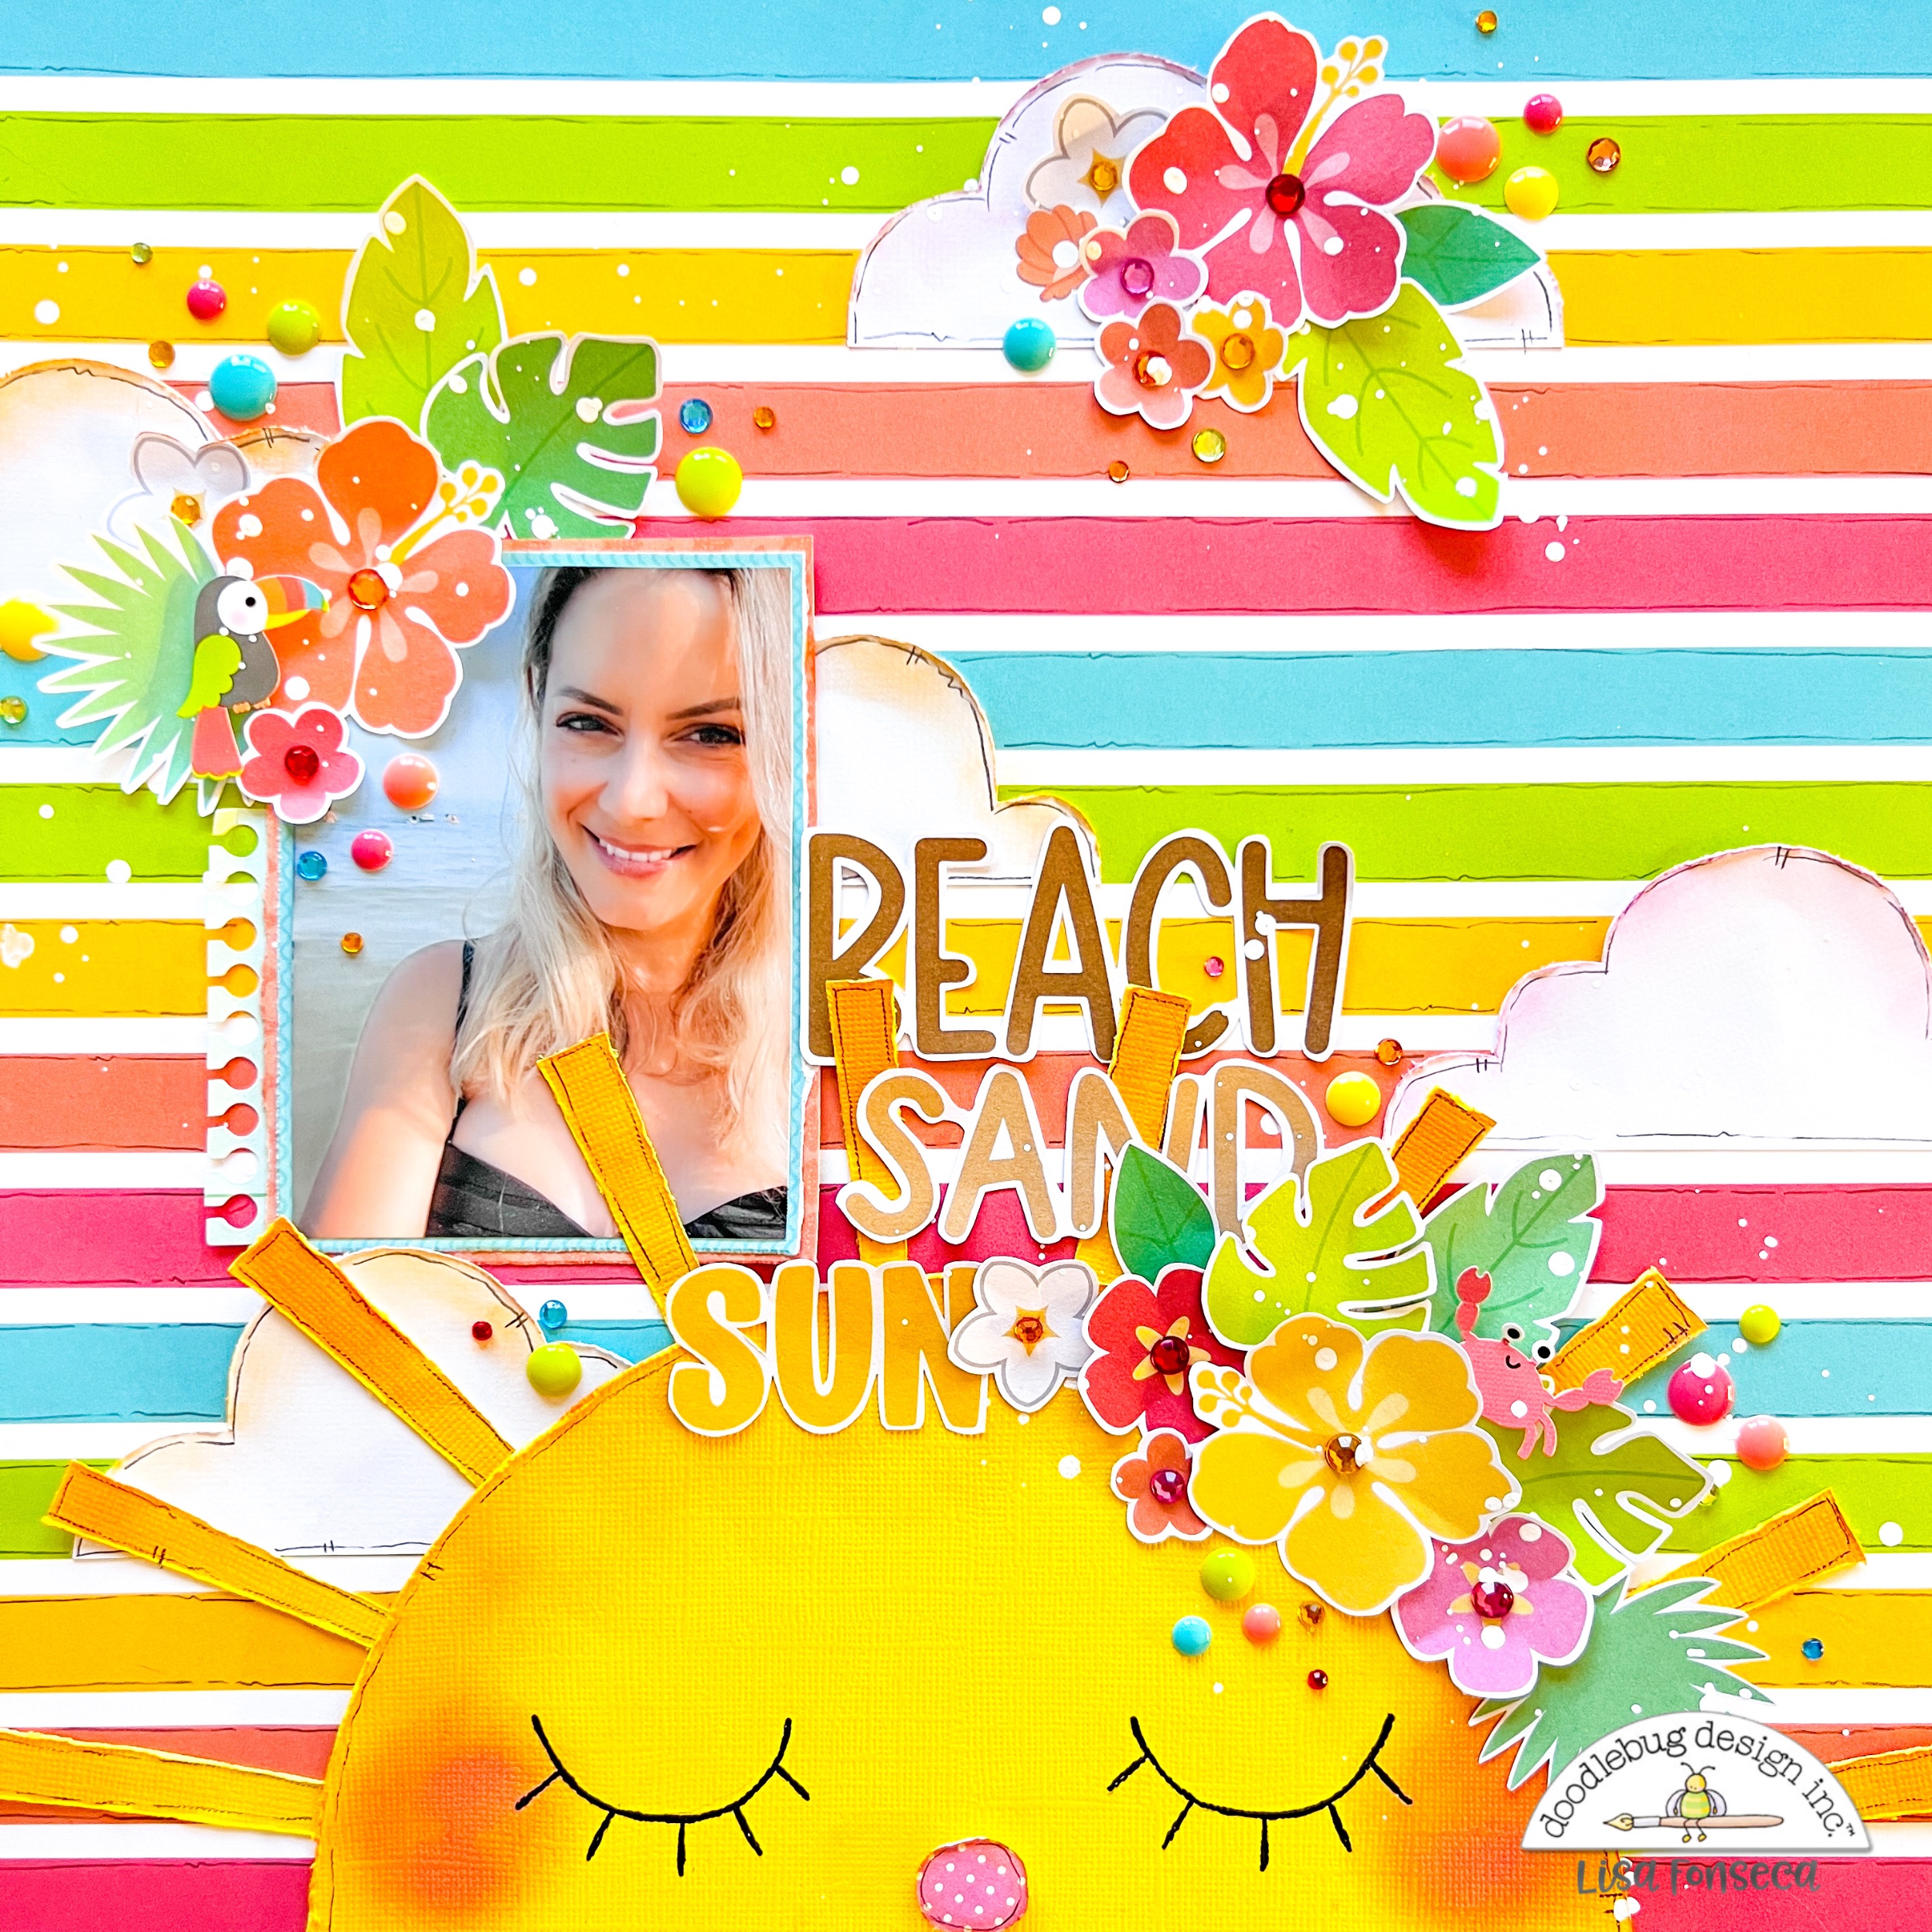
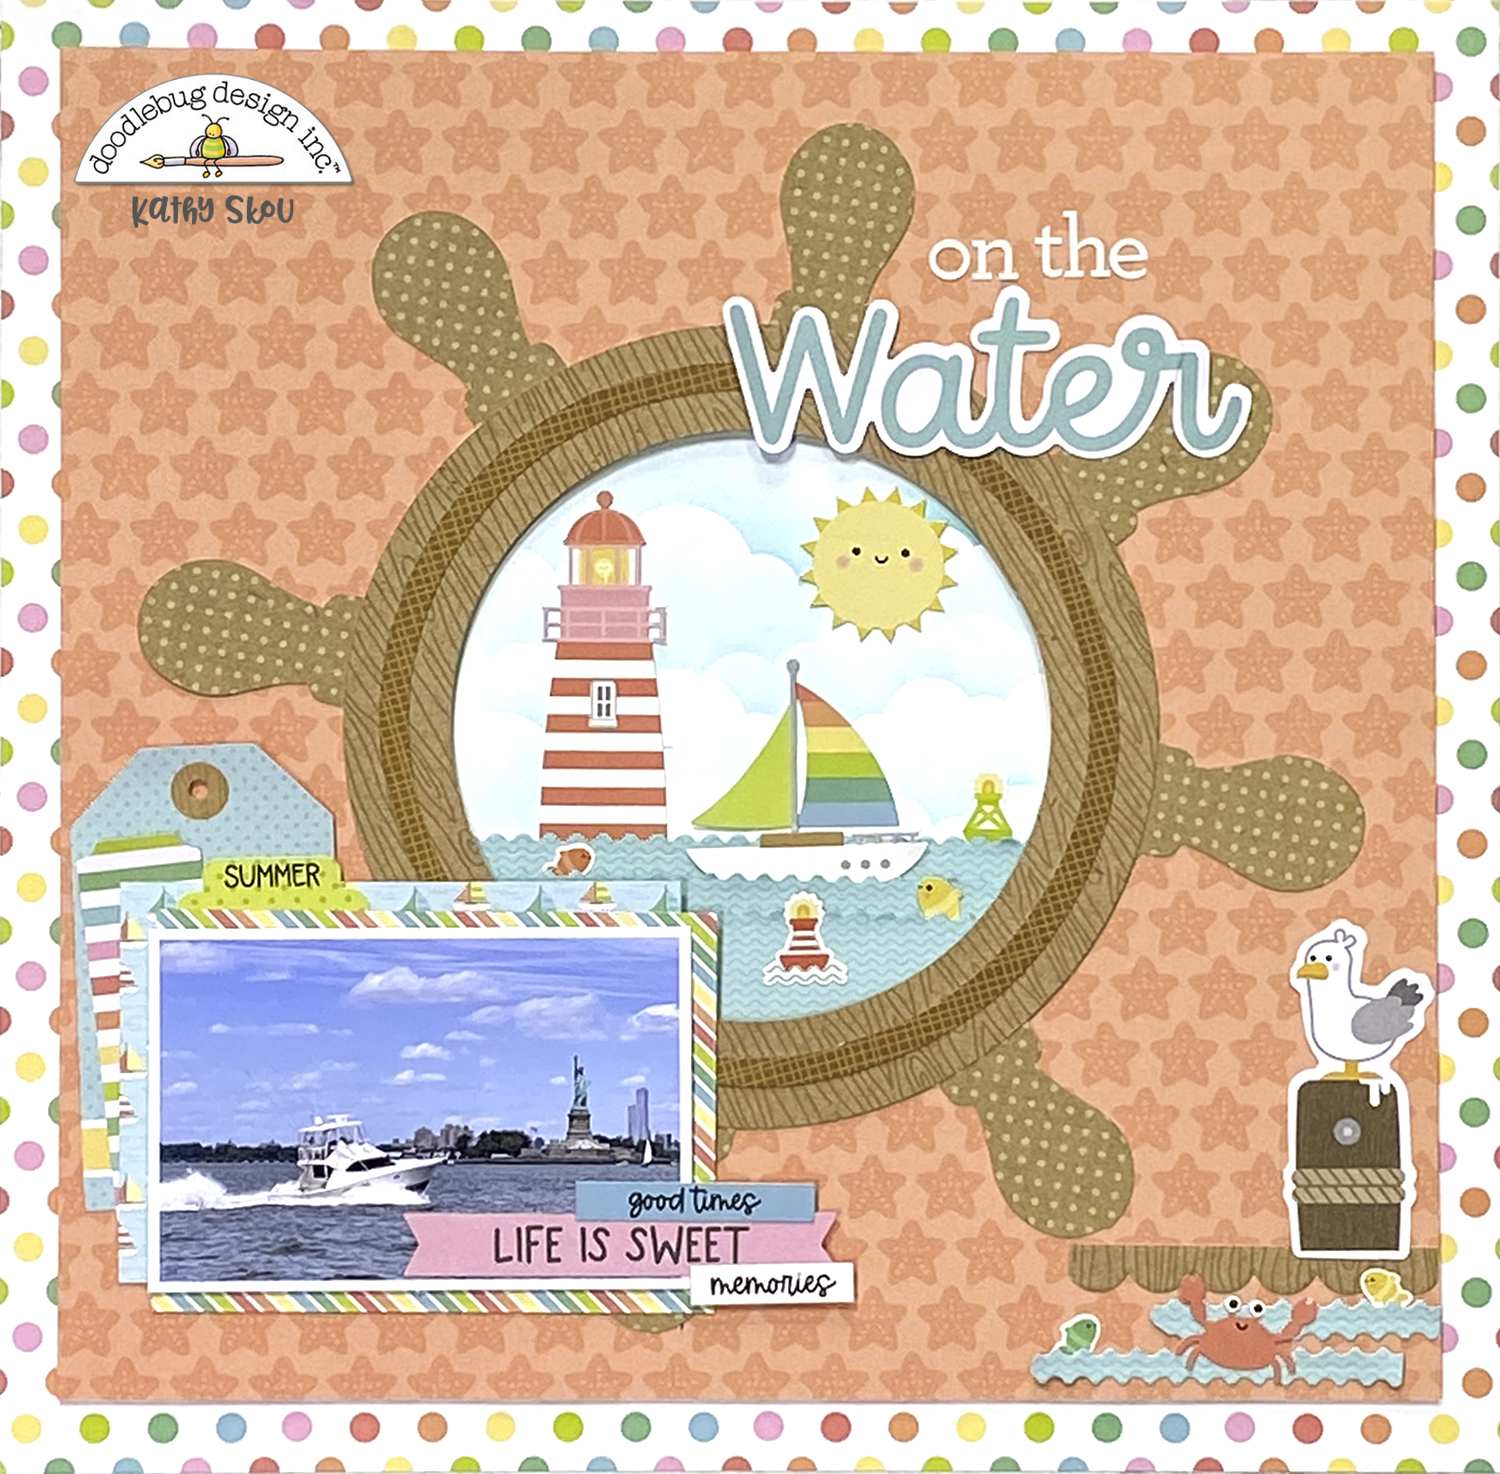
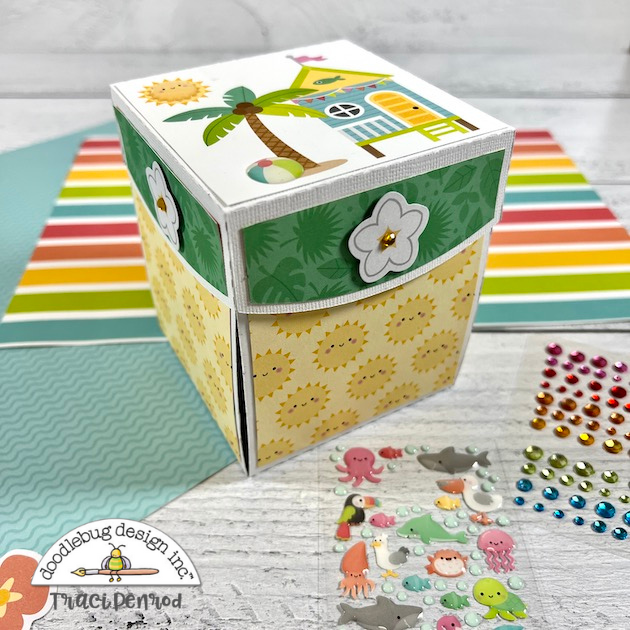
I used a piece of white textured cardstock as my base and trimmed it down to 11x11. I matted it on one of the gorgeous floral 12x12 papers from the Seaside Summer collection. I added some stamping to the background to add a pop of color and interest to the background.

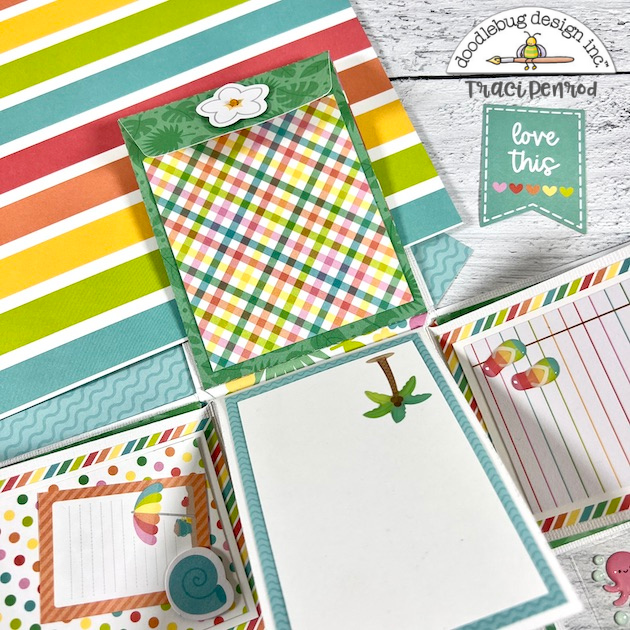
Next I placed the punched hearts in a vertical design down the left side of my page. I popped some of the hearts up on foam adhesive and then placed my photos down.

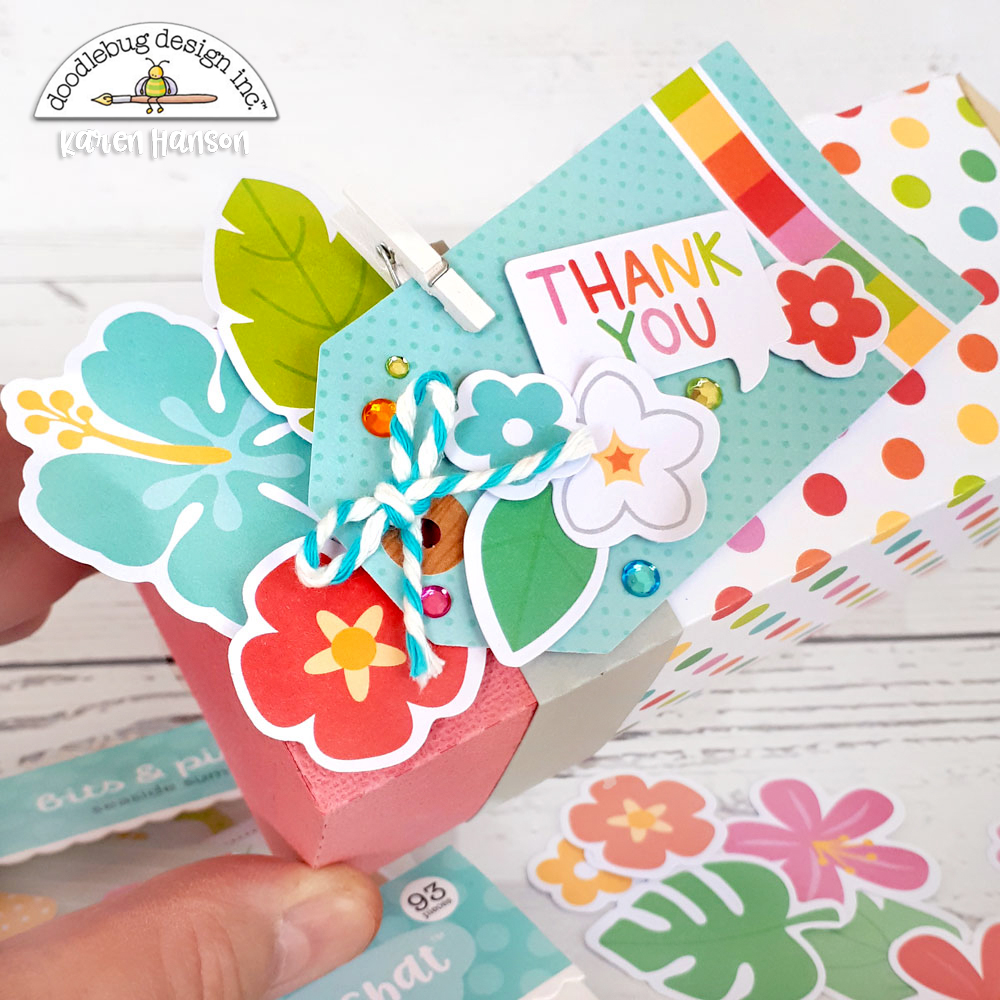
For my title I used a few of the fun and colorful chit chat pieces and placed them under my photo. I tucked in some floral odds & ends to the right of my photos and then added in some sprinkles around the page! I love how colorful this layout turned out and the paper scraps did not go to waste!

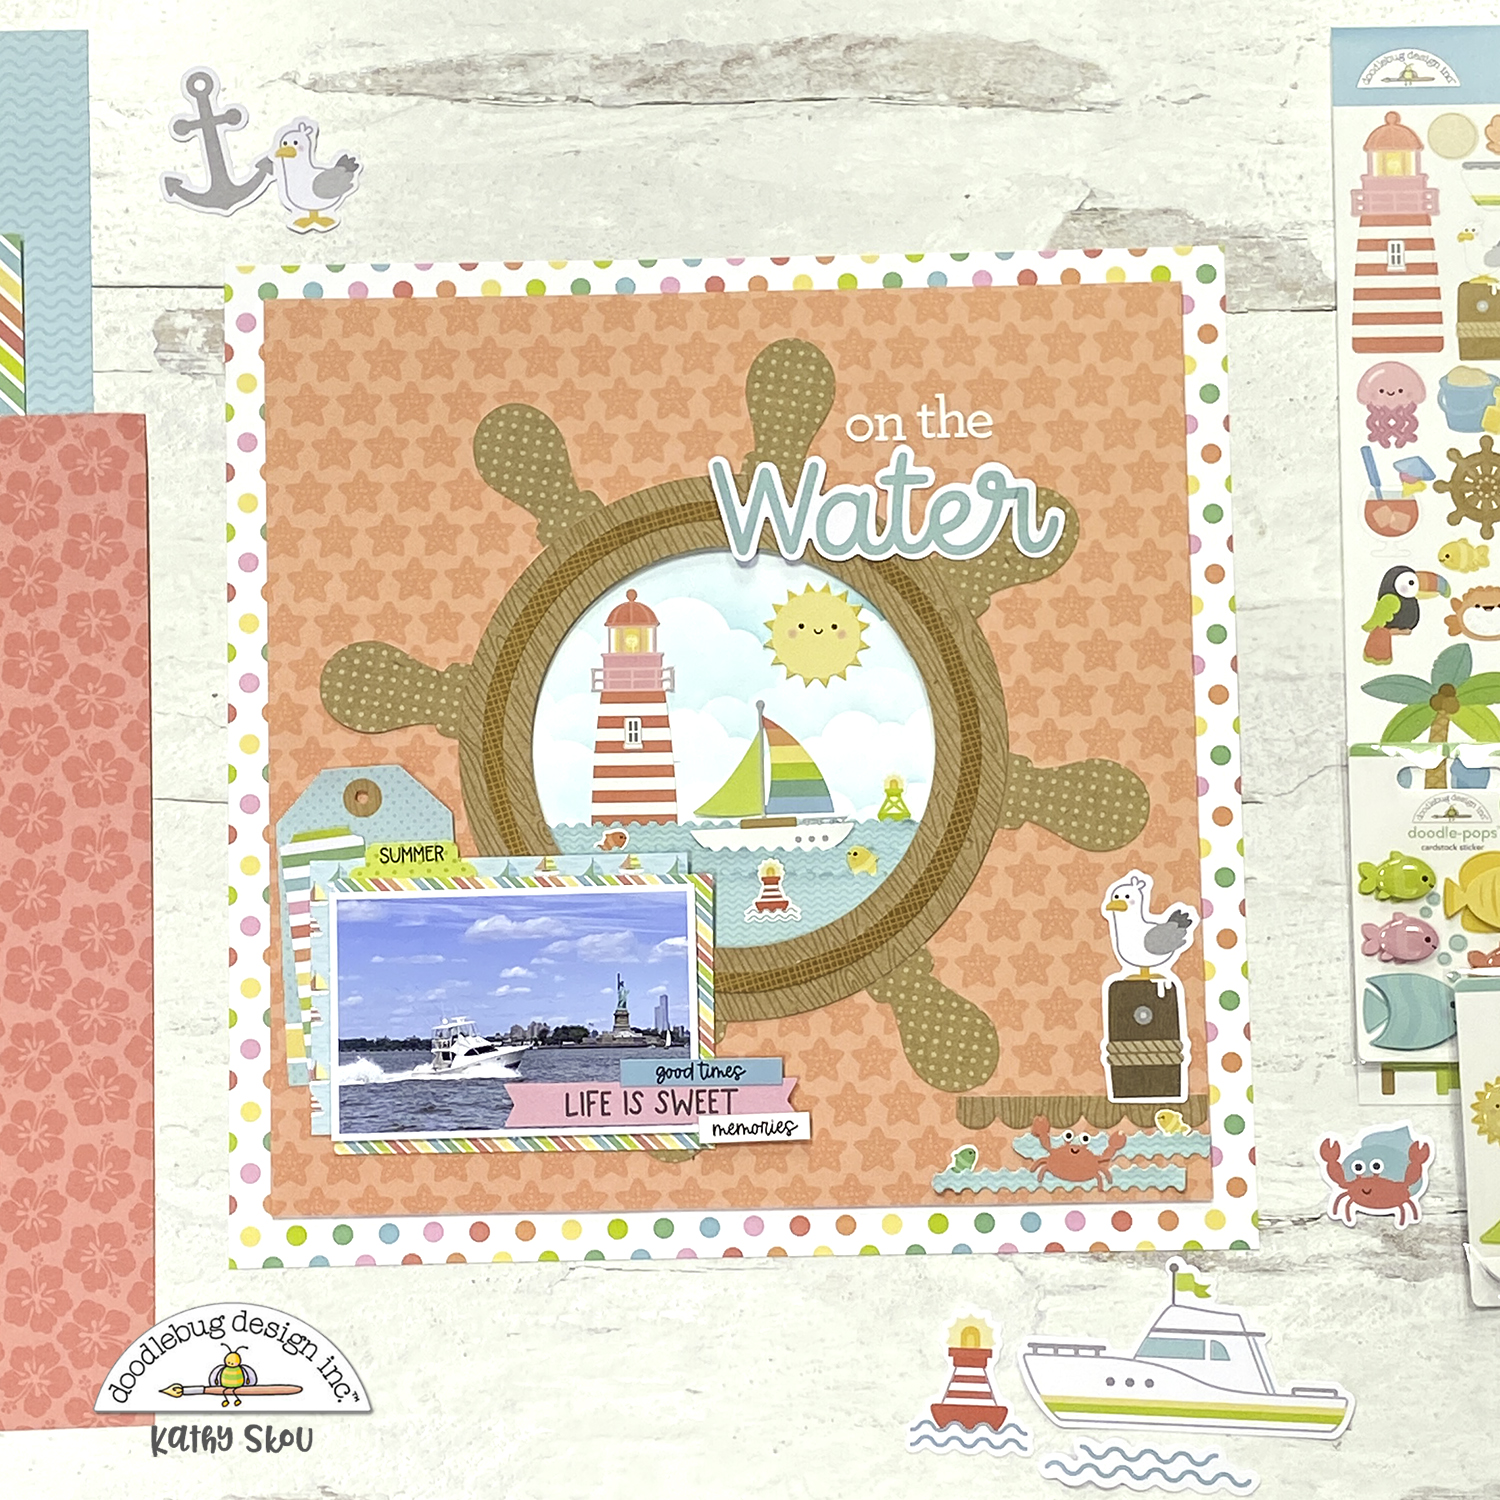
The next time you have some paper scraps to use up try pulling out your punches or dies and cut out some shapes! Thanks so much for stopping by the Doodlebug Blog today!

DOODLEBUG PRODUCTS USED

Seaside Summer Collection

Tuesday, August 30, 2022

SEASIDE SUMMER PENCIL TREAT BOX | with Karen

The Seaside Summer collection is all about celebrating fun in the sun! But this time of year, we are also staring down back to school time (which is still fun depending on who you talk to :))! So I decided to see what I could cook up with this bright and cheerful summer that also celebrates back to school and back to the routine!

Closed-1

So, with the help of a really cute cut file from the Lori Whitlock store, I created a fun little pencil treat box. I used 12x12 patterned paper for the base of the pencil and accented with Doodlebug textured cardstock.

Tag copy

To add some texture and interest, I added a tag from the Bits & Pieces set and embellished with some of the flowers shapes that also come in that set, using foam adhesive squares to add some height to the pieces.

Open-1

I ended up attaching the tag to the lid of the box, which for the pencil shape was the eraser section. While it might seem to make more sense to attach it to the main part of the pencil, I love the unexpected way it behaves when the box is opened. Either would work just fine though!

Tag-2 copy

Finally, I pulled out some Doodlebug staples for the finishing embellishments; some Doodle twine, mini jewels and a mini clothes pin. Originally, I was going to write a hand written message on the tag, but opted for a little sentiment from the Chit Chat set instead. I think I will add a hand written note inside, but using the little clothes pin to attach it behind the tag would be super cute as well.

Now I just need to figure out what to fill this cute treat container with! Any ideas?!  Thanks for stopping by!  Hugs,


BLOG | INSTAGRAM

DOODLEBUG PRODUCTS USED
Seaside Summer Collection
Doodle Twine
Mini clothespin

OTHER
Lori Whitlock Cut file - Pencil Shaped Box
Adhesive

Monday, August 29, 2022

SEASIDE SUMMER SHADOWBOX INSERT KIT | with Wanda

Hi Doodlebug Friends! Wanda here with another super fun Seaside Summer project! Today I'm sharing my Shadow Box with the awesome ocean themed Seaside Summer insert! I jazzed up the shadow box by putting shells inside! And added a fun sentiment and a cutie pie toucan too!! I love these shadow boxes. I am already getting excited about making my Halloween one too! But, it's still August and hot summer days are still here - so let's keep summer crafting, right?! Happy Monday - hope you have a great week!

1

I used the Brown Doodlebug Shadow Box Frame along with the Seaside Summer Shadow Box Insert for this project. I also used Flower elements from other collections! One of the best things about Doodlebug is that everything mixes and matches so effortlessly across the collections. I added the "down by the seashore" sticker from the 12x12 Sticker Sheet from Seaside Summer. In this photo you can see the shells I put in the bottom of the box before I closed it up. It looks really cool!


1

 I used this cute Doodle Pop called Toucan Tango up on the top corner of my shadow box!

1

In case you're new to the Doodlebug Shadow Box Inserts: They come in a kit with the design page, a sheet of vellum, and everything you need to put it together! You simply line up the vellum on top of the design page, and add all your stickers and embellishments. The only thing you need is some foam tape or foam squares! In this photo is my finished piece before I put it into the box. I added a few jewels here and there on mine!

1


1

 I mean, seriously, how can you not smile, and pack up the car to head to the beach?! 

1

That's it for me for today! Take good care, and until I see you next time, happy crafting! 

1

MY BLOG | MY INSTAGRAM


DOODLEBUG SUPPLIES

Seaside Summer Collection
Seaside Summer Shadow Box Insert
Brown 8x8 Shadow Box Frame
12x12 Gingham Paper Pack
Mini Jewels

OTHER SUPPLIES

Foam Tape

Thursday, August 25, 2022

SEASIDE SUMMER BEACH SAND SUN LAYOUT | with Lisa

Guys, I can't get over how much I love summer!!! :) The sun, the colors, the heat, the good times, the laughter, the blue sky... YESSS! :) I loved creating this new colorful layout using the Seaside Summer collection with one of my latest beach photos.


For this layout, I wanted to use this cool striped patterned paper (Beach Blanket) as a background. I like using backgrounds like this and placing things on the different stripes. Here, I had the idea of placing cute little clouds on the stripes and decorating them with flower clusters. 

I started by cutting out the sun and adhering it to the bottom. Then I drew clouds, cut them out and placed them as I wanted them. I distressed the edges of the sun and clouds and also used my Distress Oxides on them to give everything more dimension and interest. 


I drew some lashes on the sun and gave it a nose and then I chose the flowers and leaves I wanted to use from the Bits & Pieces pack.  I cut away some of the white around all of the die-cut pieces and then placed them on my background. I cut more and more (always more... :), until I was happy with the way it looked. I adhered them using liquid glue, after giving them a bit of shape, by pressing my fingers in the middle of each flower and leaf. 


I wanted to give the sun, clouds and stripes on the background even more definition. So I used a pencil and drew thin scribbly lines next to the edges of each shape. 


Then I matted my photo, added it to my layout and also added a title. The title are word die-cuts from the Chit Chat pack. I cut off some white around those too. To finish, I added some stickers from the icon sticker sheet to the clusters, a toucan, a crab and a shell and I also added enamel dots and jewels. Some white sprinkles and... voilà, layout done!


I hope you like the idea and are inspired to use this cool striped paper. :)  Thanks for stopping by!


DOODLEBUG PRODUCTS USED

Seaside Summer Collection
Yellow cardstock
White cardstock

OTHER

Pencil
Acrylic pen (Montana Marker)

Wednesday, August 24, 2022

SEASIDE SUMMER MINI ALBUM | with Miguel

It's time to  document the fun times of summer. Today I have designed a beautiful album with Russian binding using the cute Seaside Summer Collection.  I used eco-leather in different colors to create my book... I just think it's fabulous!


On the cover I created a shaker that looks like a fishbowl with some beautiful fish, and the Under the Sea cardstock. I tell you that it was quite a challenge to make it, but the I loved the result, I decorated the cover with Odds & Ends  and Sprinkles to give that summer feel to the album.


One of my favorite elements is the pelican Doodle Pop.  I added him to the top of a palm tree to add some tropical style.   Inside the book I created pages with flaps and many spaces to fill with many experiences of this summer!


I am so happy with the result of this album, the structure, the design, the colors… everything is perfect!


I say goodbye and as always I hope that my work fills you with a lot of inspiration!  See you soon!


FACEBOOK | INSTAGRAM

DOODLEBUG PRODUCTS USED

Seaside Summer Collection

Tuesday, August 23, 2022

SEASIDE SUMMER DOWN BY THE SEASHORE LAYOUT | with Nathalie

Summer is coming to an end, but that doesn't mean we can continue reliving its stories.  What better way to document those glorious days than with a bit of Doodlebug's Seaside Summer collection.   I just love the colors and designs!  It is perfect for my family beach vacation photos. Let me show you...

I started with a bit of mixed media on the background -the blue color just reminds me of the sea!-.  While the paint dried, I worked on creating the page's layers.

I ripped a few strips of paper, and curled the ripped edge to remind me of waves.   I set these along the top edge of my page.

I am using a mix of embellishments to create clusters around the bottom edge of the photo.  I love the tropical feel of the Bits & Pieces pack, the colors just matched those of the photo perfectly.

I used the leftover pieces of the ripped papers to create a similar layered look at the bottom of the page.  It just created an opportunity to create the title of my page, and complete the beach scene.

I just love how this turned out. The new Seaside Summer collection will have you documenting your Summer memories in a flash!  XO


.

INSTATRAM|  BLOG | YOUTUBE

DOODLEBUG PRODUCTS USED

Seaside Summer Collection


Monday, August 22, 2022

SEASIDE SUMMER ON THE WATER LAYOUT | with Kathy

Stop the presses... I actually did a layout!  I've gotten away from it in the last couple of years, but the Seaside Summer Collection just called to me!  

At the beginning of the summer, my husband and I bought a new boat.  We had to bring it up to Massachusetts from Staten Island, NY so we made a fun trip of it.  A friend was on a nearby boat and snapped this fabulous photo of us driving past the Statue of Liberty.  I knew I had to scrap it!  Take a peek...

I wanted a nautical theme, so I used the Captain's Wheel SVG from the Anchor's Aweigh collection.  I edited the file to make the center open so I could create a fun scene.

I used the bonus waves die from the Seaside Summer Doodle Cuts to create some wave layers.  The clouds were created using some distress ink and a cloud stencil.  All that was left was to add the cute stickers from the Icon and Mini Icon Sheets. The wheel is popped up using some foam tape to give it a little dimension.

I backed my photo with some papers from the 6x6 pad, then added some fun words from the Chit Chat Pack and stickers from the This and That Sticker Sheet.  I tucked a couple of tags from the Bits & Pieces behind my photo for color.

To balance my layout I added a little embellishment cluster in the bottom corner.  I couldn't do a layout without using the adorable Steven Sea-Gull and that cute crab!  The waves were my trimmings from the center piece.  The dock was cut using the scallop die from the Borders and Edges Doodle Cuts.

I had such a fun time piecing this together.  I think I need to do more scrapbooking!

Have you created any projects using the Seaside Summer Collection?  Be sure to tag Doodlebug Design on Facebook & Instagram.  We love to see what you create!  That's it for me today, thanks for stopping by to peek!


DOODLEBUG PRODUCTS USED

Seaside Summer Collection
Seaside Summer Doodle Cuts
My Type Alpha Stickers
Buffalo Check/Woodgrain Petite Prints
Dot Stripe Petite Prints
Gingham Linen Petite Prints
Anchor's Aweigh Captain's Wheel SVG

OTHER

Cloud Stencil
Distress Ink
Silhouette Cameo


Thursday, August 18, 2022

SEASIDE SUMMER POCKET EXPLOSION BOX | with Traci

Hey everyone! If you follow me, you know I love making mini scrapbook albums and saving photos and memorabilia. But, I also enjoy finding new and creative ways to do this. So today, I'm sharing a fun project called an explosion box. Inside there are layers of pages, pockets, and fun places to journal. Take a look ...

I designed this with the adorable Seaside Summer Collection and for the box, I used a wonderful Lori Whitlock cutting file called Pocket Explosion Box.

To start ... I enlarged the cutting file to fit a 12x12 piece of paper - making the box 3.5" wide x 4" tall. I cut it out of white cardstock, then chose a bunch of fun 12x12 and 6x6 prints to embellish it with.

For the lid, I trimmed down a 4x4 card from the Palm Beach print and added the cute sun and beach ball from the Seaside Summer enamel shape sprinkles. When you lift the top off ...


... the 4 sides unfold to display lots of layers of photo mats, journaling cards, and even small envelopes. Check out the adorable Beach in a Bottle Shaker-pops that I added to the center. How cute!!


Here's a close-up of one of the journaling spots. You can add dates, a location, people names, or share a sweet memory. I added a cute pair of enamel flip flops for fun.

There are 4 envelope pages that I made out of the pretty green 12x12 Island Tropics paper. I tucked 3x4 cards into each one. Then, I embellished the flap with a flower die cut from the Bits and Pieces and a teeny tiny mini jewel.


I love this colorful little page. I used the 12x12 paper called Plaid It's Summer and added a journaling card and a 2x2 card from the 6x6 paper pad. 

This page is more for decoration but I just adore it. The palm tree and the pelican are from the Odds and Ends and I added enamel dots in Bon Bon for the coconuts!

This explosion box has 3 double sided pages per side plus the space inside each of the envelopes. There's even room for a small gift in the center.

I love this Seaside Summer collection with it's cheerful colors, tropical theme, and adorable die cuts. I hope this project inspires you to create something wonderful!

 
DOODLEBUG PRODUCTS USED
Seaside Summer Collection
  
OTHER
Lori Whitlock's Pocket Explosion Box Cutting File

Pin It button on image hover