Showing posts with label Stamping. Show all posts

Thursday, December 4, 2025

OH WHAT FUN STAMPED CARDS | with Karen

It's time to get out the markers or colouring tool of your choice because the new Oh What Fun Doodle Stamps are in the hoooooooouuuuuuse! You know I love to colour, and there is nothing better than a set filled with the cute characters and icons of Doodlebug. Oh What Fun is no exception, so I had to share some fun cards with you today!

This card set features a few of the different shapes you will find in the Oh What Fun set. Backed up by some paper from the 6X8 patterned paper, these amazing shapes pop right off the card.

This stamp set features some beautiful shapes like these ornaments that you can mix and match in different ways to make each card unique. I happened to colour each shape the same to speed up my process (so many cards to make this time of year), but if you coloured each one up individually, your cards would be even more unique!

And then, to make them easy to cut out, grab the coordinating Doodle Cuts and you will be all set to add the stamped images onto your cards. I used a little foam adhesive for a bit of pop, but sometimes with cards being mailed, a flatter approach might be better!

Finally. finish them off with some cute Shape Sprinkles from the Snow What Fun set and a sentiment from the Chit Chat pack, and these cards are ready to head out the door. And what perfect timing because I need to make room on my table to make some more! Thanks for stopping by! Hugs,


BLOG | INSTAGRAM

DOODLEBUG PRODUCTS USED

8976 oh what fun doodle cuts
8975 oh what fun doodle stamps
8984 oh what fun 6x8 double-sided cardstock paper
8981 oh what fun chit chat
8980 oh what fun odds & ends
8953 snow what fun shape sprinkles

OTHER

White cardstock
Adhesive
Ink
Colouring tools (I used Alcohol Markers)

Tuesday, October 28, 2025

OH WHAT FUN PRODUCT SPOTLIGHT | Doodle Stamps and Doodle Cuts

We're back with another product spotlight featuring some of our favorite new products in the Oh What Fun collection!  Today, we're taking a look at all the new Doodle Stamps and Doodle Cuts!

Let's start with the new Oh What Fun Doodle Stamp Set with coordinating Doodle Cuts.

How cute are those little gingerbread people!  And those ornaments and Santa would look fabulous on a card, tag or as part of a layout.  The coordinating Doodle Cuts include a bonus die for a tag, so you have all you need to create cute tags for your gifts!

In addition to the new stamps, we have three new Doodle Cuts Sets!!


The Merry Christmas Doodle Cuts have a whole forest of trees to embellish your projects!  There are stars and circles to decorate your trees, you can make your very own rainbow forest!


We also have a new shaker Doodle Cuts set called Deck the Halls! The tree can be cut as is and decorated, or you can also make it a shaker by combining it with our coordinating Shaker Balls, Christmas Confetti, Peppermints, Jolly Holly and Happy Holidays Shakers!


And last but certainly not least we have the new Happy Holidays Doodle Cuts featuring the big guy himself.... SANTA!!  How cut would he look on a tag, card or layout?  

All of these products will be shipping to stores soon, in plenty of time for your holiday crafting!  Be sure to stop by tomorrow for more spotlights!

DOODLEBUG PRODUCTS USED

8975 oh what fun doodle stamps
8976 oh what fun doodle cuts
8977 deck the halls doodle cuts
8978 merry christmas doodle cuts
8979 happy holidays doodle cuts
8404 cupcake balls shakers
8405 bubblegum balls shakers
8406 ladybug balls shakers
8409 bumblebee balls shakers
8410 limeade balls shakers
8412 swimming pool balls shakers
8732 jolly holly shakers
8733 happy holidays shakers
8963 christmas confetti shakers
8964 peppermints shakers

Thursday, August 14, 2025

SUMMER FUN FLAMAING CARDS | with Karen

Hey everyone! Today I am so excited to share with you a little card set that sort of created itself using the adorable Flamazing Doodle Stamps that coordinate with the new Summer Fun collection. It was not at all what I had designed in my head but as I started creating, the flamingos just seemed to tell me they wanted to go in a different direction. And I say, always listen to the flamingos!

The Summer Fun collection is a really bright and bold collection, so when I first started colouring up these flamingos, I imagined that I would back my cards with some of the fun bold blues and pinks that you can find in a variety of the patterned paper. But as I started laying the flamingos out on the card bases that I used from the Summer Cards & Envelopes set, the flamingos decided that they really wanted to be the starts of the show. And really, they are so cute and tranquil that I couldn't argue! Although I love all the papers in this collection, the flamingos could really stand on their own (see what I did there?!).

So, on one card, I simply used a Mini Doily in Bubblegum as the background and then layered the stamps on top, finishing it off with a few Mini Jewels, also in Bubblegum. And to create a bit of extra dimension, I stamped the flamingo twice just to be able to cut out the wing and adhere it with some foam adhesive so it stuck up a bit. I also added one of the palm tree stamps and a few leaves which I cut out with the coordinating Flamazing Doodle Cuts to enhance the shape of the doily.

On the other two cards I did use a bit of the patterned paper together with a doily (in bubblegum and swimming pool) and a small piece of textured cardstock in Swimming Pool for a mat. Polka Dot Bikini and Water Babies in the 12x12 were my choice because I wanted a simple patterned paper that just added a bit of colour and didn't outshine the flamingos (like that was possible). On these two cards I also cut out a second flamingo for the wing to layer but instead of using foam adhesive, I just glued it towards the round end (where it would attach to a flamingo in theory) and left the rest for that layered look without the bulk.

These cards give off a light and airy feel - a little more clean and simple than I was planning with this collection. But I love them that way, and I love that you can take a collection like Summer Fun and create something totally different.

I hope you love these beautiful flamingos as much as I do! I think it's fair to say that they knew what they needed! Thanks for stopping by! Hugs,


BLOG | INSTAGRAM

DOODLEBUG PRODUCTS USED

8924 summer cards & envelopes
8932 water babies 12x12 patterned paper
8935 polka dot bikini 12x12 patterned paper
8918 flamazing doodle stamps
8917 flamazing doodle cuts
8943 summer fun textured cardstock assortment pack
6715 bubblegum mini jewels
4597 mini doilies bubblegum
4602 mini doilies swimming pool

OTHER

adhesive
alcohol markers
stamp ink

Tuesday, May 20, 2025

BERRY SWEET STAMPED CARDS | with Karen

You know when you come across something and it is so cute that you are just at a loss for words? That is how I feel about the new Berry Sweet collection from Doodlebug. I am not even sure what to say (which is kind of bad when you are trying to write a blog post). So maybe a picture will help me to get going.

I mean, come on! This collection reminds me of all the sweetness of my childhood. Think Strawberry Shortcake but for crafters! It's been awhile since I had my stamping tools out but this delightful set had me reaching for them immediately!


This stamp set has all the cute images you have come to count on from Doodlebug. Big characters and smaller embellishment stamps like the little flower and leaf here make all sorts of combinations possible.

And this little mouse? I could colour him and cute him out with the coordinating die cut set all day! Oh, and the All the Things die cuts are perfect for little embellishments and sentiments for all your projects.

Did I mention the patterns?! The paper patterns in this collection are stunning. They add a level of detail to your projects without you even having to try hard! If I owned a bakery, I would wall paper the walls with all these cute papers.

This collection is actually beyond sweet. I am not even sure what else to say. Except grab it now - you will have no regrets! Thanks for stopping by! Hugs,


BLOG | INSTAGRAM

DOODLEBUG PRODUCTS USED

Berry Sweet Collection
Berry Sweet Doodle Stamps / Doodle Cuts
Mini paperclips

OTHER

White cardstock
Adhesive

Sunday, September 29, 2024

HEY PUMPKIN HALLOWEEN WHIMSY CARDS | with Guest Designer Jenn Shurkus

Hey Everyone I’m back! Jenn Shurkus here from Creative Chick Co.  and a self-proclaimed Doodlebug Addict. I love everything they release and was so excited to be invited to guest design. I have another two cards to share with you where I had a lot of fun mixing a bunch of products from the new Hey Pumpkin release! 

I started by stamping out the cat in a pumpkin tote image and the ghost from the Hey Pumpkin Doodle Stamps and coloring them in with Copic markers which are alcohol-based markers (sharing below the specific markers I used). I die-cut it out with the coordinating Doodle Cuts.

For the first card, I started by water coloring a purple background using Distress Watercolor Pencils, and Distress Watercolor Cardstock. I dried this background, and then trimmed this it down to 4” x 5.25”.  I matted it onto a piece of patterned paper from the Hey Pumpkin 6x6 paper pad. 

For the sentiments, I chose a few speech bubble die-cuts from the Hey Pumpkin Chit Chat Ephemera Pack. I also white embossed “Happy” from the Hey Pumpkin stamp set onto black cardstock. Whenever I do ANY embossing, I prep the surface using the Cottontail Embossing Powder Tool. I also like to use a white pigment ink when I am embossing with white embossing powder. 

Next, I die-cut the “Halloween” word included in the Hey Pumpkin coordinating Doodle Cuts several times out of black cardstock, and once out of black sparkle cardstock. I adhered them stacked together with wet glue. 

I added some Prisma Glitter to the highlights of the pumpkin with a Sakura Quickie Glue Pen. I also added some Sakura Black Glaze Pen to the eyes of the cat, and the eyes and mouth to the pumpkin. 

I added the sentiments, pumpkin and speech bubbles to the card with black foam squares. I then sprinkled a few stars I cut out with the Hey Pumpkin Doodle Cuts out of black sparkle cardstock. Lastly, I added a puffy bat from the Puffy Icons Sticker sheet.


For the second card I trimmed down the Homespun 12x12 Acetate sheet to 4.25” x 5.5”. I also die-cut a stitched frame out of black sparkle cardstock. I used wet adhesive to adhere the frame to the front of the acetate panel. 

I then ink blended a background onto a piece of Distress White Heavystock with the following Distress Inks: Mustard Seed, Festive Berries, Wilted Violet. Next, I splattered some stars” with Gansai Tambi Starry Colors palette. 

I flipped the framed acetate panel over, and added 2 layers of foam strips around all four sides. I then sprinkled some Hey Pumpkin Halloween Night Shakers into the space. I also added some iridescent sequins. I then peeled the backer paper off the foam strips and adhered the ink blended background to them creating a shaker front. 


I added some Prisma Glitter to the highlights on the ghost, and “BOO” banner with a Sakura Quickie Glue Pen. I added some Sakura Black Glaze Pen to the heart and star in the speech bubbles. 

I chose a sentiment banner and some speech bubbles out of the Hey Pumpkin Chit Chat Ephemera Pack. 

I added the sentiment banner to the card front with wet glue. I added the ghost and speech bubbles with black foam squares. 

I sprinkled some candy stickers from the Puffy Icons Sticker sheet, and some stars from the October Sky Shape Sprinkles. Lastly I added some glossy accents to the glasses on the ghost. 

I am sharing the swatches of the Copic colors I used to color the images above so you can easily recreate them with the coloring medium you choose.  If you would like to learn more about coloring with Copic markers or alcohol-based markers, be sure to check out my Copic 101 online class, which includes a workbook! 

If these cards have inspired you to create with your Doodlebug Halloween stash I would love to see what you create! Be sure to tag me on social media!


DOODLEBUG PRODUCTS USED

Hey Pumpkin Collection
Hey Pumpkin Doodle Stamps & Doodle Cuts
Homespun 12x12 Acetate sheet

 OTHER

Copic Markers
Black Ink Pad (alcohol marker friendly)
Distress White Heavystock
Distress Watercolor Cardstock
Distress Inks ( mustard seed, festive berries, wilted violet)
Distress Watercolor Pencils
Gansai Tambi Starry Colors Palette
Glossy Accents
Black Sparkle Cardstock
Black Cardstock
Stitched Rectangle Frame dies
Prisma Glitter
Sakura Quickie Glue Pen
Sakura Black Glaze Pen
Black foam squares
Blender Brushes
Trimmer
Dot Runner
Glue Tube
Misti
Small Acrylic Block
Paint brush

Sunday, September 22, 2024

HEY PUMPKIN SPOOKTACULAR GREETINGS | with Guest Designer Jenn Shurkus

Hey Everyone! Jenn Shurkus here from Creative Chick Co. and a self-proclaimed Doodlebug Addict. I love everything they release and was so excited to be invited to guest design. I have two cards to share with you where I had a lot of fun mixing a bunch of products from the new Hey Pumpkin release!

I started by stamping out the pumpkin balloon image and the car from the Hey Pumpkin Doodle Stamps and coloring them in with Copic markers which are alcohol-based markers (sharing below the specific markers I used). I die-cut it out with the coordinating Doodle Cuts. 

For the first card I ink blended a background onto a piece of Distress White Heavystock with the following Distress Inks: Mustard Seed, Festive Berries, Wilted Violet. I trimmed this background down to 4” x 5.25” and stamped some of the stars, sprinkle stamps in the Hey Pumpkin stamp set with Versafine Onyx Black ink. Next I trimmed a piece of patterned paper from the Hey Pumpkin 6x6 paper pad to 2.5” x 4” and adhered it to the bottom of the ink blended background. I matted this onto some black cardstock sized at 4.25” x 5.5”. 

Next I chose a couple sentiments to use out of the Chit Chat Ephemera Pack. I dusted the edges of the “eek” speech bubble with a little bit of Wilted Violet Distress Ink. I added some Prisma Glitter with a Sakura Quickie Glue Pen to the highlights on the pumpkin balloon, ghost, and scalloped trim on the basket. I also added a bit of sparkle to the Halloween banner, and some of the stamped images on the background.


 I used a Sakura Black Glaze Pen to trace the face on the pumpkin.

I added the pumpkin balloon, speech bubble, and sentiment banner to the card with black foam squares. I then sprinkled a few stars, dots etc. from the Puffy Icons Sticker sheet.

For the second card, I started by water coloring a spooky night scene using Distress Watercolor Pencils, and Distress Watercolor Cardstock. I dried this background, and then splattered some “stars” with Gansai Tambi Starry Colors palette. I then trimmed this background down to 4” x 5.25”.  The "b"side of the Plaid it's Halloween paper from the Hey Pumpkin 6x6 paper pad has a variety of decorative strips, from this I trimmed out the one that looks like a fence. I added this to my background. 

I matted this background onto some patterned paper from the same paper pad. 

Next, I took the large die-cut “halloween night” moon from the Hey Pumpkin Chit Chat Ephemera Pack, and added some Sakura Black Glaze Pen to the wings of the bats, and traced over the “halloween” letters. I also used a Sakura Quickie Glue Pen to add some Prisma Glitter to the details on the moon.

I also added some sparkle to the colored in car. I added it on the highlights of the pumpkin, balloons, bumper, headlights and ghost. I used a Sakura Black Glaze pen to dot the eyes of the cat, pumpkin, and ghost. I also filled in the steering wheel. 

I added the moon and car to the card with black foam squares. I then sprinkled a few stars I cut out with the Hey Pumpkin coordinating die set out of black sparkle cardstock. Lastly, I added some glossy accents to the headlights. 

I am sharing the swatches of the Copic colors I used to color the images above so you can easily recreate them with the coloring medium you choose.  If you would like to learn more about coloring with Copic markers or alcohol-based markers, be sure to check out my Copic 101 online class, which includes a workbook! 

 If these cards have inspired you to create with your Doodlebug Halloween stash I would love to see what you create! Be sure to tag me on social media!


DOODLEBUG PRODUCTS USED

Hey Pumpkin Collection
Hey Pumpkin Doodle Stamps & Doodle Cuts

 OTHER

Copic Markers
Black Ink Pad (alcohol marker friendly)
Versafine Onyx Black Ink
Distress White Heavystock
Distress Watercolor Cardstock
Distress Inks ( mustard seed, festive berries, wilted violet)
Distress Watercolor Pencils
Gansai Tambi Starry Colors Palette
Prisma Glitter
Sakura Quickie Glue Pen
Sakura Black Glaze Pen
Glossy Accents
Black Sparkle Cardstock
Black Cardstock
Black foam squares
Blender Brushes
Trimmer
Dot Runner
Glue Tube
Misti
Small Acrylic Block
Paint brush

Tuesday, September 10, 2024

HEY PUMPKIN DOODLE STAMPED CARDS | with Karen

Okay, hold on everyone. I know it seems like summer has barely ended but get ready because the cutest Doodlebug treat is on its way for Halloween. The "Hey Pumpkin" collection is here and once you get your hands on it, there will be no looking back to summer because you are going to want to craft Halloween projects for as long as your crafty hands will let you!

All-three-start

For my first project, I started off with a set of cards so I had an excuse to play with the most adorable stamp set you could ever imagine. The coordinating Cards & Envelopes set makes the perfect base to feature these little cuties.

Stamps

And cuties they are! I mean come on...this little ghost in his glasses has me squealing in delight! I have a feelings he is going to make his way on to about a hundred or so projects in the next few weeks. Don't say I didn't warn you.

Mini-Jewels

I layered them on top of some cute pieces from the coordinating Bits & Pieces packs and then added a sentiment from the Chit Chat pack. Finally, I added a bit of sparkle with some mini jewels from the Halloween Assortment.

All-3-end

I am just loving how the bold and contrasting colours make the stamps pop. These are some of my favourite creations in a while!

So forget summer - bring on Halloween! Trust me on this one! Thanks for stopping by! Hugs,


BLOG | INSTAGRAM

DOODLEBUG PRODUCTS USED

Hey Pumpkin collection
Hey Pumpkin Doodle Stamps
Cards & Envelopes - Hey Pumpkin Assortment
Mini Jewels - Halloween Assortment

OTHER

Adhesive
Ink
Alcohol Marks
White cardstock

Tuesday, March 26, 2024

BUNNY HOP STAMPED EASTER CARDS | with Karen

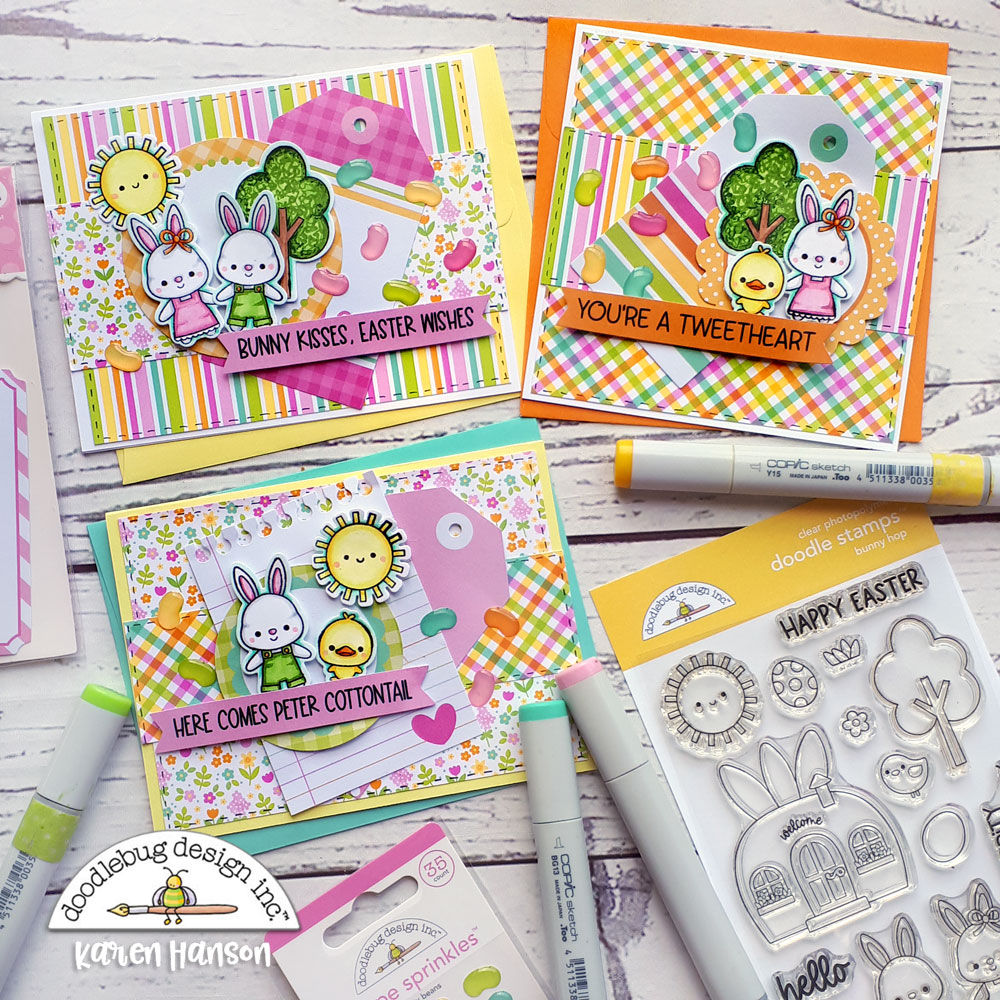
Today, I got out my markers. It's been awhile - I am not exactly sure why except to say that there were so many other goodies from Doodlebug to work with that my stamps took a back seat for awhile. But the new Bunny Hop stamps were just so darn cute that there was no way that they were not making an appearance on a project! So I give you the revival of my markers with an adorable card set featuring the new Bunny Hop Stamps!


Tada! I know - now you can see what I am talking about, right? How could I not devote some time and energy to these cuties?


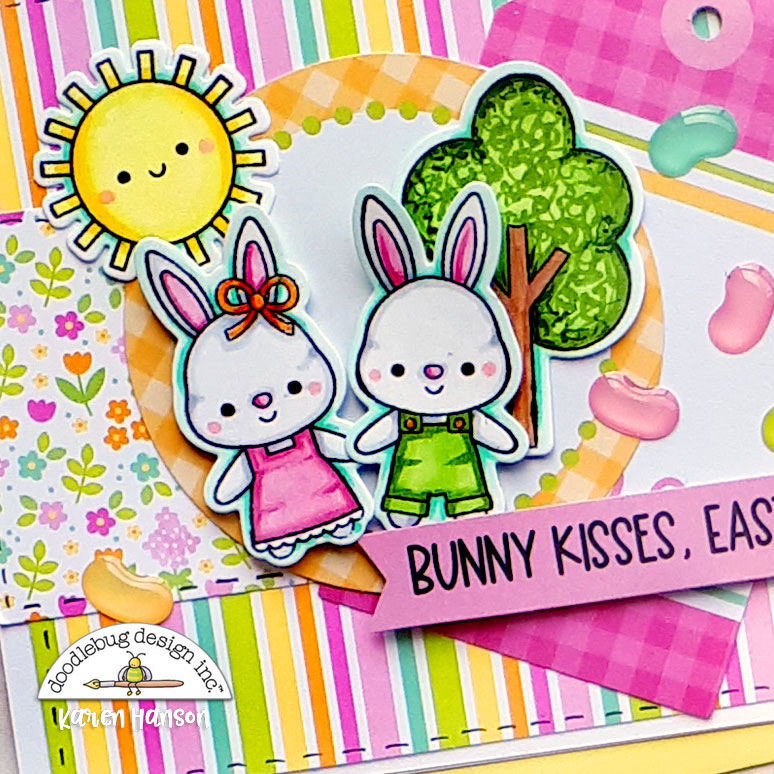
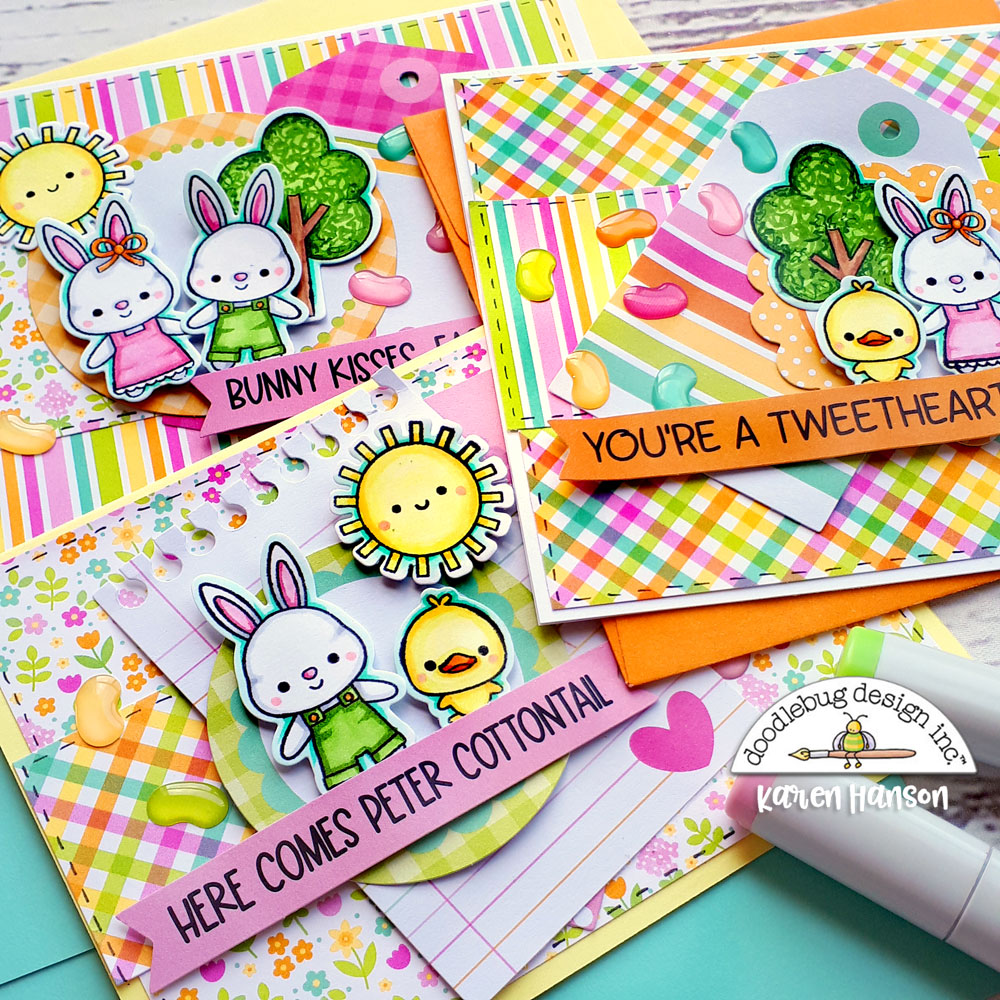
Two adorable bunnies and a darling chick together with a host of background items like a tree, eggs, grass and a happy sun! The combinations with this set are endless. I teamed them up with the coordinating Cards & Envelopes and some of the 6x6 patterned paper. I used some of the die cuts from the Bits and Pieces set for some added layers and patterns.


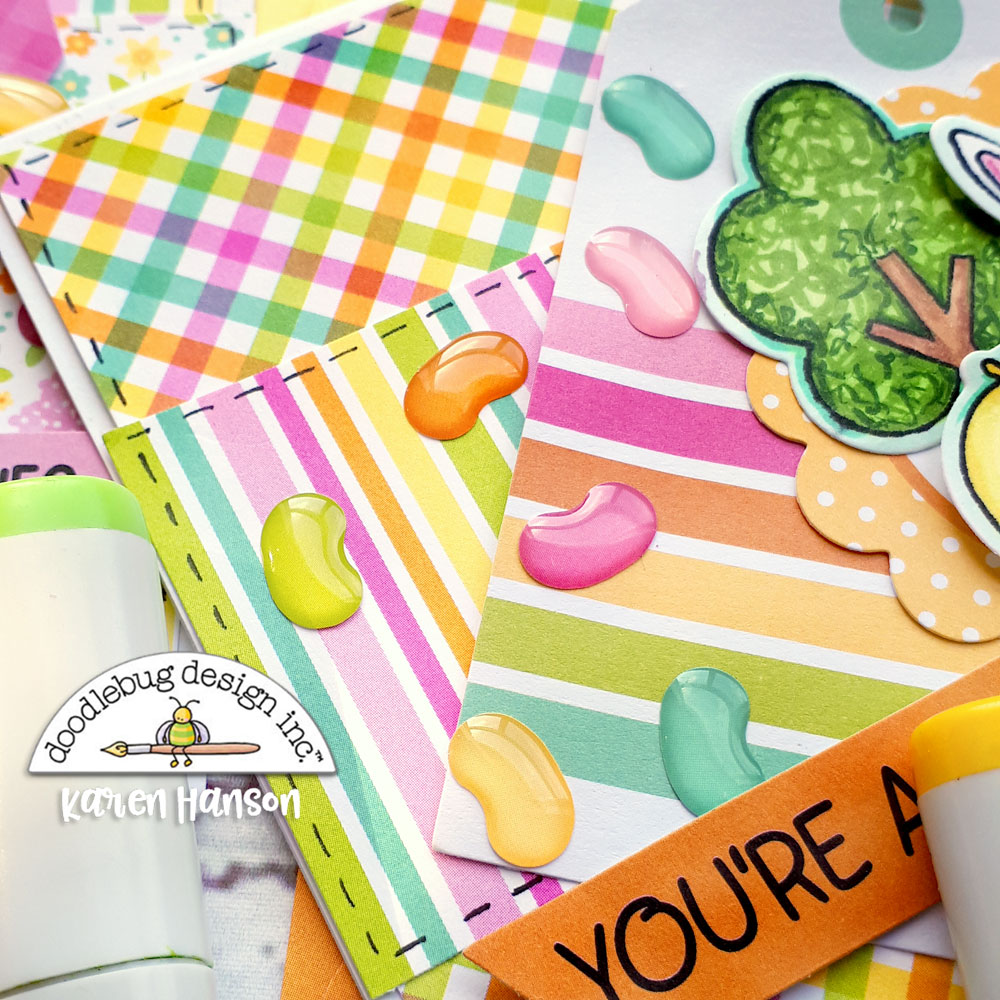
And then I topped it all of with some of the amazing Bitty Beans - Shape Sprinkles. I love them! It actually looks like I have just spilled some jelly beans on the front of the cards. It really is a fabulous, fun addition to the cards.


Well, I have absolutely no regrets on this project and am so glad that the stamping tools came out of the crafty cupboard. I loved every minute of working with these projects and I hope they brought a smile to your face too!  Thanks for stopping by!


DOODLEBUG PRODUCTS USED

Bunny Hop Collection
Bunny Hop Doodle Stamps
Cards & Envelopes

OTHER

Adhesive

Pin It button on image hover