Hey Everyone! Jenn Shurkus here from Creative Chick Co. and a self-proclaimed Doodlebug Addict. I love everything they release and was so excited to be invited to guest design. I have two cards to share with you where I had a lot of fun mixing a bunch of products from the new Hey Pumpkin release!
I started by stamping out the pumpkin balloon image and the car from the Hey Pumpkin Doodle Stamps and coloring them in with Copic markers which are alcohol-based markers (sharing below the specific markers I used). I die-cut it out with the coordinating Doodle Cuts.
For the first card I ink blended a background onto a piece of Distress White Heavystock with the following Distress Inks: Mustard Seed, Festive Berries, Wilted Violet. I trimmed this background down to 4” x 5.25” and stamped some of the stars, sprinkle stamps in the Hey Pumpkin stamp set with Versafine Onyx Black ink. Next I trimmed a piece of patterned paper from the Hey Pumpkin 6x6 paper pad to 2.5” x 4” and adhered it to the bottom of the ink blended background. I matted this onto some black cardstock sized at 4.25” x 5.5”.
Next I chose a couple sentiments to use out of the Chit Chat Ephemera Pack. I dusted the edges of the “eek” speech bubble with a little bit of Wilted Violet Distress Ink. I added some Prisma Glitter with a Sakura Quickie Glue Pen to the highlights on the pumpkin balloon, ghost, and scalloped trim on the basket. I also added a bit of sparkle to the Halloween banner, and some of the stamped images on the background.
I used a Sakura Black Glaze Pen to trace the face on the pumpkin.
I added the pumpkin balloon, speech bubble, and sentiment banner
to the card with black foam squares. I then sprinkled a few stars, dots etc. from the Puffy Icons Sticker sheet.
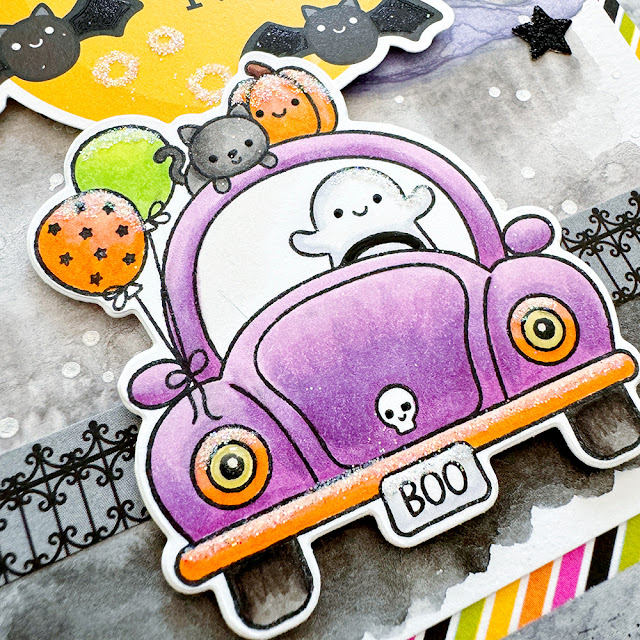
For the second card, I started by water coloring a spooky night scene using Distress Watercolor Pencils, and Distress Watercolor Cardstock. I dried this background, and then splattered some “stars” with Gansai Tambi Starry Colors palette. I then trimmed this background down to 4” x 5.25”. The "b"side of the Plaid it's Halloween paper from the Hey Pumpkin 6x6 paper pad has a variety of decorative strips, from this I trimmed out the one that looks like a fence. I added this to my background.
I matted this background onto some patterned paper from the same paper pad.
Next, I took the large die-cut “halloween night” moon from the Hey Pumpkin Chit Chat Ephemera Pack, and added some Sakura Black Glaze Pen to the wings of the bats, and traced over the “halloween” letters. I also used a Sakura Quickie Glue Pen to add some Prisma Glitter to the details on the moon.
I also added some sparkle to the colored in car. I added it on the highlights of the pumpkin, balloons, bumper, headlights and ghost. I used a Sakura Black Glaze pen to dot the eyes of the cat, pumpkin, and ghost. I also filled in the steering wheel.
I added the moon and car to the card with black foam squares. I then sprinkled a few stars I cut out with the Hey Pumpkin coordinating die set out of black sparkle cardstock. Lastly, I added some glossy accents to the headlights.
I am sharing the swatches of the Copic colors I used to color the images above so you can easily recreate them with the coloring medium you choose. If you would like to learn more about coloring with Copic markers or alcohol-based markers, be sure to check out my Copic 101 online class, which includes a workbook!
DOODLEBUG PRODUCTS USED
OTHER


No comments:
Post a Comment