Showing posts with label Doodlebug Cut files. Show all posts

Saturday, May 10, 2025

BUTTERFLY KISSES DREAM FOREVER LAYOUT | with Tarrah

The Butterfly Kisses collection is so gorgeous with its whimsical elements and color. I have really enjoyed working with this collection and hope you enjoy it too!

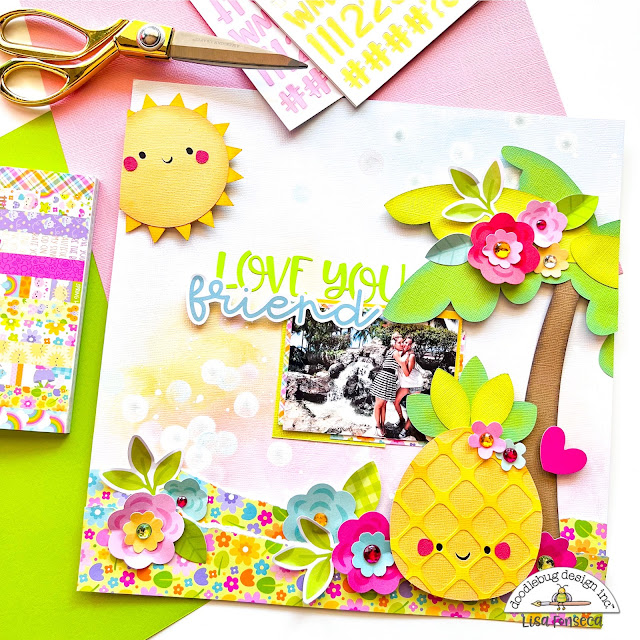
I have created a fairy tale-inspired layout today featuring the Butterfly Kisses collection together with some Over the Rainbow mushroom cut files. I chose to document a sweet photo of my nieces when they were younger and playing dress up!


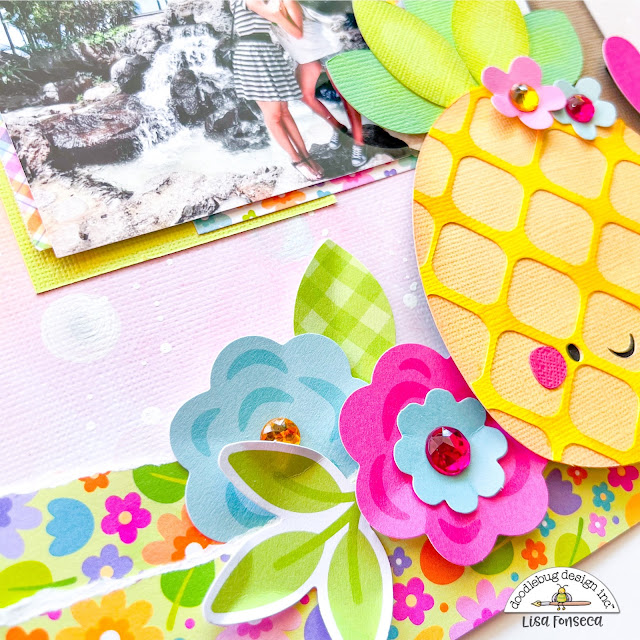
I used my Silhouette Cameo machine to cut out the mushroom cut file pieces and built the mushrooms once all the pieces were cut out. I added florals from both the Odds and Ends and Bits and Pieces packs to bring in that natural, garden feel that ties everything together. I also added tiny flower puffy stickers, butterfly puffy stickers and the adorable pink snails puffy stickers, I mean how cute right?! I placed my photo over the top of one of the mushrooms using craft foam to add dimension to the page. 


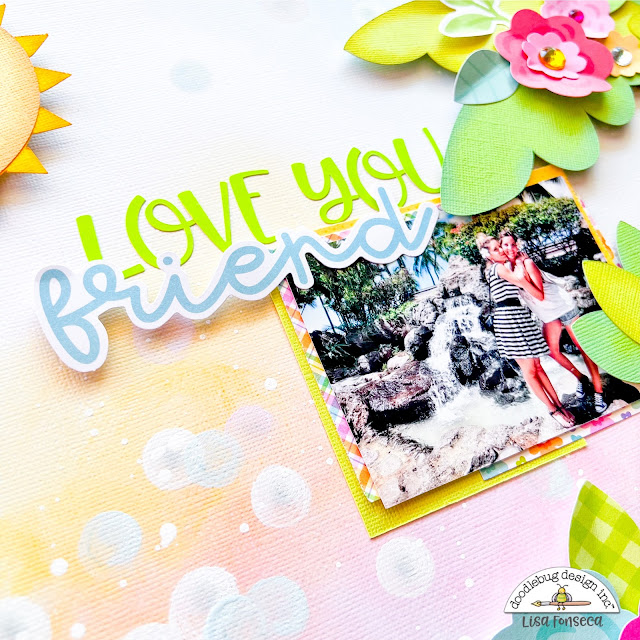
For the title, I grabbed two pre-made ones from the Chit Chat pack – “Dream and Forever.” It felt perfect for this layout, as it reflects how in my photo, my nieces are dressing up as princesses. I want them to continue dreaming they are princesses forever! The two different fonts are also the perfect size and color for the placement below the photo too.


To complete the look, I used a few stickers from the This and That sticker sheet and some sprinkles, adding cute little accents like hearts and tiny flowers. These just made the whole layout feel more playful and fun.


I had so much fun creating this whimsical layout using the Butterfly Kisses Collection and the Over the Rainbow Mushroom Cut Files. I hope you are enjoying all the creations the design team are creating using the Butterfly Kisses collection. Happy crafting!


DOODLEBUG PRODUCTS USED

Butterfly Kisses collection
Butterfly Kisses cardstock pack 
Over the Rainbow Mushroom House 2 SVG

OTHER

Silhouette Cameo machine
Date stamp
Black ink

Thursday, March 30, 2023

OVER THE RAINBOW BEACH NIGHT MEMORIES LAYOUT | with Lisa

Did you ever use a themed collection to create a project that had a different theme? Well, that's what I did for this layout. I used the new Over the Rainbow collection and created a summery layout. Even though the photo I documented was taken in spring, the beach always screams summer, right?

I started by making a mixed media background using watercolors. I primed my sheet of cardstock with white gesso to create a barrier between the color and the paper. That way, you're able to play with the color a lot longer and it'll not sink into the paper right away.


Then I started with some aqua watercolors that I used with a lot of water. I like to create a big splatter and then turn the page in different directions to let the color run over the paper.


I then use my heat gun to dry the layer (actually, you can use it to make the color go where you want and create fun waves) and start again, until I'm happy with the result. I did the same, using pink and gold.


When my page was dry and ready, I continued with a Doodlebug cut file. I used the Fairy Garden Lightning Bug Jar file and pieced it together with Doodlebug Textured Cardstock.


I love how cute this cut file looks... :) I matted my photo with two different patterned papers from the collection and the placed my two elements on the layout. I never really plan my mixed media background, so sometimes I need some time to see how to place my elements, so to not cover up too much of the color.

I adhered the cut file and photo and then went through the collection's embellishments to see what I could add.


I chose some clouds and a sun from the Odds & Ends pack. To fill the jar a bit more, I used heart stickers and I placed a teeny tiny doodle pop bird at the bottom of the page.  Talking of that, I wanted to create some kind of base for my jar. Since the photo I took was on the beach, I chose sand-colored textured cardstock from Doodlebug and created three layers of strips to make it look like the sand on the beach.


For the title, I used a Chit Chat word and some Sunshine alpha stickers. For some more finishing details, I used a pencil and drew lines and shadows on the jar and fireflies, drew some white dots "in" the jar and I splattered paint around the jar.

That's it! :) I think it turned out cute!  See you soon scrappy people.


DOODLEBUG PRODUCTS USED

Over the Rainbow Collection

Doodlebug Textured Cardstock
Sunshine Alpha Stickers
Fairy Garden Lightning Bug Jar Cut File


OTHER

Gesso and watercolors

White pen

Thursday, June 16, 2022

MY HAPPY PLACE I LOVE BEING HOME LAYOUT | with Lisa

I had so much fun creating my first layout with the new My Happy Place collection! The colors are so cute and I love the added interest with the mini polka dots. I decided to scrap a photo of my cat.


For my background, I used three different patterned papers. The one with the scalloped border is called Garden party. I cut out the middle part of the paper and a 3mm border around it. Then I backed it with a red and a yellow patterned paper, which are called Hello Sunshine and The Neighborhood. 

The cat is a Doodlebug cutfile called Happy Cats and is from the Happy Haunting collection.  I cut it out from Doodlebug cardstock, put a bit of color around the edges with my Distress Oxides and put the pieces together. Then I added some details with my white acrylic pen. 


I backed my photo with some papers from the 6x6 paper pad. To back my photos, I always use 4 or 5 random rectangles of patterned paper that I rip off using a ruler. Then I put them behind the photo in a way that you can see each color peaking out around the photo.


I placed my cut file cat and my photo on the background and then started embellishing. I used a lot of flowers from the Bits & Pieces pack on the cat and put enamel dots in the centers of the flowers. I used a die cut piece from the Chit Chat pack for my title and backed it with a rainbow striped patterned paper.  

I also used a little Doodle Pop house next to my cat and finished the title with alpha stickers. 


To finish the layout, I added some white paint around the cat.  I really love this collection. The colors are totally my thing!  Hope you like the process and see you back soon! :)


DOODLEBUG PRODUCTS USED


My Happy Place Collection

Textured cardstock

Sunshine and Skinny alpha stickers

Happy Haunting - Black Cats SVG


OTHER


White paint


Wednesday, April 20, 2022

CUTE & CRAFTY SCRAPBOOK CHARM | with Miguel

Scrapbook charms are definitely the perfect accessory for a mini album, they come in different shapes and sizes. Today I bring you this idea to inspire you and you can make one.

I'll tell you... the Cute and Crafty cut files are a great tool when creating!  I cut the files with my Silhouette Cameo.  I modified the size and made a window to make a shaker.  I added some foam tape to give it height and placed some beads inside.  I used Doodlebug's Textured Cardstock to make the bag, and some paper and elements from Cute & Crafty Icon stickers to decorate. 

I love making charms from leftover elements of a collection.  It's a great way to use all my scraps and makes a great decoration for my projects, in this case in my beautiful charm. 


See how they look when placed in this beautiful scraper tote. I also added colored plastic beads strung one by one on the metal chain to give it texture and movement, I'm sure it would look great on an album spine.  It's that easy to create your own charm designs, with the collection that you like the most. I hope my idea inspires you a lot and you put it into practice. See you soon!


DOODLEBUG PRODUCTS USED
Textured Cardstock
Cute & Crafty Collection
Cute & Crafty Craft Caddie SVG

Thursday, March 10, 2022

DOODLEBUG CUT FILES LOVE YOU FRIEND LAYOUT | with Lisa

Doodlebug cut files are just the best for fast and cute layouts :) I LOVE them! For this layout, I decided to go with three different cut files to scrap a photo I took in Hawaii.


So I chose a palm tree cut file, a pineapple cut file and a sun cut file, all from Fun at the Park. After my machine had cut all of the pieces, I assembled them. What I like to do before assembling, is inking with a dauber and my Distress Oxides to give the pieces more dimension and shadows. 


Then I prepared my background. I used a baby wipe and my Gelatos in pink, yellow and blue to put some color down. Then I used a dauber and white acrylic paint to make some dots and make it look a bit like bokeh. I really love this technique, it's so easy and so cute. I also splattered some white paint on the page.


When the background was dry, I placed all my pieces on it. I matted my photo with four ripped pieces of patterned paper and placed it on the layout. Since the bottom was a bit naked, I decided to use two ripped strips of a green paper with flowers from the Fairy Garden collection.


Then I went through the flowers from the Lots of Love Bits and Pieces and used a lot of those to decorate my page. I added jewels to the centers of the flowers. I really love how that looks.
For my title, I used Limeade Abigail alpha stickers and a blue Chit Chat die cut word. 

This layout came together super fast, thanks to the cut files and looks so summery that I can't wait to finally have warm weather again. :) (Today was sunny but freeeeeeeezing cold...)


Thank you so much for stopping by and go check out the amazing Doodlebug cut files in the Silhouette Store and the Lori Whitlock SVG Shop!

Doodlebug Products Used

Fairy Garden Patterned Papers
Lots of Love Bits & Pieces
Abigail  Alpha Stickers
Textured Cardstock
Jewels

Other

Gelatos
Distress Oxides


Friday, October 22, 2021

HAPPY HAUNTING HALLOWEEN LAYOUT | with Lisa

I like all things spooky and when it comes to October, I could scrap Halloween layouts and mini albums every day :) I love the new Doodlebug Halloween collection, called Happy Haunting, and created my very first layout yesterday. I like the bright colors and I love that there's some pink in the collection. :)


For this layout, I went to the Silhouette store and chose two of the older Halloween cut files from Doodlebug, the pumpkins and the ghosts. First, I let my machine cut out all of the pieces, then I assembled all the parts of the pumpkins and adhered them to some white cardstock. I hand-stitched around the whole design, using color-matching thread. To give the pumpkins more detail and dimension, I added shadows and highlights, using Distress Oxides and a white pen. Then I cut the design out, leaving white borders. 


For the background, I did some easy mixed media. First I added color using my Gelatos and a baby wipe and then I added some stars with a stencil an my Distress Oxides. To finish, and make it more interesting, I splattered white paint on top and let everything dry.


For the ghosts, I just added some color around the edges with my Oxides and then adhered them to some vellum using foam squares and ripped the paper around the ghost, leaving a distressed, transparent border.

I knew that I wanted the pumpkins to be on the bottom of the page but I didn't really know, where I was going to place my ghosts.

After some playing around, I decided how I wanted to place the photo and the ghosts and then I started going through the die cuts and stickers to find some more things to add. 
I really love the naked, spooky trees in the background and the little bats, flying around... ;)


To top the layout off, I added some colorful stars, a worm sticker and a cute little shaker pumpkin on top of the other pumpkins. LOVE IT! :)


I hope you like how the layout turned out. Thank you so much for stopping by and see you soon! :)

Facebook Instagram YouTube


Doodlebug Products Used

Happy Haunting Collection

Pumpkins - Pumpkin Spice 

Ghosts - Pumpkin Party


Other Products Used

Embroidery thread

Distress Oxides

Star Stencil

Gelatos

Monday, August 9, 2021

CUTE & CRAFTY NOTEBOOK MINI ALBUM | with Kathy

I have fallen deeply and madly in love with all of the adorable icons in the Cute & Crafty Collection.  They are just so sweet!  One of my favorites is the little notebook... that cute smile is just fabulous! I decided to make a mini book using it as my inspiration.  Take a peek... 


I started with the Cute & Crafty Notebook SVG file, and edited it to take out the spirals so I could add my own using my binding tool.  Once I had the cover, I set to filling my book. For my pages, I used the Cute & Crafty Coordinating Petite prints pack.  If you're not familiar, these packs are full of fun tone on tone prints that work perfectly with the collection.   


I wanted to make this a more "all purpose" mini, where my previous 2 books were "scrapbooking" focused.  The Bits & Pieces were the perfect solution. I just love all the pieces in this pack!  Lots of flowers, tabs, labels.  So much to work with!  I also used some of the cut-aparts from the Happy Thoughts Cardstock, Chit Chat pieces and Odds & Ends.


I could not resist using some of the buttons from the Odds & Ends Pack... they just make me smile!  Also the big words from the Chit Chat pack are a fun way to embellish a page.


I really had fun putting this one together!  Have you created any projects using Cute & Crafty?  Be sure to tag Doodlebug Design on Facebook & Instagram.  We always love to see what you create.  That's it for me today, thanks for stopping by to peek!


DOODLEBUG PRODUCTS USED
Cute & Crafty Collection
Cute & Crafty Coordinating Petite Prints
Bits & Pieces
Doodle Twine
Sprinkles
Cute & Crafty Notebook SVG

OTHER
Cinch Mini Binding Tool & Wire
Stitched Square, Rectangle, Photo Frame Dies
Chipboard


Monday, July 26, 2021

CUTE & CRAFTY CRAFT CADDIE MINI ALBUM | with Kathy

I love all sorts of mini albums.  Traditional and non-traditional, so when I saw the adorable Craft Caddie from the Cute & Crafty cut files  I started thinking that a 3D caddie would make an adorable mini!  I set to work making an actual tote, and filled it with "cards" that are actually scrapbook pages!  Take a peek...


It's along the idea of a "recipe box" type album... a tote which holds the different pages.  I added some of the fun tools from the Odds & Ends to the tops of the pages so they stick up like an actual tool tote!  Of course, my tool tote is not nearly this neat or this cute!


The base of the box uses the Cute & Crafty Craft Caddie SVG.  I sandwiched a couple of small boxes between the layers to hold the pages.  I added the scissors, craft blade and rub-on tool from the Odds & Ends to the side pockets.  All that was left was to create some pages!


Cute & Crafty has so many fun embellishments, it's hard to decide which ones to use!  I started with these pages, but there is definitely room for more! 


I can't wait for my next in person crop!  I plan on taking LOTS of photos with friends to fill this little tote.  Have you made any projects using the Cute & Crafty Collection?  Be sure to tag @doodlebugdesign on Facebook & Instagram.  We LOVE to see your creations!  That's it for me today, thanks for stopping by to peek.


Doodlebug Products Used
Cute & Crafty Collection
Gingham Linen Petite Prints
Dot Stripe Petite Prints
Buffalo Check Woodgrain Petite Prints
Doodle Cuts Borders & Edges

Other Products Used
Silhouette Cameo
Stitched Rectangle Dies
Stitched Square Dies
Photo Frame Dies


Pin It button on image hover