Showing posts with label Scrapbook Page. Show all posts

Tuesday, August 12, 2025

SUMMER FUN SPLISH SPLASH LAYOUT | with Nathalie

It is the season of sunshine, beach, and fun!  And I am so glad that the beautiful Summer Fun collection is here to help me document all those fun and colorful memories with it.  I think all the fun designs and vibrant colors are just the perfect complement to our sun filled memories. Let me show you what I created: 


I  wanted a design that would bring your eyes to the photo but at the same time showcase the fun look of this collection. So, I set to construct a sunburst design for my page using different patterns from the collection.


I started by gluing half of the Water Babies paper to the bottom of the white cardstock from the Texture Cardstock Assortment, then selected a center point for the photo.  Once I marked the spot, then I pulled my 6x8 paper pad and started cutting some of the papers into triangular strips to fit on   the page.


I laid them on the page so that the triangular pieces start at the designed point on the page and cover the top part of the paper.   I made sure that the triangles fan out of the center point marked, lay flat on the page, and then trimmed the excess outside of the layout.


Once the sunburst design was complete, I set the photo onto  a piece of the Let's Luau paper and set it atop of the joining point of the papers.   Next, I mixed pieces from Chit Chat, This & That stickers, mini sticker icons, and icon stickers to create clusters at the top left and bottom right corners of the photo.


Once the title was set on place, I then needed to balance the page by adding a smaller cluster at the bottom of the page.  This time, I pulled some of the This & That stickers and added a few icon stickers to complete the page.

I love how this turned out, and I hope it inspires you to pull your Summer Fun collection to document your fun filled memories. XO

DOODLEBUG PRODUCTS USED

8943 Summer Fun Texture Cardstock Assortment
8932 Summer Fun- Water Babies paper
8934 Summer Fun - Let's Luau paper
8925 Summer Fun - 6x8 Paper pad
8906 Summer Fun - Mini Icon stickers
8922 Summer Fun - Chit Chat
8926 Summer Fun - Icon stickers
8927 Summer Fun - This & That cardstock stickers

Monday, August 4, 2025

SUMMER FUN - SUMMER FUN LAYOUT | with Brianna

 Hey friends! Brianna back with you today with another layout using the absolutely amazing new Summer Fun collection. It's bright, bold and happy and I can't get enough of it!! Here's my page: 

I'm really enjoying creating with this collection and have been so inspired by it. This layout came together so quickly and I'm so happy with how it came out. I pulled out the 12x12 Beach Towel paper for my base and then trimmed the 12x12 Water Babies to a 10x12 size. I layered a piece of textured white cardstock that I had trimmed to a 9x12 and layered it right on top of the Water Babies paper.  I adhered both paper layers to my base and love how the colors really pop under that white cardstock. 

Next, I matted my photos twice using the 6x8 Paper Pad and popped them up on foam tape. I adhered them a little more towards the top of my page, right in the center. I had plans on having my title and a bunch of the die cuts down at the bottom of my page. 

I then chose a phrase from the Chit Chat pack and made sure to pop it up on foam tape as well. Everything on this page just really pops up off of the page!

I wanted to try out a different design layout and not only was it a fun process, but it was also a way for me to highlight some of the adorable icons from the Odds & Ends pack in the collection. The turtle and crab? So cute! I also sprinkled in a few Puffy Icons stickers as well as the adorable bubble stickers from the Summer Splash Shape Sprinkles.


Lastly, I wanted to include a few florals so I grabbed a large floral die cut from the Bits & Pieces pack and adhered it under my two photos. I also pulled in a few florals from the Icons Sticker sheet and added them at the top of my photos. This page is so bright and happy, just like my sweet girl. Our days are spent playing outside in the sunshine and I can't wait to document more memories with her using this beautiful collection. Here's one last look: 


Thank you so much for stopping by today, I hope I've inspired you in some way. I'll see you next time friends! xo,


BLOG INSTAGRAM | YOUTUBE

DOODLEBUG PRODUCTS USED

8943 summer fun textured cardstock assortment pack
8939 beach towel patterned paper
8932 water babies patterned paper
8925 summer fun 6x8 paper pad
8921 odds & ends pack
8923 bits & pieces pack
8922 chit chat pack
8907 puffy stickers icons
8895 summer splash shape sprinkles
8926 summer fun icons stickers

Saturday, August 2, 2025

SUMMER FUN - OUR BEACH ADVENTURE LAYOUT | with Tarrah

 The vibrant and playful Summer Fun collection is like a match made in heaven for my colorful and vibrant photos of a recent trip to the beach huts at Brighton Beach, Victoria, Australia! If you’re anything like me and love capturing colorful beach days, this collection will have your heart from the first glance.


I chose the Water Babies 12' x 12' patterned paper as my background to mimic the sea, trimming it down and matting it on white cardstock, then trimmed down the white cardstock and matted it further on to the 'B' side of the Gull Friends 12' x 12' patterned paper to frame the design. I included three of our favorite snapshots from the day, matted with the bold stripey paper from the 6x8 paper pad for extra contrast.


I took 3 of the bright beach hut die-cuts from the Odds & Ends pack and lined them up using foam adhesive to the right of my main photo. I also placed the wave die-cut underneath and added some fish stickers over the waves from the Summer School Sprinkles Pack. The sun tucked in at the top of my larger photo is also from the Odds & Ends pack.


I layered some word and phrase stickers from the This and That cardstock sticker sheet on top of the middle beach hut die-cut, the pink tab sticker on the left of the large photo and the scalloped border sticker under my title are also both from the This & That sticker sheet. My title is from the Chit Chat pack and made up of 3 words - Beach is popped up using foam adhesive. Of course I could not go past adding some Doodle-Pops! I added the Palm Tree from the Palm Beach Doodle-Pop pack near my large photo and the seagull from the same pack to the top of one of the beach huts. I also added a few florals from the Flora Flamingo Doodle-Pop pack around my title  

The Summer Fun collection is an absolute must-have for scrapping your sunny days, beach holidays, and poolside pics. Its bold colors, whimsical patterns, and darling embellishments make storytelling a total breeze!

Thanks for stopping by! I hope this inspires you to dive into your summer memories and get creative with Doodlebug’s newest release! Happy creating!


DOODLEBUG PRODUCTS USED

8925 Summer Fun 6x8 Paper Pad
8943 Summer Fun Textured Cardstock Assortment Pack
8927 Summer Fun This & That
8922 Summer Fun Chit Chat
8921 Summer Fun Odds & Ends
8893 Sweet Shells Shape Sprinkles
8894 Summer School Shape Sprinkles
8896 Flora Flamingo Doodle-Pop
8900 Palm Beach Doodle-Pop
8932 Summer Fun Water Babies 12 x 12 patterned paper
8940 Summer Fun Gull Friends 12 x 12 patterned paper

OTHER

Date stamp
Black ink
Black journal pen

Tuesday, July 22, 2025

SUMMER FUN - SPLISH SPLASH LAYOUT | with Tya

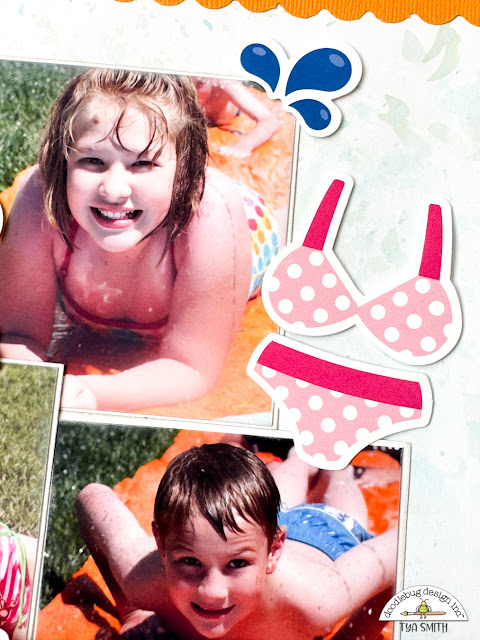
Hi there, crafty friends! I hope you're all having a wonderful summer so far! I've been extremely excited to work with the new Summer Fun collection! I had the best time using all the playful icons, bold colors, and summer-ready patterns; it was the perfect choice to document our Slip 'n Slide adventures from a few years back.


At the top of the page, I layered the bold rainbow stripe found on the Beach Towel paper with a strip of cute polka dots from the Polka Dot Bikini paper, and a bright, scalloped orange textured cardstock border for that classic Doodlebug sunshine-y feel. I added a floral cluster from the Bits and Pieces ephemera and a title strip from the Chit Chat that reads "Fun in the Sun", which sets the tone for the whole page. Just below that, I included some typed journaling strips to share a little about our day in the sun- those simple memories are my favorite to document.


In the center, I  arranged three sweet photos of the kids laughing and sliding their way through the afternoon on some  Lily white cardstock. A little bit of ink splattering was added behind the photos for a watery look. To the left, a cute unicorn floatie  Odds and Ends die cut, and some cheerful florals bring a whimsical touch. Right in the middle, I layered the adorable "Splish Splash" title found in the Chit Chat die cuts, with some happy little water droplets from the Odds and Ends. Also, some pretty shiny Enamel Dots from the Summer Assortment add just the right finishing touch to the center of the flowers.


To the right, I added a pink polka dot bikini from the Odds and Ends, and on the bottom,m a classic beach ball to keep the water-themed vibe going strong. The embellishments in this collection are so easy to mix and match - I couldn't resist!


On the bottom corner of the layout, I created a fun little tag cluster featuring a pair of floral swim trunks (how cute are those??) from the Odds and Ends on a bright green tag from the Beach Picnic paper. I then added a few more touches with a "Lovin' it" speech bubble from the Chit Chat and a heart and flower die cut from the Odds and Ends. I topped the tag with some  Tangerine Twine to finish it off and balance the page. Bright scallops and a mix of that same rainbow stripe and polka dot paper anchor the top and bottom of the layout, giving it a cheerful, cohesive look.  I love how these little details work together and capture the joy of a carefree summer day! 


Thank you so much for stopping by today! I hope this sunny project has inspired you to grab the Summer Fun collection and start scrapping your own water-filled memories.  Whether it's pool days, sprinkler parties, or backyard adventures, this collection is bursting with everything you need to make your summer stories shine! Happy crafting, friends! 


DOODLEBUG PRODUCTS USED

8943 Summer Fun Textured Cardstock Assortment Pack
8933 Beach Picnic paper
8935 Polka Dot Bikini paper
8939 Beach Towel paper
8921 Odds and Ends pack
8922  Chit Chat pack
8923 Bits and Pieces pack
8891 Summer Assortment Sprinkles
Tangerine Doodle Twine

OTHER

Tumbled Glass Distress Ink

Monday, July 21, 2025

SUMMER FUN - SUMMER TIME SHAKER LAYOUT | with Brianna

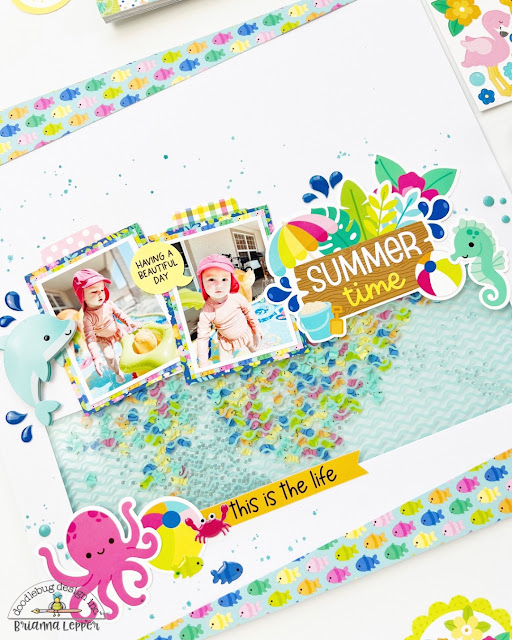
Hey friends! Brianna here today and if you know me, you know my favorite season is summer! So of course you can imagine my excitement as soon as I saw the new Summer Fun collection! It's bright and happy and it will be the perfect collection for all of your favorite summer moments. Here's my page: 

When I was going through this beautiful collection, I saw the new coordinating Shakers and was immediately inspired to create a shaker element on my layout. So that's exactly what I did! I took the Lily White cardstock from the Cardstock Assortment set and trimmed a 3x10 rectangle out of it. I wanted my shaker element to be a large focal point on my page so I made sure to have it take up a lot of real estate on  it. Next, I turned over the cardstock and backed it with the new Catch A Wave Acetate. This acetate is gorgeous and it was the perfect piece to create my shaker window!

I then took some foam tape and adhered it right on top of the acetate and applied it around the entire perimeter of my rectangle. This provided a place for all of the adorable Shakers to go. I carefully poured in a bunch of the Fishies and Bitty Bubbles Shakers and then sealed it with another piece of white cardstock. I flipped it back over to the front to see the shaker itself and I was in LOVE! The fishies, the bitty bubbles and the waves on the acetate just all go together so well!!

Next, I matted my photos using a few papers from the 6x8 Paper Pad and adhered them right on top of my shaker. Not only was my shaker a fun, interactive and focal point on my page, but it also provided a great grounding point for my photos and title. I chose a phrase from the Chit Chat pack for my title and adhered it right next to my photos. This collection has so many bright and bold pieces! I love how my title really pops on this page.


I started to add more embellishments around my page and pulled in a few adorable sea animal pieces from the Odds & Ends pack and scattered them around the page. I even chose that cute Donnie Dolphin Doodle-Pop and he fit perfectly on the left side of my page!


I thought that my page needed a little more pattern, so I grabbed the Summer School 12x12 paper and trimmed out two pieces at a diagonal. I adhered one to the top and one to the bottom of my layout and it really pulled everything together. The fishies on the paper match the fishies in my shaker and I think it's so cute! Here's one last look: 


Thank you so much for stopping by today, I hope that I've inspired you in some way! Have you created a large shaker element on your projects before? If not, you should give it a try! They're so fun and really add that extra something to your pages. See you next time friends!


BLOG INSTAGRAM | YOUTUBE

DOODLEBUG PRODUCTS USED

8943 summer fun textured cardstock assortment pack
8930 summer school patterned paper
8902 donnie dolphin doodle-pop
8925 summer fun paper pad
8921 odds & ends pack
8923 bits & pieces pack
8922 chit chat pack
8905 shakers fishies
8904 shakers bitty bubbles
8928 catch a wave acetate
8907 puffy stickers icons
8894 summer school shape sprinkles


Saturday, July 12, 2025

BEE HAPPY BEE-UTIFUL LAYOUT | with Tarrah

The Bee Happy collection gives super sweet, happy and cheerful vibes. This layout is all about celebrating beautiful friendships and spreading those happy, cheerful vibes!


I started with the “BEE-UTIFUL” title cut file (link below), which instantly set the playful tone for the whole page. I backed each letter with different patterned papers from the Bee Happy 6x6 paper pad—how could I resist those bright yellows, aqua blues, and happy greens? I wanted to add some solid colors so the check and spot prints were perfect.


To bring extra dimension and personality, I added the cutest little embellishments—those bees, hearts, mushrooms, and flowers are from the All the Things pack, Doodle-Pops, Puffy Stickers and Sprinkles pack and they all honestly steal the show. I popped some of them up with foam tape for extra fun and movement.

I kept the photo black and white to let the colors shine and to create a nice contrast against all that vibrant paper. The photo captures a happy moment with one of my scrappy besties, and the title felt just perfect: “Bee-utiful”. 

A stitched border around the outside, scalloped trims from the This and That sticker sheet, and a few enamel dots later—and voila! A layout that makes me smile every time I look at it.


If you love playful, colorful designs and layouts that feel like sunshine in scrapbook form, the Bee Happy collection is an absolute must!  Happy crafting!


DOODLEBUG PRODUCTS USED

Bee Happy collection
Bee Happy cardstock pack

OTHER

Date stamp
Black ink

Tuesday, July 8, 2025

BEE HAPPY THE SWEET LIFE LAYOUT | with Nathalie

We are so loving the new Bee Happy collection! It is just the best combination of color and cute designs which are perfect to document your all your memories especially those sweet Summer filled ones.   Let me show you what I have created for today.


I wanted to take advantage of the designs and colors in the papers to bring the story forward.   That led me to using strips of a few papers to build my page.


I started by trimming a circle out of white cardstock, then trimmed papers from the 6x8 paper pad into 1" strips.  These were layered at the lower half of the circle  in a random patterned - just making sure that all the colors and patterns balanced- then trimmed at the edges to keep the shape of the circle in place.


I decided to glue the circle to one of coordinating solid cardstock pages.  Once in place, I set the picture on the right side of upper half of the circle.  I added a small embellishment cluster at the top right corner of the picture, and also below the bottom edge of the photo.   I kept the clusters simple as there is a lot of interest already showcased in the paper layers.


I mixed pieces of the ephemera and some stickers to create the title to the left of the photo. I wanted something large that will not hide the shape of  background.  Once those were in place, then it was all about adding extra movement to the page, so I pulled a few of the puffy stickers, Doodle-pops, and Sprinkles- all of those cute bees- and scattered them through the page.  I used a white marker to add the dotted lines to the page.


I decided to frame the layout with the small floral patterned than added a few enamel dots throughout the page. I love how it turned out, and I hope it inspires you to get creating with the beautiful Bee Happy collection!! XO

DOODLEBUG PRODUCTS USED

Bee Happy Collection
Bee Happy Cardstock
 Sprinkles
Doodle-pop

Tuesday, July 1, 2025

BEE HAPPY SWEET AS HONEY LAYOUT | with Tya

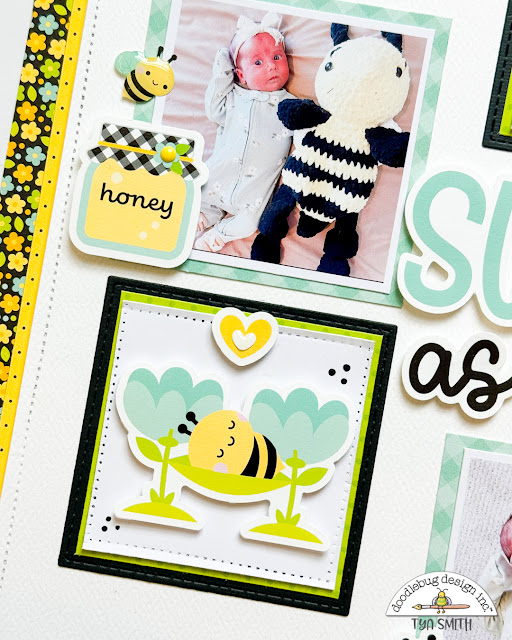
Today, I'm buzzing with excitement to share a very special layout that's close to my heart! I used the Bee Happy collection to create this sweet and sunny 12x12 page celebrating the one-month milestone of Emmy B - my best friend's brand-new, oh-so-precious granddaughter! 


Let's dive into the details a bit more! From the very start, I knew I wanted this page to be as sweet and cheerful as little Emmy herself. The "Sweet as Honey" title couldn't be more fitting for this bee-themed layout. All of the die cuts I used on the layout are from the awesome "All the Things" ephemera pack.  I love how big and bold the title is!!  I also loved this big floral heart. I sprinkled a few additional flower die cuts for some pop of contrast and whimsy.  The pretty pattern papers I used,  Honey Bees and Sewing Bees, look great layered up behind my white cardstock base. I love the pops of color that these papers add. 


Baby Emmy cozied up next to her bee friend. I added a cute honey jar die cut, and a smiling bee from the Honey Bees Shaped Sprinkles tie in with the theme. I couldn't resist using the little bee in the hammock! This little square adds so much personality and charm, and it captures the peaceful vibes of a snoozing babe! 


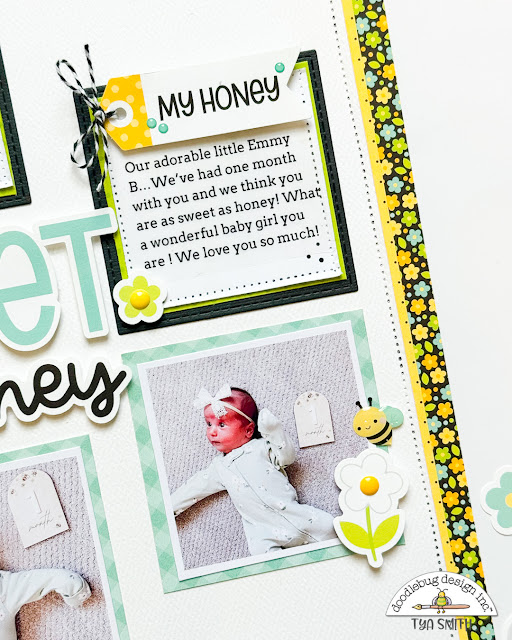
I used the "My Honey" tag as a title for my little journaling spot. I tied it with some baker's twine. The journaling is a sweet little message about Emmy's first month. A sprinkling of enamel dots from the Honey Bees Sprinkles adds that perfect handmade touch. More flowers and bee sprinkles were added to the bottom photo. I also always love to add the round enamel dots from the Bee Happy Assortment to the centers of all of my flowers. 


On this bottom photo, I added a large bee die cut, layered up with a sweet little black and white polka dot heart sticker, and the "love you" sentiment strip sticker from the This and That Sticker Sheet. It frames out the photo and keeps everything soft and playful. 


I used layers of pattern paper, stitched borders, and lots of dimensional elements to make this layout pop. The black and yellow florals mixed with the minty blue add a fresh twist to the traditional bee palette. I love this color combo together, don't you? 


 Thanks so much for buzzing by the blog today! I had such a blast creating this layout for baby Emmy using the Bee Happy collection. It's always extra special when you get to craft with people you love in mind. I hope this project has inspired you to pull out this adorable collection and make your own baby-themed layouts. Whether you are documenting a new arrival or just want to celebrate someone who's "as sweet as honey", Bee Happy has everything you need to make your pages shine!  Happy crafting !


INSTAGRAM | YOUTUBE | BLOG

DOODLEBUG PRODUCTS USED

Bee Happy Collection
Bee Happy Textured Cardstock
Beetle Black Doodle Twine
Citrus Dot/Stripe Petite Prints


OTHER 

Black Nuvo Drops

Pin It button on image hover