
 So what is paper piecing anyway? The idea behind paper piecing is that you stamp multiple layers and glue them on top of each on a stamped image? While it can be used to create dimension, it is often used to create patterns on stamped images that would otherwise be difficult to create.
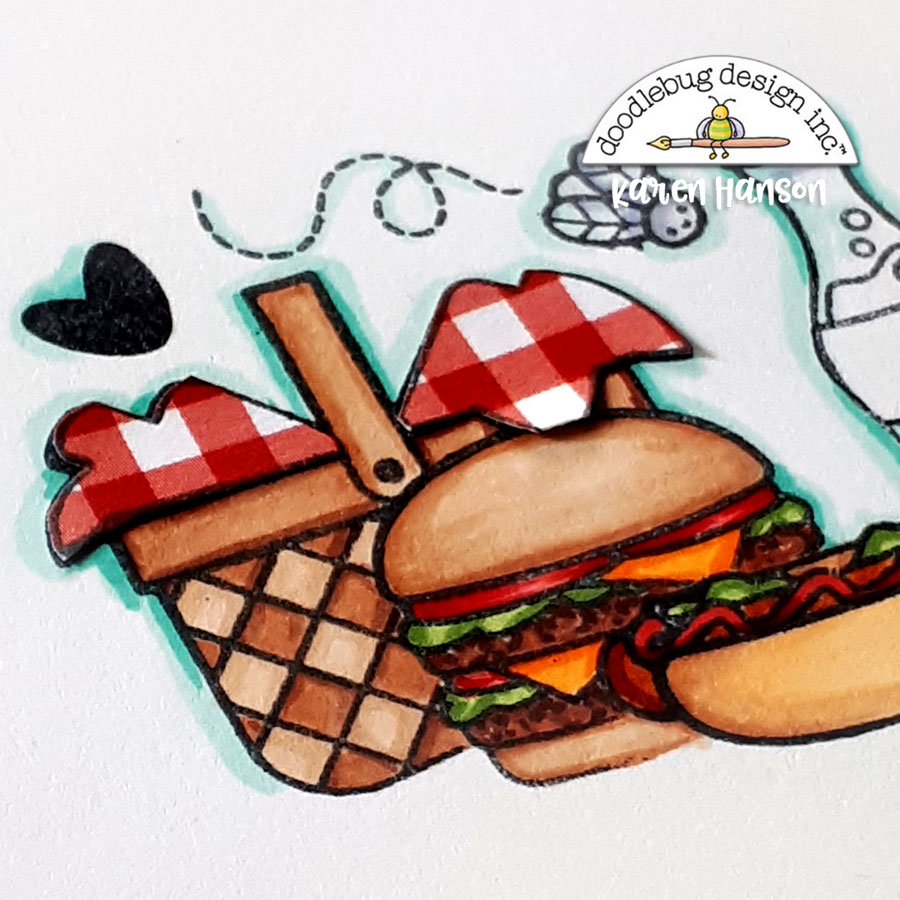 For instance, on this adorable picnic basket that you will find in the Bar-B-Cute stamp set, I really wanted to create a gingham blanket poking out of the top. Colouring it that way would have been time consuming, so I used paper piecing instead!
Here's how you can too:
For instance, on this adorable picnic basket that you will find in the Bar-B-Cute stamp set, I really wanted to create a gingham blanket poking out of the top. Colouring it that way would have been time consuming, so I used paper piecing instead!
Here's how you can too:
 1.Grab your favourite Doodlebug stamps, ink and some patterned paper (like this 6x6 from the Bar-B-Cute collection)
 2. Stamp your original image. I did some colouring at this point, but you can colour your image at the end too!
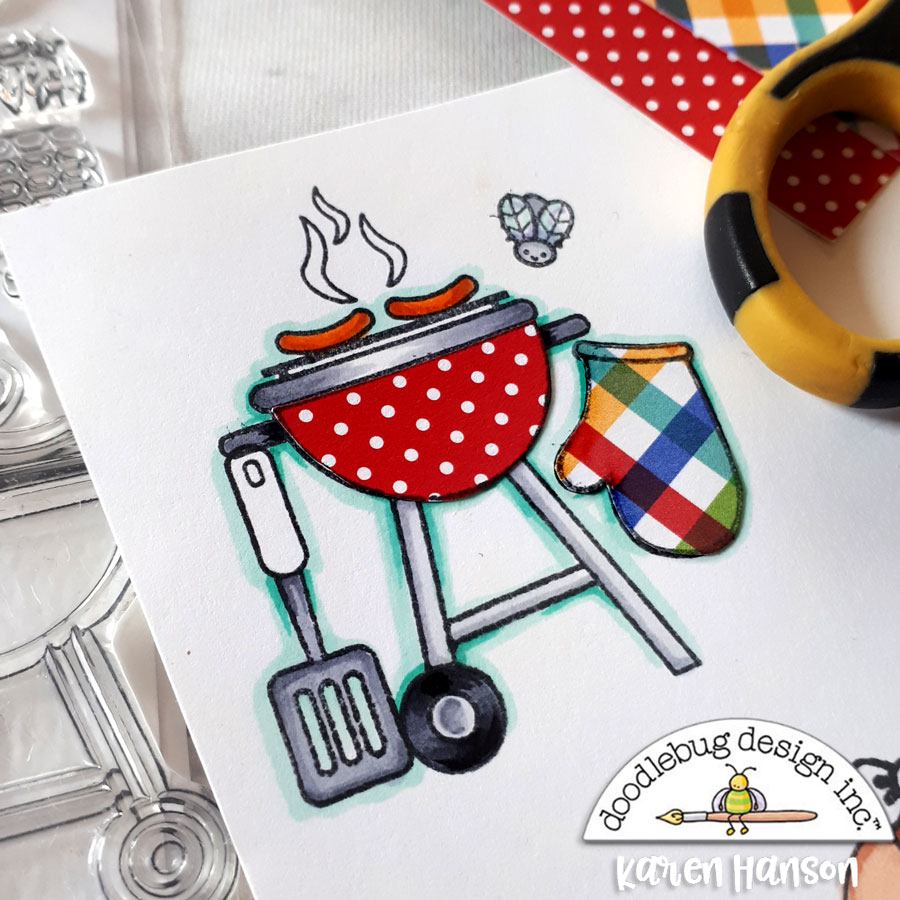
 3. Ink up your stamp again and stamp the image onto the patterned paper. I am a bit of a paper hoarder, so I only focus on stamping the part of the image I am going to use - in this case, the base of the bbq. Feel free to stamp the whole image if you are more comfortable with that!
 4. Continue the process with any other images in your stamp design that you want to feature pattern. I also wanted a cute plaid oven mit, so away I went!
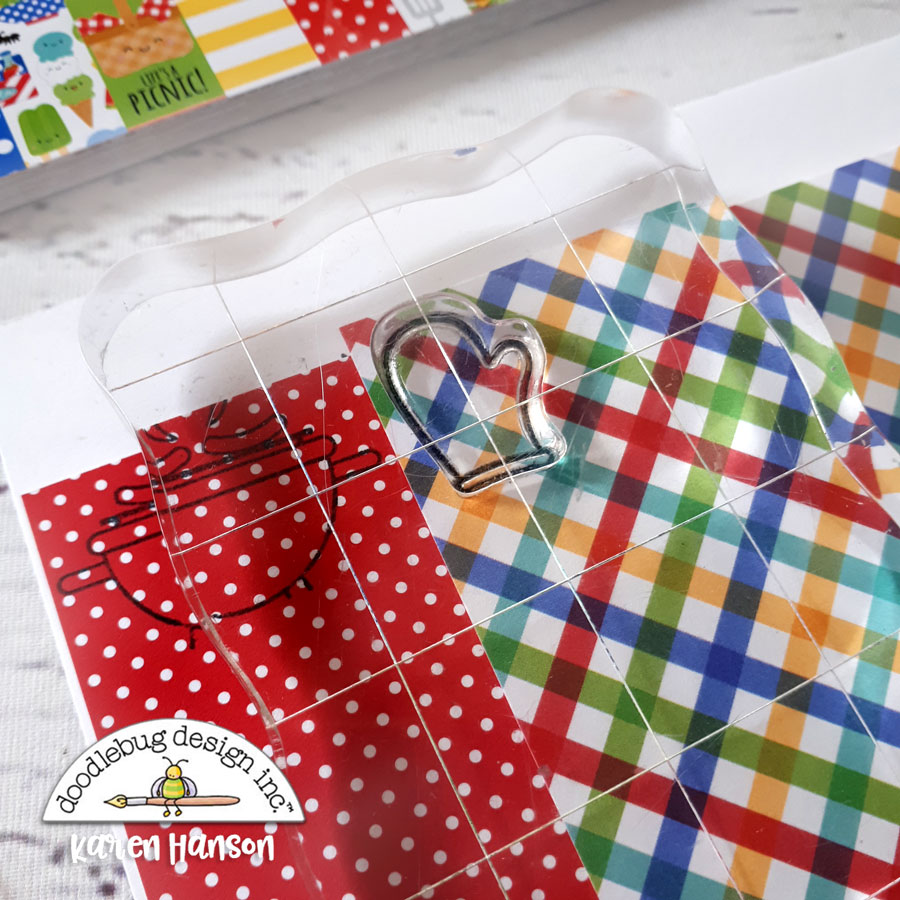
 5. Using a pair of sharp scissors, fussy cut around your image. Try to maintain as much of the stamped line as possible to get a clean look. And remember, when you are fussy cutting, move the paper and not your scissors to get clean, intricate cuts.
  6. Using a liquid adhesive, glue on your paper piece on the original stamped image.
 7. Add in any additional paper pieces with adhesive. Finish colouring your image if you haven't already done so!
 Note: This technique can be a really fun way to add a unique look to your stamps. Try this technique with little patterns (like this cute ant in the 6x6 collection).
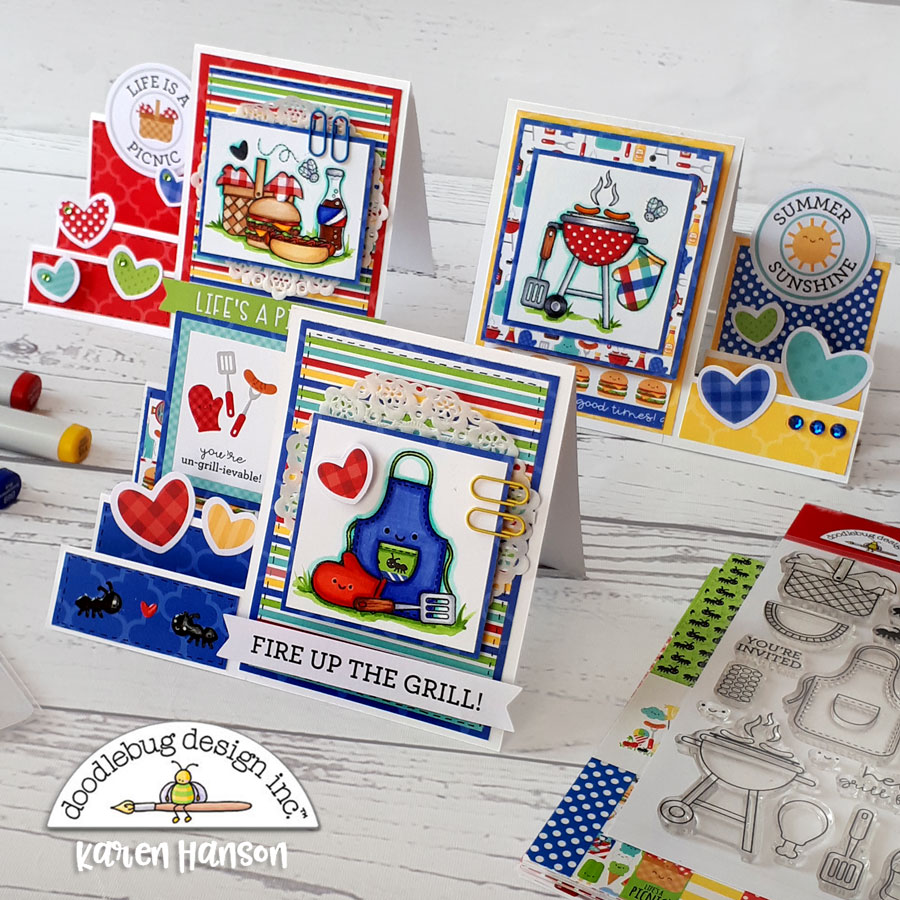
  8. Add it onto a fun card base (like these side step cards) and you are all finished!
 It's as easy as that! And let me tell you - with the awesome patterns in this collection and the adorable stamps in this set that are begging for pattern, you will paper piecing to your heart's content!
 We would love to see what you come up with! Make sure to share your creations on Instagram so we can see your Doodlebug paper piecing creations!
Thanks for stopping by!
;
Doodlebug Design Product:
Bar-B-Cute Collection
Bar-B-Cute Stamps
Mini Jewels
Mini paper clips
Other Products:
White cardstock
Alcohol markers
Ink
Adhesive


Absolutely Adorable! I love to paper piece too!
ReplyDeleteThese are so super cute. Love this set.
ReplyDelete