Tuesday, March 7, 2023

OVER THE RAINBOW SPRING CARDS | with Karen

You know, as I find myself in the middle of winter, there is something hopeful about having my crafty table full of colour. The world may be white outside but inside, my space is as bright as a rainbow and it reminds me that spring time is just around the corner. And in the meantime, I can get crafty with all the Doodlebug colours, especially in the new Over the Rainbow collection. And my heart is full!

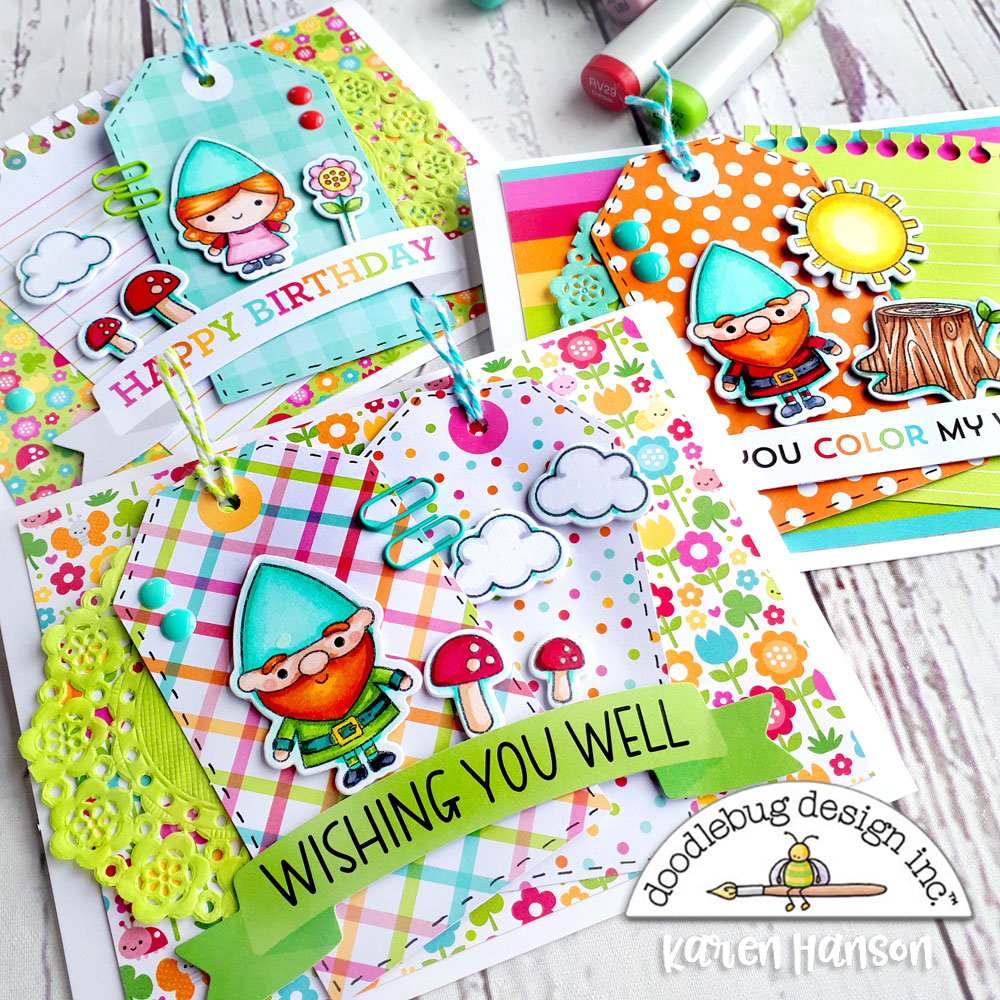
Cards-all-1

For this little card set, I decided to work with the Gnome Sweet Gnome stamps again because they were just about as cute as can be!

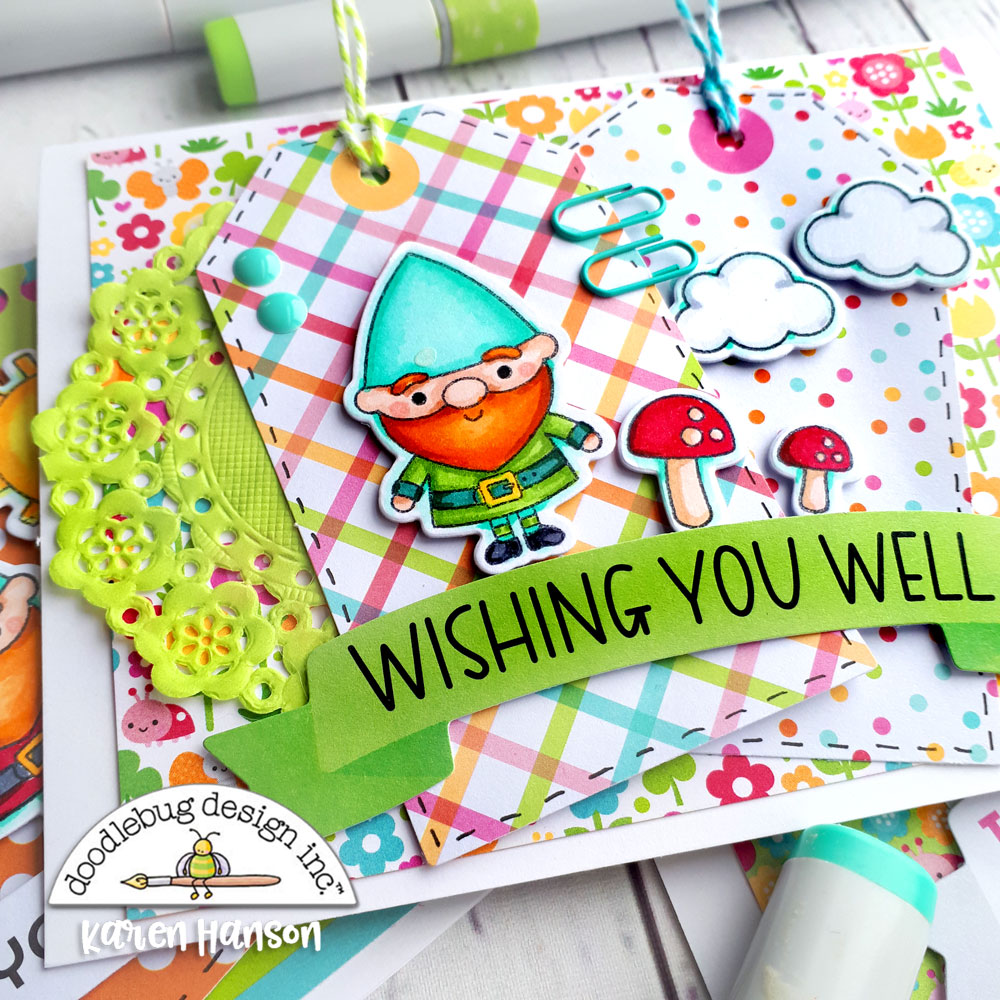
Closeup-1

And this time, pairing them up with the coordinating die cuts made creating little scenes on my cards a breeze! A little gnome for each one and then a combination of flowers mushrooms and clouds created the perfect set for each unique card!

Closeup-2

With a few Bits and Pieces and some mini doilies I was able to do some fun layering. And the sentiments from the Odds and Ends packs together with some coordinating Sprinkles and mini paper clips finished off the design.

Cards-all-2

Wherever these little cards end up, I hope they fill up the hearts of the recipients too. If nothing else, I know these little Doodlebug characters will make them smile! Thanks for stopping by!  Hugs,


BLOG | INSTAGRAM

DOODLEBUG PRODUCTS USED
Over the Rainbow Collection
Over the Rainbow - Bits & Pieces
Gnome Sweet Gnome stamps
Gnome Sweet Gnome Die cuts

OTHER

Cardstock
Adhesive

Monday, March 6, 2023

OVER THE RAINBOW MY SUNSHINE GIRL LAYOUT | with Brianna

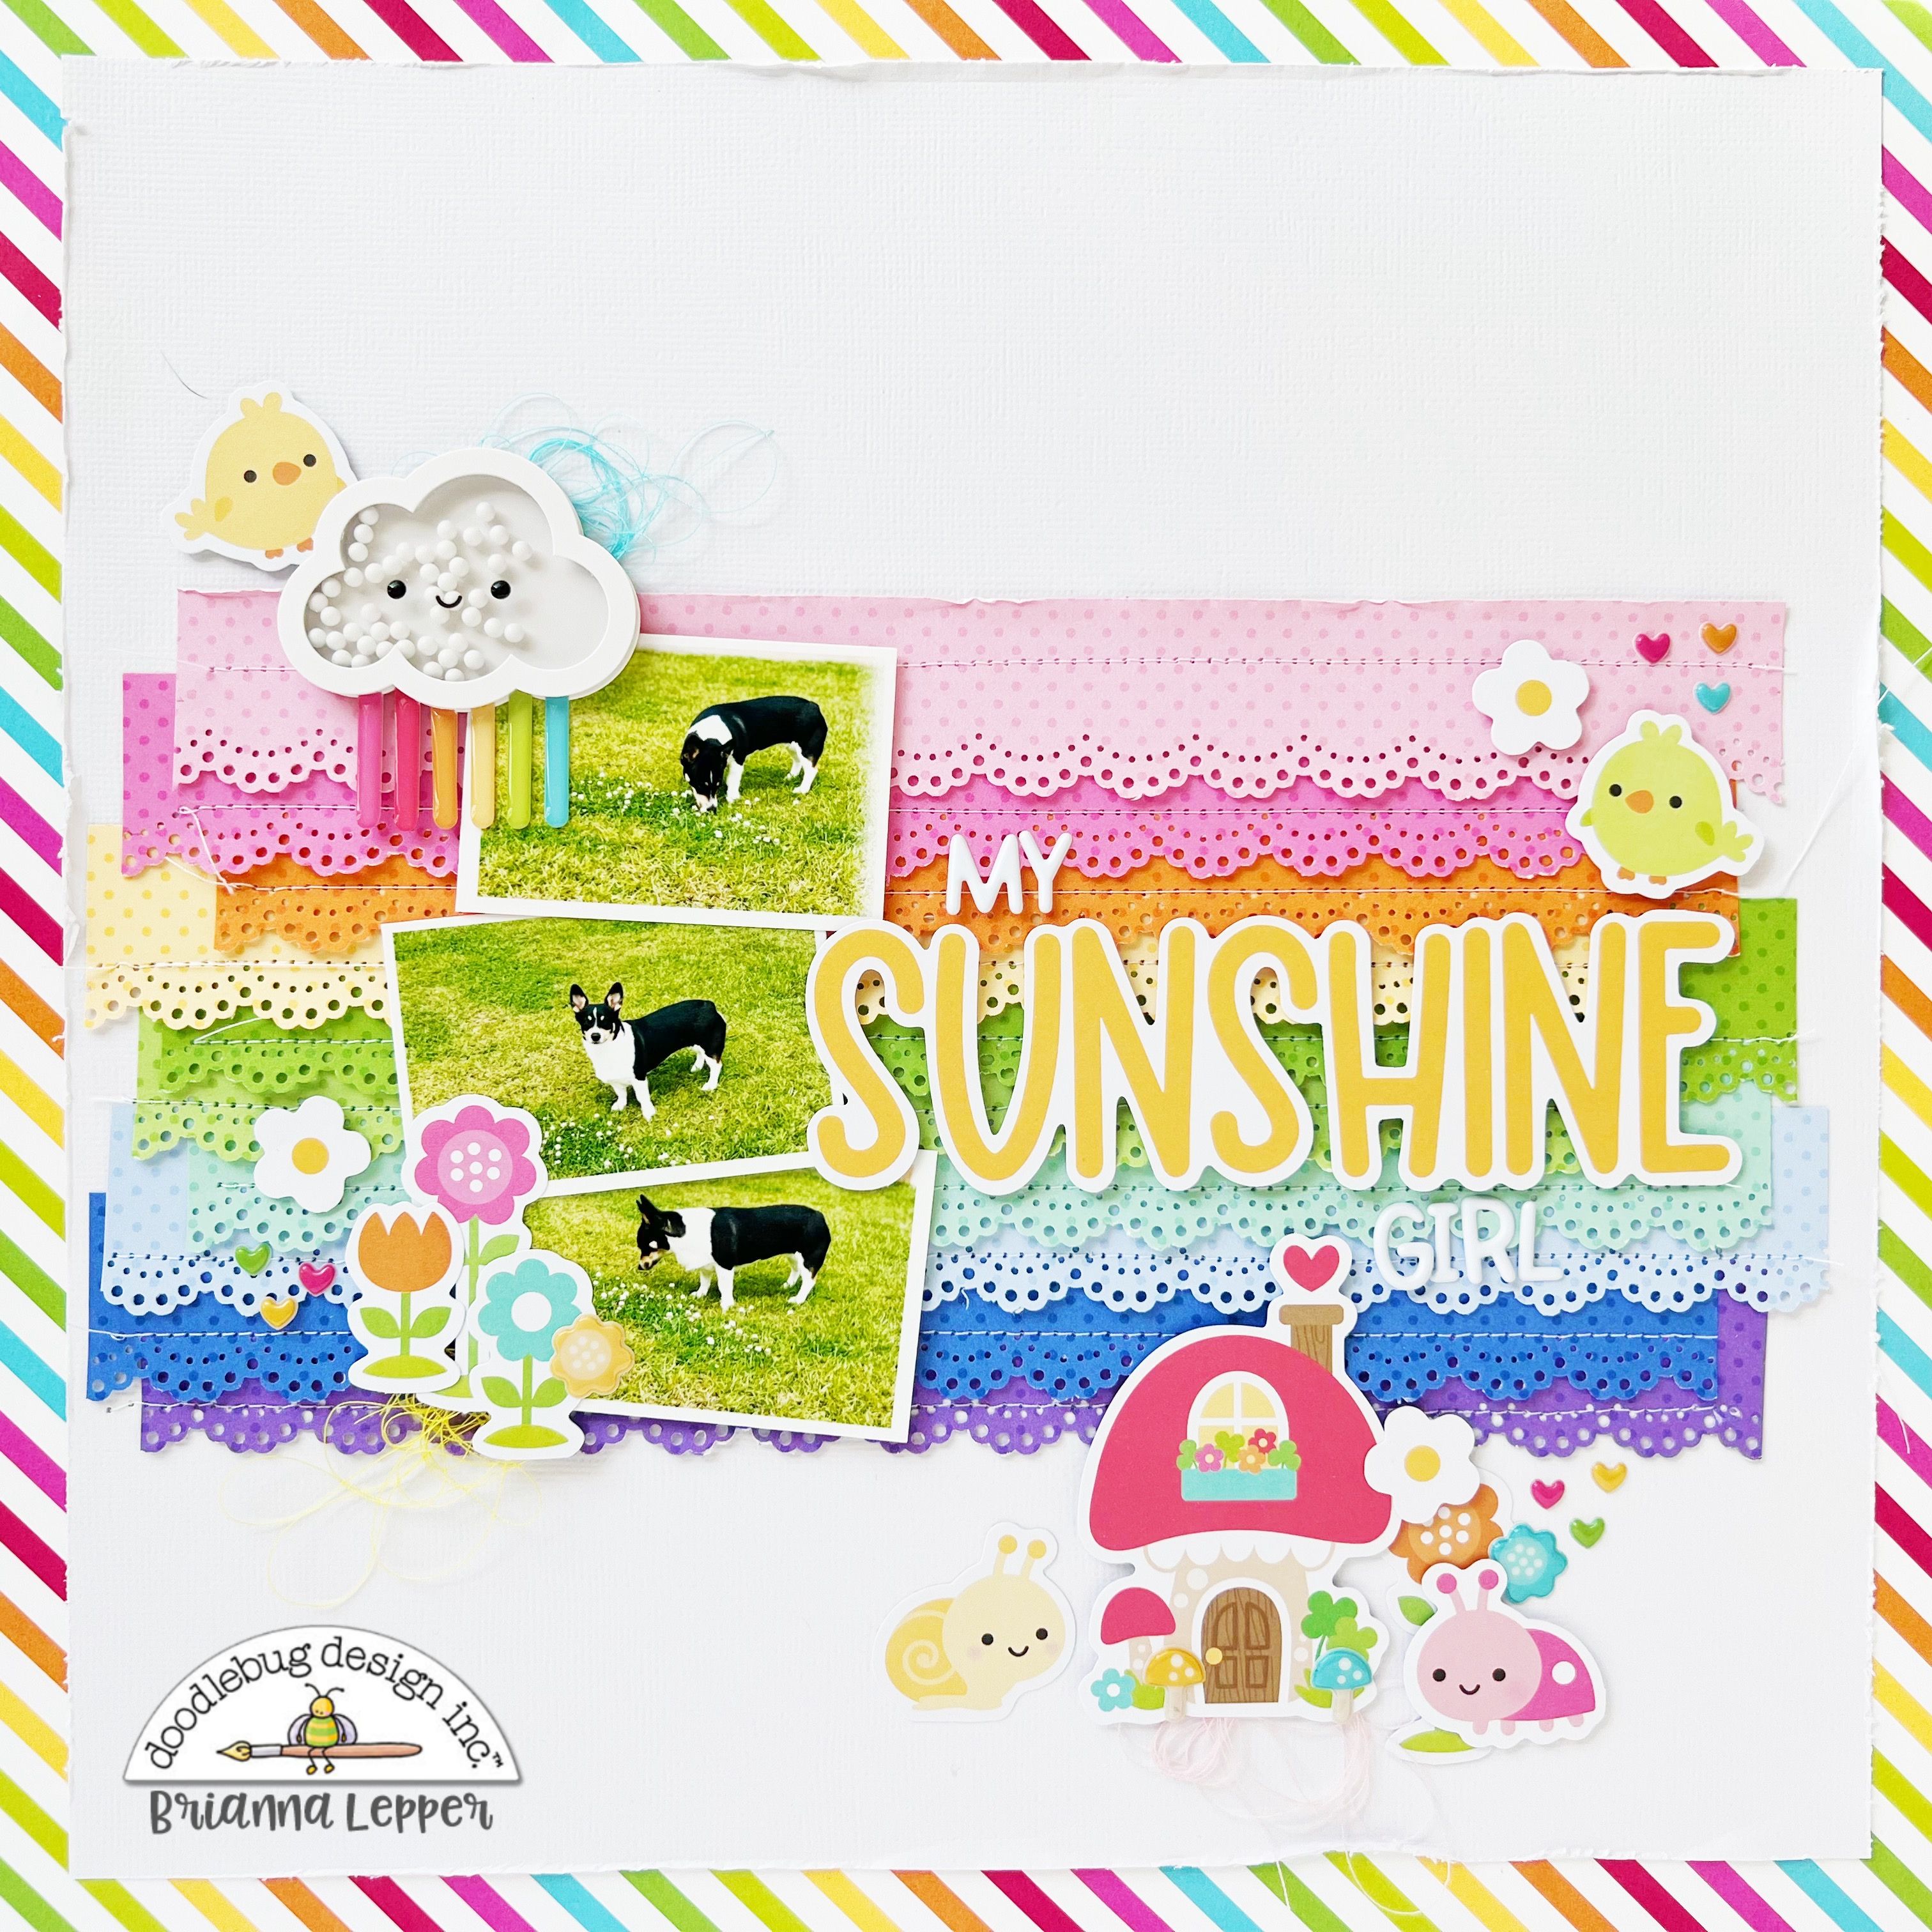
Hey friends! Brianna Lepper here and I've got a super colorful layout for y'all on this beautiful Monday. I have really been enjoying the Over The Rainbow collection and have been so inspired with the gorgeous colors and fun elements. Here's my page:


I really liked the Shine Bright 12x12 patterned paper and was inspired to create a page with a rainbow design. I took the polka dot side of the Petite Prints 12x12 paper and trimmed down 1.5"x12" inch strips of Cupcake, Bubblegum, Mandarin, Lemon, Grasshopper, Limeade, Pistachio, Bubble Blue, Blue Jean and Lilac. I then ran each strip through a doily punch from my stash to give them all a fun bordered edge.


I wanted the strips of paper to really stand out so I adhered them to a piece of white cardstock that I trimmed down to 11"x11". I adhered it to the Shine Bright paper and really like how it came together! I arranged the paper strips in rainbow order, adhered them down and ran each one through my sewing machine. I also made sure to flip up the doily edges for extra interest. The Rainbow Bright Shaker Pop was a perfect addition to the layers!


I decided to use three photos instead of one on this page and I had them set to cascade down the layers of paper. The green grass in the photos really pop!


I chose a phrase from the Chit Chat pack for my title and added onto it using the Alphabet Soup Alpha Stickers in White.


I kept the embellishments pretty minimal and pulled a few pieces from the Odds & Ends pack and a few stickers from the Puffy Icons sticker sheet. Those little bugs and floral pieces were perfect for this page!!


Here's one last look at this bright and happy page!


Thank you so much for stopping by today and I hope that I've inspired you in some way! I'll see you in my next post friends!


DOODLEBUG PRODUCTS USED

Over The Rainbow Collection
Petite Prints 12x12 Paper
Alphabet Soup Alphas

OTHER

Doily Paper Punch
Sewing Machine
White Cardstock

Saturday, March 4, 2023

OVER THE RAINBOW OUR LITTLE LADY LAYOUT | with Tarrah

Can you believe it's March?! The gorgeous Over the Rainbow collection is the perfect collection to document your memories from March and Spring!

I am sharing a 12' x 12' layout today created with the Over the Rainbow collection. What is not to love?! I mean the gorgeous colours, the cute icons and elements are all just sooooo super cute! This collection has been a dream to work with, especially to document a cute baby photo of my niece!


I began by choosing a plain white cardstock background for my layout today. I trimmed the cardstock down to measure roughly 11' x 11' and then adhered it to the 'B' side of the 'Spring Garden' patterned paper.
I measured roughly 1.5 inches in from each edge of the white cardstock and ruled some lines to create a square using a ruler and pencil.

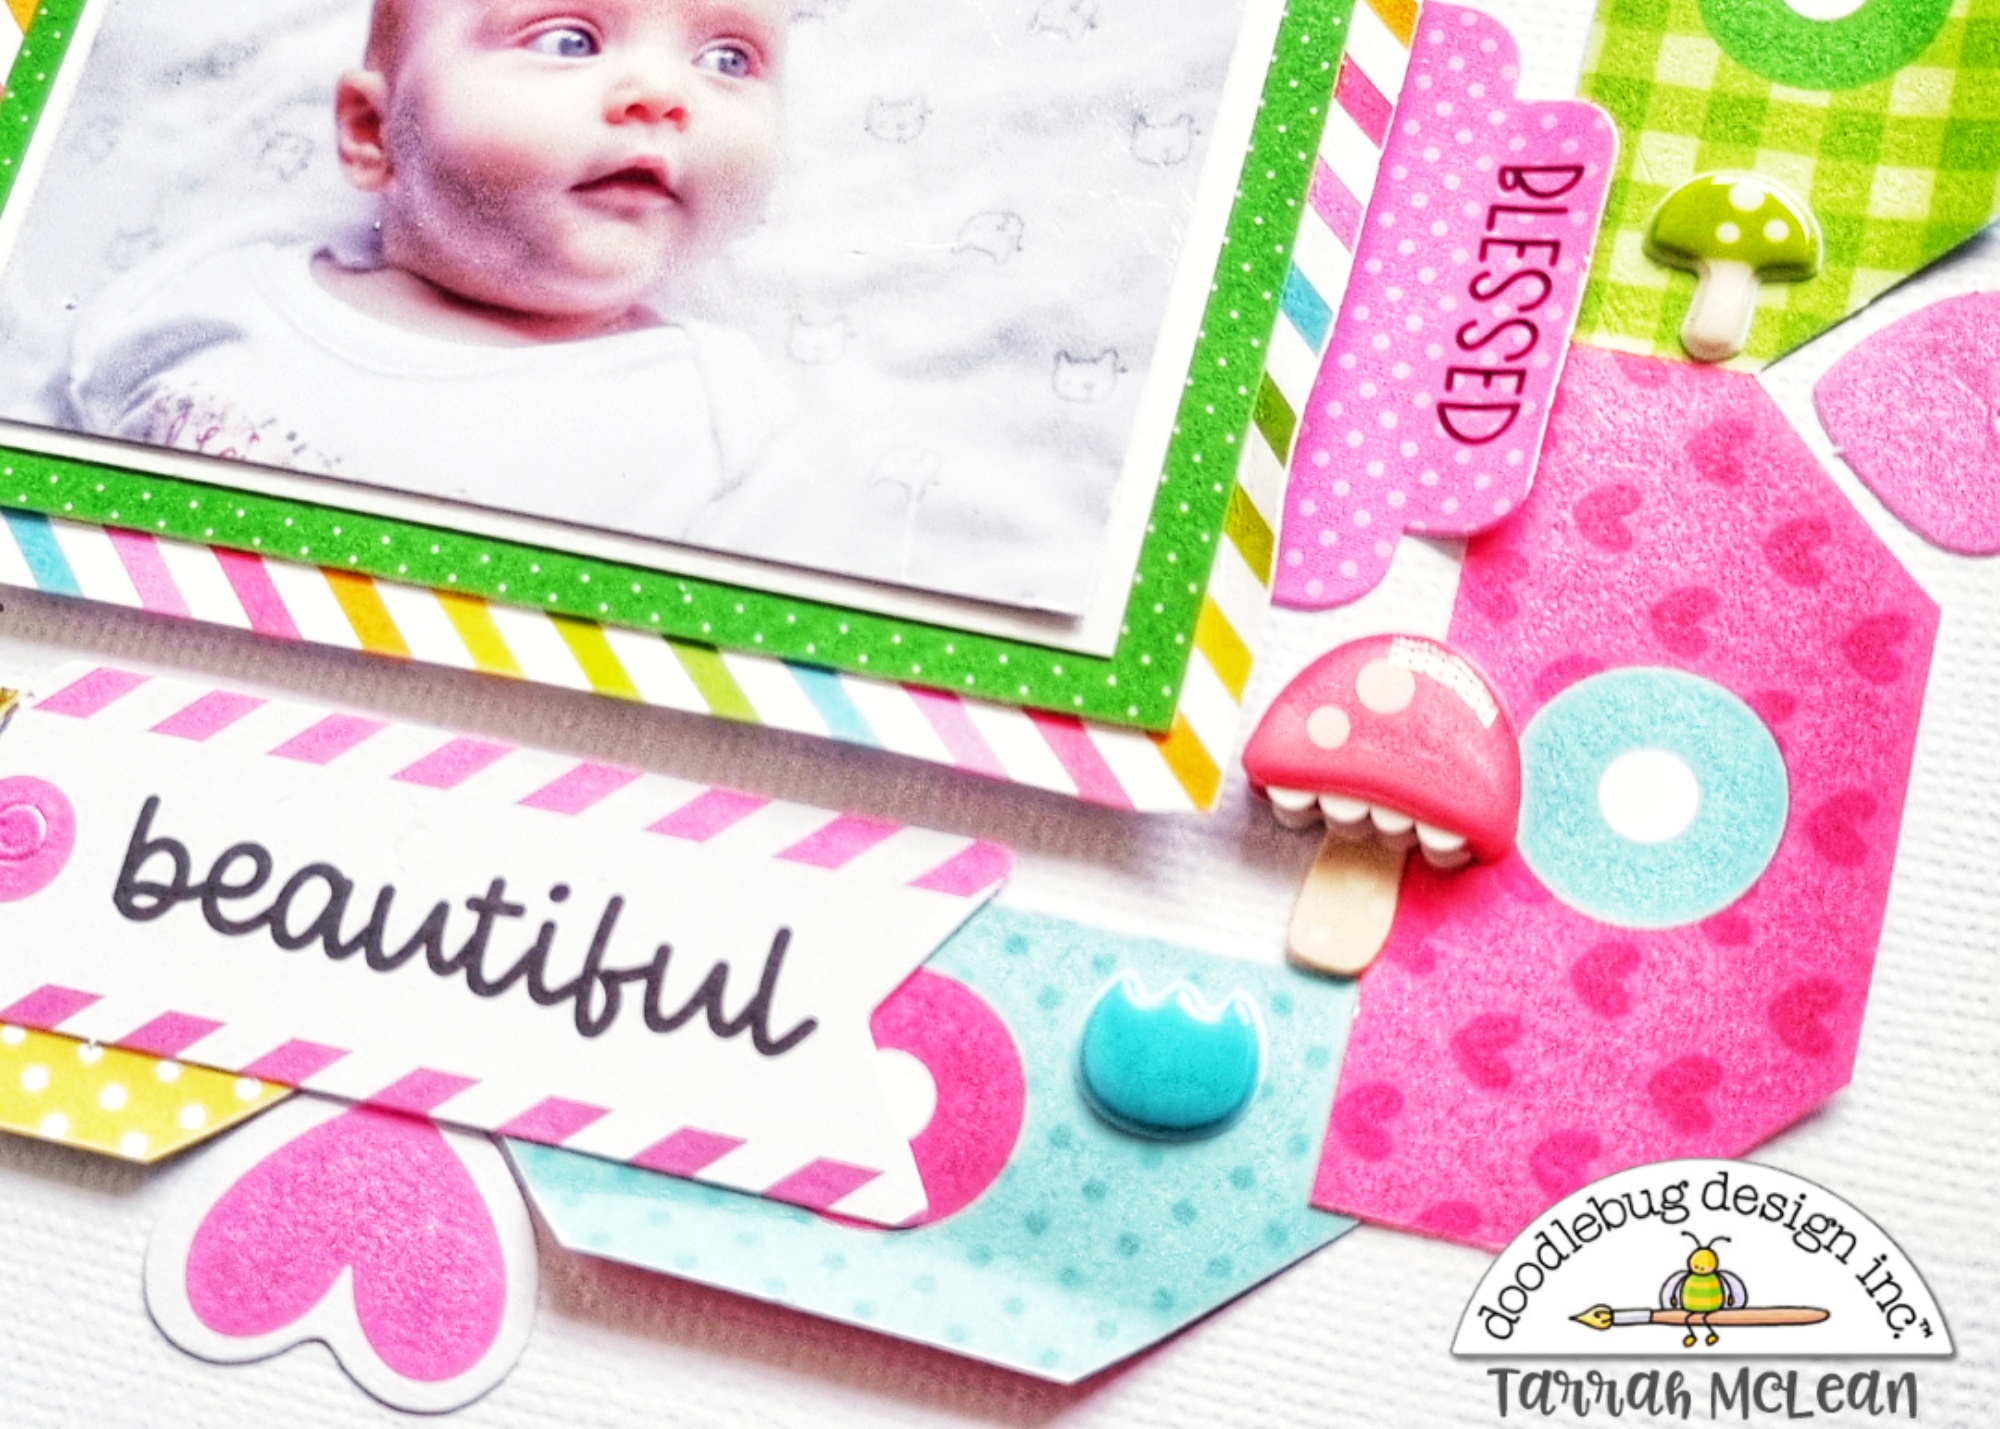
I then took the 'Just For You' patterned paper and cut out the tops of the tags only from the paper. I then strategically adhered the tag tops around the square and I LOVE how this turned out. It was a bit fiddly to get this right however I just kept at it until I was happy with the way they were arranged on my page.


All of that colour is gorgeous against the white don't you agree?! I added the photo of baby niece to the bottom right corner, choosing 2 of the papers from the 6' x 6' paper pad to layer under the photo. My title is the banner die-cut that says 'Our Little Lady' it was perfect to compliment this photo! I also added the Happy die-cut above, to fill in a little space. I made sure to leave lots of white space on this page so that you don't get too overwhelmed with so much going on!


I wanted to layer lots of embellishments on top of the tag tops and also in between the spaces between the tags as well. I used a mixture of hearts and small flowers for the spaces in between. I took hearts from the Odds and Ends pack, Cardstock Stickers and Puffy Shapes, the flowers are mainly from the Odds and Ends pack.


In the top left corner I added the super cute Hello Sunshine Doodle-Pop, I LOVE the Doodle-Pops soooo much! They are gorgeous! I added the cute little blue bird from the same pack just near my photo on the right hand side. In the bottom left corner I added some of the flowers from the Garden Gnome Doodle-Pop pack. I just love the dimension and interest these add to a page!


I continued to add small embellishments around the page, some to fill in gaps and some just because I felt like it needed something lol! It is SO hard to know when to stop sometimes isn't it? I find that a lot! Trust me, you are not alone! I added some This and That cardstock stickers, more puffy stickers, more die-cuts and more cardstock stickers! Lastly I stamped the date stamp of when the photo was taken (this is one of my signature details on a page).


I absolutely LOVED working with the Over the Rainbow collection, thanks so much for taking a peek at my layout today! I hope you enjoyed reading about how I created my layout. See you next time!


DOODLEBUG PRODUCTS USED

Over the Rainbow collection

OTHER

White Cardstock
Date stamp
Black ink
Pin It button on image hover