Showing posts with label card. Show all posts

Monday, May 26, 2025

BERRY SWEET BIRTHDAY BOX CARD | with Kathy

Have you seen the new Berry Sweet Treats Doodle Cuts?  I fell in love with them as soon as I saw them!  I knew exactly what I wanted to make as soon as I got my hands on them!  Take a peek....


I think that 3D cards are so fun to receive and they look so cute on display.  My box card was created using the dies in the set, along with the 6x8 Pad, some coordinating cardstock and petite prints.  I added a sentiment from the "All the Things" pack as a finishing touch.


I created some dimension by adding strawberries on both the front piece and the insert.  How cute is that mouse??!! 


I just love how he peeks out over the pile of berries!  This card was really easy to make, and it fits into a standard A2 envelope.  If you'd like to make your own, I created a quick tutorial video.


If you make one, please be sure to tag me (@kathy_skou) and @doodlebugdesign!  We love to see your creations.  That's it for me today, thank you for stopping by to peek.


DOODLEBUG PRODUCTS USED

Berry Sweet Collection
Berry Sweet Treats Doodle Cuts
Berry Sweet Coordinating Textured Cardstock
Petite Prints

OTHER

Sizzix Big Shot

Tuesday, May 13, 2025

BERRY SWEET PREVIEW WEEK - BERRY SWEET CARD | with Cynthea

 We have another fun preview for you today!  Cynthea put together this "berry sweet" card using the new Berry Sweet Collection and Berry Sweet Treats Doodle Cuts.  Take a peek...


How cute is that little mouse? And those strawberries look good enough to eat!  Cynthea die-cut the shapes from the Berry Sweet Coordinating Cardstock pack.  These packs make things so easy!  No guessing the colors, they are perfect every time!


The sprinkles in the flowers are a fabulous finishing touch!  Be sure to check back all this week for more previews of Berry Sweet!


DOODLEBUG PRODUCTS USED

Berry Sweet Collection
Berry Sweet Coordinating Textured Cardstock
Berry Sweet Treats Doodle Cuts


Friday, May 17, 2024

HAPPY HEALING TAG CARDS | with Niella

Hi crafty crew, it's magic May-hem time with Happy Healing! This project is super easy + versatile - are they tags or are they cards? Well, why not have both. It's so simple, yet so clever right. Who doesn't like a two-in-one! As we hit into the fifth month of 2024 it's time to do some more memory keeping and giving and what a great way to do that with a new Doodlebug Design collection. Come check out my latest project! Tags vs Cards!

To replicate these Tags vs Cards, all you do is grab the sweet 6x6" paper pad and choose (tough choice) three papers and fold each width wise. You'll then have a folded 3x6" card. Next snip the top corners and punch a hole in the middle top part of card. Easy! Now you have a Tag vs Card :-)

Once you've made the bases of each Tag vs Card, go wild decorating! As you know, this is my favorite part of crafting - it's when all the foundation pieces are created and it's all ready to decorate to your hearts content. Here I've used the adorable patterned papers that are named (l-r) On the Mend, Love Blooms and Happy Healing.


To help "pop" the icon stickers and ephemera, I always mount a solid matching cardstock on the top of the base patterned paper. It looks easy on the eye and helps show the pieces. I love that each collection comes with a matching textured cardstock pack! The co-ordination is perfection.


To add more cuteness, I've used two little charmers on two of the Tags vs Cards! Did you spot them? Here, let me show you in my video showcase below :-) And whilst you're watching; see if you can spot how I used a round band-aid like a balloon in the cutest balloon bouquet!


Thank you crafty crew for visiting today! I hope I gave you a crafty hit of inspiration! Don't forget to tag us in on your socials - we're looking forward to seeing your next Doodlebug Design project! Until next time; doodle dee!


DOODLEBUG PRODUCTS USED

Happy Healing collection
Doodle Twine

OTHER

machine stitching
foam dots


Friday, December 27, 2019

WINTER WONDERLAND REVERSE STAMPING TUTORIAL | with Karen

I thought that playing around with Doodle Stamps could not get any more fun than it has been since they were introduced earlier this year. But oh, was I ever wrong! Because just when I thought they couldn't get any better, the new Winter Wonderland collection was released with a whole set of adorable new characters!
But I have to admit that the only thing better than the new Yeti character is that he comes in more than one pose. And if that still isn't enough for you, I am going to share a little tutorial with you today so you can see how you can get even more characters out of your stamps! 
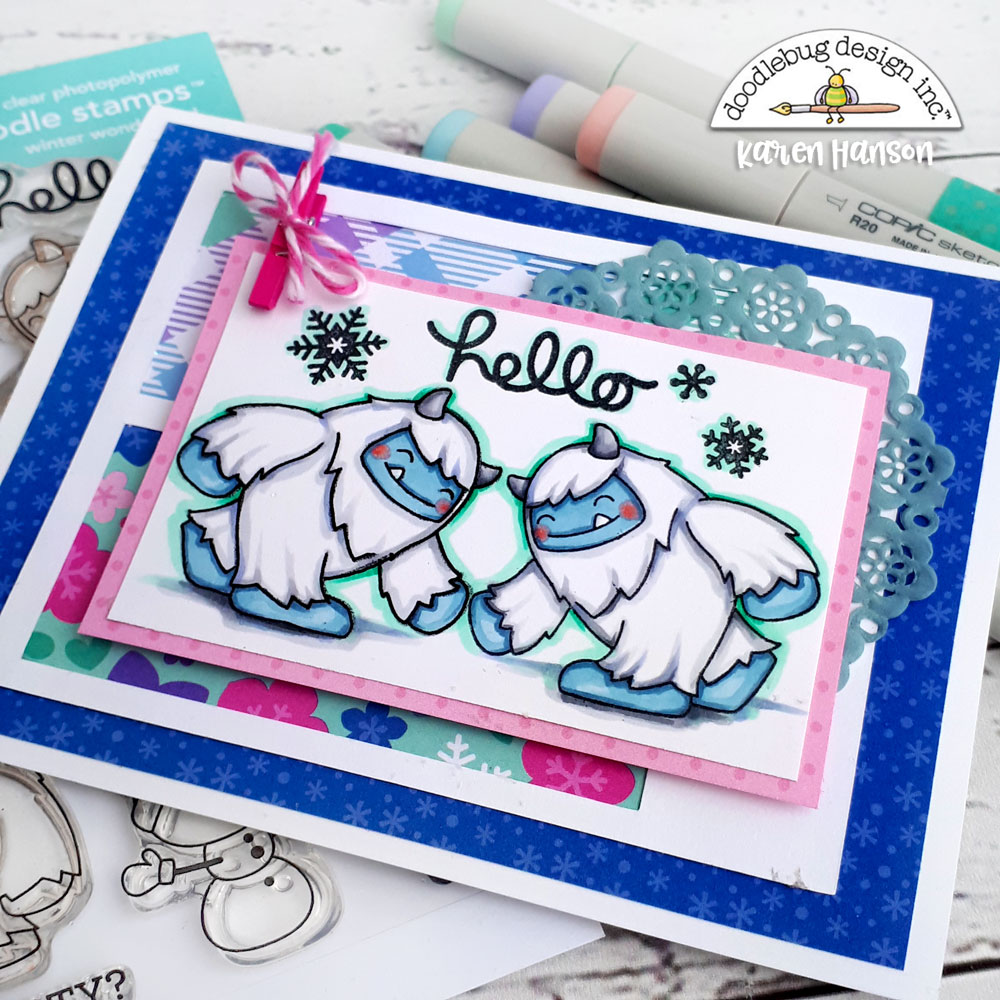
Reverse stamping is a technique used when you have a stamp that you would like facing the opposite direction when it is stamped. For this little card, I actually just used one stamp of the Yeti, reversing one to create the yeti facing the opposite direction by stamping it twice - first onto a mat and then onto paper. While there are stamping tools designed to help with this process, a few simple product that you have in your crafty collection will do the trick too! Here's how:
To create this effect, all you need are your regular stamping tools together with a silicone mat. I actually use the silicone mat that came with my die cutting machine, but any silicone mat will do as long as it is larger than your stamp.
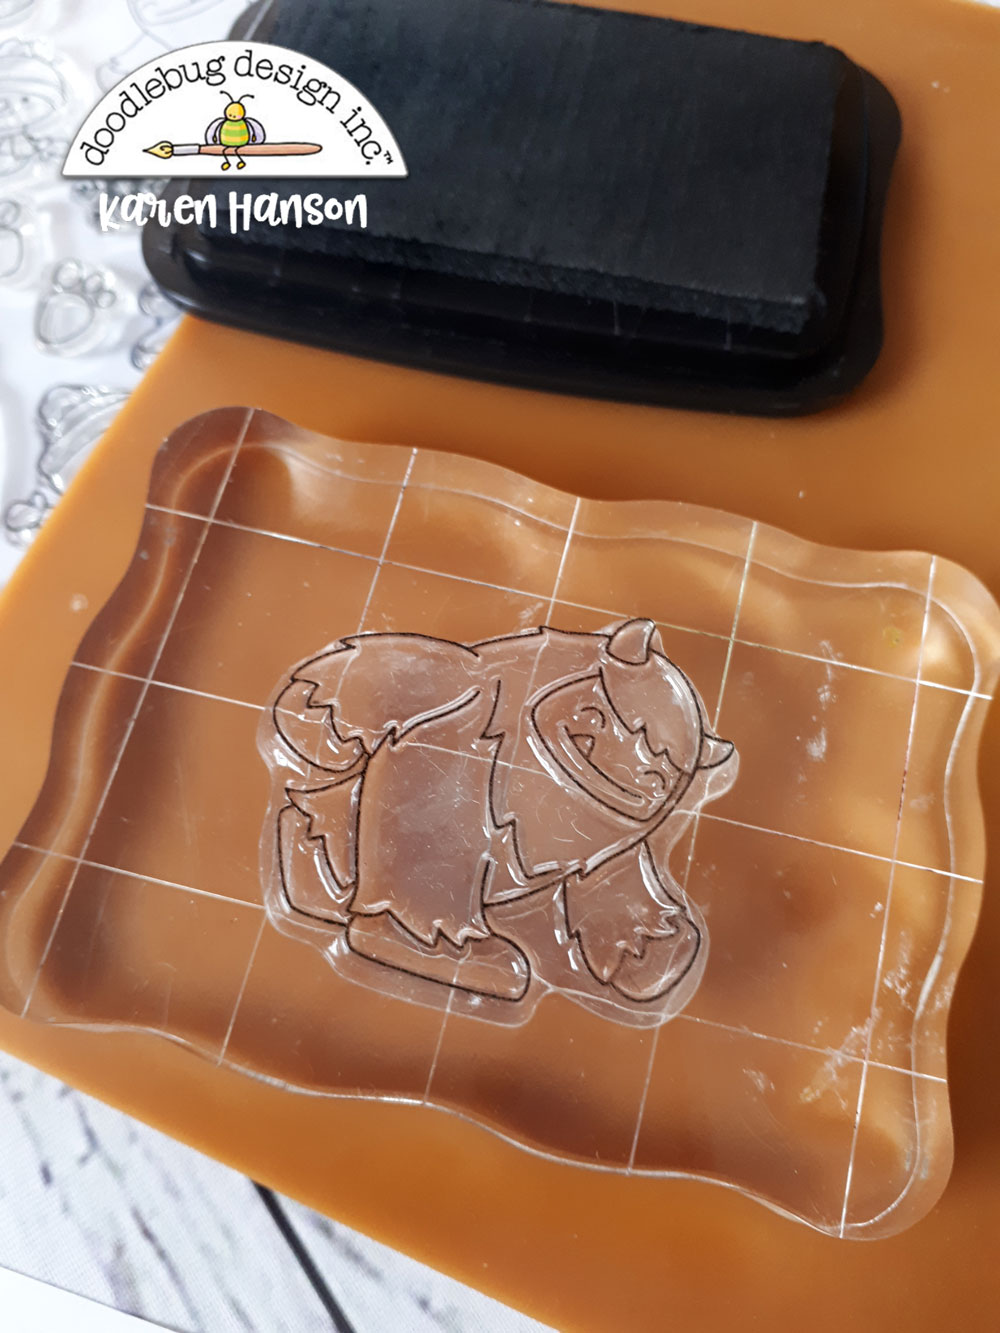
Ink up your stamp just as you would normally do.
Instead of stamping onto your paper, stamp the image onto your silicone mat. One of the reasons I like the silicone mat is that it is a bit tacky, so your stamp doesn't slide around creating a "fuzzy" image. When you are first trying out this technique, you may have to stamp it a few times before you get a crisp stamp you are happy with. Don;t rush - take your time and simply wipe of the mat if you are not happy with the quality of the stamp.
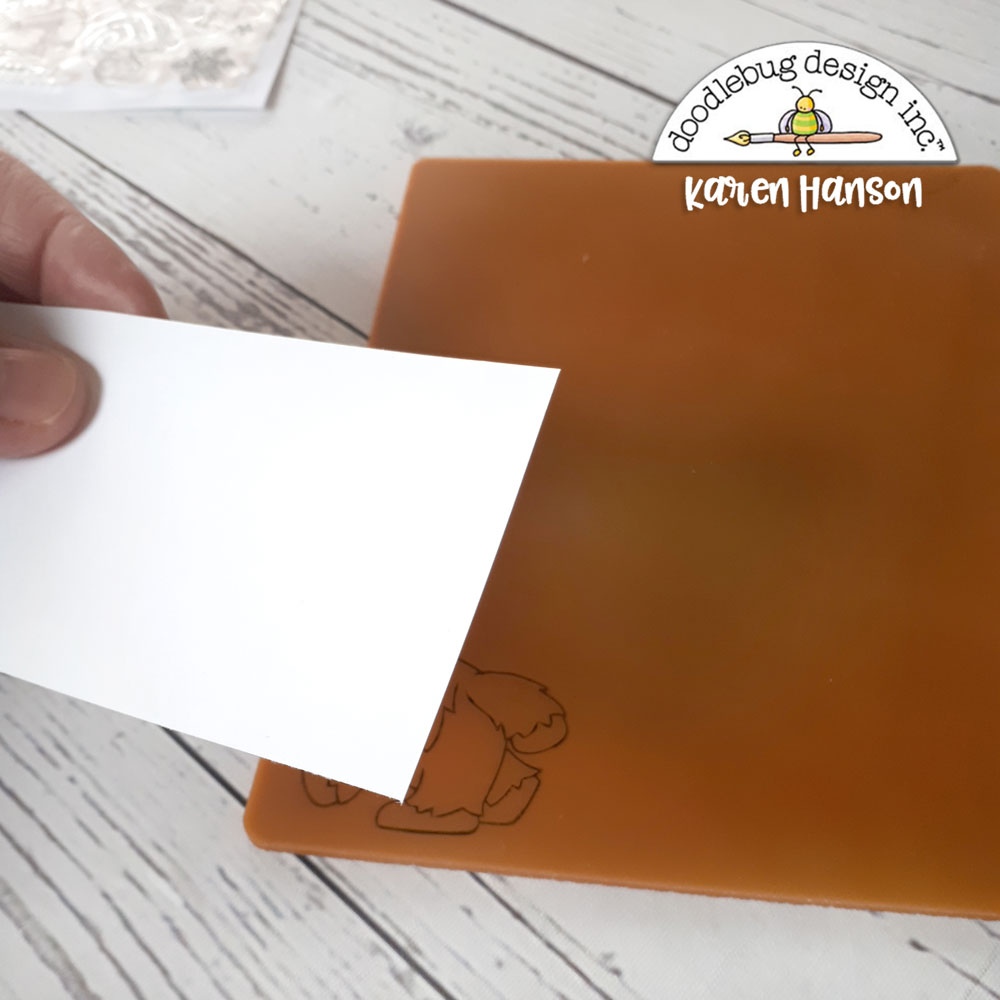
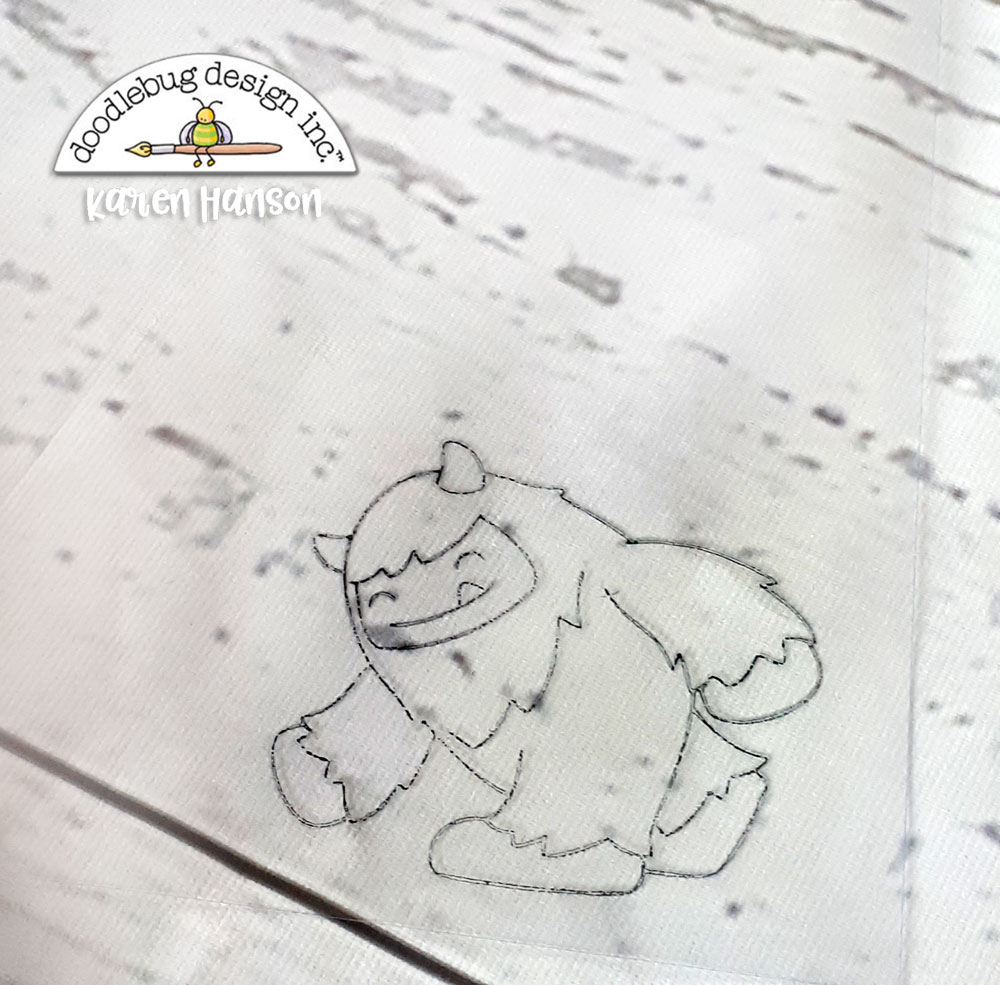
Now take the piece of paper you are stamping onto and place it over the stamped image. Be sure not to move the paper and place it straight down onto the mat, securing with a strong grip. Again, the "tackiness" of the mat will help keep the paper in place. Note: I highly recommend putting the paper to the mat rather than trying to place the mat down onto the paper to stamp. It is difficult to get the mat down without moving it, resulting in a blurry image. Placing the paper down onto the stamp always works better for me!
Hold the paper down onto the mat and run your fingers gently over top in a circular motion, transferring the ink from the mat to the paper.
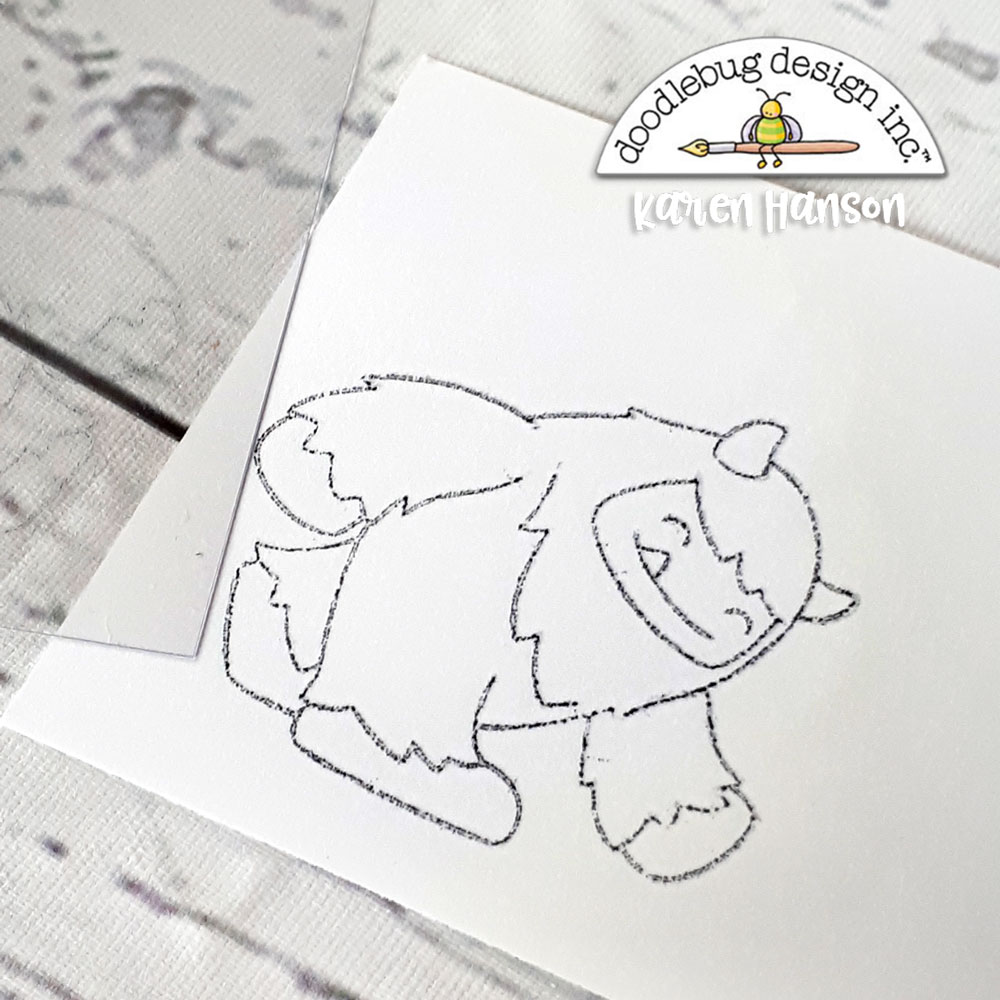
Carefully lift off the paper, and you will have your reversed design! Don't worry if you don't get a great image the first time. It sometimes takes a couple of tries!
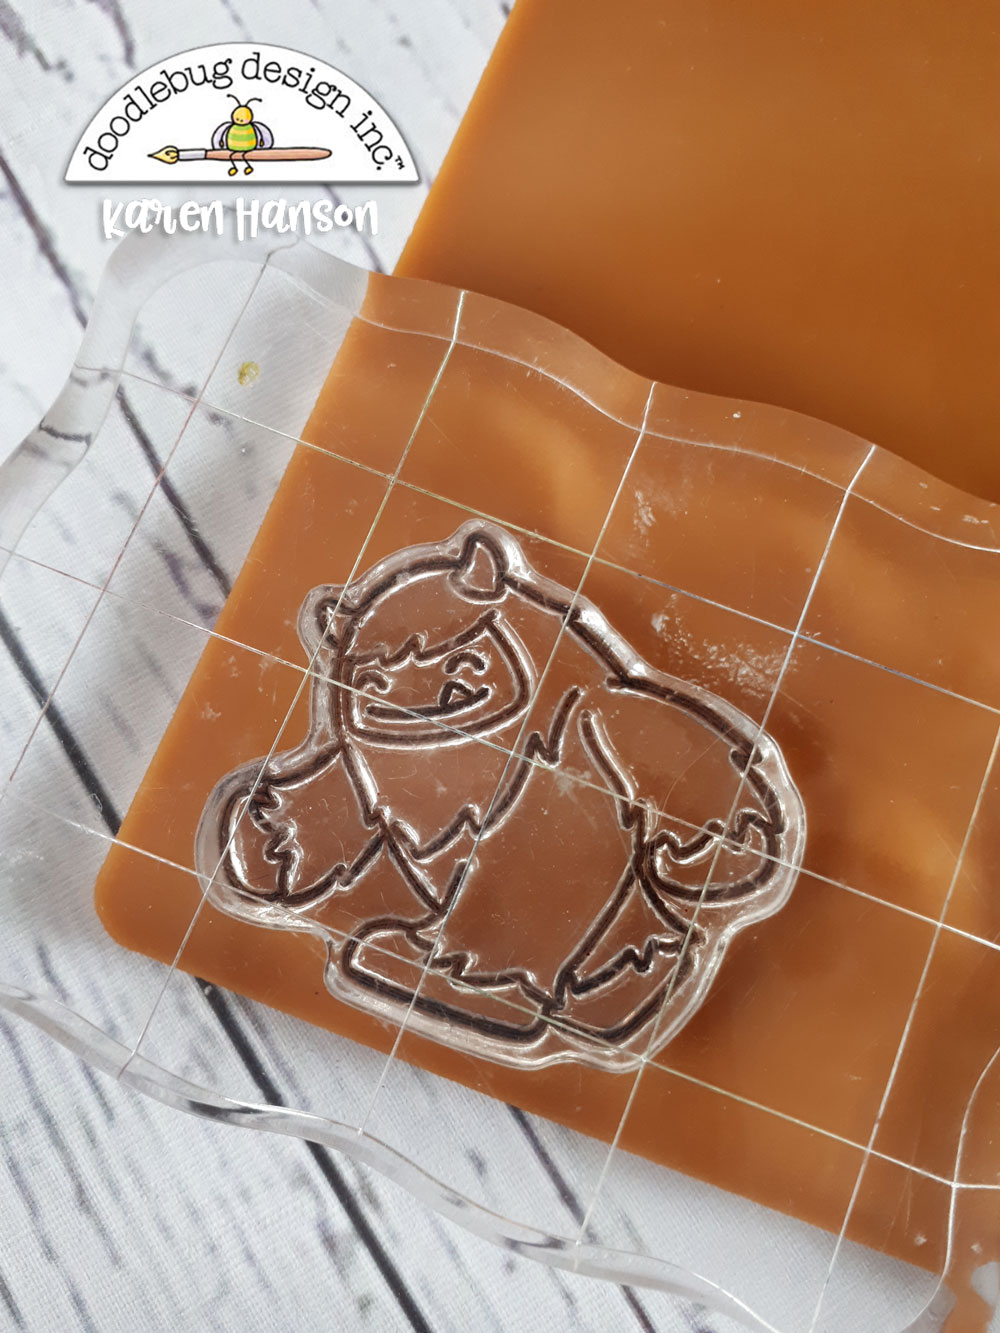
To create the mirrored image, simply ink up the stamp again and place it down facing the reversed image.
 
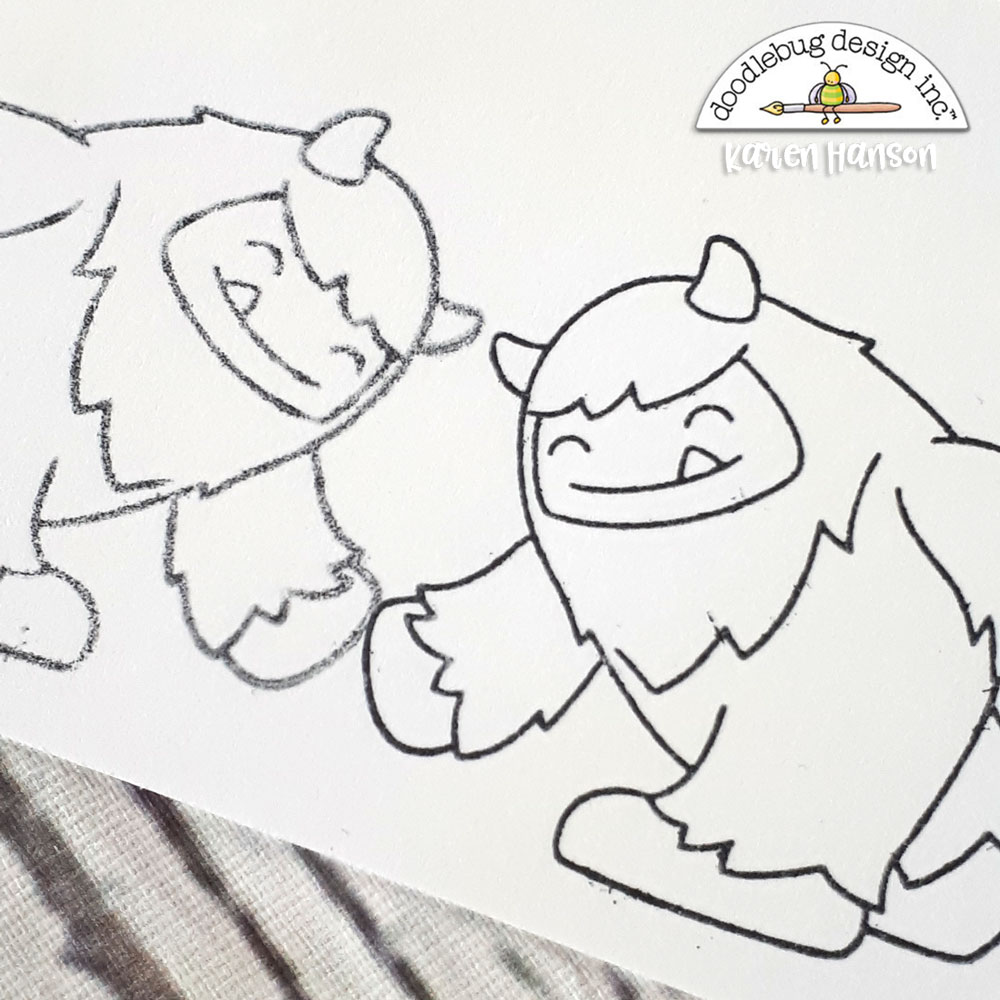
Note: You will notice that the reversed stamp is never as crisp and clean as the stamp created the regular way. But hang in with me and I will show you that in the end, it won't matter at all!
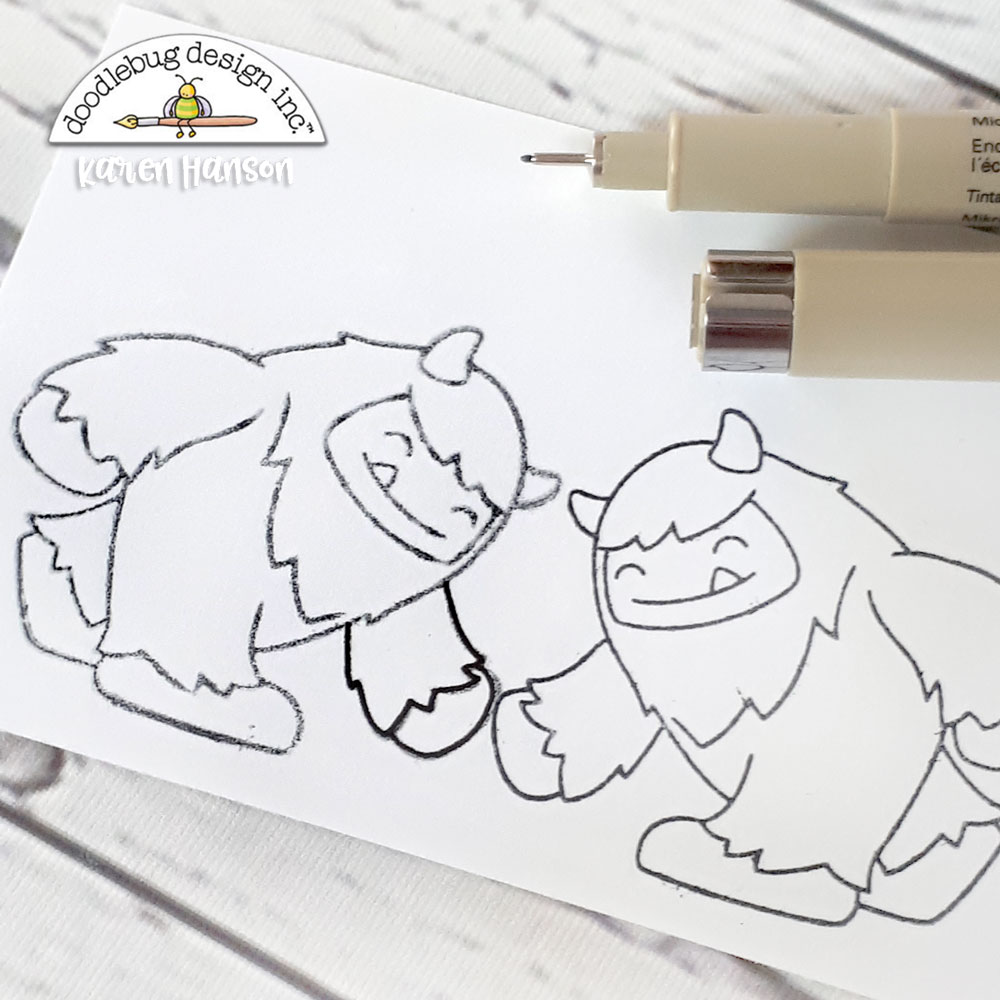
One of the tricks that I have (and I actually use this trick all the time when stamping the regular way in situations where I don't get the perfect press), is simply to go over the reverse stamped image with an ultra thin black pen. This cleans up the line and will actually create a nice bold line. And while this line will appear darker than the other stamped image at first...
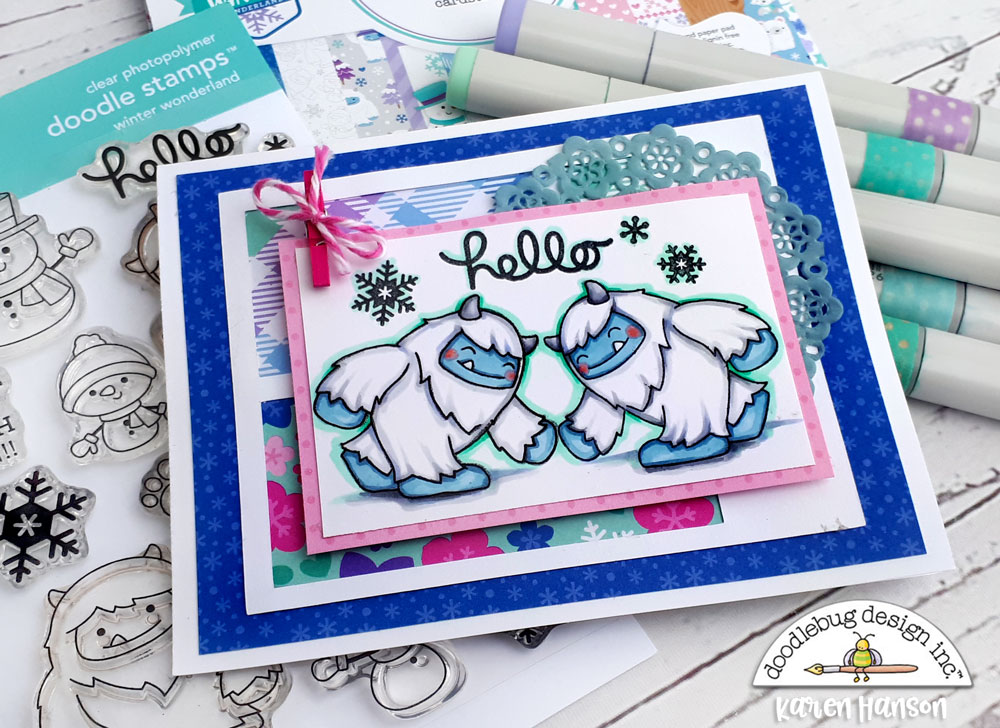
...by the time you colour them in and add some shading, you will not be able to tell the difference at all! I promise - no camera tricks here. This is the same image I stamped in the tutorial pictures!
Now, let's say you don't happen to have a silicone mat to work with. Don't worry- you can still create this effect. In fact, you can find the perfect tool right on the back of your Doodlebug stamps - a clear acetate sheet! Simply pull one off of your stamps and you are ready to go.
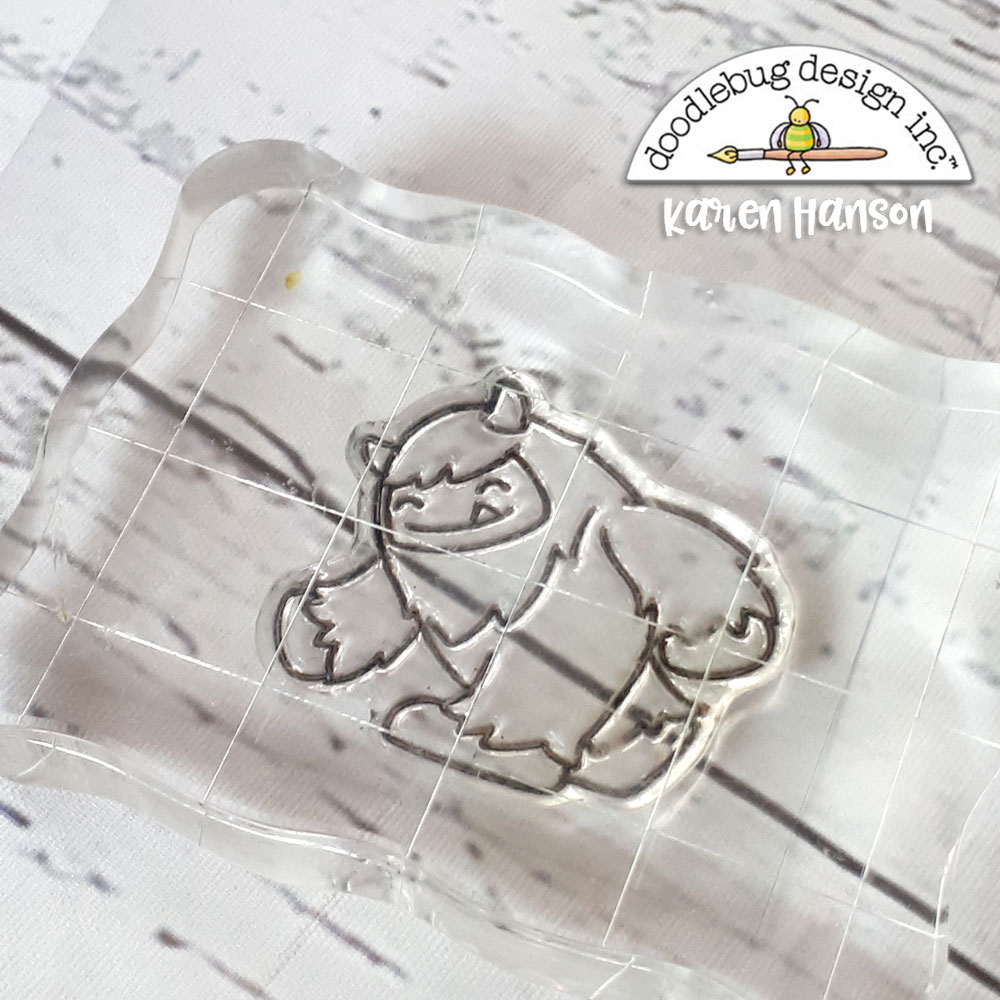
The technique is exactly the same as it is on the silicone mat, except that you are stamping onto the acetate sheet.
Now you will notice that the ink is a bit more "splotchy" on the acetate than it was on the silicone. I also find that it is more slippery, so you have to be extra careful when placing your paper down onto the acetate.
But in the end, you can get a great transfer this way too, and with a little pen work, the image will be perfect!
 
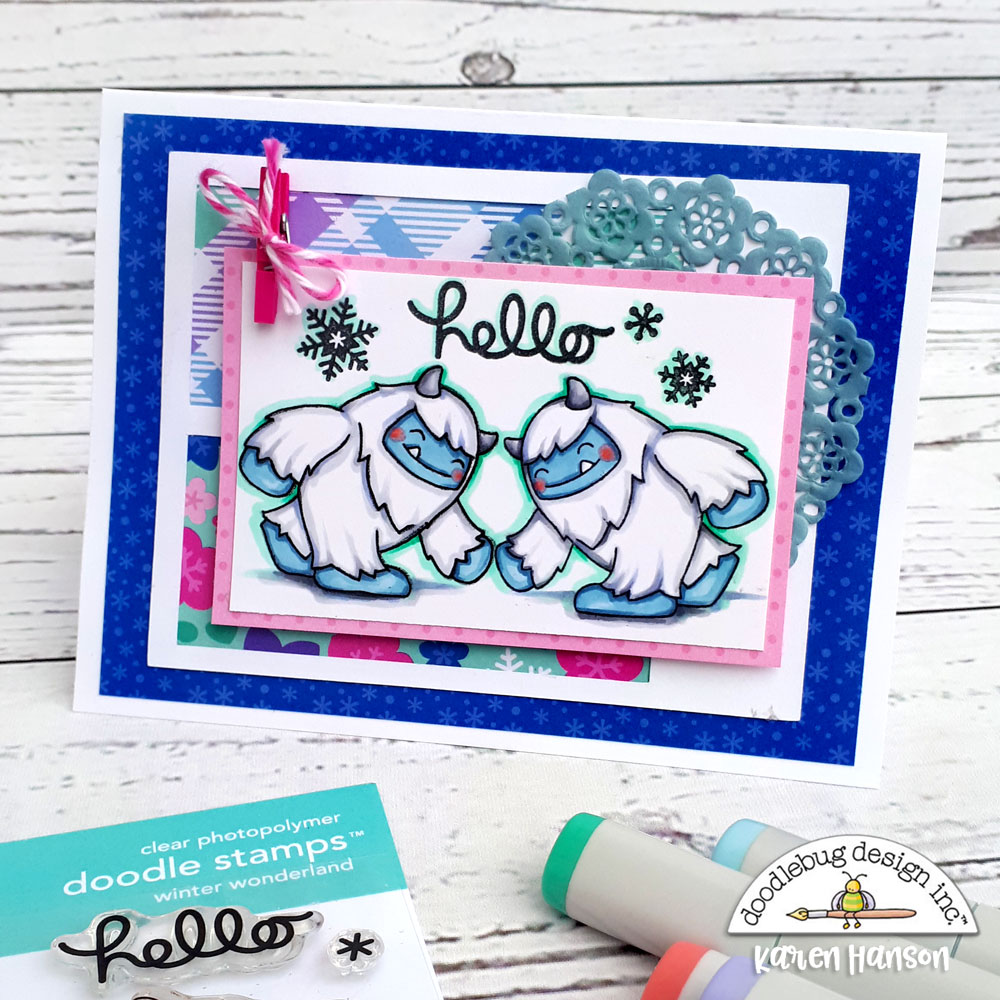
So there you have it - you can have twice as much fun with your Doodlebug stamps! And let's be honest, the only thing better than one adorable yeti is two!
Thanks for stopping by!
Hugs,
Doodlebug Design Product:
Winter Wonderland Collection
Winter Wonderland Stamps
Mini Clothespins
DoodleTwine
Mini Doilies
Other Products:
Silicone mat
 Alcohol markers
 Ink
 White Cardstock

Saturday, November 2, 2019

CHRISTMAS MAGIC - LET THE CARD MAKING BEGIN! | with Karen

Every year, I make a bunch of Christmas cards for my card stash. It's partly because I love the Christmas season, but also because I just never know when I need to pull a card out at the last minute. So, it does mean that Christmas crafting starts early in my house - probably earlier than some might like. But when Doodlebug launches amazing new goodies like the adorable "Christmas magic" collection, you don't have to tell me twice! Bring on the Christmas card crafting!
And this year, it's more fun for me than ever because this is the first Christmas that Doodlebug has added their line of stamps. And the cuties that coordinate with this new collection will not disappoint!
Sweet Santa holding a tiny little candy cane and a beautiful textured Christmas tree are two of my favourites. Coloured up with alcohol markers, they are a darling focal point for this A2 sized card.
 And the papers in this collection - oh, the papers!!! Fun, playful colours together with some expected and not so expected patterns will have you smiling the whole time you are crafting! There are a hundred ways to style these cute little stamps - every card will be a unique work of art.
So, I have one card down and about 50 to go to get me through the season. And I can't wait to use Christmas Magic for every single one of them!
Thanks for stopping by!
Hugs,

Doodlebug Products Used:
Christmas Magic Christmas Magic Doodle Stamps Christmas Magic Doodlecuts Petite Prints
Other products:
Alcohol Markers Adhesive White cardstock
Ribbon

Thursday, October 24, 2019

CANDY CARNIVAL 'HELLO' CARD | with Karen

Halloween is just around the corner and if you haven't been inspired this month by all the darling Doodlebug creations with the new Candy Carnival collection, the only reason might be that you are not a fan of Halloween. And I get it - this holiday wasn't always one of my favourites! But fear not - today I wanted to showcase a little card that uses all the fun from the Candy Carnival collection without featuring the October 31st part!
For this particular card, I decided to use some of the fun candy-themed stamps from the Trick or Treat collection. Coloured up with alcohol markers and then placed on top a simple "hello" sentiment, it's a card that can be sent as a simple hello for the fall season or even a "thanks for being sweet" card!
And while the little Candy Corns might have you thinking "Halloween"...
...all the other sweet treats are as innocent as can be! I mean, look at that face! Add some fun star shaped Sprinkle and you are all set!
This collection, while perfect for Halloween, is also perfect for all sorts of occasions! Fall fair layouts or even fall birthday cards would be a perfect fit! So even if Halloween crafting isn't part of your repertoire, this collection really does have something for everyone. I know you will love it as much as I do!
Thanks for stopping by!
Hugs,

Doodlebug Products Used:
Candy Carnival
Trick or Treat Doodle Stamps
 Trick or Treat Doodlecuts
Other products: Alcohol Markers Adhesive White cardstock
Ribbon

Wednesday, October 9, 2019

CANDY CARNIVAL BOO CARD | with Karen

I am in love with Candy Carnival! And it is not just because it gives me an excuse to have small chocolate candies around the house all the time. I mean, don't get me wrong, Halloween collection crafting is the perfect cover story for boxes of Halloween candy bought far before it is "needed", but even without the candy, this collection is SWEET!
Case in point - this cute little Halloween card that is all sorts of sweetness even without a candy insight! I created this really simple A2 sized design with some of the 6x6 paper from the Candy Carnival collection, an awesome starburst section from the 12x12 paper, the Happy Halloween stamps and some darling shape Sprinkles.
I used alcohol markers to colour up the stamps that happen to feature a whole number of images perfect for this size of card! Small enough to be able to show off all the cute papers, and big enough to create a focal point, this little set of characters are simply too cute to spook!
And if you need just a bit of texture, nothing hits the sweet spot like a beautiful, shiny, Doodlebug Sprinkle. The Halloween Night starts are about as perfect as can be.
While Halloween may not be complete without some chocolate goodness, I would argue that this collection brings all the sweetness needed and more!
Thanks for stopping by!
Hugs,

Doodlebug Products Used:
Candy Carnival
Happy Halloween Doodle Stamps
Happy Halloween Doodlecuts

Other Products:
Alcohol Markers
 Adhesive White Cardstock
Ribbon

Friday, September 27, 2019

CANDY CARNIVAL STAMPING FUN | with Karen

I was not always a fan of Halloween. I mean, little chocolate treats aside, the creepy side of Halloween always left me feeling...well...creepy! That is until I was introduced to Doodlebug's version of Halloween a few years ago! And now, dare I say, it is one of my favourite times of the year to craft! Bring on the cute ghouls and darling pumpkins! I am ready for some Halloween fun!
And Doodlebug's new collection, called Candy Carnival certainly delivers. It doesn't get any cuter than the little pumpkins, sweet treats and adorable creatures like little Sir Fatty Batty! First up on the crafty table was a little card I created using the Happy Halloween Doodlestamp set.
I first stamped out the little pumpkin and the vampire and then masked them out to place the adorable castle into the scene. Sir Fatty Batty, the stars and the sentiment all then made their way onto the page and I was ready to colour it up.
And can we talk about the embellishments in this collection. Always a fan of a Doodlebug Sprinkle, I may have squealed a bit when I first laid eyes on these candy themed ones!
You don't have to be a fan of Halloween to be jumping at the chance to craft with this collection! In fact, this collection will have you wishing that Halloween came around more often. As for me, I am off to embrace my "cute spook" self and have more fun with this collection. I can't wait to share more projects with you.
Thanks for stopping by! Hugs,
Doodlebug Products used:
Candy Carnival Happy Halloween Doodlestamps
 Petite Prints
  Other products:
Alcohol Markers
Adhesive
White cardstock
Pin It button on image hover