
 Being able to play with stamps from Doodlebug has made this year's card creations a breeze (I cannot tell you enough how much I love Doodlebug stamps)! Not only can you mix and match between the many stamps in the coordinating sets from Christmas Magic, you can also use a bit of stamping "magic" to create some unique scenes! Want to know how - I've got you covered with a little tutorial below!
Simply start by grabbing your Doodle Stamps, your favourite stamping tools and a stack of sticky notes. There are all sorts of great stamping tools that can make this process a bit easier, but these basic supplies will do the trick, especially when you are just starting out.

Your first task is to create your masks. Masking is simply a process of overlapping stamped images so some appear to be in front of others. For my image, I wanted the little elves to be in the foreground of my image, with a little present behind them and a tree in the background. Think of it like three layers. You will need masks for any stamps that are going to be in the foreground or middle ground. For my image, this meant I needed masks for the little elves and the present. To create the masks, simply take a sticky note and stamp your image onto the end of the note that has the glue. This will create a little removable stamp you can place down and remove as needed. Don;t worry about fitting the whole stamp on the sticky portion - as long as it has some glue on the back, your mask will work. Fussy cut around the image with a good pair of scissors and you are all done creating your mask. Note: I also use removable labels to create my masks. You can buy these at any office supply store. They work a little bit better than a sticky notes because the glue covers the whole mask. But to be totally honest, sticky notes work great too!
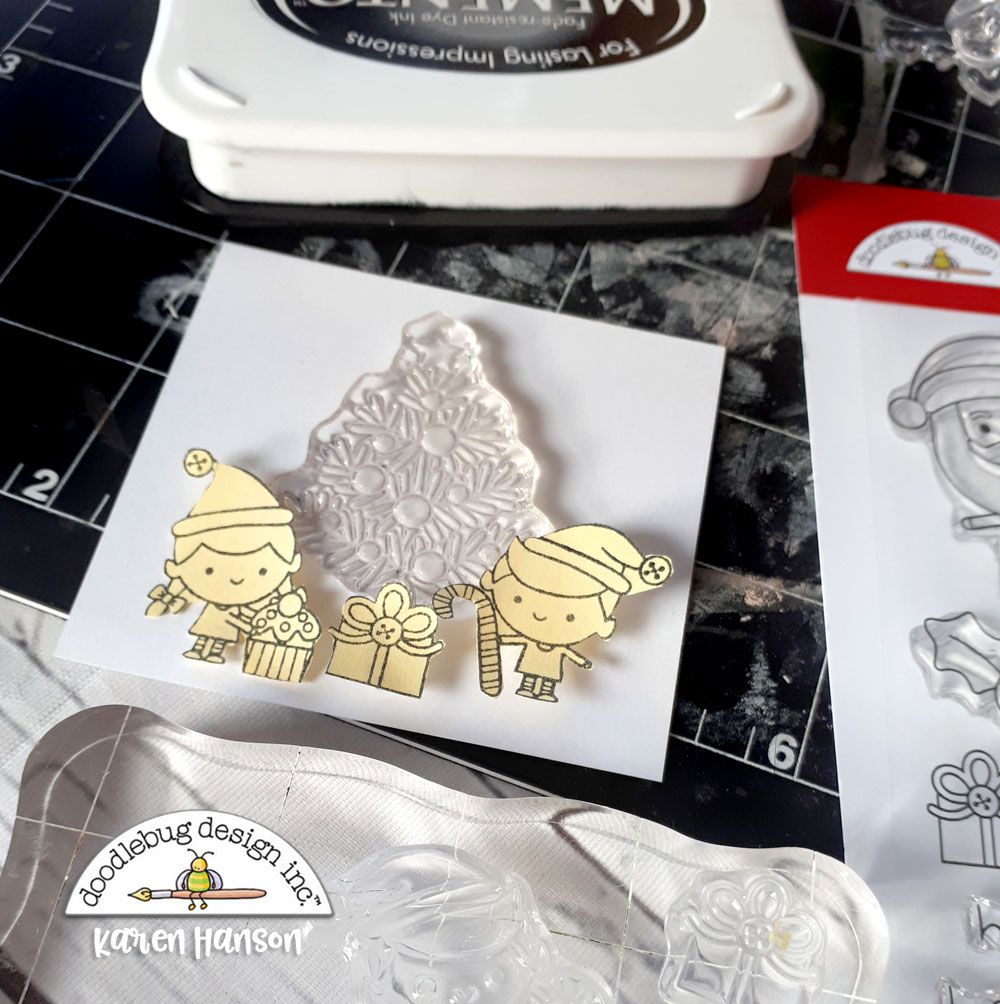
Once you have your masks cut out, simply place them down on your paper, deciding where you would like each image to go. Since I didn't need a mask for my tree, I just used the stamp itself to help with placement. Just make sure it is clean!

Now its time to start stamping. You will start by stamping the images in the foreground (front) first and will work backwards. I stamped the little boy elf first, leaving the girl elf mask in pace so I could be sure they were spaced properly.

Then I lifted up the mask for the girl elf and stamped the image. My foreground was now complete.

It was time to cover up those stamped images with the masks so I could continue to work backwards in my design.

The little present was the image I wanted in the mid-ground. Moving it slightly up to make it look like it was further back, I stamped it down in the middle right over top of the masks for the elves. It's a little hard to see in the picture, but the lines for part of the present are now stamped on top of the boy elf's candy cane. Once I lift the mask, that line will be gone and it will appear to go behind the candy cane. But don't lift those masks yet - there's more stamping to go!
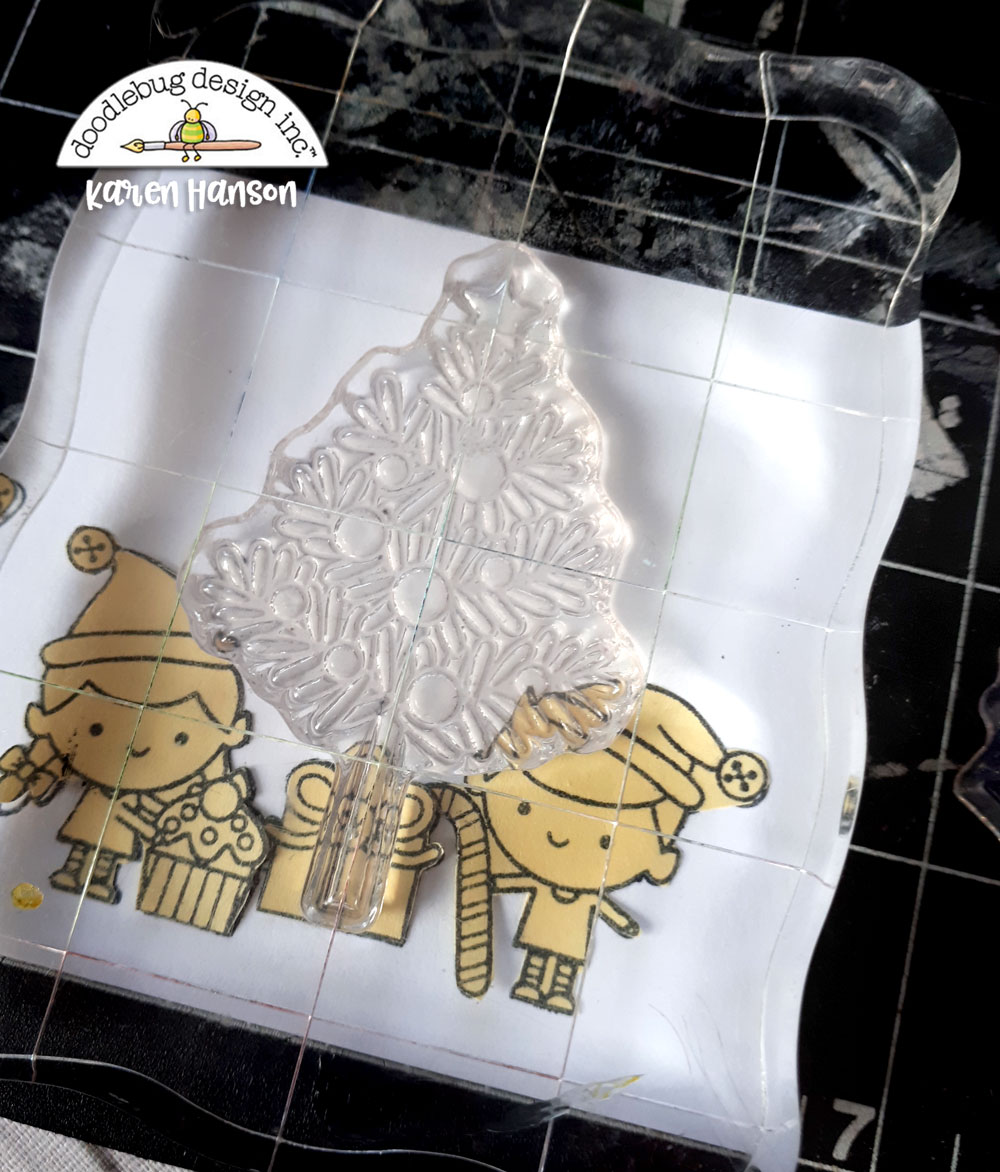
Now that the present was also stamped, I covered it with the mask that matched. It was time to stamp the tree. To show you what is happening, I actually took this picture before I inked up the tree. You can see that when I do stamp it, the lines will go over top of the present and elf masks.
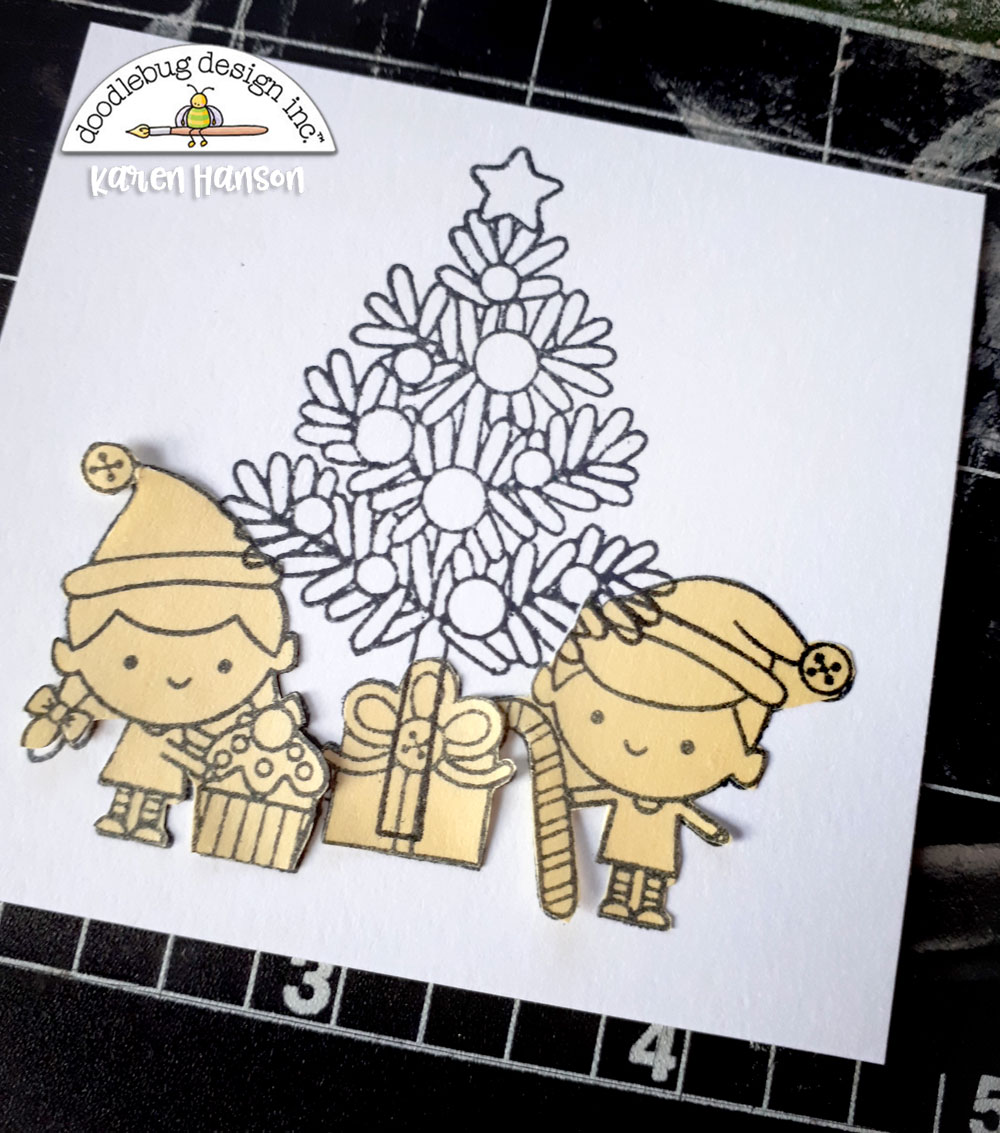
Voila - you can see how the tree is actually stamped on top of all of the other stamps, but when you remove the masks...

...it looks like it is behind them! Christmas magic indeed!

From there, grab your favourite colouring tools and have fun finishing off your little scene (and yes, that is snow - real snow - in my picture! Not even a snow storm can get in the way of a crafter)!

Oh, and for my favourite tip - make sure you hang on to your masks! I simply flip over my stamp packaging and place them on the back. That way, any time I want to do some more masking, I can skip some of the steps and get right into stamping!
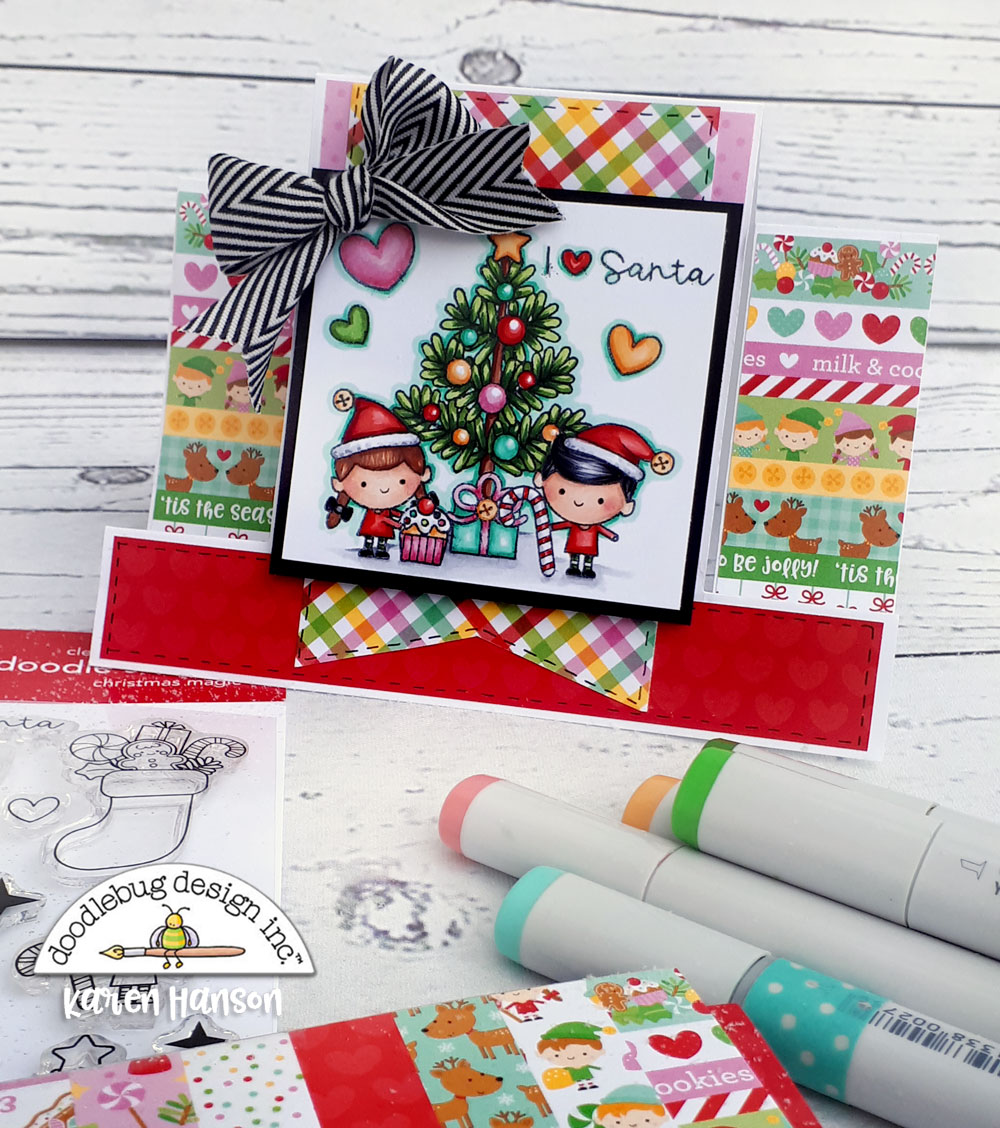
So there you have it! With a little bit of "magic" you can create all sorts of fun scenes with your Doodle Stamps. Oh, but fair warning...it's a bit addictive once you get started!
Thanks for stopping by and let me know if you have any questions about the tutorial in the comments below!


Fabulous tutorial!! Love this sweet little scene!
ReplyDeleteThanks Kathy!
DeletePerfect tutorial
ReplyDeleteOh, I am so glad it is helpful!
DeleteThanks for the great information.
ReplyDeleteBeautiful! Love the paper!
ReplyDeleteHave a great day!
Marilyn❤
Thank you Karen!! I love the Doodlebug stamps and am always looking for inspiration for using them! I love masking and this card is amazing!
ReplyDelete