
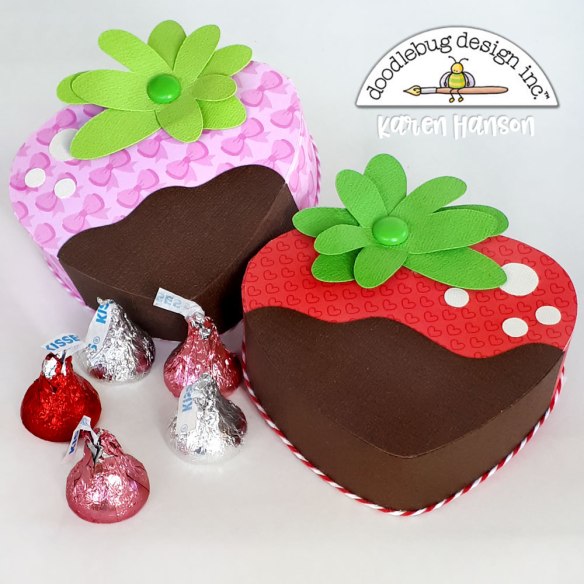
 Originally, I was planning on making one of the classic heart shaped boxes filled with chocolates for Valentine's day, but when I saw the strawberry cut file, I wondered if I could figure out how to use the file to create a box. It was really easy, and I get to show you how!
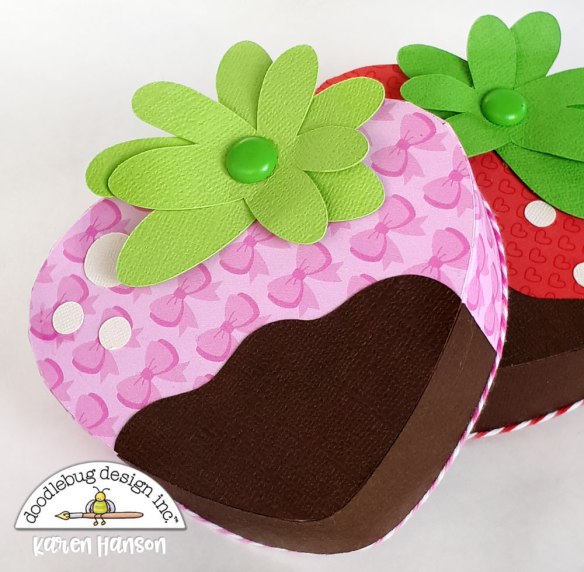 With a bit of darling patterned paper from the French Kiss collection and some textured cardstock, you will have your box together in no time.
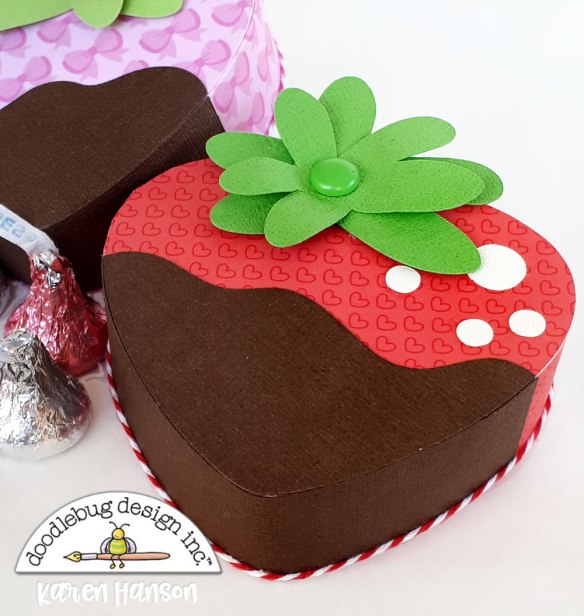
Add a chunky brad and some Doodle Twine for embellishments and you will be all set. Here's how easy it really is:
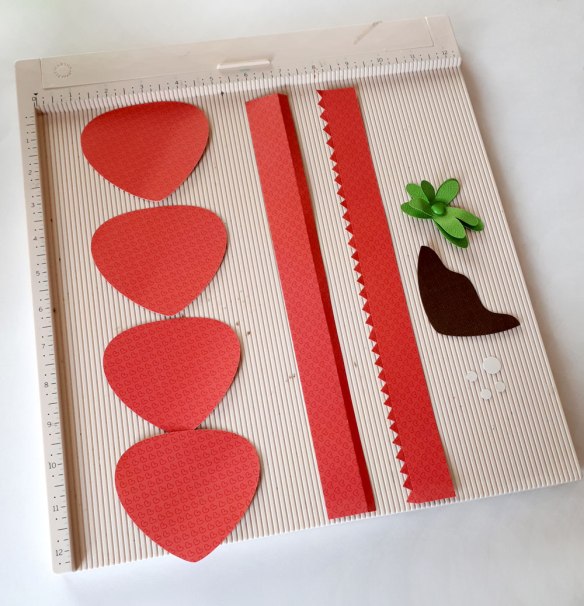
- To create this box, download the Strawberries cut file. In your design software, resize the strawberry to 3.5" wide (keep your aspect ratio locked so the height automatically adjusts).
- Duplicate the base of the strawberry shape so you now have two red pieces that are 3.5" wide. You will use these two pieces for the top of your box.
- (Optional) At this point, I also duplicated the green piece so I could layer two pieces and get more dimension. This is for aesthetics only and will not change your ability to create a box if your choose not to do this step.
- Duplicate the red strawberry shape 2 more times. Resize each of these new shapes to 3.3" wide. These will form the bottom of your box. Please note - I actually found the bottom of my box could have been a bit larger to get a tighter fit on the top and bottom of the box. You may want to try resizing it to 3.4" instead.
- Cut your shapes with your cutting machine.
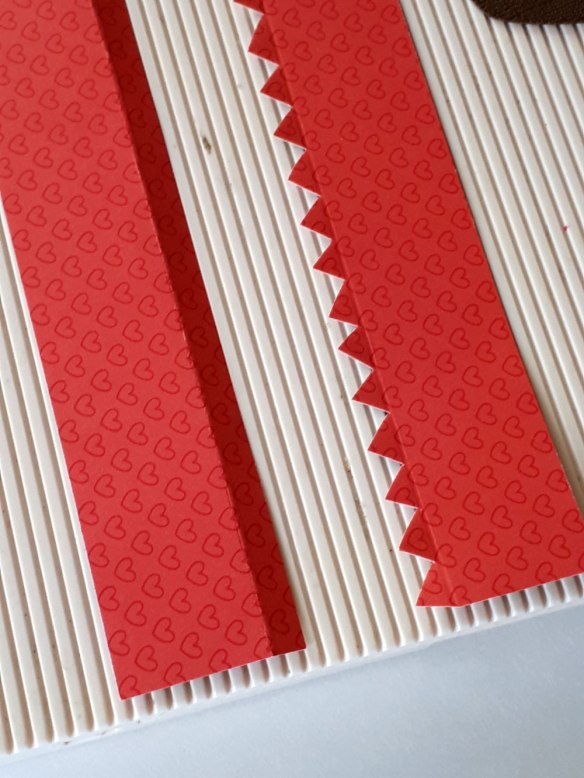
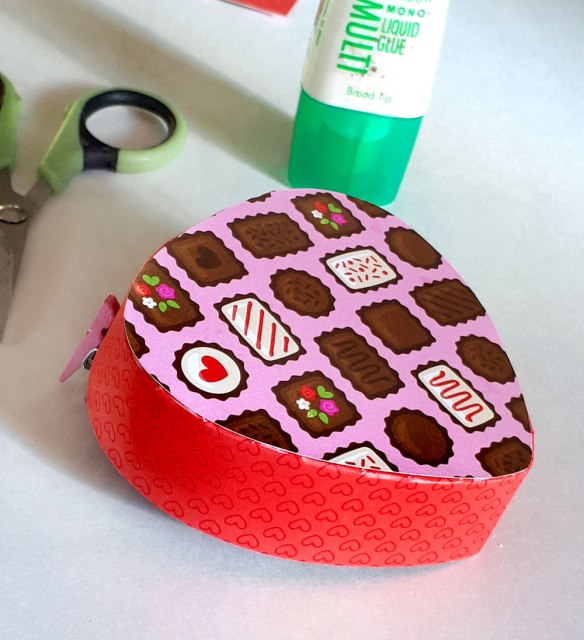
6. Using a paper trimmer, cut two strips of red paper at 1.25"X 12". Score at the 1/4" mark on the long edge of your paper. Please note: if you are working with directional paper like I was, you will want to score opposite sides of each strip of paper so you can use one strip for the top of your box and one for the bottom. 7. Use some scissors to cut triangular shapes all the way along the edge of both strips of paper.
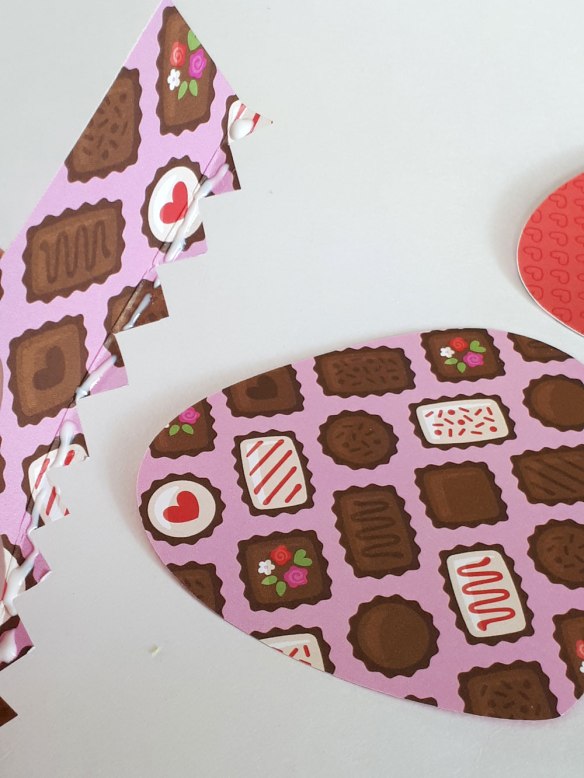
8. To create the bottom of your box, take one of the 3.3" shapes and place it down on your work space. Place glue along your triangular pieces. I used a quick drying glue and would recommend doing so.
9. Starting on the top edge of your strawberry shape, place the triangular pieces underneath the shape, making sure the score line sits right up against the strawberry shape as you work your way around. Spent a bit of extra time around curves making sure your side panel is sticking before moving on. This is why a quick dry glue helps with this project.
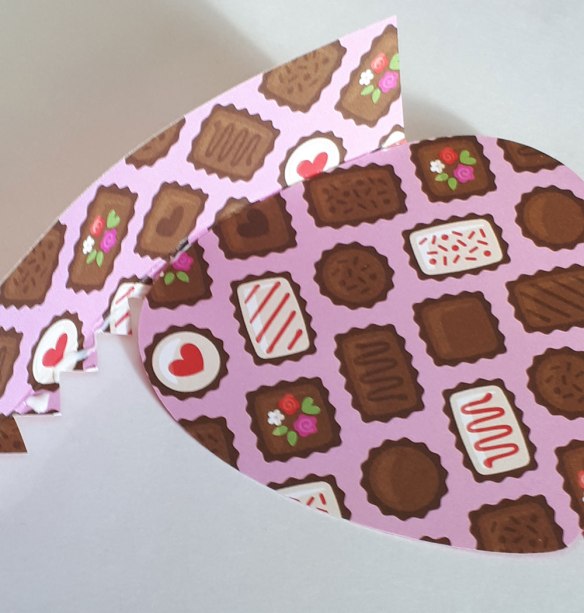
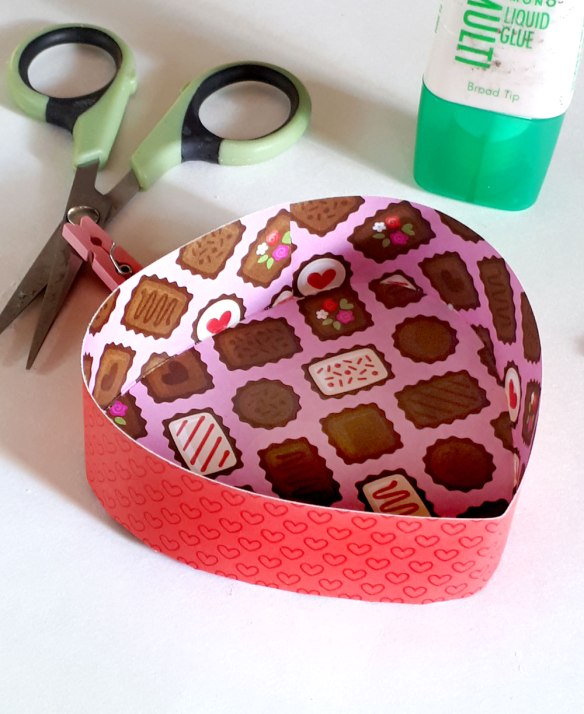
10. Continue working all around the shape making sure to stay tight up against the strawberry shape.

11. Once you get all the way around, you will have an overlap. Add some adhesive to the overlapping strip and glue in place.

12. Even with quick dry glue, I clipped the overlapping section with some clothes pins and let the box dry for about 5 minutes.

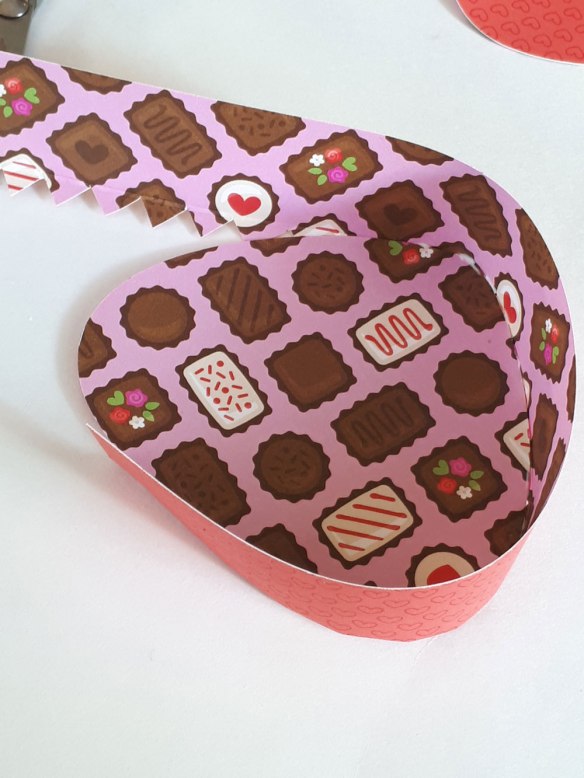
13. Flip over your box base and place glue all over the bottom. You will now hide the seam you created with the second strawberry shape that also measures 3.3".
I actually decided to have the backside of the paper showing on the bottom because it was just so cute! You can place it with the red side up if you want more of a uniform look.
14. Take off the clips, and the bottom of your box is complete.
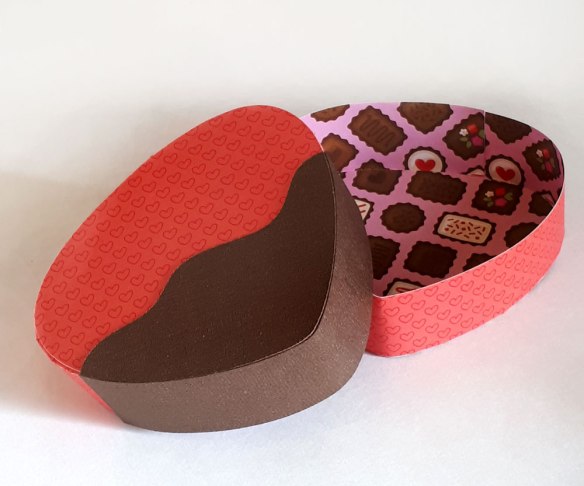
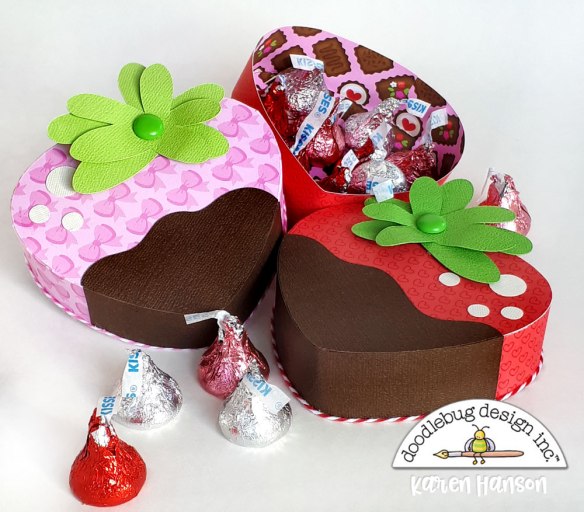
15. Repeat these steps with your 2 - 3.5" strawberry shapes and your other 1.25"x12" strip to create the top of your box. 16. Embellish the top with the cute file circles, chocolate piece and stem. Please note: If you would like the chocolate to look like it is coming down the side of your box, cut a strip of textured cardstock at 1.25" wide and at least 5" long. Once you have placed the chocolate on the top, run the strip of cardstock along the side of your box with some adhesive. trim when you get to the other side of the chocolate piece on top.

And there you have it! It seems like a lot of steps, but it really is an easy project! I also decided to run a little Doodle Twine along the bottom for a whimsical embellishment at the last minute. These cute boxes, while perfect for Valentine's day, would work any time of the year! In fact, I wish I was getting married because these would be adorable favour boxes!
Thanks for stopping by and make sure to post some pictures if you give these a try!

Doodlebug Supply List:
6276: french kiss 12x12 paper pack
3409: chocolate chip textured cardstock
3386: citrus textured cardstock
3388: grasshopper textured cardstock
2463: Happy Holidays Chunky Brads
2987: Doodle Twine - Bubblegum
2988: Doodle Twine - Ladybug
Strawberry Cut File (Lori Whitlock)
Other:
adhesive


These little boxes are so sweet!!! Great tutorial!!!
ReplyDeleteThanks Kathy! I hope it give some readers the confidence to try it!
DeleteWhat a sweet project!
ReplyDelete