Showing posts with label treat bags. Show all posts

Wednesday, November 27, 2024

FARMHOUSE TREAT BAGS WITH BEE HAPPY TAGS | with Miguel

Making small gifts each season is something I really enjoy and even more so if they are done with beautiful Doodlebug collections. Today I made these little bags filled with pumpkin-flavored sweets to share using the Farmhouse collection and the fun Bee Happy Doodle Cuts!


I decorated each bag with tags I made using the Bee Happy Doodle Cuts.  I filled them with Bumblebee Shaker Balls, and I love the results!


I added some Odds & Ends and Chit Chat to my tags to decorate some more!


I tied my tags with different shades of Doodle Twine, which coordinated perfectly with the colors of the Farmhouse collection.


Thank you! for stopping by here, I say goodbye but not before inviting you to continue creating!

DOODLEBUG PRODUCTS USED

Farmhouse Collection
Bee Happy Doodle Cuts
Doodlebug Shakers
Doodle Twine

Tuesday, October 8, 2024

HEY PUMPKIN MINI TREAT BAGS | with Karen

You know what I love about Halloween? Mini chocolate candy treats! And while the yummy chocolate is definitely a part of the love, it is actually the size I love even more. Because who doesn't love something in miniature?   

Treat-bag-all-three-2

So I decided to use my project this week to create some adorable mini treat bags to fill with miniature goodies! Created with the 12x12 patterned paper simply cut to 7"x6" and scored with a 1" bottom and sides, this little treat bag is as cute as can be!

Closeup-2

And here's the great thing! While the Odds and Ends pack is filled with a variety of adorable of die cut shapes and characters, there are a bunch that are small enough to fit on this treat bags. I picked a few for each bag and just layered them a bit, overhanging the edges to add a bit more interest.

Closeup-1

I then topped each one off with a sentiment for the Chit Chat pack, using some foam adhesive for dimension. I then filled up each one, pinched the sides about 3/4s of the way up and used some ribbon from my stash to tie them up. We wouldn't want any of the treats to escape now, would we?!

Treat-bag-all-three

And that was it! These little containers are going to make a cute addition to a larger treat bag, but could also be used as a place setting or little appreciate gift. They may be mini, but their mini-ness makes them monstrously cute! Thanks for stopping by! Hugs,


BLOG | INSTAGRAM

DOODLEBUG PRODUCTS USED

Hey Pumpkin collection

OTHER

Adhesive
Ribbon

Tuesday, April 4, 2023

DOODLE POPS & PUFFY STICKERS EASTER TREAT BAGS | with Karen

Given that it is almost Easter, it is almost time for a little bunny to be hopping through my house. So it seems appropriate that I spent some time with the "pops" at my crafty table - you know "hops"..."pops"...okay, I know it was a stretch. But you know what isn't a stretch - that Doodlebug Doodle Pops are really one of the best product out there. They make even the simplest project - well, adorable!

All-3-1

Take for example these simple little treat bags that I created from my crafty stash. I went way back in time to the Easter Parade collection to make some cute containers for chocolate that can sit on my Easter table.

All-3-2

But the real "ace up my sleeve" were the Doodle Pops that I may or may not have been collecting over the last few years!

Closeup-1

Look, don't judge! Doodle Pops are the best. I mean, check out the Easter Basket featured on this treat container. The detail is amazing. I even embellished it a bit more with another small carrot Doodle Pop from Mr. Bunny, and a puffy icon sticker from the Over the Rainbow collection. Yes. that's right - a Doodle Pop on a Doodle Pop!

Closeup-2

Oh, and here a little tip for you: don't be afraid to fold the top layers of the Doodle Pops up a bit when you have them in place on your project. For Little Lamb, I actually pulled up a bit on his ears and legs to add a bit more dimension (don't worry - no animals were injured in pursuit of this project). I did the same on the Easter Basket bow. it adds just a bit of extra shape to the Doodle Pop and the material it is made out of is strong enough to bend and hold the shape!

All-3-3

And because I love a little bow and Doodlebug's mini paper clips, I decided to embellish the side a bit too. These simple little containers may just steal the show on Easter! in fact, I may even search through the collection to make even more...maybe! :) Thanks for stopping by! Hugs,


BLOG | INSTAGRAM

DOODLEBUG PRODUCTS USED

Easter Parade 12x12 paper
Over the Rainbow puffy icons
Doodle Pops - Easter Basket, Little Lamb, Mr. Bunny
Mini paper clips

OTHER

Cardstock
Adhesive
Ribbon

Sunday, April 21, 2019

HOPPY EASTER | Treat Holders with Tya

Hello everyone and Happy Easter! Today I wanted to share with you some quick and easy Easter treat holders you can whip up in a matter of minutes! Today can be a busy day full of egg hunts, family dinners, and other fun festivities. If you want a quick and easy way to add some Doodlebug cuteness to some treats -I've got 3 treat holders you can whip up lickety-split!
The first treat holder looks harder than it really is - just a few scored lines and some folding and you have a fun container that can hold oodles of treats! Here is the link to the tutorial used to make this holder:  
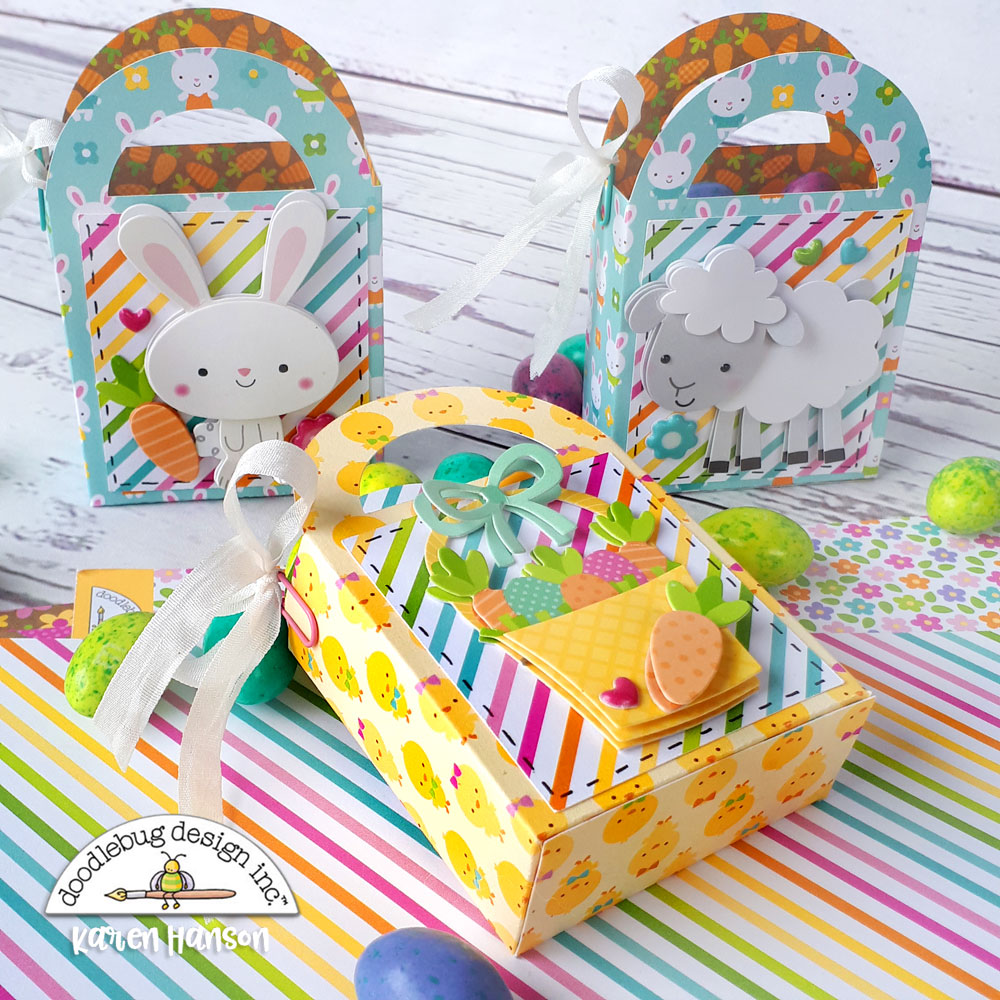
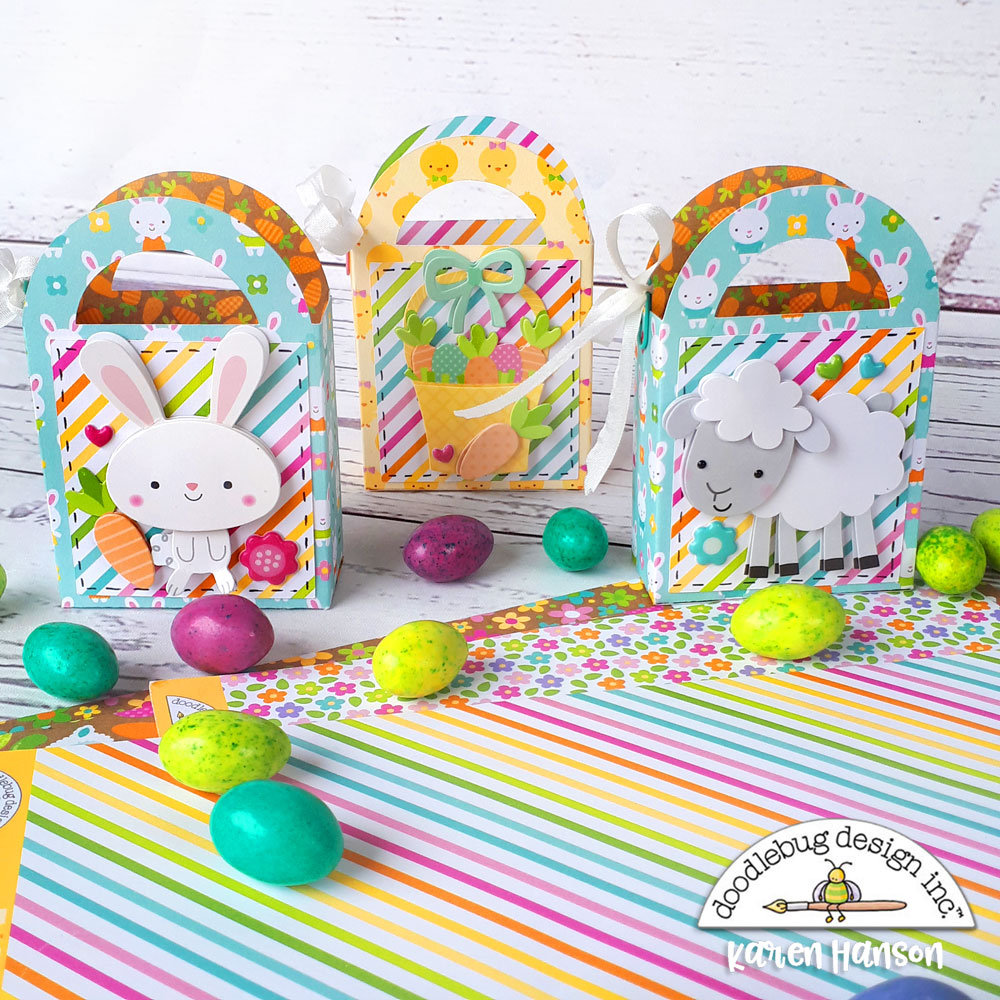
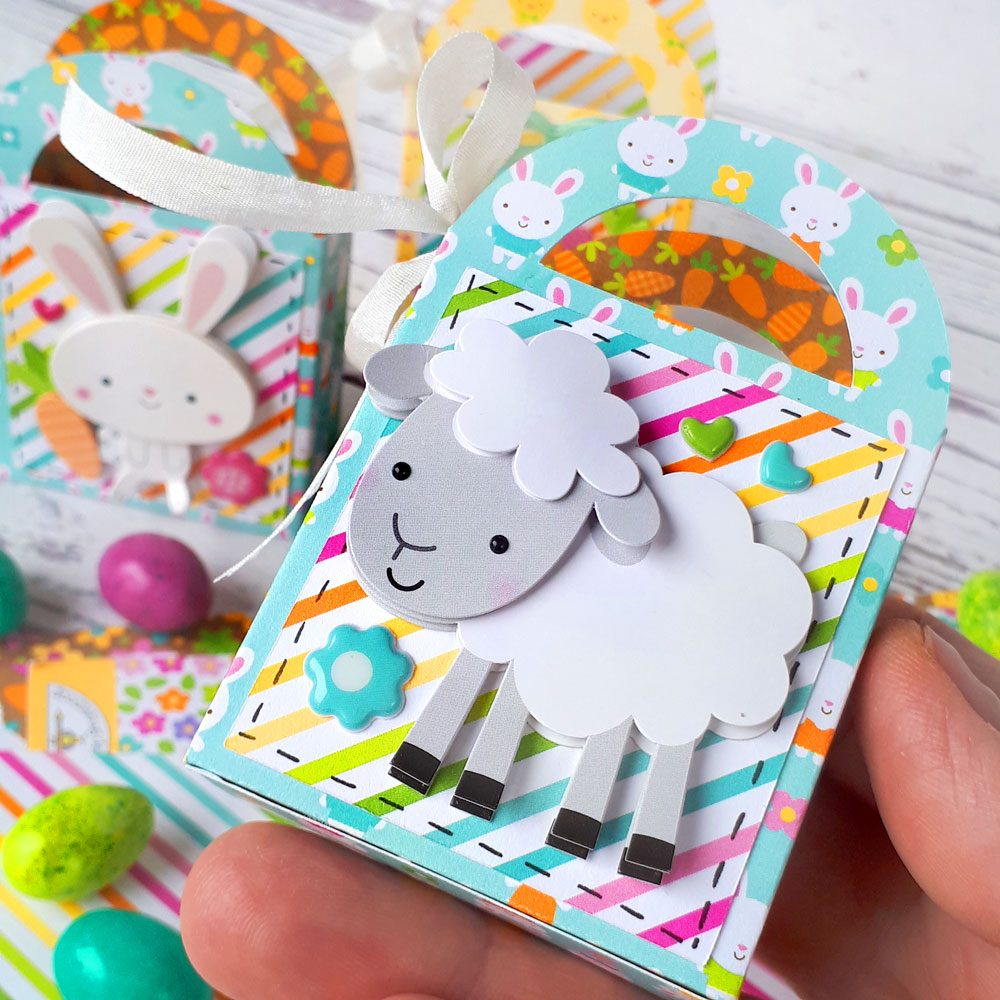
Gift Caddy. I used a  12 x 12-inch piece of Cupcake Textured Cardstock for the base and then decorated each of the panels with  4x4 inch squares of the Jellybean Plaid and some Easter Egg Hunt paper. I decorated the front panel with a tangerine doily, the sentiment is a sticker from the This and That sticker sheet and a banner from the Sunday Dress paper. I added a pink bow sticker from the  Icon Sticker sheet and a few Jellies shaped sprinkles on the front. 
The next holder is a simple berry basket filled with some treats in a cellophane bag. I decorated the front of the basket with the "hoppy easter" sticker which is from the This and That sticker sheet. I  made a quick tag using a flower printed paper from the 6x6 paper pad. I added the Flower Basket Doodlpop to the tag and a small sticker sentiment from the This and That sticker sheet. I added a small purple heart sprinkle to the tag for some added shine. You can make oodles of tags in no time using Doodlepops and a few stickers.
The last is a simple kraft paper sack that I decorated. I added a card from the 3x4 inch card side of the Sunday Dress paper. I backed the card with the grass side of the Easter Egg Hunt paper. I mounted these pieces on a piece of the Jellybean Plaid paper.  I added a few stickers from the Icon Sticker sheet and the This and That sticker sheet. I added an aqua blue Glitter Sprinkle to the center of the bow on the 3x4 card. I added a scallop flower border from the This and That sticker sheet. I punched a couple of holes in the top of the bag and laced some sheer ribbon through the top. It was a quick and easy way to dress up a plain paper bag. 
That's all I have for you today! I hope you all have a wonderful Easter holiday full of family, festivities and a little fun! These cute treat holders are just what you need to add that special little something to your treat bags. Happy Crafting! 

DOODLEBUG SUPPLIES USED:
Hoppy Easter Jellybean Plaid paper
Hoppy Easter Sunday Dress paper
Hoppy Easter Easter Egg Hunt paper
Hoppy Easter This and That Sticker Sheet
Hoppy Easter Icon Sticker Sheet
Hoppy Easter Doodlepop -  Flower Basket
Hoppy Easter Jellies Shaped Sprinkles
Cupcake Textured Cardstock
Tangerine Doily
Rainbow Heart Sprinkles
Birthday Girl Glitter Sprinkles

OTHER SUPPLIES USED:
ScorPal Scoring Board
Sheer Ribbon
Hole Punch 
Small  Kraft paper bag
Berry Basket

Monday, December 10, 2018

Christmas Town Tags & Bags | with Kathy

Christmas is officially 15 days away!  Hopefully you have some shopping done... I'm actually in good shape this year, mostly because all of the "kids" I need to purchase for are in their 20's and 30's and prefer gift cards!  I don't love giving gift cards, but sometimes they really are the perfect gift, so I've made it a point to wrap them in something special!  This year I decided to wrap them in cute bags with some tags made with the Christmas Town Odds & Ends Pieces.  I made the tags for the gift bags, but they could be used for any gift!


For the tags (and bags), I used a few different cut files from Lori Whitlock's 2 on 12x12 Tag Bag Bundle, but there are plenty of cut files and dies you could use, or even create your own tags using a trimmer and punches.  Once I cut the tags from the Dot Strip Petite Prints, the fun began!  I had fun making little scenes with the Christmas Town Odds & Ends, along with some of the different sprinkles.  Here are some close-ups...


I added a To/From stamp to the backs of the tags to add the recipients' names.  I topped them off with some Doodlebug Chunky Twine.


These tags could be used for any gift at this point.  I added them to some small bags from the cut files, and some papers from the Christmas Town Collection. I filled them with some treats and the cards!


Now I just have to finish putting up my tree so that I can place them under it!  Have you made any tags, or gift wrap with the Christmas Town Collection?  We would love to see them!  Make sure to tag @doodlebugdesign on Instagram and Facebook!  That's it for me today, thanks for stopping by to peek!

Thursday, October 25, 2018

Pumpkin Party Cut File Treat Bags | with Caroli

As I told you on previous posts, I love halloween, it's such a fun event in my house and every year I try to prepare little details for my children. 
This year it will be a different kinds of Halloween, because I will be out of my country (having a mum vacation) attending a scrapbooking convention (YAY!). For this reason, I decided to make some cute bags for them to go candy collecting, so they will have a bit of mom with them on that day. My little girl was especially excited about them (she happens to love Halloween too!).
For this, I used few of the fabulous cut files from Pumpkin Party collection, already available at Lori Whitlock shop and soon at the Silhouette Design Store.
I wanted to create a simple but yet lovely cluster of images, so I chose the pumpkins and ghosts for my design. I used my electronic cutting machine and flocked heat transfer material in different colors to decorate two black cotton bags.
The little ghosts are too cute to spook and the favorite icon of my little girl from this cut file bunch, so I used them for her bag. For an extra cute detail I added some jewels on their cheeks , how adorable is that!
I layered different colors of heat transfer material to create these sweet pumpkins, they are so cute and not scary at all.
I completed the design with few silver glitter stars here and there, these make the project more interesting and eye catching (and sparkly!).
This is a super simple project and the result can't be better, now my kids can go trick-or-treating with their custom made bags!
I hope you like this idea and give it a try, I love custom made stuff and this is certainly great way of adding a special detail to Halloween.

Have a lovely day!
BLOG  |  YOUTUBE  |  INSTAGRAM

Monday, February 5, 2018

Valentine's Day Treat Bags with Kathy

When my daughter was in grade school I used to love sending in fun, homemade treats and crafts to her class.  She's a sophomore in college now, so I've had to switch gears!  Instead of class treats, I go for dorm treats!  Her friends always appreciate a little something sweet!  For this Valentine's Day I put together little treat bags featuring the So Punny Collection... take a peek!


How cute are these little bags??  I used a metal die and some of the papers from  So Punny to create the bags.  To finish them off, I added some fun So Punny Odds & Ends and Chit Chat pieces to tags (and of course those ADORABLE Tiny Hearts Sprinkles) and tied them together with some Doodle Twine!  Here are some close-ups of each bag...


I know the girls will probably roll their eyes at the puns...but we all know that they secretly love them! Now to box them up and send them in a care package!  That's it for me today, thanks for stopping by to peek!

Saturday, October 1, 2016

Boos and Brews Collection: Easy Treat Bag Tutorial by Tya

Hey everyone - it's Tya and I am wrapping up the Boos and Brews Collection Week with a fun tutorial for you. Of course, the absolute best part of Halloween in my opinion is the CANDY!! So I wanted to share with you a quick and easy treat bag that is great to whip up and give to your favorite little trick or treaters!
Here are the steps to make these bags:
Step 1-
Start with a 7 1/2 x  11 piece of paper. On the 11 inch side, score the paper at 4 1/2 and 6 1/2 inches.
Step 2-
On the 7 1/2 inch side of the paper, score the paper at 2 and 5 1/2 inches.
Step 3-
Fold on all of the scored lines
Step 5-
Snip the middle section of the box just up to the scored lines as shown on both sides.
Step 6:
Add adhesive to the flaps and fold up one side of the box.
Step 7:
Add adhesive to the outer side flaps of the box and fold up to complete the box. So quick and easy!
Now that I have given you the basic pattern - you can now use all of the adorable Boos and Brews pattern papers as your bag bases.
Here are some close ups of my bags:


I used the following products for my bags:
Boos and Brews 12x12 Paper Pack
Boos and Brews 6x6 Paper Pad
Boos and Brews This and That Sticker
Boos and Brews Icons Sticker Sheet
Boos and Brews Odds and Ends
Stars and Moons Cute Clips
Cute Critters Mini Doodle Pops
Pumpkin Pals Mini Doodle Pops
Eerie Eyes Shaped Sprinkles
Halloween Assortment Matte Sprinkles
Shocking Chevron Washi Tape
Beetle Black Chunky Twine

Hopefully I have inspired you to create a batch of these bags. Doodlebug has so many darling patterns on their papers - I love that I can custom make my own treat bags using whatever papers I want to, instead of having to stick with plain boring store bought bags. Thank you for stopping by today! Happy Crafting!
Pin It button on image hover