I also knew that I wanted to see if I could incorporate one of the most elusive "hiding" characters (and my personal favourite Doodlebug character of all time) - the YETI! But we will get to him later!

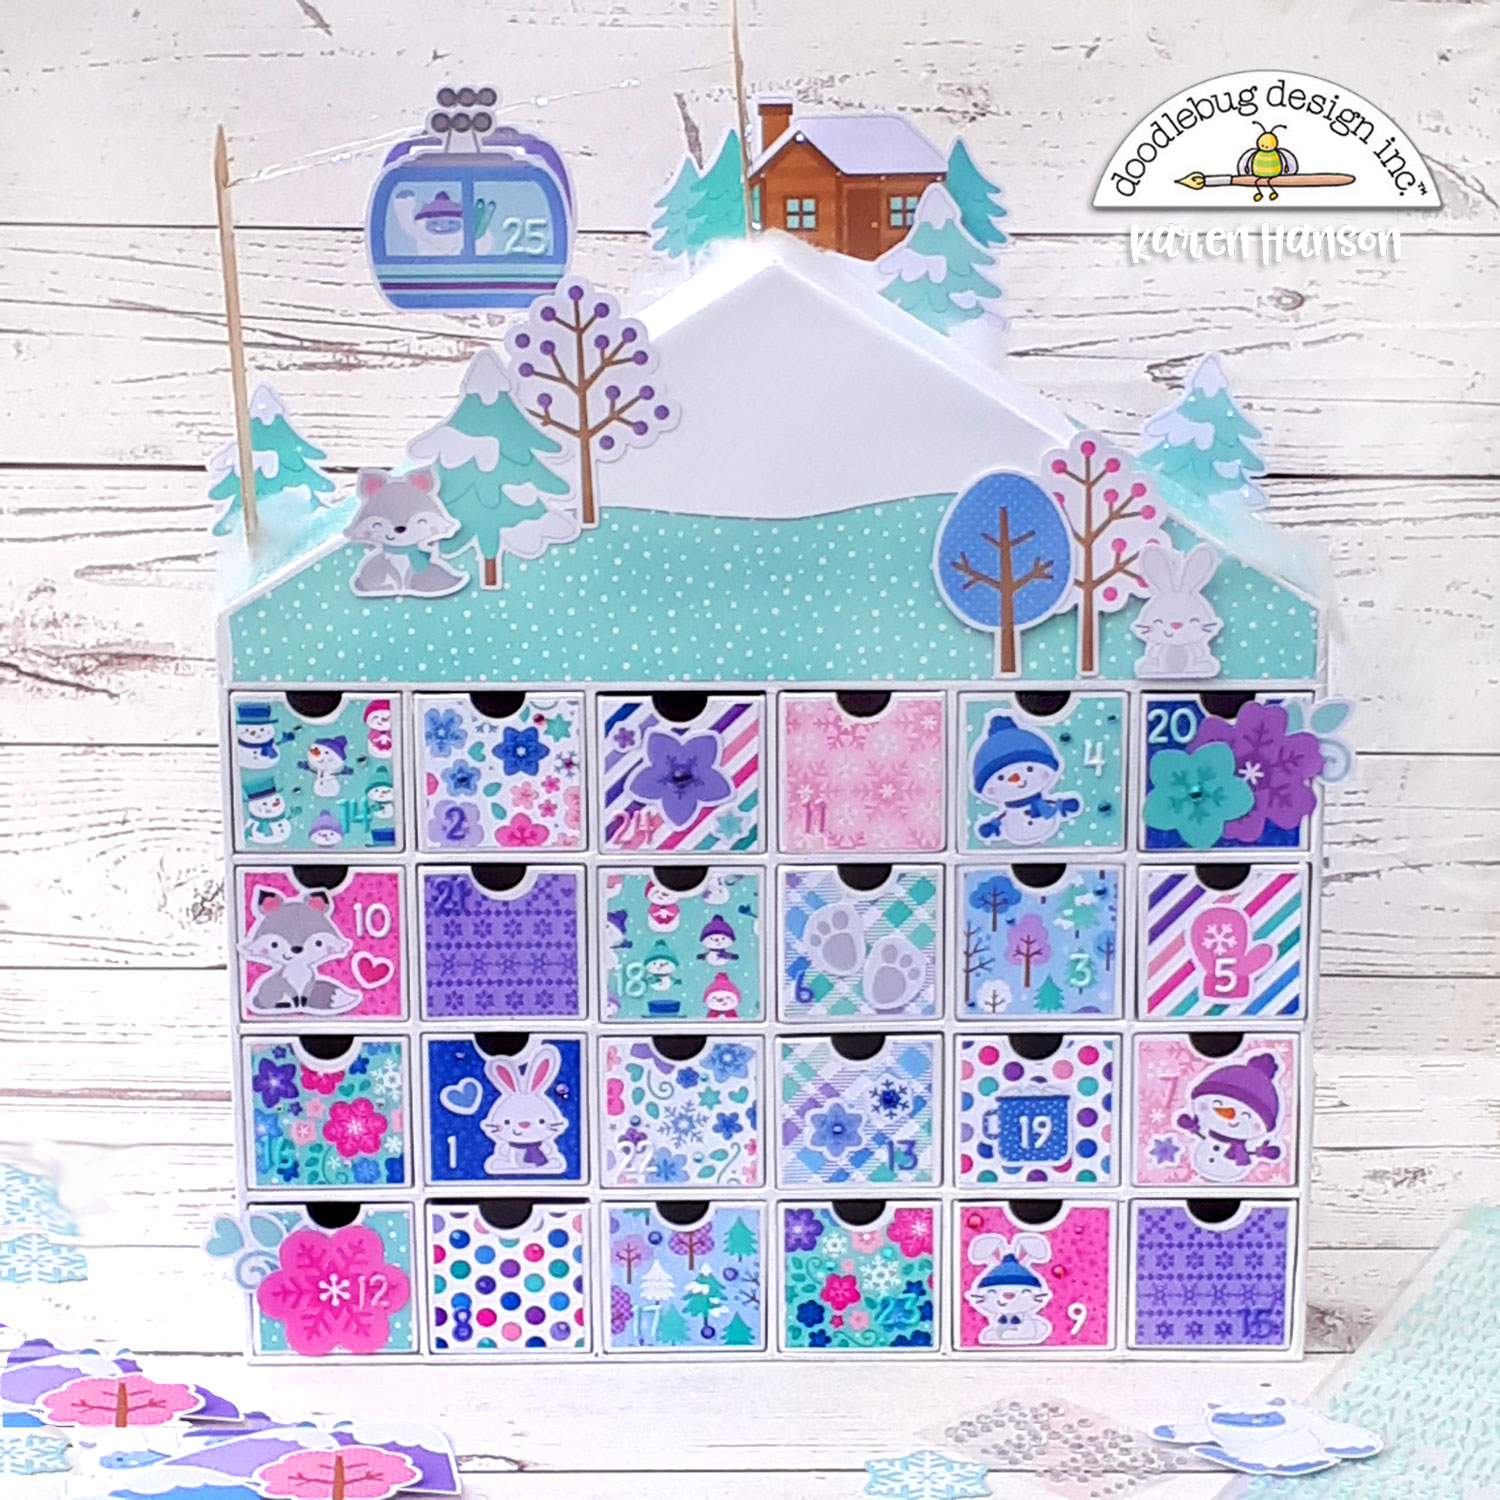
For this calendar, I used the Winter Wonderland collection. The papers and patterns in this collection are spectacular - no dull winter scenes here. I mixed and matched the patterns, cutting each door at 2 1/4" x2 1/4" each with about 2 doors for each pattern. I then grabbed the Alphabet Soup Puffy stickers for the numbering. On some of the doors, I used contrasting number so they would stick out and be easy to find (like #1 in the photo). But for other doors, I decided to hide the numbers a bit more by using a matching colour and disguising it in the pattern (like door #22 beside door #1). I really love the way the doors turned out. The patterns are amazing and I love that you really need to look to find some of the dates! Mission accomplished.

And the best part of this calendar is that you don't have to have any fancy tools to decorate. The scene at the top and embellishments on some of the doors were simply created with the die cuts in the Odds and Ends pack - both the regular Winter Wonderland pack and the Snowflakes pack. Just use some adhesive and you are all set!

I did jazz up some of the die cuts by poking holes in them and stringing some small LED light behind the holes. You can see this feature on a couple of trees and along the cabin.

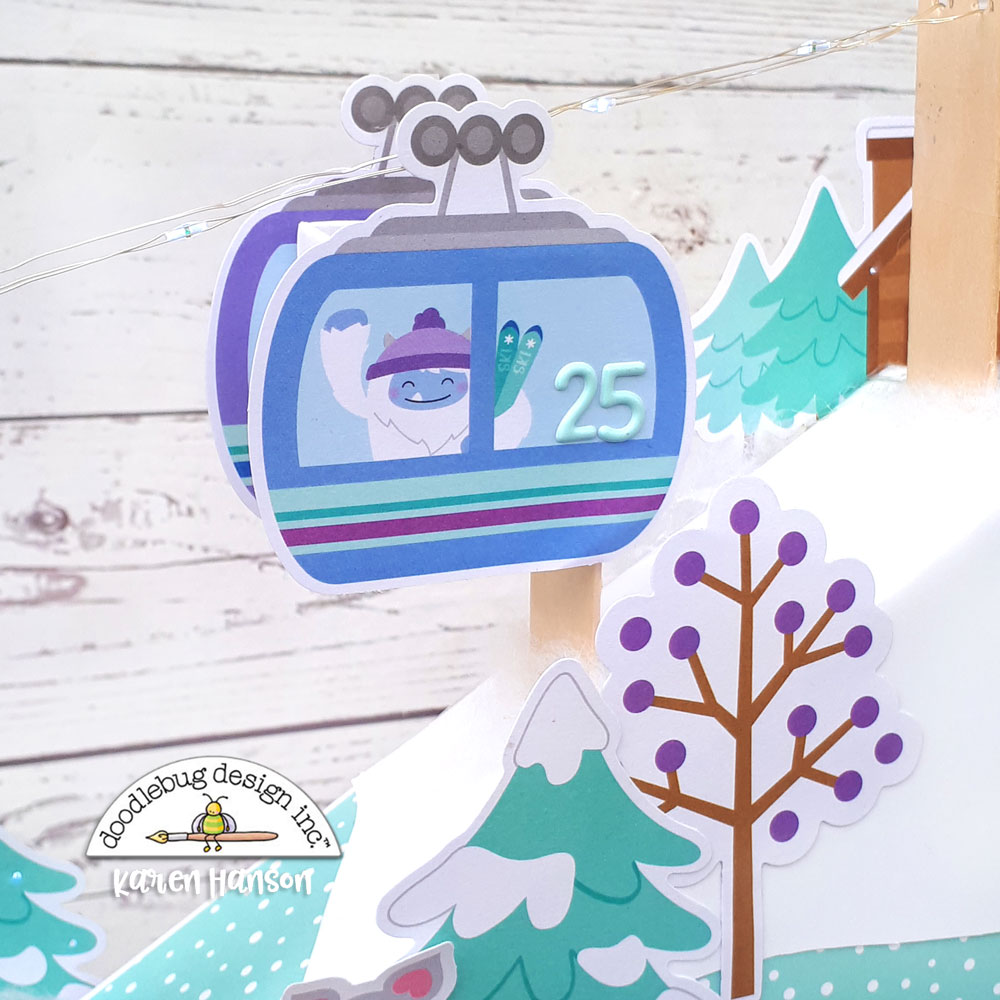
And then of course, the Yeti! Harry gets to make an appearance here to riding a little gondola to the top of the calendar. I actually took the chimney feature off of the calendar and used it to combine two gondola die cuts (front and back), creating a little box in a rather unusual location for one last special treat. This also gave me a really sturdy way to attach the gondola with a hidden craft stick. I took the picture from this angle so you could see the stick (it pokes down right into the top part of the calendar)...

...but from the front, with a special placement of some die cut trees, it looks like it is suspended above the mountain. Some more of the LED string complete the look of the cables.
While not your traditional advent calendar, I am in love with this version. If you have a favourite Doodlebug collection, don't be afraid to use it on a project like this. There is no wrong collection to use! And trust me, this will not be the last time you see Harry on one of my projects! Thanks for stopping by!
Hugs,
DOODLEBUG PRODUCTS USED
Advent Calendar House
Winter Wonderland collection
Advent Calendar House
Winter Wonderland collection
Mini jewels - variety of colours
Alphabet Soup Puffy Sticker
Alphabet Soup Puffy Sticker
OTHER
Adhesive
Adhesive
Craft Sticks
Mini LED lights
Cotton stuffing


No comments:
Post a Comment