Monday, October 26, 2020

GHOST TOWN TREAT HOLDERS | with Karen

A number of years ago, Doodlebug made me a Halloween crafting convert! I wasn't much for the spooky and scary, but colourful and cute?! Now we are talking! So each year, when I get ready for Halloween , I grab my Doodlebug goodies and I smile. It has actually become one of my favourite times of the year to craft!

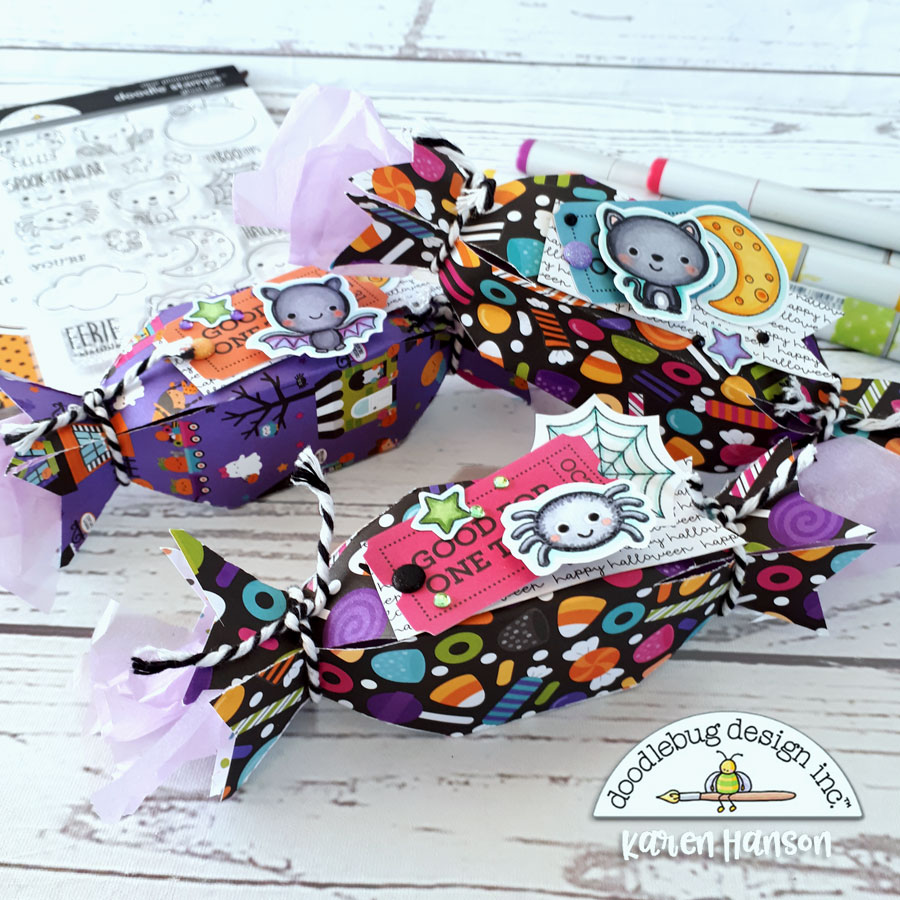
And this year, with the introduction of Ghost Town, I have been crafting up a storm. The candy theme in this collection is, well, sweet! So I couldn't resist whipping up some candy-themed treat containers to help bring a bit of fun back into what will be a bit of a different celebration is my house this year!

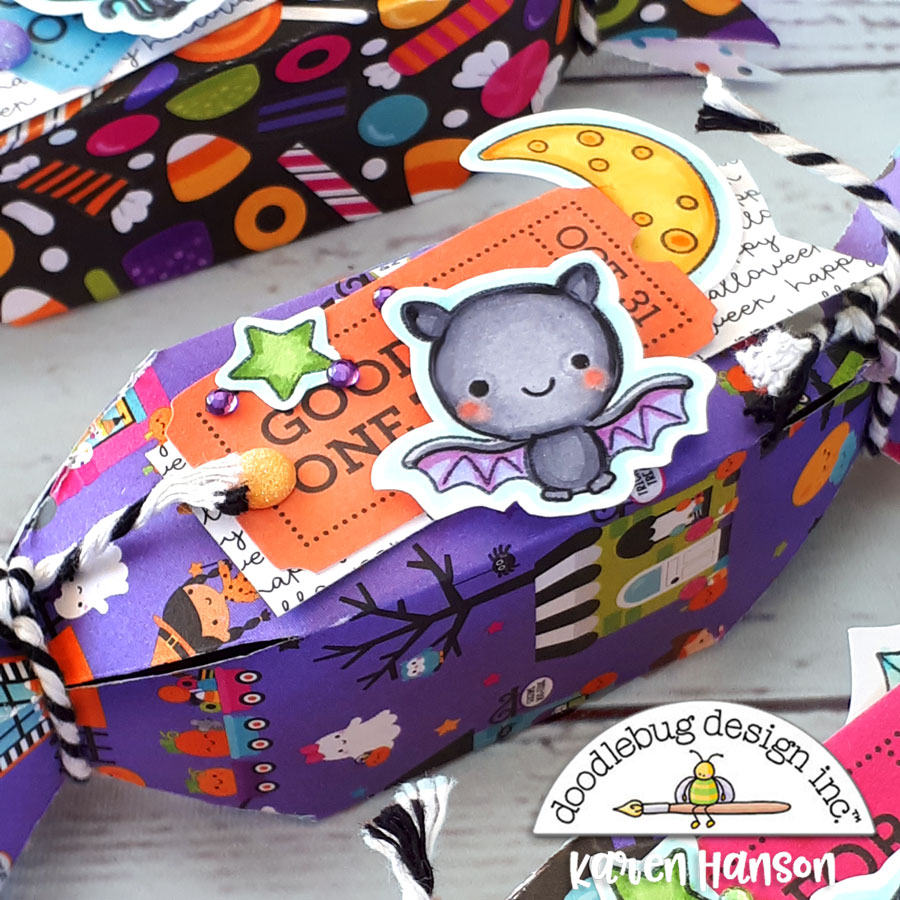
Topped off with some adorable stamps from the adorable coordinating Ghost Town stamp set , these little containers pack some serious cuteness!   

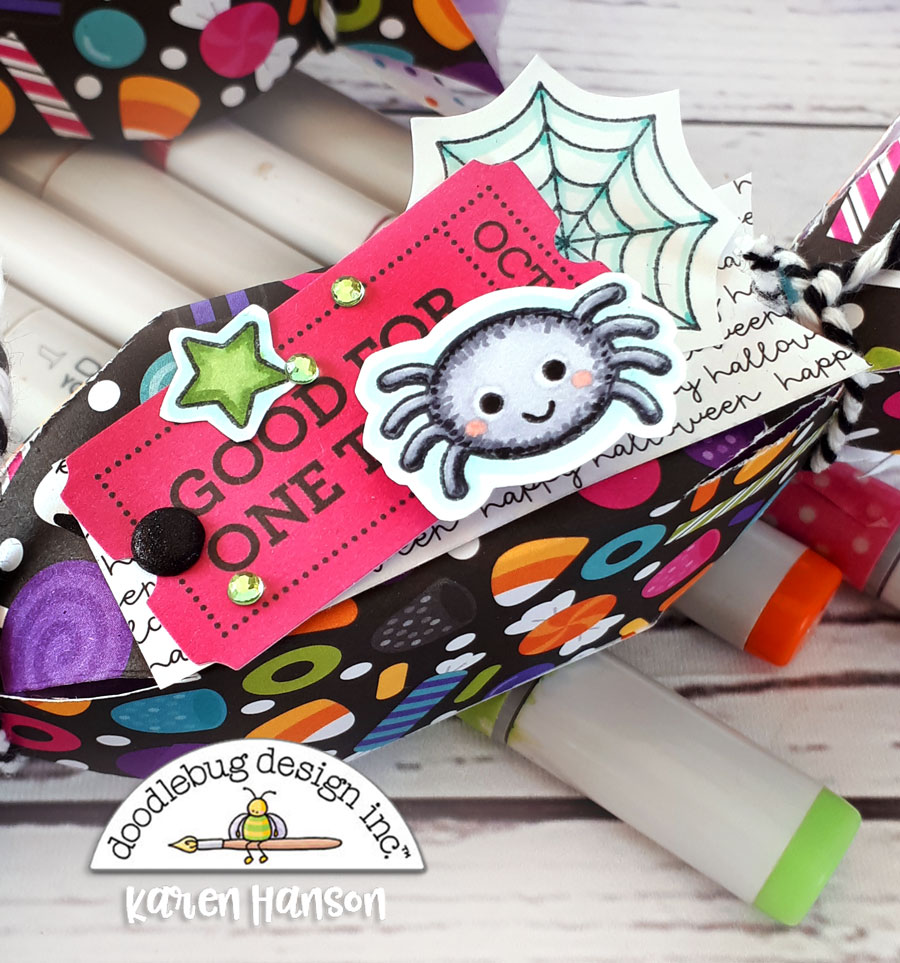
And backed by some fun embellishments from the Chit Chat die cuts and one fabulous glitter brad to keep it all in place, the containers are layers of Doodlebug fun!

And guess what, there are so easy to make! No special tools required! Really. Don't believe me, let's take a look:

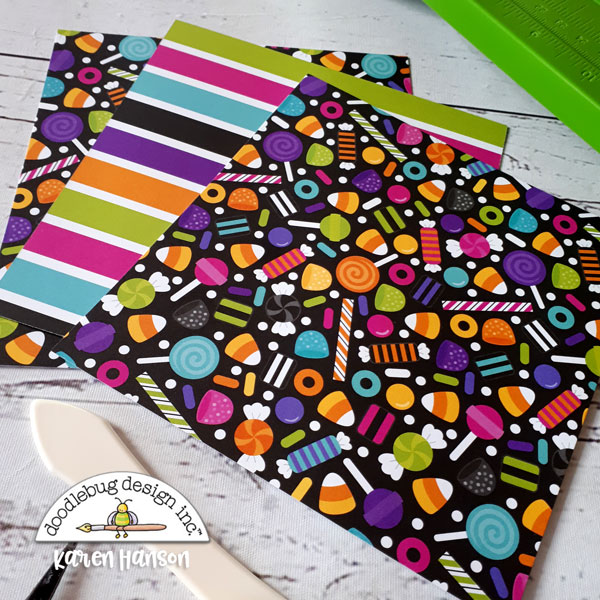
Start with squares cut to 6x6". I used the 12x12 paper for this, but you can use papers from the 6x6" stack too (I just liked the size of the prints on the 12x12 for this particular project).

Now let me warn you - those of you that are very particular in your crafting, just take my measurements and off you go with your scoring boards. My lack of precise measuring and folding may be totally "scary" to you! But I wanted to show you that you really don't need any fancy tools - just something to push down those folds - so that this could be a project accessible to all - even kids! And not only that, it is so fast, you won't believe how quickly these come together. So with that warning in mind, let's keep going:

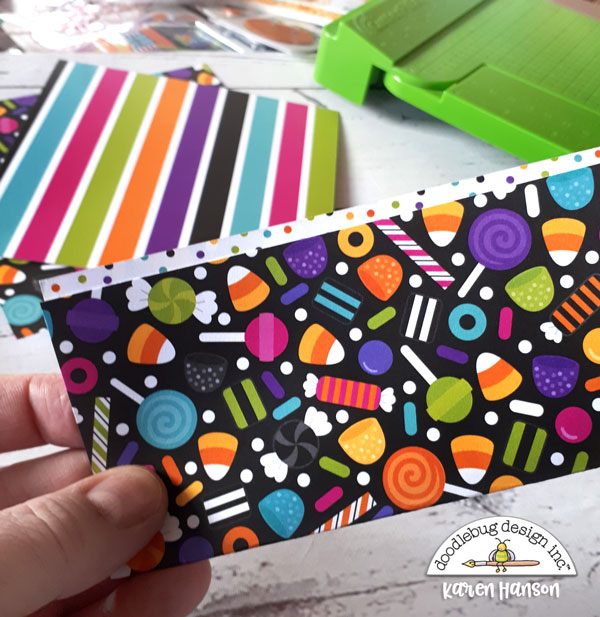
Fold your paper "almost" in half, leaving about 1/4" exposed at the top.

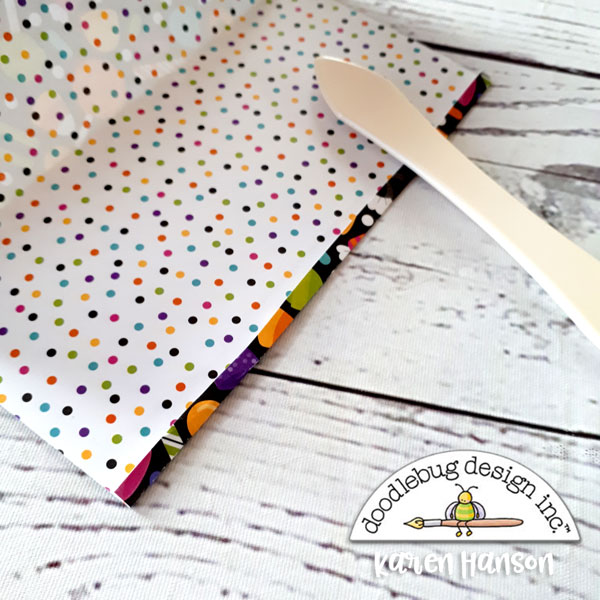
Now simply fold that 1/4" extra edge in. Use your nail or a bone folder if you have one to really push down that fold. Add so glue to the little 1/4" flap you have created.

Glue the other side down onto the tab and you have made a little tube (sort of).

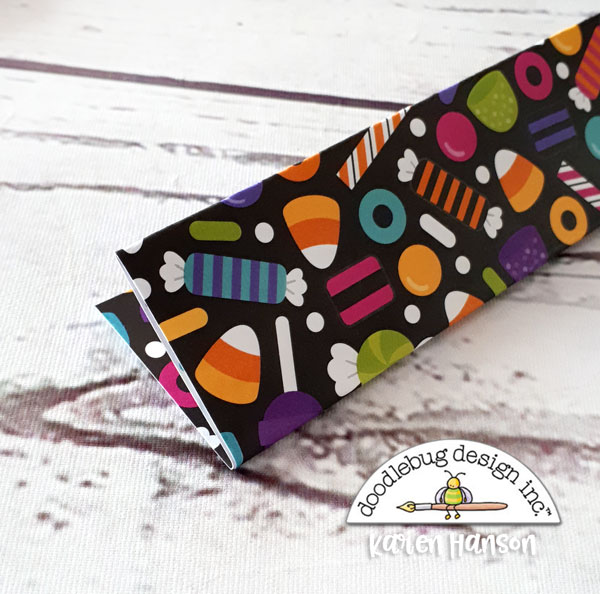
Now take the "tube" and fold it in half again. Now, Doodlebug paper is really wonderfully thick so you won't get a tight fold here. That's okay. Just push it down again and you are good to go!

Now for you precise crafters, if you are still with me, this next step will drive you crazy. But it works. I promise. And remember, if you have a scoring board, you already know how to modify this project to use it, so go ahead and do that. But for everyone else, we are just going to fold up each end of the "tube" about 1" or so. Try to keep it close to 1" but it doesn't have to be exact. Again, the paper will be really thick but it will be okay. And it doesn't matter if the top edge stays lined up. None of mine did and the project still turned out great!

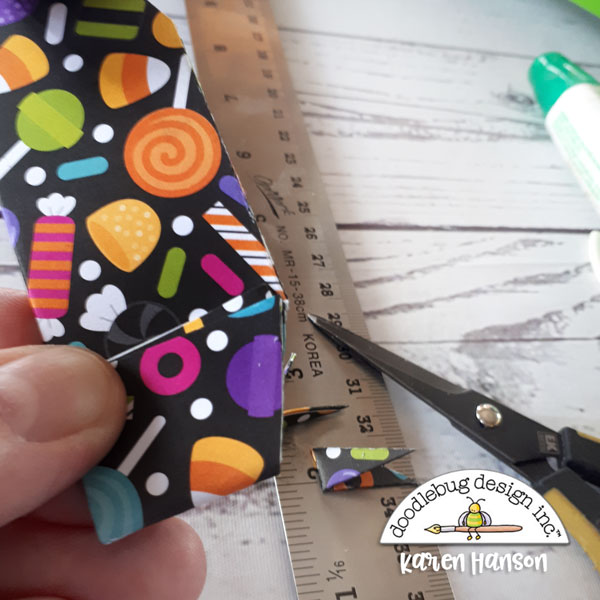
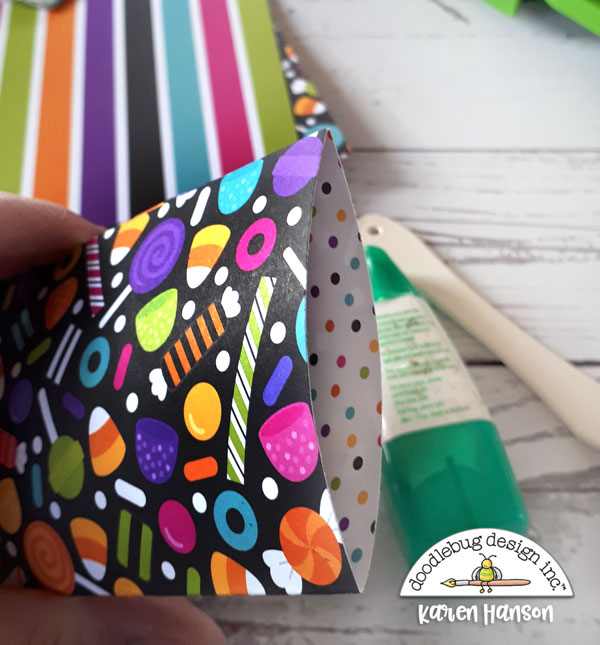
With a really good pair of scissors, go in about 1/2" on the folded edge and cut outward to the end of the tube. If you are working with kids, you might need to do this step because of the thickness of the paper. Repeat on the other side so you have a trapezoid.

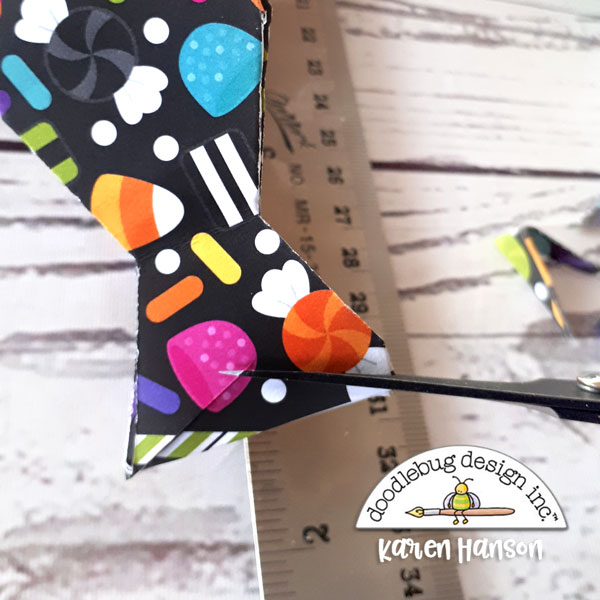
Open up the fold. Starting on the outside edges of the top of the tube, cut inwards to about the middle from both sides.

Repeat on the other end of the tube. You will end up with a shape like you see above. Now here is where the magic happens:

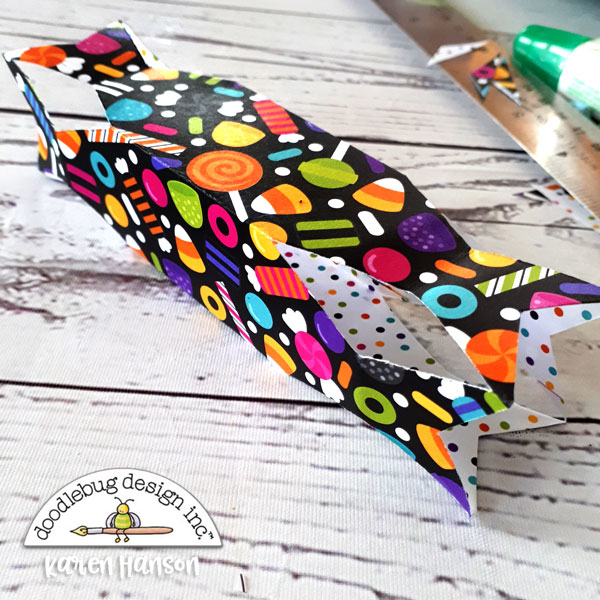
Open up all of the folds so that you have a bit of a rectangular prism. Grab some Doodle Twine and cut two pieces about 4" or so each.

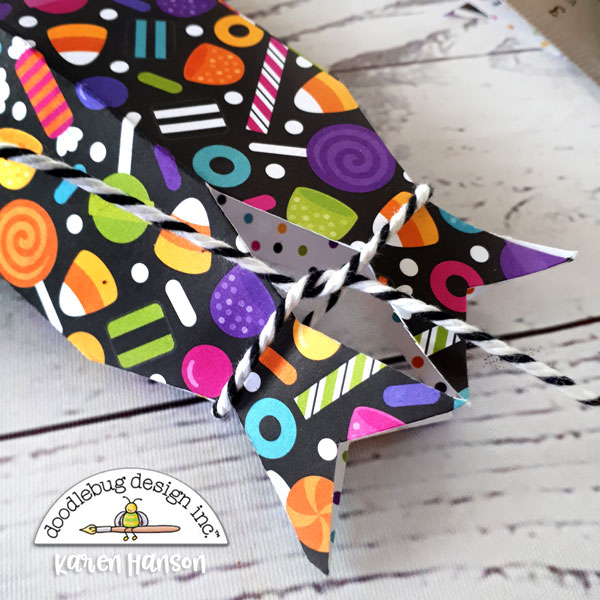
At the narrowest parts of both ends of the tube, tie your twine. Now stay with me. I totally doubted this would work. But then I pulled GENTLY and....

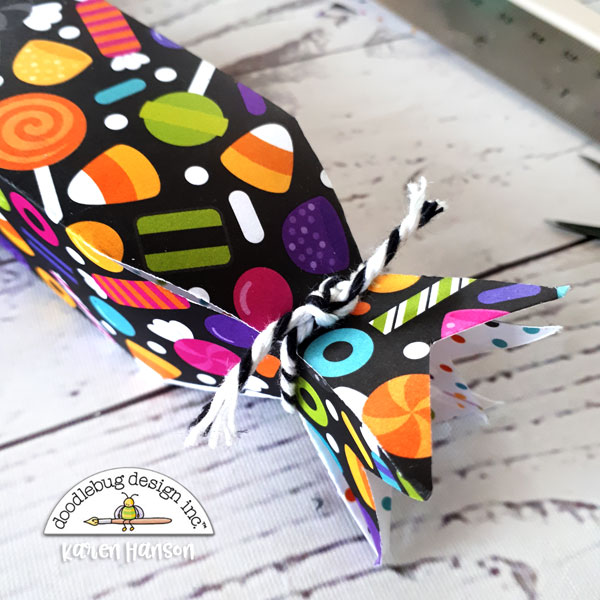
....VOILA! It pops right together and looks just like a little candy container!

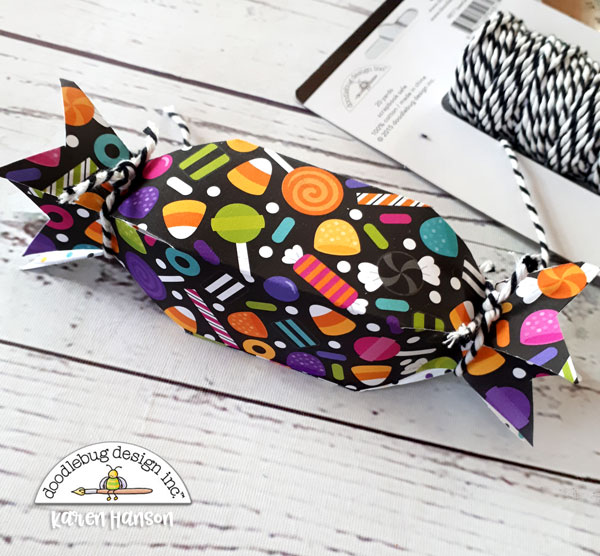
Tie up the other side with the second piece of twine and you end up with the cutest (and easiest) treat container ever!

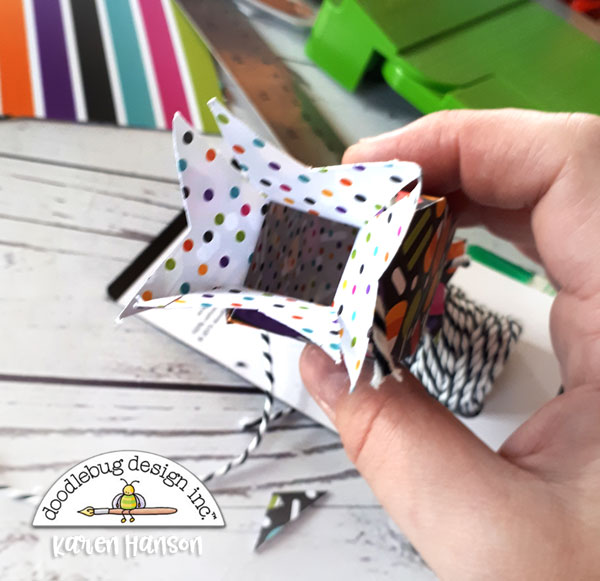
Now just a heads up, to keep the integrity of the box, you will end up with a gap at each end of the container. If you are putting mini chocolate bars in there, this gap will not be a problem. But I wanted to fill mine with small chocolate candies. So I simply wrapped the candies in some tissue paper first, twisting the ends, and then sealed everything up. Problem solved! And I actually loved the extra texture and look of the tissue paper sticking out of each end of the container in the finished project!

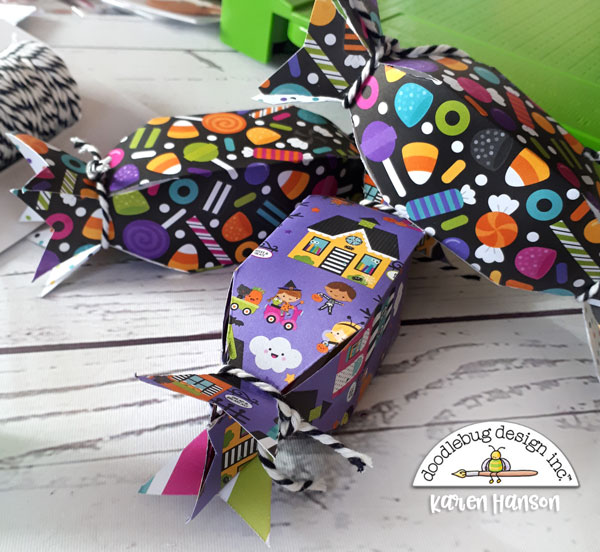
Now go ahead and make them in all the patterned papers you love. Because you will want to! Trust me! Top them off with some stamps and/or the cute coordinating die cuts in the Odds and Ends and Chit Chat packs and you are all set!

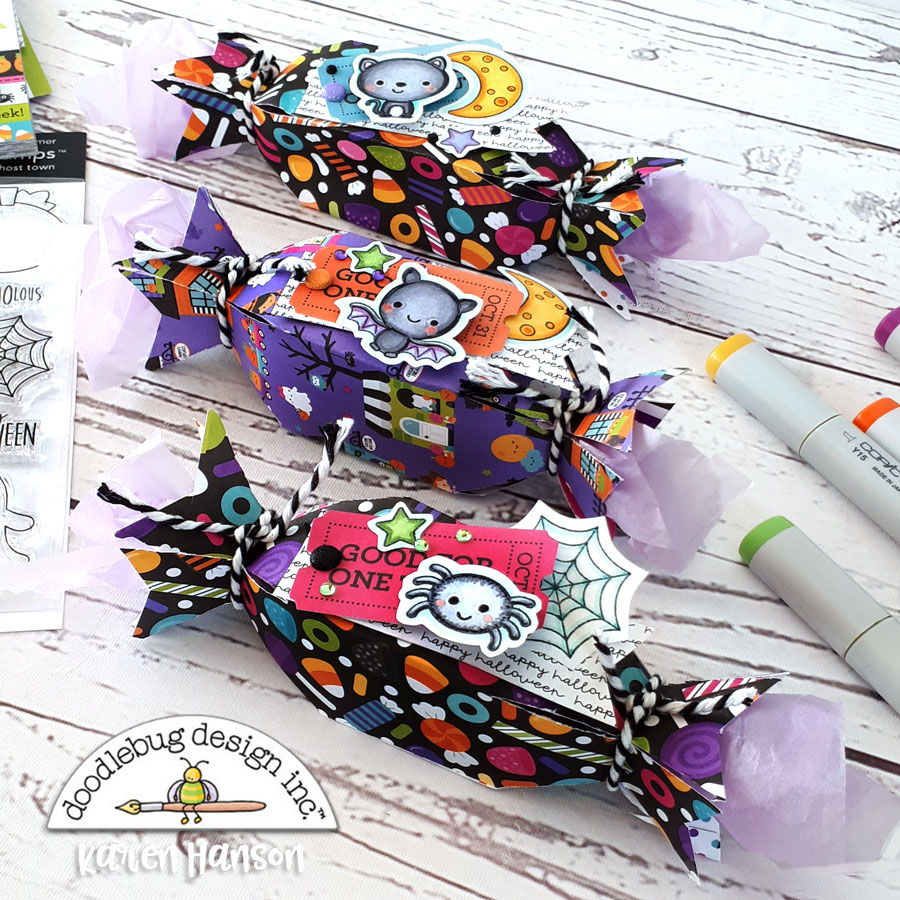
Oh, and how cute would these look as a centerpieces stacked up on a cake plate (which I thought of after I took these pictures, of course)! you may have hard time giving them away!  So no matter what your Halloween is looking like this year, these will have you smiling! I hope you have fun making them. 

Thanks for stopping by!

BLOG | INSTAGRAM

Doodlebug Design Product:
Ghost Town Collection
Ghost Town Doodle Stamps
Glitter Brads
Doodle Twine
Mini Jewels
Other Products:
Alcohol markers
Ink
Adhesive
Tissue paper

Friday, October 23, 2020

GHOST TOWN TRICK OR TREAT LAYOUT | with Tya

 Hey there! Happy Friday! I can't believe we are almost to Halloween - has this not been both the longest and shortest year ever? Today I am sharing a scrapbook layout with you featuring the spook-tacluar "Ghost Town" collection! I had such a blast using this collection to create a throwback layout of my kiddos a few years back. (Why do they have to grow up?) 

My kiddos loved Halloween, I mean LOVED Halloween! They would plan for months what their costumes would be and how we would decorate our house and what candy we would pass out. They had such a fun time and I loved how festive they were. Of course, I took oodles of photos of them and loved seeing their little personalities in the costumes they picked out. Such precious memories! Anyway - here is the layout!


Like I usually do, I started getting inspiration from a sketch to create my layout. This time I used this layout that is part of this month's PageMaps. I really liked the multiple photos on this layout- 3 photos - 3 kids! Worked perfectly!


As you can see, I used quite a few of the pattern papers in the collection like the sketch shows.  I also decided to move the line in the middle of the layout to the bottom by using some of the border strips found on the Star Bright paper. I then got to use some of the Odds and ends to decorate my layout. I loved all the little ghosties in the collection so I used a couple on my layout. I also used some of the star sprinkles found on the "Halloween Night" Shaped Sprinkles. I also added this adorable banner die cut underneath my photo block. This is from the Chit Chat die cuts.


Up in this corner are some super fun bats. I added them to the top right corner of the layout. I  also added the "Batty for You" speech bubble from our Chit Chat die cuts. You can also see that I used some of my favorite Stickles on the cheeks of all of my die cuts. I love the extra little sparkle the Stickles give to the die cuts. I used the Unicorn shade. You can also see that I added some ink splatters on my white cardstock background - I love doing this lately as it breaks up the stark contrast of the white cardstock against the bright pattern paper. 


I turned to the "This and That" sticker sheet for my title. I thought the green looked so fun next to all of the pattern papers. I also used the fun journal spots that are found on the back of the Boutique Plaid paper. I don't often add my own handwriting to my layouts but I really loved this card and it added that beautiful pop of aqua to the layout that I thought was just the right touch. How cute is that little ghostie with a bow? I love her! 

This layout came together so quickly with the help of the sketch and all of the darling coordinating products in this collection. So even if your kids are 3 or 23, you can use the "Ghost Town" collection to create oodles of Halloween layouts and projects to cherish for years to come! Happy crafting and Happy Halloween my friends! 


DOODLEBUG PRODUCTS USED:
Ghost Town Collection
Mandarin Textured Cardstock
Orchid Textured Cardstock

OTHER PRODUCTS USED:
Stickles in Unicorn 


Wednesday, October 21, 2020

GHOST TOWN HALLOWEEN TAGS | with Stephanie

Hello again Doodlebug friends!  October has been an awesome month for Doodlebug fans because we’ve been treated to two adorable new collections! Today I’m playing with Ghost Town, the newest (and cutest) Halloween Collection. Halloween of course is all about tricks and treats, so for my 'treats' this year I decided to make tags with sweet little Halloween scenes, here’s a look: 

 
These little tags came together easily with just a few elements. I cut all my tag layers using a metal tag die set.  I used the Ghost Town 6x6 and Petite Prints Buffalo Check 6x6 paper pads for the base and subsequent layers.  

 
I used small banner dies and the Ghost Town stamp set for the sentiments.  Ok, that little frog on the back of the scooter is hilarious!  

 
Aren’t these costumed kiddos the cutest?  They are all images from the Icon sticker sheet popped up on foam squares. I also used moon, star and cloud Shape Sprinkles for some of the scenes.  

 
Here’s just one idea for using tags this size. I love all of the seasonal soaps that are out this time of year and sometimes I give them as small gifts to friends and family.   


All they need are cute gift tags tied to them!  That’s it for me today, I hope this project sparked a little creative inspiration in you!  Happy crafting!


  Doodlebug Products Used:
Ghost Town 6x6 pad
 Petite Prints Buffalo Check 6x6 pad
Halloween Night Shape Sprinkles 
Ghost Town Icon Sticker Sheet
Ghost Town Stamp Set
Doodle Twine Beetle Black 
Mini Clothespins
 
  Other Products Used: 
Tag Metal Die Set
Adhesive Foam Squares & Liquid Glue
Pin It button on image hover