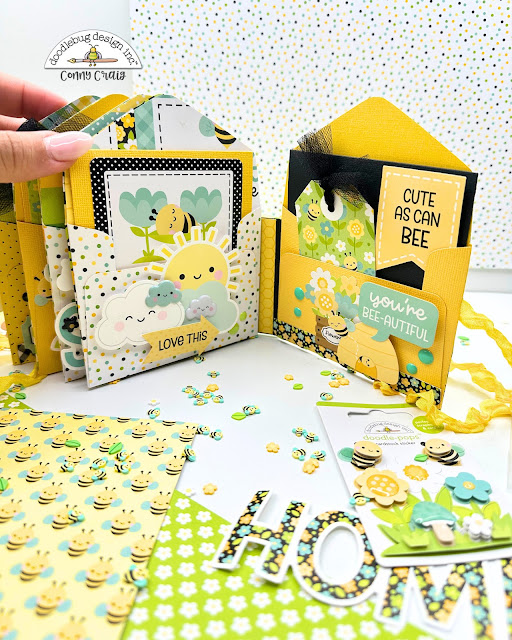
Hello, crafty friends! It’s Conny here from The Daily Life of Creativity, with an envelope mini album made from the Bee Happy Collection. If you’d like to see the process video, head over to my YouTube channel, where we can create some magic together. Be sure to grab the notes from the blog so you’re prepared to make your own envelope mini-album.
I started by cutting 10 envelopes using a cut file. They measure approximately 3 1/4 by 4 1/4 inches. And if it's open from top to bottom, 8 in length and 6 in from side to side, with the flaps .
For the spine, I used a piece of chipboard measuring 2” x 3”, wrapped it with the Bee Happy 8847 paper cut to 4” x 4½”, and mitered the corners. You’ll also need a piece of black cardstock measuring 3” x 4”. On the 4” side, score at 1” and 3”. Then, place your chipboard spine in the center, leaving 1” flaps on both sides. Next, I added the heavyweight acetate (Bee Happy 8846 Honeycomb) to the outside of the spine. Cut the acetate to 3” x 4¾” and adhere it to the ends of the flaps to create a half-circle effect around the spine.

For the mini album, you can leave the envelopes open or closed. I kept mine open at the top. To adhere the envelope pages to the spine, I used six envelopes. I created hinges measuring 1” x 3” and scored them at ½” on the 1” side. Since the spine is 2” wide, I placed the first hinge ½” in from one side, then the second hinge next to it, and the third in the center, each spaced ½” apart. I added double-sided tape to the hinges and adhered envelopes on both sides. I also added a small amount of glue in the center of each envelope to hold it in place, repeating the process for the rest of the hinges to create all the pages.
For the front and back cover, I followed the same process. The hinges were part of the original 1” flaps, where I also added the acetate. I placed double-sided tape on top and added seam binding for a closure before adhering the two envelopes back-to-back, with the seams facing away from each other.

Inside the envelopes, you can fit 3” x 4” photos. I also added photo mats measuring 4” x 8” (scored at 4”) and 9” x 4” (scored at 4½”). I folded these and tucked them into the pockets, then embellished the fronts.

For the cover, I decorated the lower part of the album with a circular ephemera piece, and on top of that, I added the Doodle-pop “My Honey” with the cute little brown bear. I included 3D hearts and a few bees popped up on foam adhesive for dimension, and added the “Summer” title and “It’s a bee-autiful day” sticker. The sun at the top is attached to a card tucked into the pocket, and enamel dots complete the page. I repeated similar embellishing techniques throughout the album using foam tape, cardstock, Doodle-pops, stickers, and ephemera.


No comments:
Post a Comment