Thursday, March 3, 2022

FAIRY GARDEN WATERFALL FOLIO ALBUM | with Traci

Hello Friends!  I've been playing with one of my favorite Doodlebug collections this week (Fairy Garden) and I'm excited to share this project with you!  It's a waterfall style folio album, which I love, because you get to see layers of pretty paper!


To make the base of the album, I used white card stock and chipboard.  Although not exactly the same, I have a tutorial for a similar album over on my blog and you can get measurements and instructions HERE.


I used my cutting machine to add a circle in the front cover, but you could also use dies or a circle punch.  Under the circle inside, I layered paper and part of a scallop punch onto a white envelope from the Lots of Love collection, and included a magnet so that my flap would stay shut.


I added a few cute cards from the Fairy Garden 6x6 paper pad on the front of the card and tucked it inside the little 2x3 envelope.  This will be a cute place for a note when I give this little album to a friend.


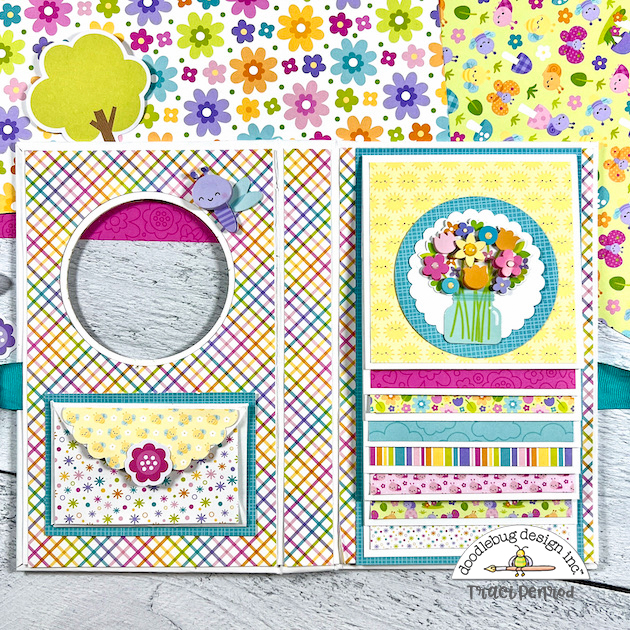
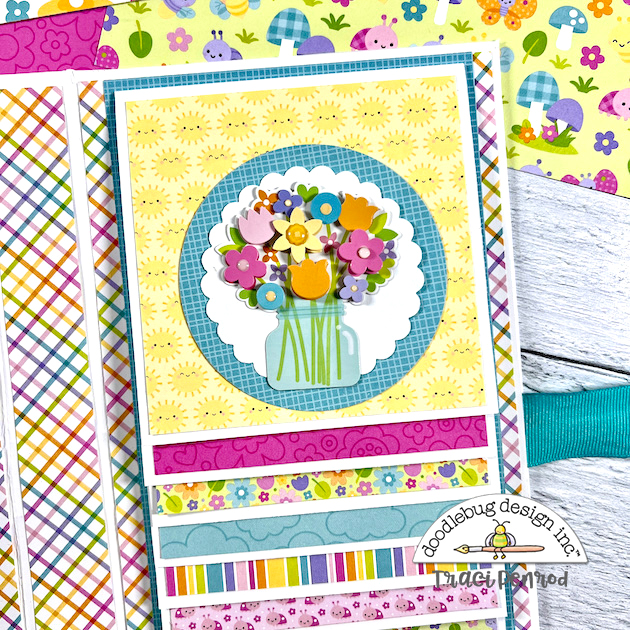
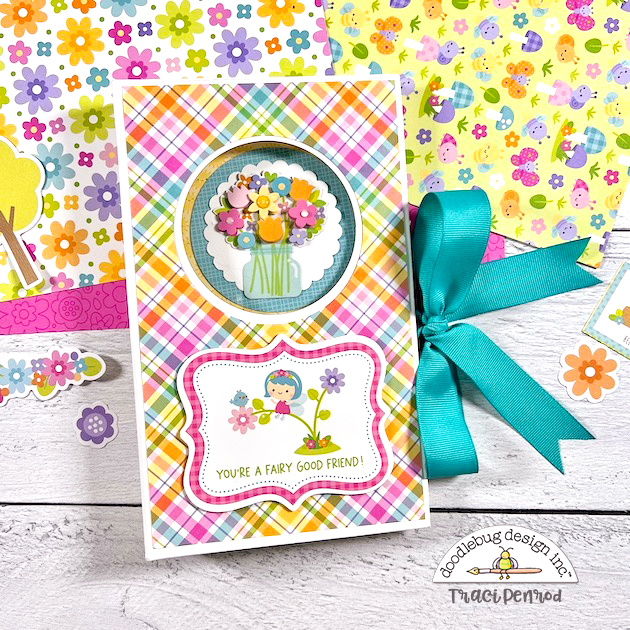
See, there are all those pretty layers of colorful paper!  For the front of the waterfall, I wanted to mimic the circle shape in the cover window so I punched out a 3" circle and a 2 1/2" scallop circle, then added the "pièce de la résistance" ... that adorable flower bouquet DoodlePop!  So pretty!


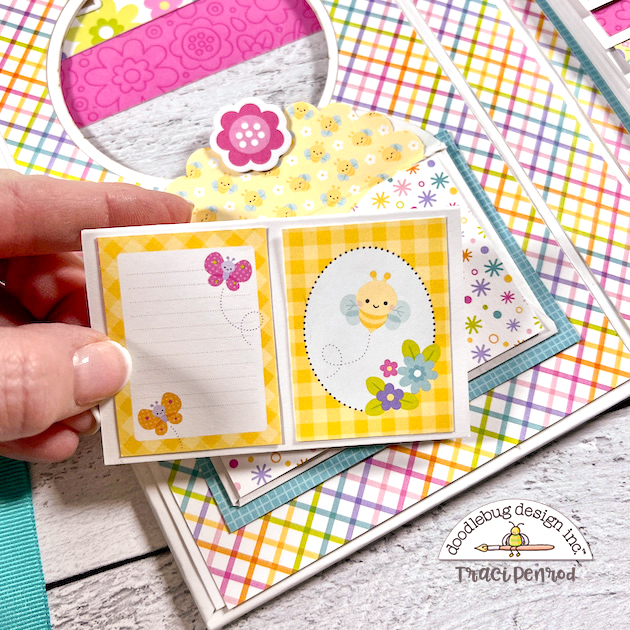
I embellished some of the pages with This & That stickers, Odds & Ends, and Chit Chat and my album was done!  I can't wait to add photos on the other pages ... up to 14 photos will fit in this fun little book.

Well, like the sticker says, you brighten my day and I hope my project has brightened yours!  

Doodlebug Products Used
Fairy Garden Collection
Lots of Love Cards & Envelopes
Bright Bunch DoodlePop
White Card stock

Other
3" circle punch
2 1/2" scallop circle punch
Chipboard
Ribbon

Wednesday, March 2, 2022

WINTER WONDERLAND SNOWMAN FUN LAYOUT | with Erica

Happy Wednesday friends! Erica here with you today sharing a 12x12 Winter scrapbook layout featuring the beautiful Winter Wonderland collection!

I really wanted to go crazy with snowflakes on this layout so I pulled out the Winter Wonderland Odds & Ends and the Mix & Match Snowflakes. I started by assembling 3 of the large Mix & Match Snowflakes. I pulled out a piece of white cardstock that I trimmed down to 11x11 and matted it onto the Nightfall pattern paper. I then matted my layout onto the beautiful Cozy Cardigan 12x12 paper.

Vertical Designs are one of my favorites so I had that in mind when creating this page. I laid out the large Mix & Match snowflakes first. Then I placed snowflakes from the Winter Wonderland Odds & Ends pack all along the left side of my page. This pack of Odds & Ends includes cardstock and acetate pieces.

For some added dimension I popped up some of the snowflakes using foam adhesive. Once I had a good amount of die cut pieces down I pulled in some different packs of Doodlebug Shape Sprinkles.

My photos fit nicely in the center of all the snowflake goodness! I backed them with a piece of pattern paper from the Winter Wonderland 6x6 paper pad.

For my title I used two of the Winter Wonderland Chit Chat pieces and created two small embellishment cluster around the title. To finish off the layout I added in some word stickers from the Winter Wonderland 12x12 sticker sheet.

To add a little something extra to my page I went in and added in some splatters using white acrylic paint and silver mist. Thanks so much for stopping by the Doodlebug Blog today!


YouTube | Instagram | Facebook | Blog

DOODLEBUG PRODUCTS USED

Winter Wonderland Collection

Tuesday, March 1, 2022

GREAT OUTDOORS DOODLEPOP CARDS | with Karen

Sooooo...I have a bit of a confession to make. I love Doodle-pops! Now, I know that might not sound like a big deal (because who doesn't love Doodle-pops), but the truth is that I love them so much that most of the time, I can't bring myself to use them. I have lost count of how many I have, but my collection keeps getting bigger and bigger because the Doodle-pops just keep getting cuter and cuter!

All-3-1

So for today's project I decided to force myself to make some cards with my favourite product. Because I have some special people that I want to say "thank-you" to, and special people deserve special Doodle-pops.

Bear

The Great Outdoors collection has been out on the kitchen table for just over a month now and the projects have been flying! I love this collection - the colours work for masculine and feminine cards and the characters are as cute as can be! Honey Bear was the first Doodle-pop to find a home on card...

Shaker

...followed very quickly by the amazing shaker Doodle-pop called S'more Fun! I am a sucker for a shaker, but I am usually too lazy to make them. Doodlebug always has my back!

Washi

Since I am already confessing, I should also let you know that I also collect washi tape, but what better place for a beautiful strip of washi than on a card. I actually ran a strip across the back of my white card base and then to coordinate - across the white envelopes that I was using as well. I love that these spots that I usually don't think much about get a little extra Doodlebug cuteness too!

Closeup-all-3

At the end of the day, I know that these Doodle-pop cards will bring as many smiles to the recipients as they do to me. And the best news is that now, I have more room for more Doodle-pops!

Thanks for stopping by!
Hugs,


BLOG | INSTAGRAM

Doodlebug Design Product:
Great Outdoors Collection

Other Products:
Adhesive
White cardstock

Pin It button on image hover