The milk carton shape is an absolute icon. It always reminds me of my childhood and all the nostalgia of simpler times. So today, I decided to team up that cute shape with all the Doodlebug cuteness to create some little treat containers perfect for Valentine's Day or any day you want to show a little appreciation or love!

And while these look like you slaved away for hours creating them, they couldn't be simpler to make. And don't worry - you don't need any fancy equipment or cut files - just some doodlebug paper, and few tools! In no time, your crafty table will be filled with these cuties!

Okay, just in case you don't believe me, let me prove it to you! All you need is paper, scissors and adhesive. A scoring board helps. But other than that, no fancy tools required!

Start by cutting the base of your carton. 6 15/16" x 6 15/16". Score at the 2.5" mark. Turn the page 90 degrees and score again at the 2.5" mark. Keep turning and scoring until you have done all 4 sides.
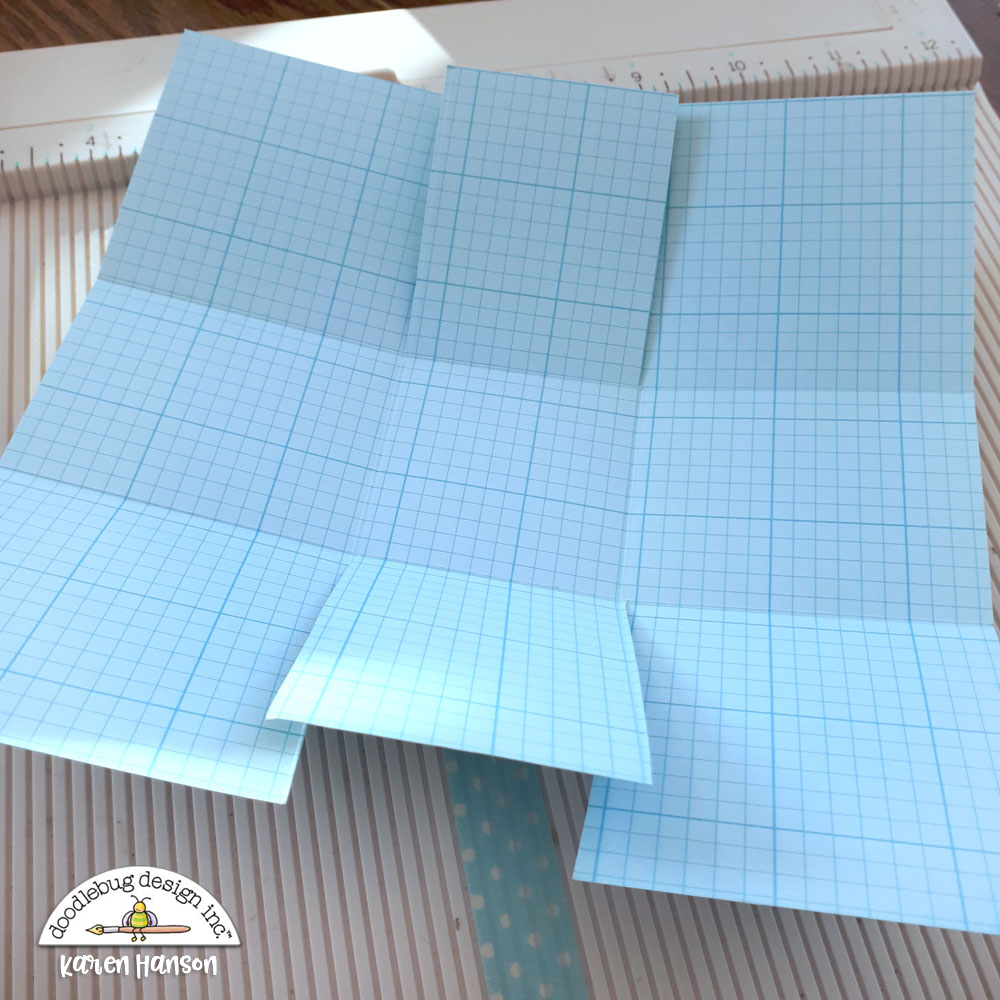
On the top edge, cut down along the score lines stopping at the first perpendicular score line. You will have 2 cuts. Repeat this on the bottom edge.
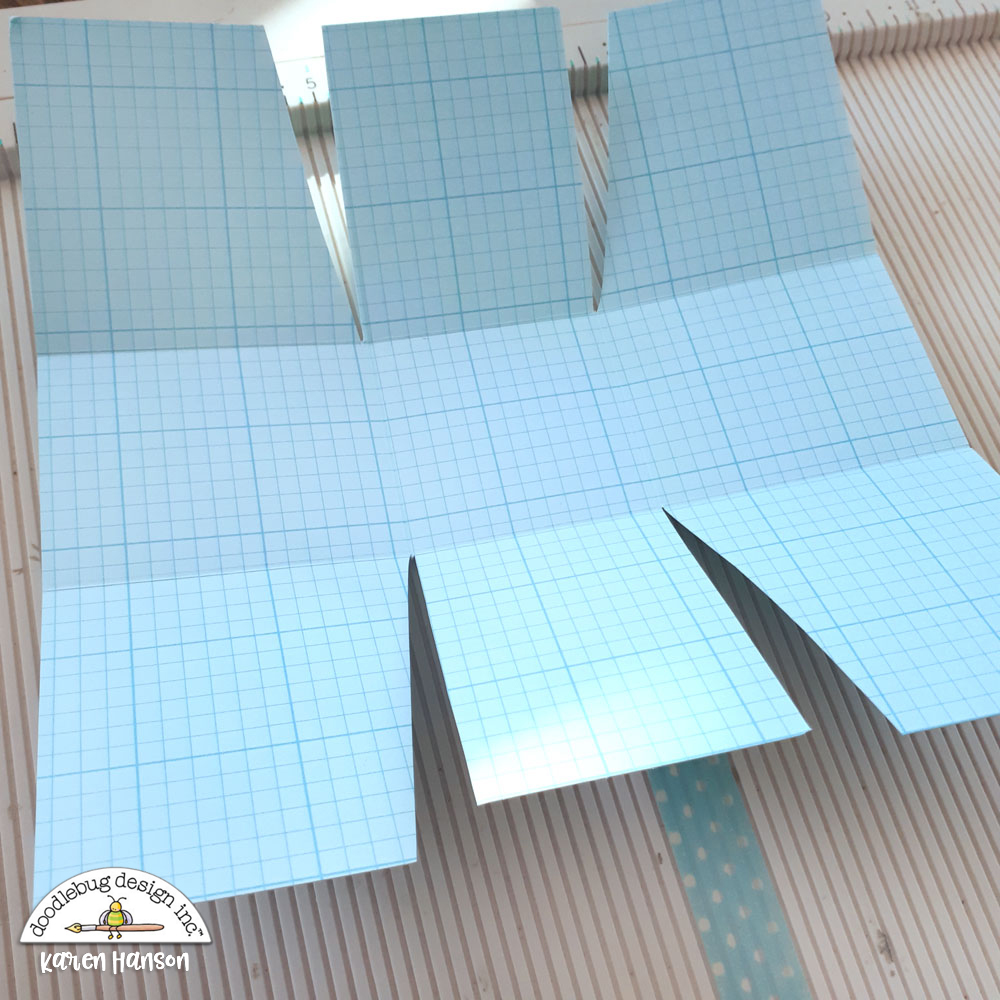
On the 4 outside flaps you have created with your cuts, cut an angled "v" like shape off of the inside edge. Note - do not cut anything on the middle flap as this will form the side of your carton. We are just trying to remove some bulk when we glue the carton base together.

On those same 4 outside flaps, trim off at least half of the flap. Just eyeball it - it is not a big deal if you cut a bit more or a bit less as these flaps will be tucked inside the carton base.
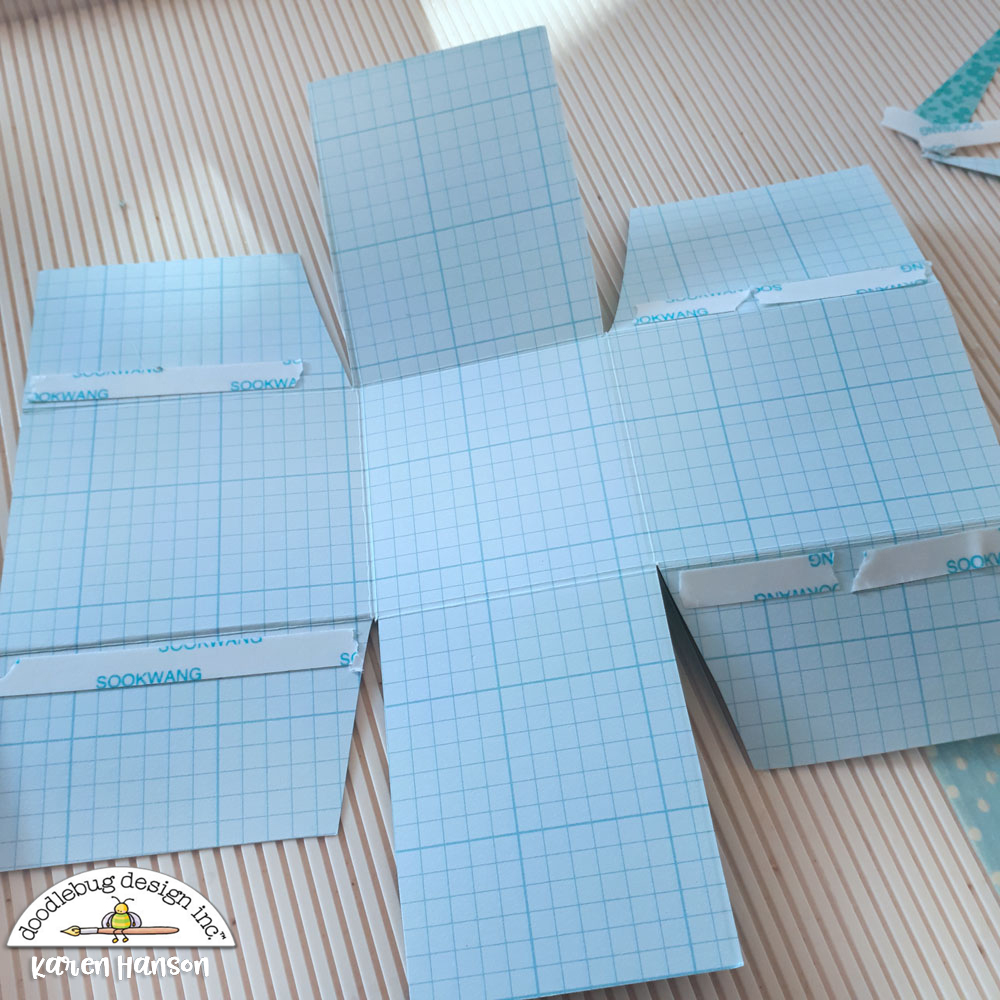
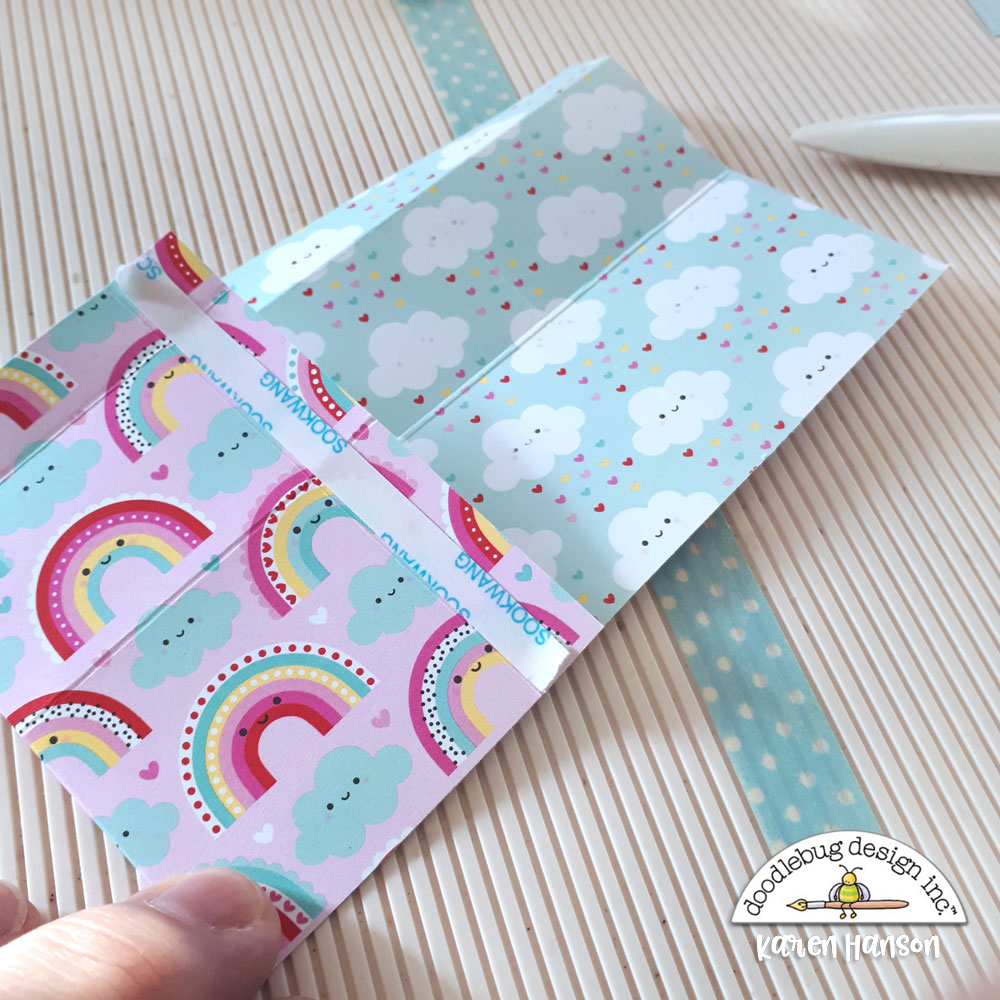
Add adhesive to each of the flaps along the score line.
Fold up each side with the adhesive and attach it to the uncut side right beside it. This will form the sides of your box.
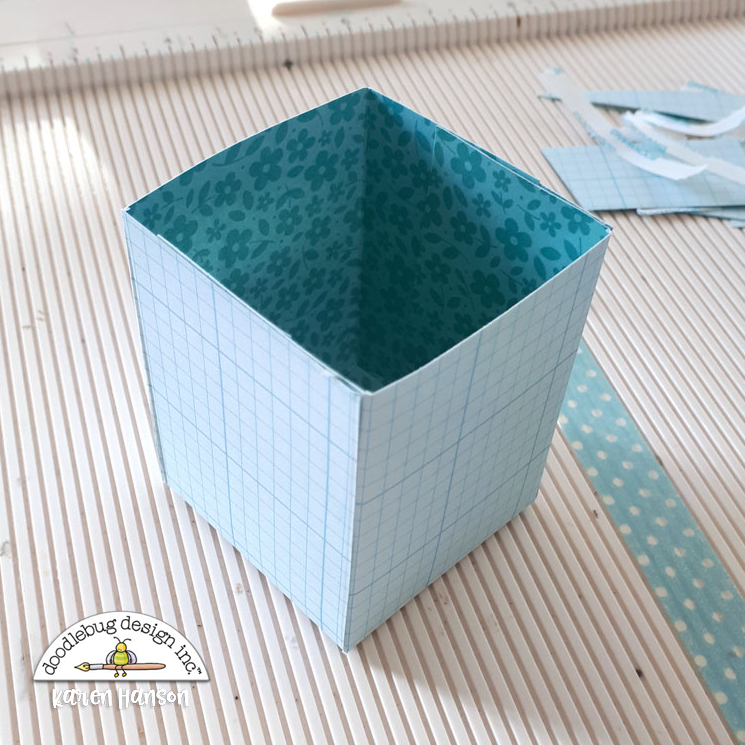
Tada - the bottom of your carton is all finished! Now for the top...

Cut the paper for the top piece 8 1/2" x 3 1/2". Along the long edge, score at 2", 4", 6" 8".

Turn the paper 90 degrees and then score along the short edge at 1 3/4" and 3".
Fold all your fold lines. Add some adhesive along the tab created by the 8" long edge.

Fold into a square.
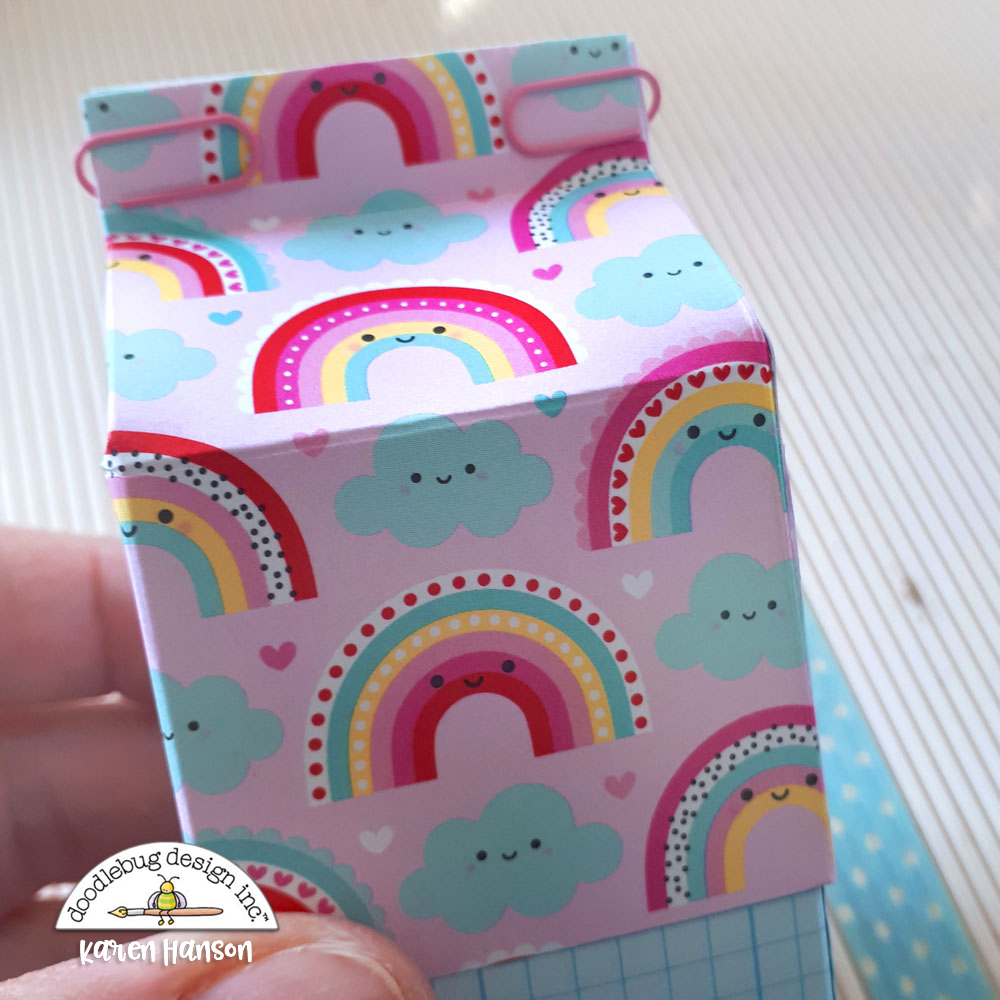
Add adhesive on the tab created by the 3" short edge score and pinch the top together. Hold in place with some clips until the adhesive is dry. I prefer liquid adhesive for the top because I find it hold better long term.

Add some embellishments and you are all done! I used the Odds and Ends and a few stickers from the 12x12 sticker sheet. I also added a few mini jewels for some added texture!

Now I get to fill these up with treats and get ready to give them away. Although, do I really have to? They are soooo cute! Thanks for stopping by! Hugs,

BLOG | INSTAGRAM
DOODLEBUG PRODUCTS USED
Lots of Love Collection
Lots of Love - Odds & Ends
Petite Prints
Mini paperclips
OTHER
Adhesive - Dry and Liquid


 So I decided to not only use that cute milk carton stamp in my project, but to actually use it as the inspiration for a treat container shape. And while the milk containers of my past were crisp white, I couldn't help but to bring in some bold Doodlebug colour - petite prints to the rescue!
 Given that I have a few little people in my life currently in school and many teaching colleagues that I like to spoil with treat containers, I couldn't just stop at one! I played with a few of the different stamps in both the School Girl and School Boy Doodle Stamp sets sometimes adding them to the little tag with some foam adhesive for a bit of "pop"...


 While these cute containers might not be filled with actual milk, I hope that they will bring some smiles and fond memories to those who will receive them!
