Happy Halloween!! Halloween is one of my favorite memories to document! Who doesn't love getting all dressed up and getting free candy right?! The Hey Pumpkin collection is perfect for documenting all those recent photos you took this Halloween! I chose to document a photo from a few years ago as it went well with this collection.
Saturday, November 2, 2024
HEY PUMPKIN SPOOKY LAYOUT | with Tarrah
Friday, November 1, 2024
HEY PUMPKIN TICKET MINI ALBUM | with Niella
Hi crafty boo crew! Halloween may be over for BUT that means it's now time to start documenting all the fun, mayhem and ghoulie treats you've saved over October! Eek! Remember your memory keeping is an investment! Don't lose those special memories so while it's all still fresh in your mind, let's get documenting in a fun ticket mini album! Yay! Or save this post for ideas! And your treat is at the end, a video showcasing!
Thursday, October 31, 2024
HEY PUMPKIN TRAVELERS NOTEBOOK LAYOUTS | with Tya


Tuesday, October 29, 2024
HEY PUMPKIN GHOUL FRIENDS LAYOUT | with Nathalie
Halloween is just a few days! Time to get ready to celebrate and document all those fun and spooky activities with the beautiful Hey Pumpkin collection. I love the fun designs and colors in this collection, and they were perfect to document this story.
Can you believe that I only used my 6x6 paper pad to create this layout! I wanted to play with circles, and the smaller patterns were just what I need it to make the photo pop on the page.
I started by trimming the stripe paper into two 6x3" strips and set them on the gray cardstock so they lay from left to right edges. However, I set them so they are about 1" higher on the right side of the page.
Next it was all about the circles. I simply cut a few circles (with a metal die) from the 6x6 paper pad. I layered a few of them with a second circle to create a frame-like idea, and also to minimize the patterns on the page. I set them in a zig zag motion down the page. Then placed the photo atop the two paper strips.
Then it was all about embellishing, I pulled pieces from the Bits and Pieces, Odds and Ends, to add interest to the circles. I added icon stickers, puffy stickers and Doodle pops as I worked down the page. For the title, I reached for large Chit Chat words and added extra puffy stickers to bring it all together.
I love how this layout came together so easily. I cannot wait to see all your Halloween paper crafting. Remember to check the Hey Pumpkin collection! XO
Monday, October 28, 2024
HEY PUMPKIN KITTY BOX CARDS | with Kathy
I started with the Hey Pumpkin October Garden Kitty 2 SVG. The little kitty popping up from behind the pumpkin made me smile! I cut the pieces from the Hey Pumpkin Coordinating Textured Cardstock and added some Bits & Pieces and Puffy Icons for the florals. I love that the coordinating cardstock packs have the perfect colors!
I added the hello speech bubble from the Chit Chat pieces using a piece of heavyweight acetate so it looks like it's floating.
My next card features the Hey Pumpkin Pumpkin Kitty SVG. The little fella in the pumpkin candy pail was too cute to resist!
I created a tutorial a few years ago showing how I convert flat cut files to 3D cards. You can find that here on the Doodlebug blog. It will give you a general idea on how to create your own box cards featuring Doodlebug's cut files! That's it for me today, I hope you all have a fun and safe Halloween!
Hey Pumpkin Coordinating Textured Cardstock
Hey Pumpkin Pumpkin Kitty SVG
Clear Heavyweight Acetate
Saturday, October 26, 2024
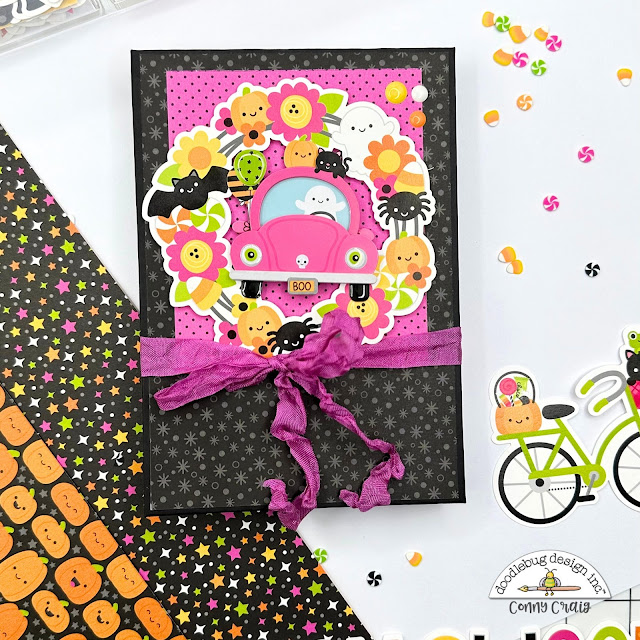
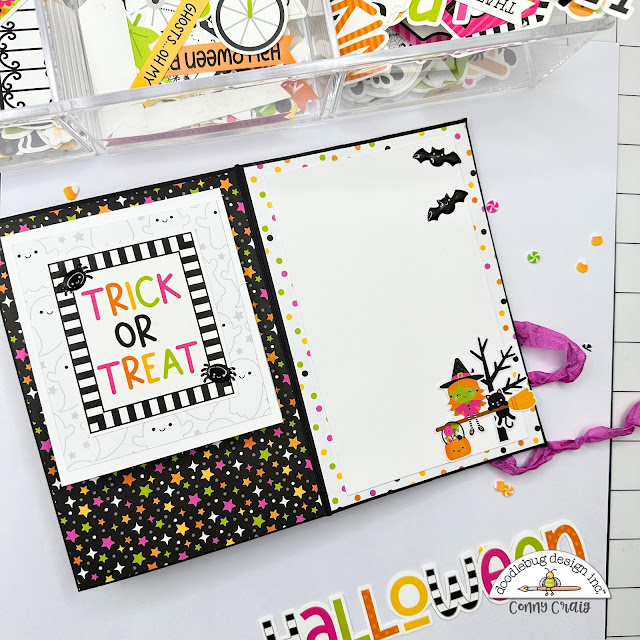
HEY PUMPKIN ACCORDION MINI ALBUM | with Conny


 The white photo matts were cut in three sizes: 3 3/4" x 4 1/4", 6" x 3 3/4", and 8 1/2" x 4 3/4". I scored the longest side of the 8 1/2" x 4 3/4" mat at 4 1/4" to create flip-up pages. I embellished them with my favorite pieces from the Bits and Pieces, Odds & Ends, chit chat, and more.
Friday, October 25, 2024
HEY PUMPKIN WITCH CANDY HOLDER | with Jen
I have been obsessed with the witches in the new Hey Pumpkin collection! They are just the cutest but the little witch at her cauldron has to be my favorite.
I used the adorable Hey Pumpkin Witches Brew SVG file and my Cricut to make a cute little candy dish. I cut the file as-is, sized up to 11" tall. I cut the base layer from medium weight chipboard four times and then stacked and glued them together.
I added 1/4" strips of black cardstock around the edge to hide the chipboard, but you could also paint it. I cut an extra frog and an extra cauldron. I used the Hey Pumpkin coordinating cardstock to cut all the layers. You could use petite prints for some layers as well.
Have a great day!
DOODLEBUG PRODUCTS USED
Hey Pumpkin Collection
Hey Pumpkin Coordinating Solid Cardstock
Hey Pumpkin Witches Brew SVG file
OTHER
Medium Weight Chipboard

.png)
.png)
.png)
.png)
.png)


