Sunday, May 31, 2020

DOODLE CUTS - TAG MINI ALBUM | with Kathy

Have you seen all of the fun new Doodle Cuts?  They come in some fun shapes and are perfect for cardmaking and scrapbooking!  I used a bunch of the new dies to create this tag mini album.  My daughter spent last summer working and living in NYC.  She celebrated her 21st Birthday there... which actually turned into a month of celebrations.  Lucky for me she shared lots of pictures, (and honestly I stole some from Instagram, lol) which I printed up for this fun mini.  Take a peek...


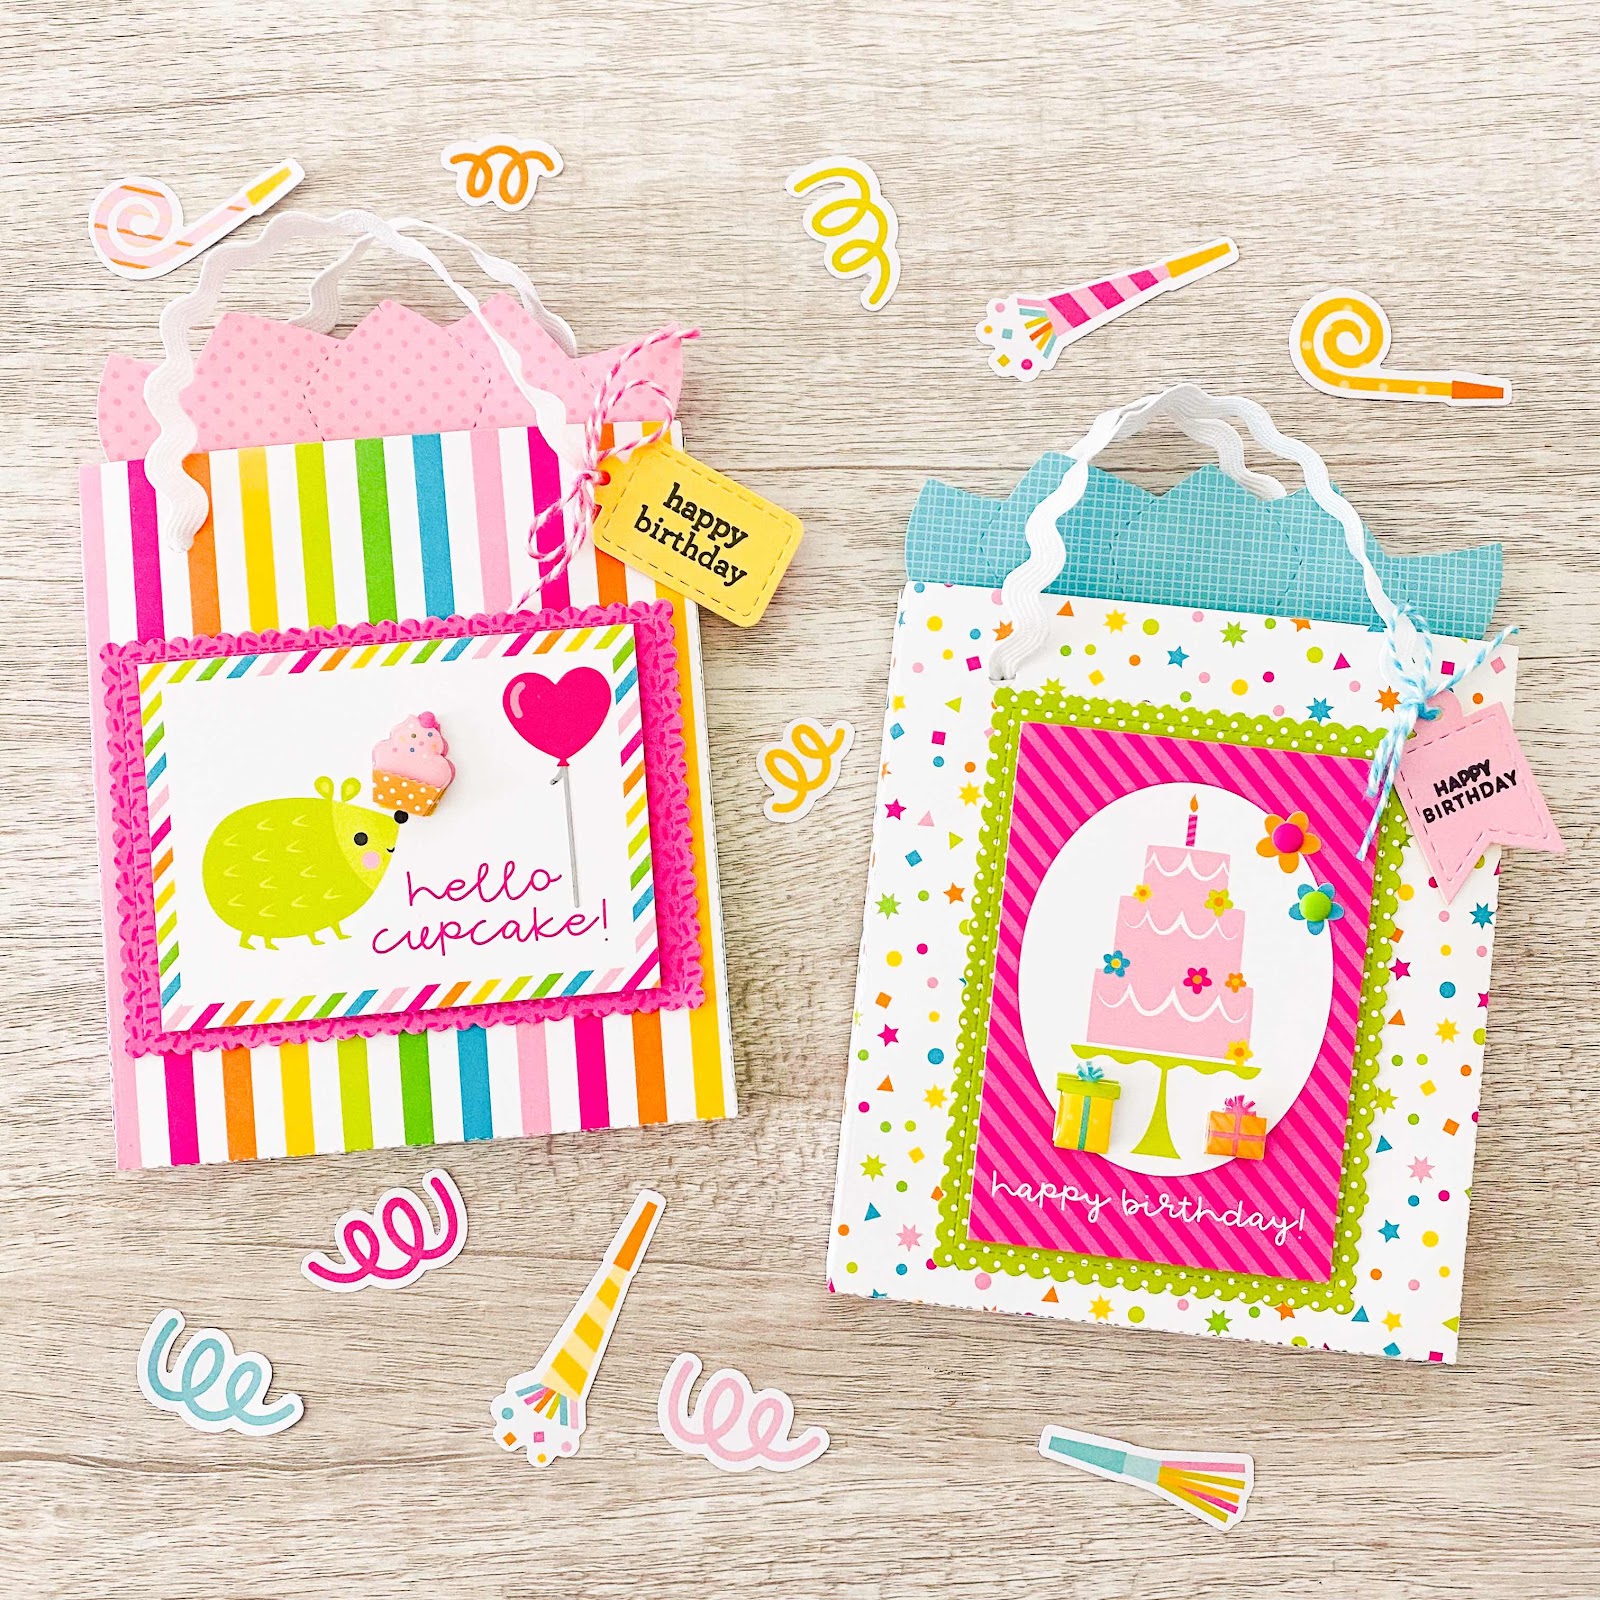
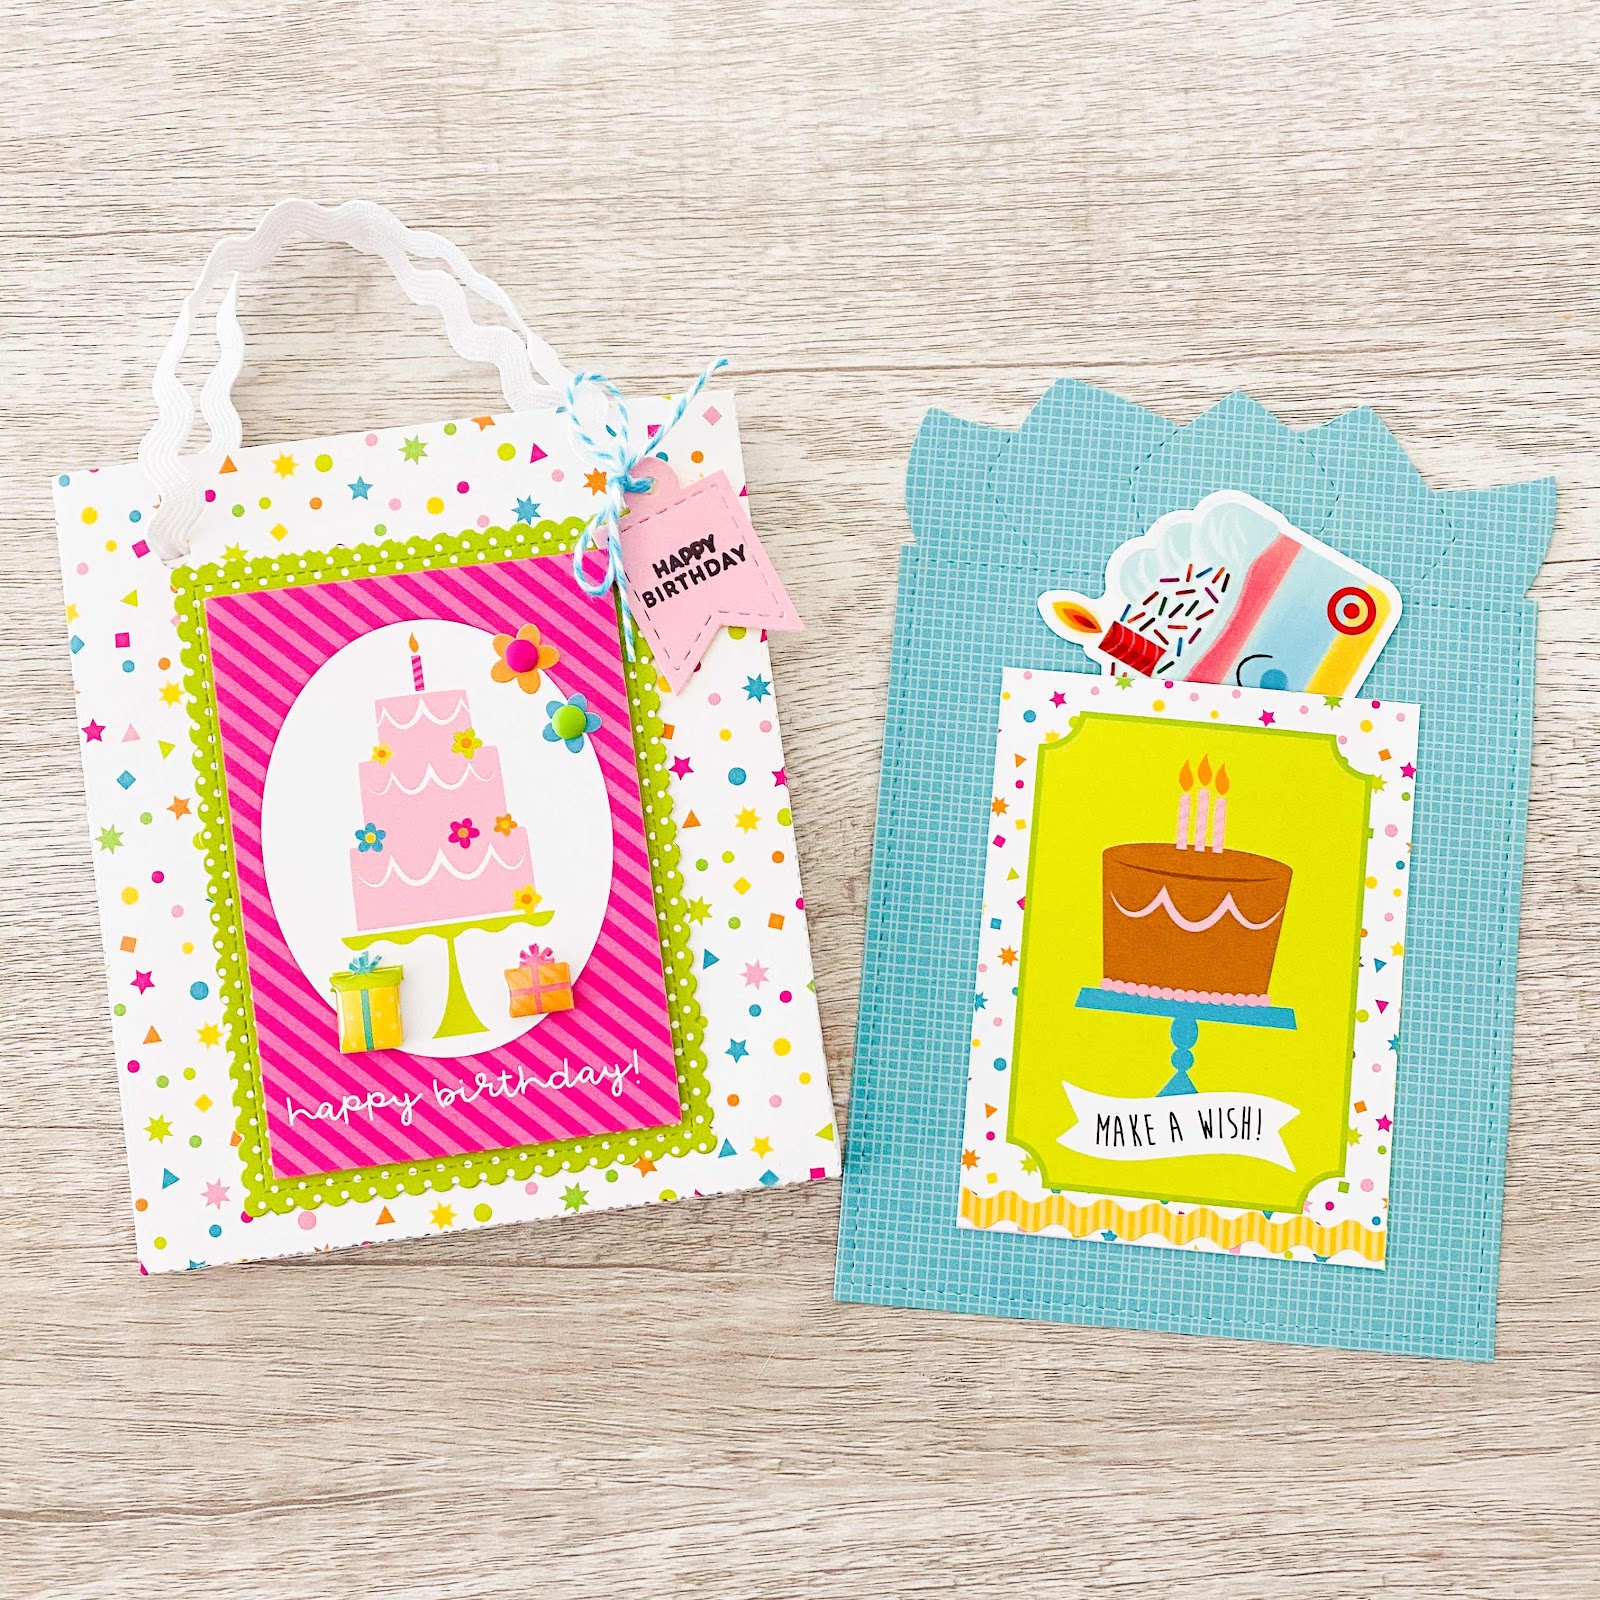
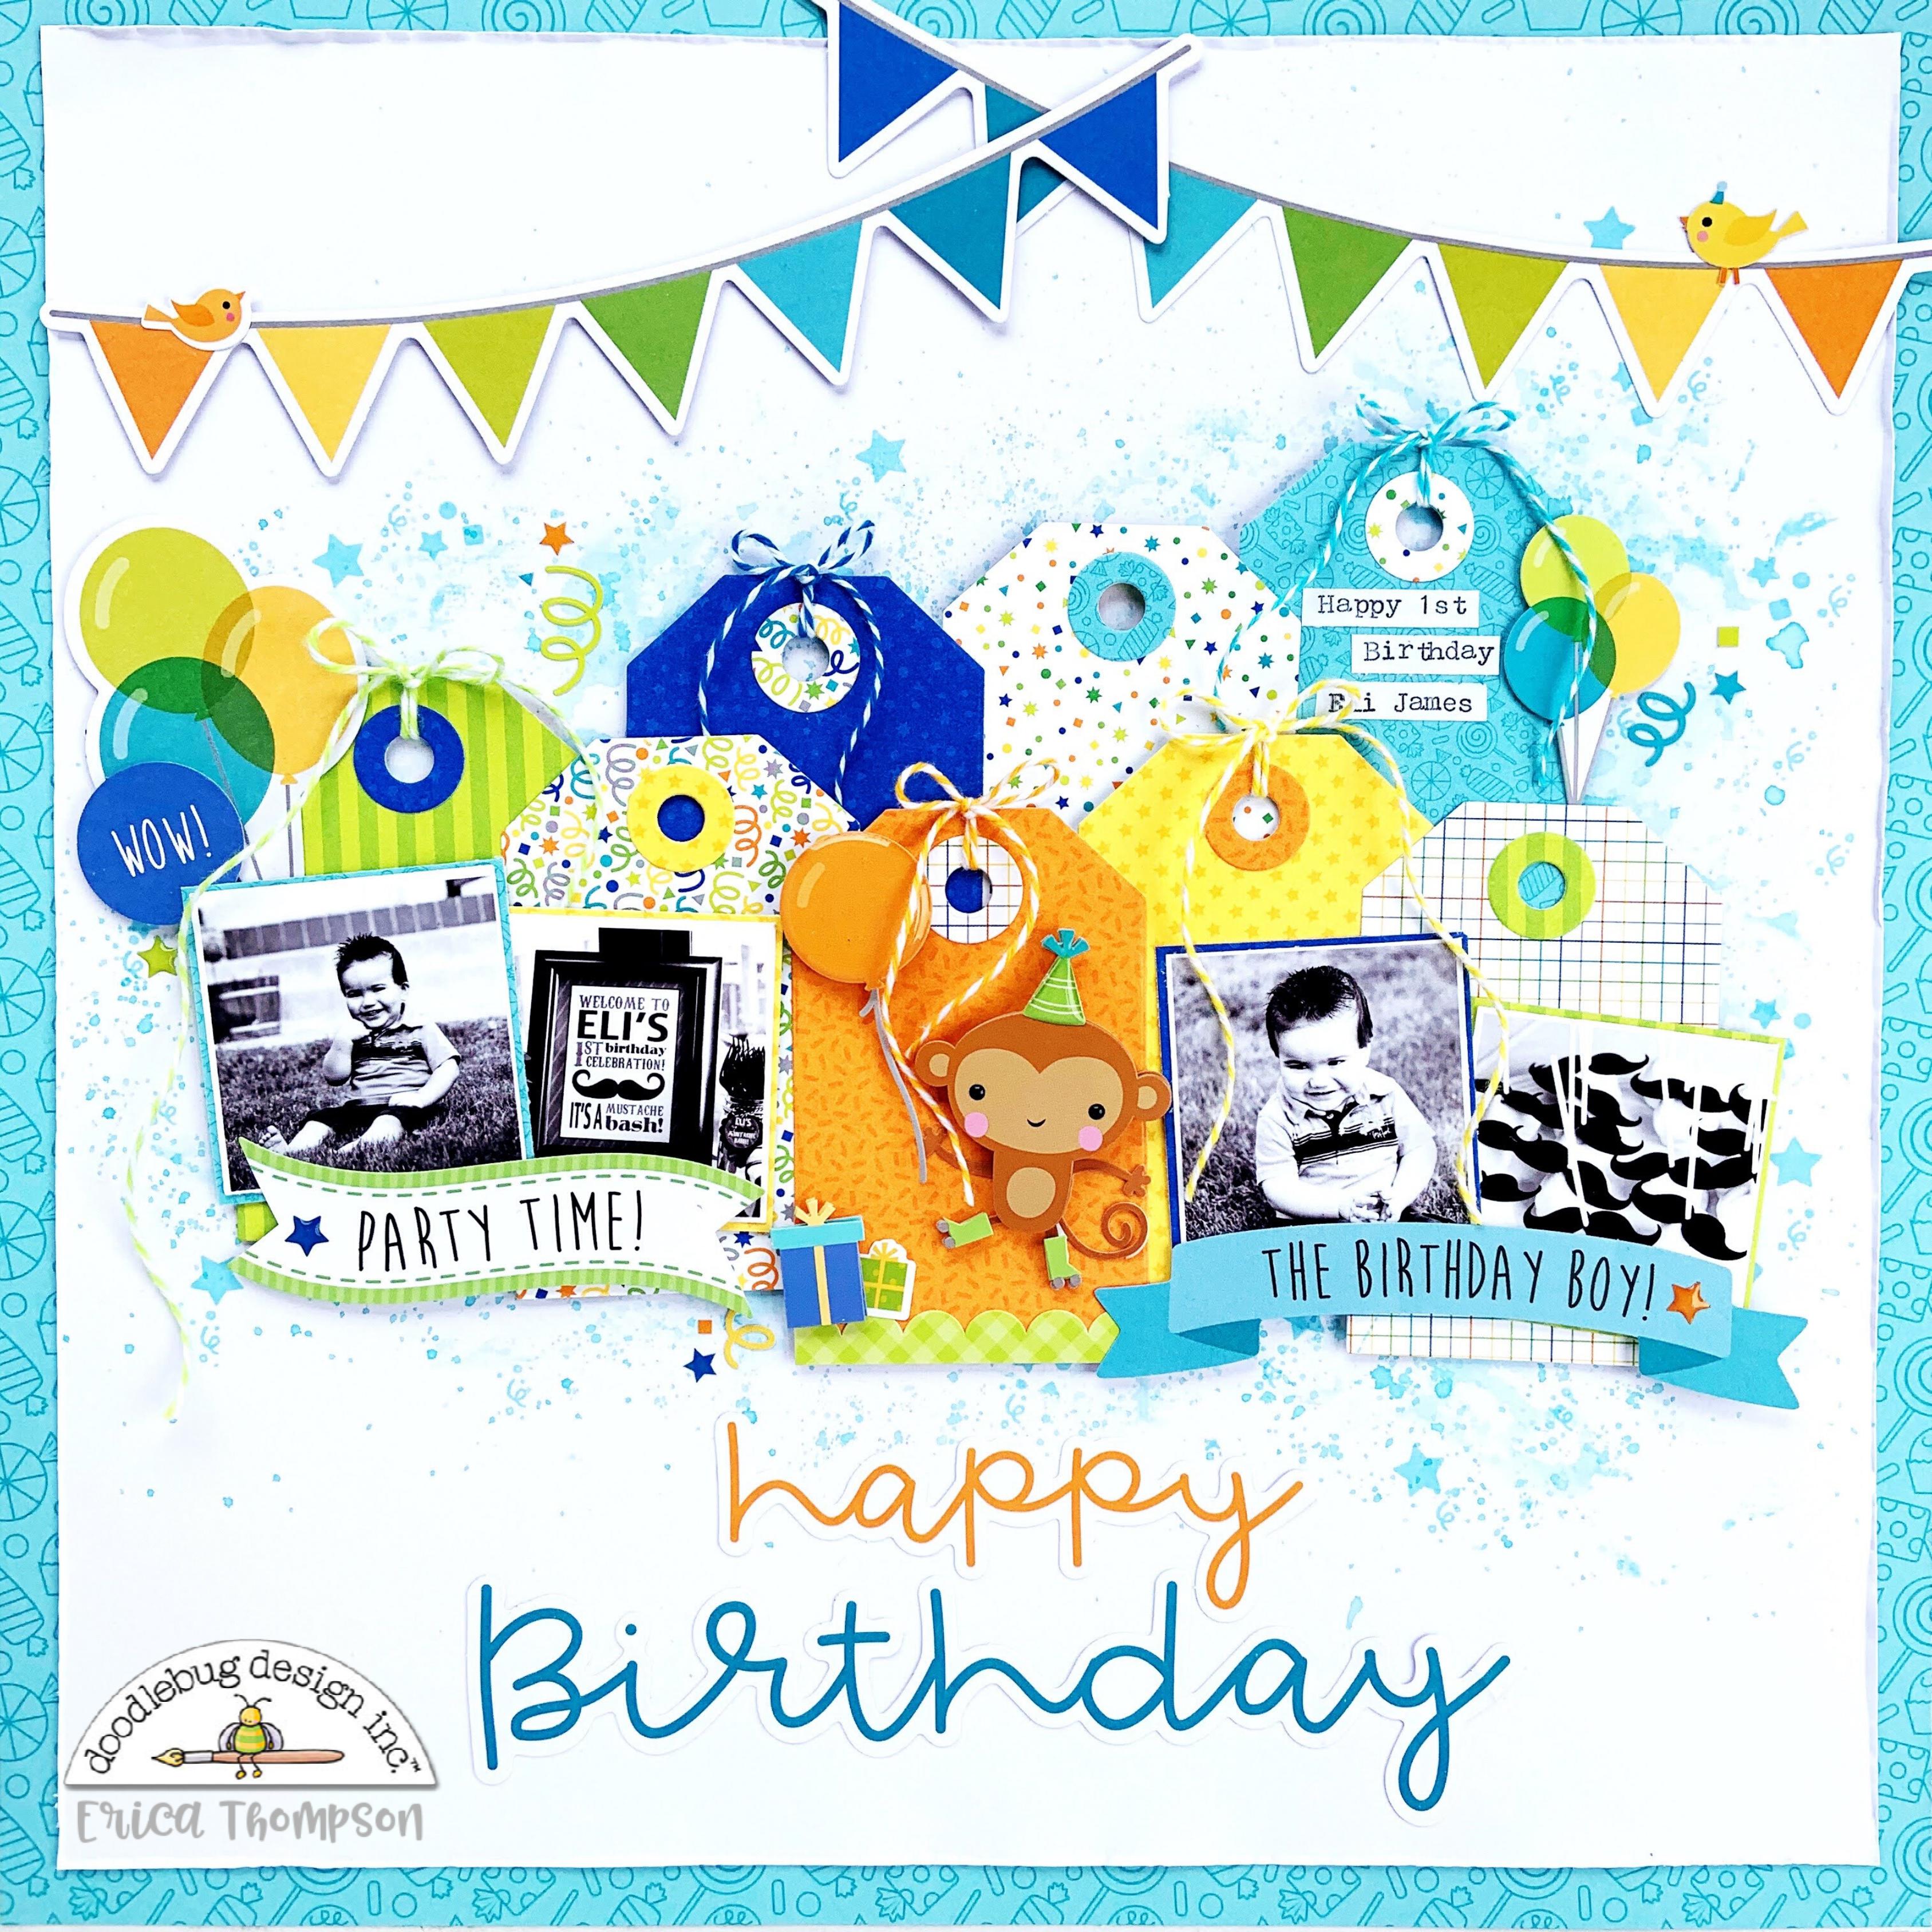
I used the big tag from the Large Tags Doodle Cuts as the base of my album.  I printed my photos about 1.75" square, which was the perfect size to fit the tags and leave room for some embellishments.  The papers and embellishments are from the adorable Hey Cupcake Collection.


For my cover, I added one of the Nesting Scallops Doodle Cuts to frame my title.  The Happy stamp is from the Happy Birthday Doodle Stamps, and the cute little champagne bottle is from the Occasions Holidays Doodle Stamp set.  Here are some close-ups of the inside pages...

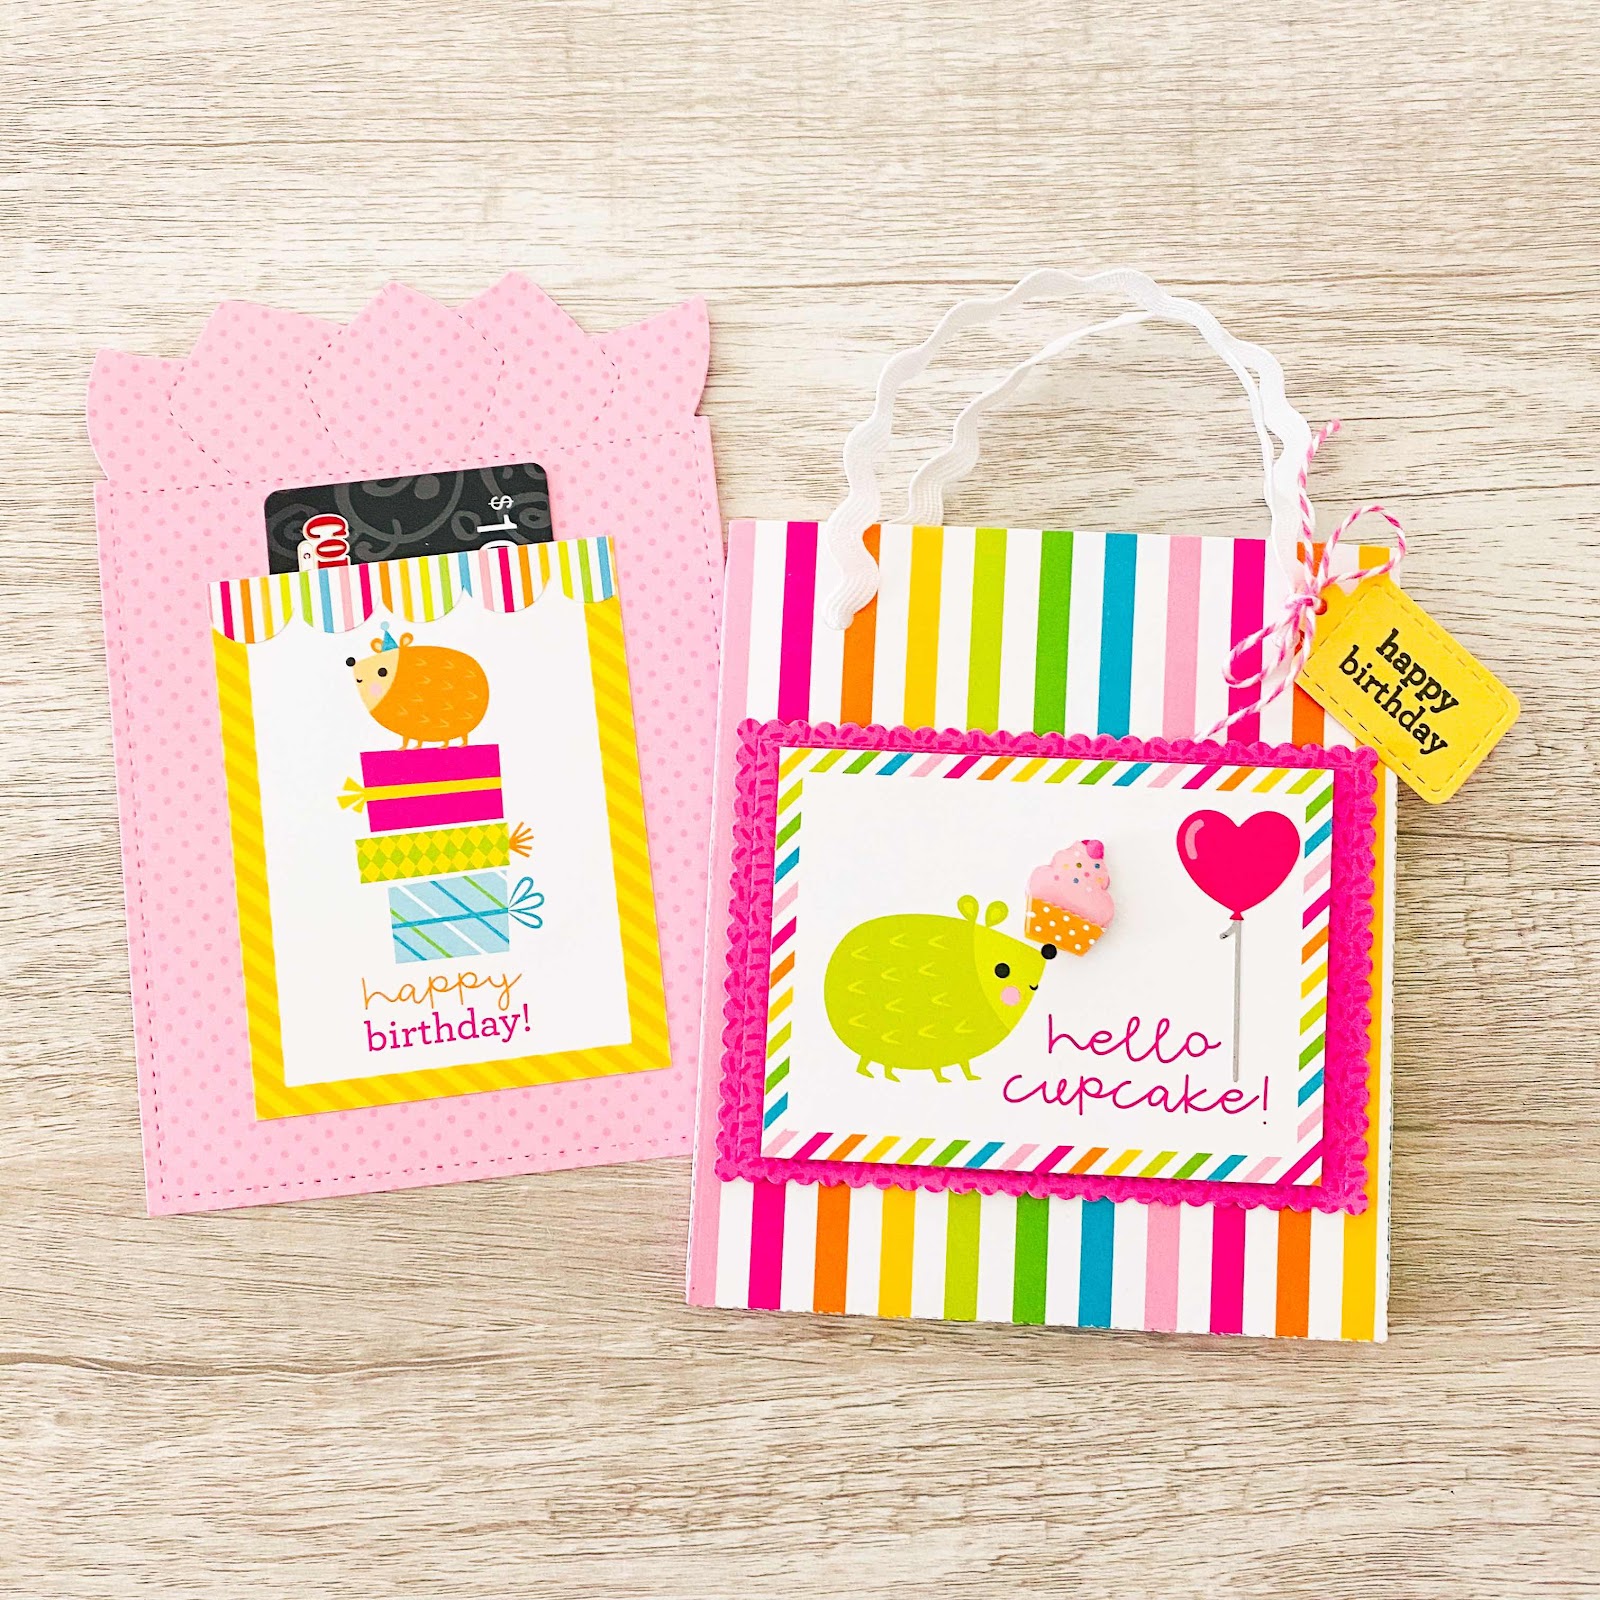
The stickers from the mini icons sheet were the perfect size to decorate my tags.  I also added stickers from the This and That sheet and some Chit Chat pieces.  The wine glasses stamp is from the Occasions Everyday Doodle Stamps set.

The Borders and Edges Doodle Cut dies were an easy way to embellish my tags.  I also added a few of the smaller tags from the Mini Tags Doodle Cuts in between my larger tags for embellishment.  My favorite is the clear shaker tag I made by cutting 2 of the larger tags from a sheet protector, stitching and filling with some Doodlebug Sequins.
To complete the album, I created a little tassel using some Doodlebug Chunky Twine.  My daughter loved this little collection of pictures.  Tag minis are really a great way to scrap a small number of photos.  They make great gifts too!


You can really make so many different types of projects with the new  Doodle Cuts and Doodle Stamps.  They are good for planners, cards, scrapbook pages.... just about anything you can think of!  If you've used them in your projects, be sure to tag Doodlebug Design on Facebook and Instagram.  We love to see your creations!  That's it for me today, thanks for stopping by to peek!


Doodlebug Products Used:
Hey Cupcake Collection
Nesting Scallops Doodle Cuts
Borders & Edges Doodle Cuts
Mini Tags Doodle Cuts
Large Tags Doodle Cuts
Happy Birthday Doodle Stamps
Occasions - Everyday Doodle Stamps
Occasions - Holiday Doodle Stamps
Doodlebug Sequins
Chunky Twine
Chippers Alphas
Teensy Type Alphas

Other:
Sizzix Big Shot
Sewing Machine
Book Ring

PARTY TIME - 3D ROBOT | with Jennifer

Hello, Doodlebug friends. Today I'm sharing a project featuring the new Party Time collection. I hope you love this little guy as much as I do.
The inspiration for this project comes from these adorable robot stickers, which you might remember from the older line, Hip Hip Hooray. 
 Aren't they cute?!!!
Robots can be really fun to make using odds and ends from your craft stash. The main components for this little guy are shown in the picture above.
  1.  For the head, I used a small flat rectangular box. The lid was cut in two and used to create the feet. For his neck, a small wood drum was used, and his body is a 2 1/2" woodblock. I cut his legs out of 1/2" foam board then covered them with chipboard for additional strength. Wood pieces were layered together to form the ears.
  2. A mouth was cut out to the same width as the box from foam board. The foam board mouth was covered with chipboard, and side flaps were added.  
  3. Round discs, buttons, and axel dowel caps were stacked together to form the shoulders. Floral wire was used for the arms, and small claws were cut from wood for the hands.
  4. Each piece was covered with patterned paper or painted then pieced together on a round wood base.
More wood pieces were used for the eyes and nose. A birthday sign was created for the robot to hold, using a die-cut reinforced with chipboard and wood dowel. 
Keeping with the robot theme, a few chipboard gears were added to the base along with some sprinkles. 
The top of the base was covered with patterned paper from the collection. A decorative border and a patterned paper strip were added around the edge. To finish off the project, the "Hip Hip Hooray" die-cut was added.

Thanks for joining me today and happy scrapping! :)

 Blog | Etsy | Pinterest

Thursday, May 28, 2020

DOODLE CUTS - DIE CUTTING ON A LAYOUT | with Erica

Have you seen the new Doodlebug Design Stand Alone Dies? They are perfect for all types of papercrafts and today I want to share how I used some of them to create a layout!
I started out by die cutting some tags using the doodle cuts large tags and the Party Time 6x6 paper pad. I love that this set comes with the hole reinforcers! I used a piece of white cardstock as my background and trimmed it down to about 11.25x11.25. I distressed the edges a bit with my scissors and then used some; Catherine Pooler Designs ink in the color; It's A Boy to add some color to the background. This was the perfect color to go along with the blue in this collection.
I pulled out a few of the new doodle stamps to add a few little images around the background. I used occasions-everyday, all occasion and happy birthday! I stamped the images out in the same It's A Boy ink color and love the look!
I arranged the tags on my layout and popped them all up on some foam adhesive. To add some texture to the layout I added some doodle twine to some of the tags.
I backed my photos with some papers from the 6x6 party time paper pad and used chit chat pieces and stickers to embellish around the page. I matted the layout on the Party Time 12x12 pattern paper. Here is a look at my completed layout! Thanks so much for stopping by today! I hope you found some inspiration using the new doodle cuts and stamps! Have a great day!
 
Doodlebug Design Products Used:
Doodle Twine
Doodle Cuts
Doodle Stamps
Other Products Used:
 

Wednesday, May 27, 2020

DOODLE CUTS A - Z SCHOOL TAGS | with Shellye

ABC's please!  With so many turning to school at home in recent days,  I thought I'd share this fun project that is educational and crafty!

To begin: I started with an assortment of Doodlebug cardstock and the tag die from the "Large Tags" Doodle Cuts set.  After die-cutting the 26 tags, I chose to add a coordinating oval of color to each using the die from the "Mini Tags" set.  
 

After die-cutting the letters using the "Alex Alphabet" dies, I attached them to the ovals with a glue pen.  Once all of the cards were done I laminated them with a heat laminator and then cut apart!

In finishing up the cards, I came back with an assortment of alpha and mini stickers to coordinate with each letter.  I also added some of the adhesive jewels to give each card a little sparkle.   The cards were then added to a shower curtain ring (or use a standard binder ring) and topped with a bow!
Have fun coming up with your own designs...and the REAL challenge of finding a sticker that matches the letter LOL  Such a fun activity for the kiddies :)
Thanks for joining today!

Doodlebug Products:
Alex Alphabet Doodle Cuts
Mini Tags Doodle Cuts
Large Tags Doodle Cuts
Hey Cupcake Mini Jewels
Hey Cupcake 6X6 Paper Pad
Party Time Paper Pad
Skinny Alphabet Stickers
Doodlebug Cardstock
Mini Icon Stickers

Tuesday, May 26, 2020

DOODLE STAMPS & CUTS - LAYOUT | with Tegan

I love creating graphic designs on my layouts! I used the new Doodle Cuts Borders and Edges Dies and the Hey Cupcake collection to create a fun chevron background on today's layout. I love how it turned out so come take a look! 


​ I started by using the heart strips Borders and Edges die to cut out four strips in four different bold colors.
 I then used the graph design of the Lollies Patterned Paper to help me create the chevron design. I used the light pink stripe in the middle of the patterned paper as a guide to place the heart strips at an angle against. Using the different colors of the graph to see where to place the strips made this design so easy!  I then embellished my photo with some Odds & Ends pieces and Sprinkles. I also used the largest Doodle Cuts Nesting Scallops die to create a circular frame around my photo.

​ The Odds & Ends and Chit Chat Die Cut Packs make embellishing projects so easy. I also added some Sprinkles Self-Adhesive Shapes as confetti in the balloon. And isn't that little birdie just the cutest?!

​ I used the fun Abigail Alphabet in Swimming Pool and a Chit Chat Die Cut piece to create the title. I embellished the word 'GIRL' with a few of the round Sprinkles Self-Adhesive Shapes. I love the little bit of detail this adds! I then further embellished the title with Mini Icons Stickers. 

​ The Hey Cupcake collection is just perfect for helping me document my niece's birthday! I can't wait until her birthday rolls around again so I can take more pictures to document with this fun collection. And I think the heart strip die makes a pretty cool background design! 

​ Thanks for joining me today! I hope I have inspired you to grab some of the new Doodle Cuts Dies and the Hey Cupcake Collection for your next layout!


Doodlebug Design Products Used:
​ Hey Cupcake Collection
​ Abigail Alphabet Stickers - Swimming Pool
​ Doodle Cuts Borders and Edges Die Set
​ Doodle Cuts Nesting Scallops Die Set


Monday, May 25, 2020

DOODLE STAMP & CUTS - TREAT CONTAINERS | with Karen

Birthdays always seem to be a time when we reach out to one another and celebrate, so one of my favourite parts of planning for a birthday has been figuring out how to say "thank-you" to those who help make it a special day. Little treat containers have become a part of our birthday traditions so the new Hey cupcake collection together with some of Doodlebug's new Doodle Cuts are a welcome addition to my crafty collection! 
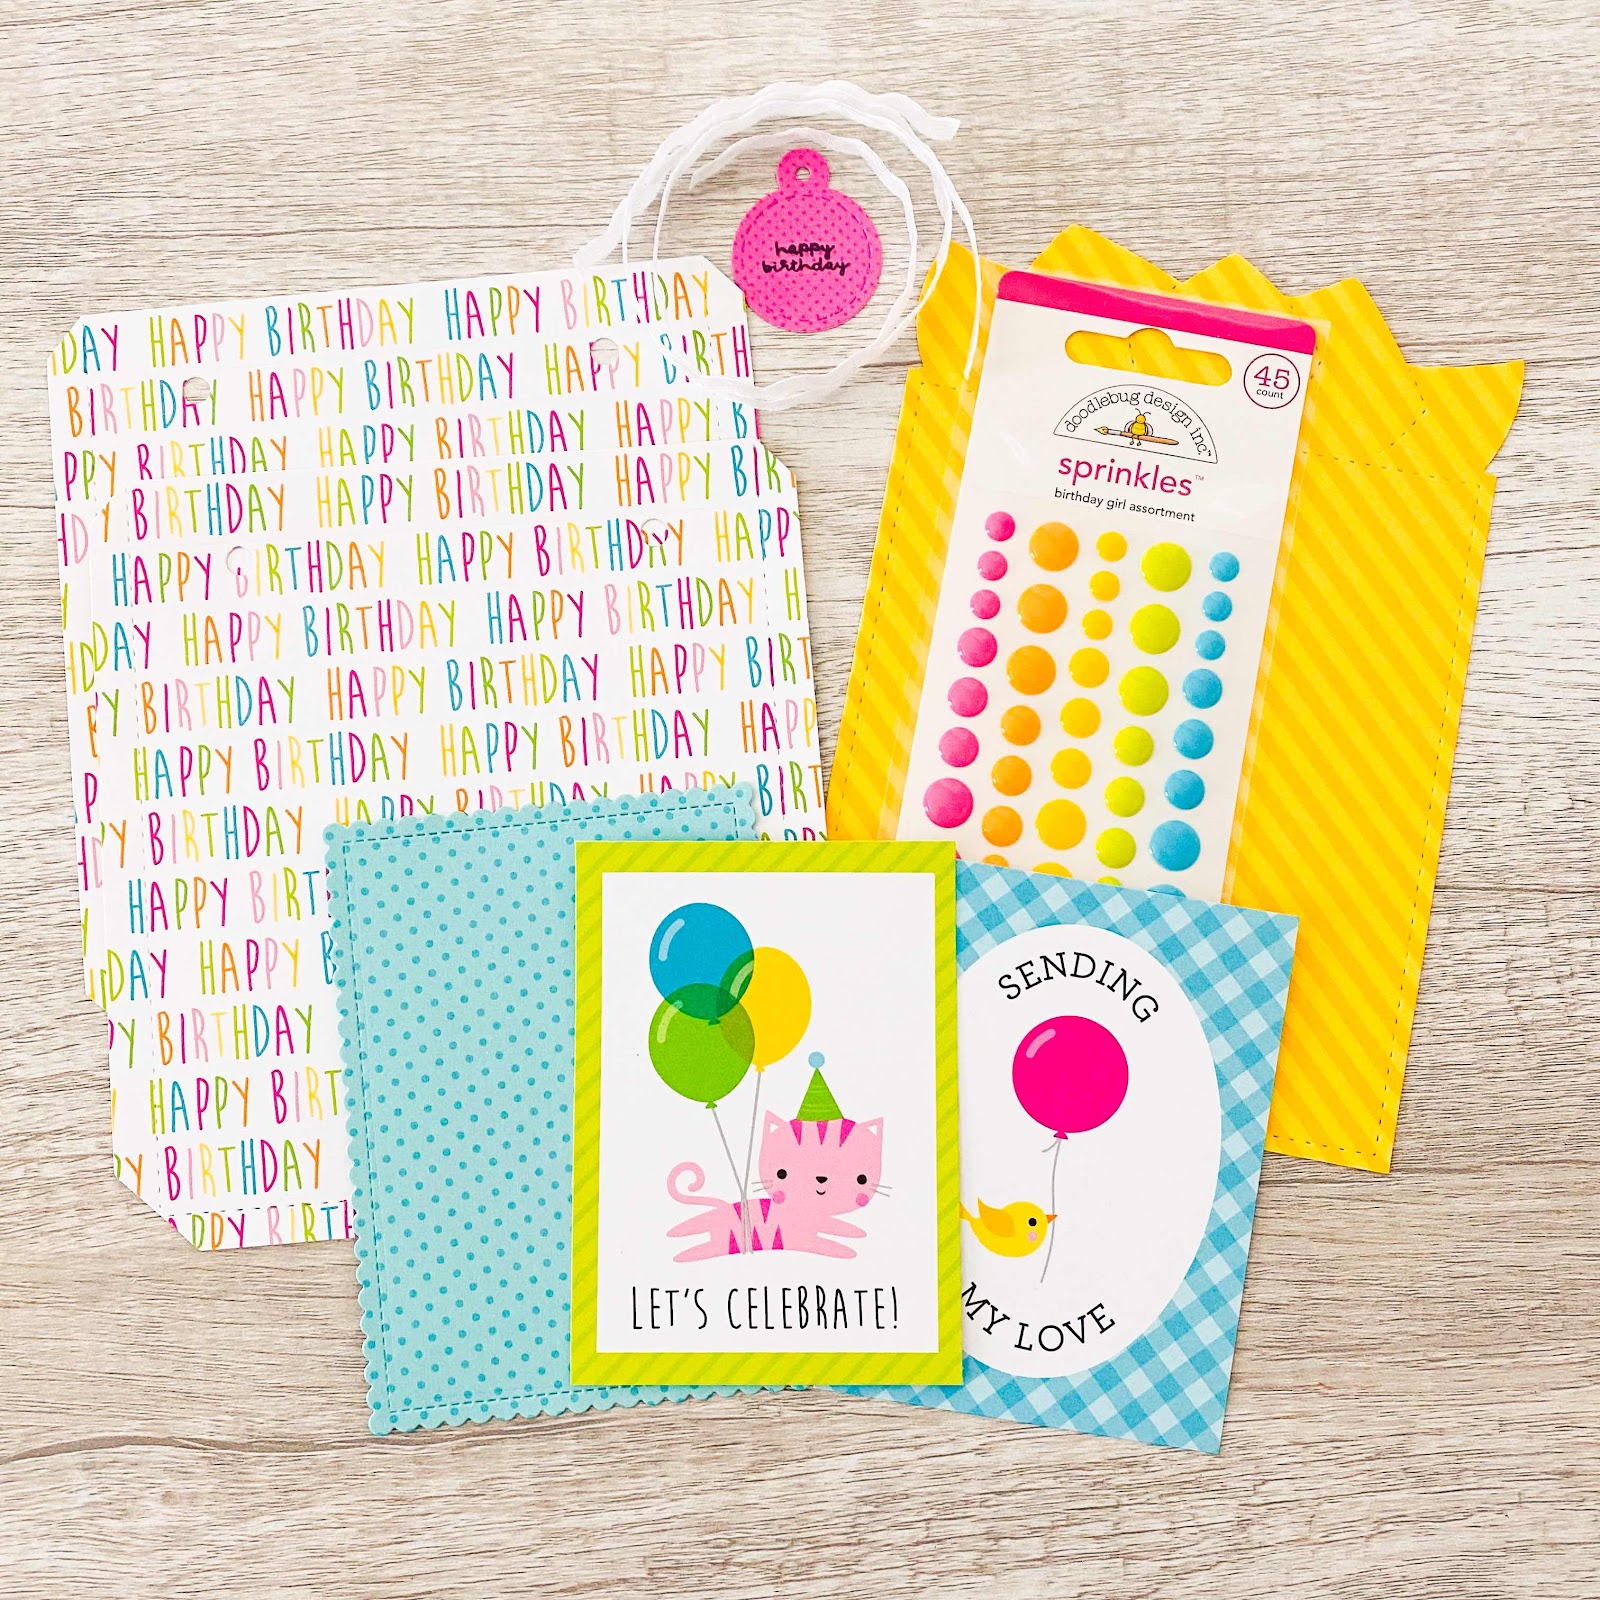
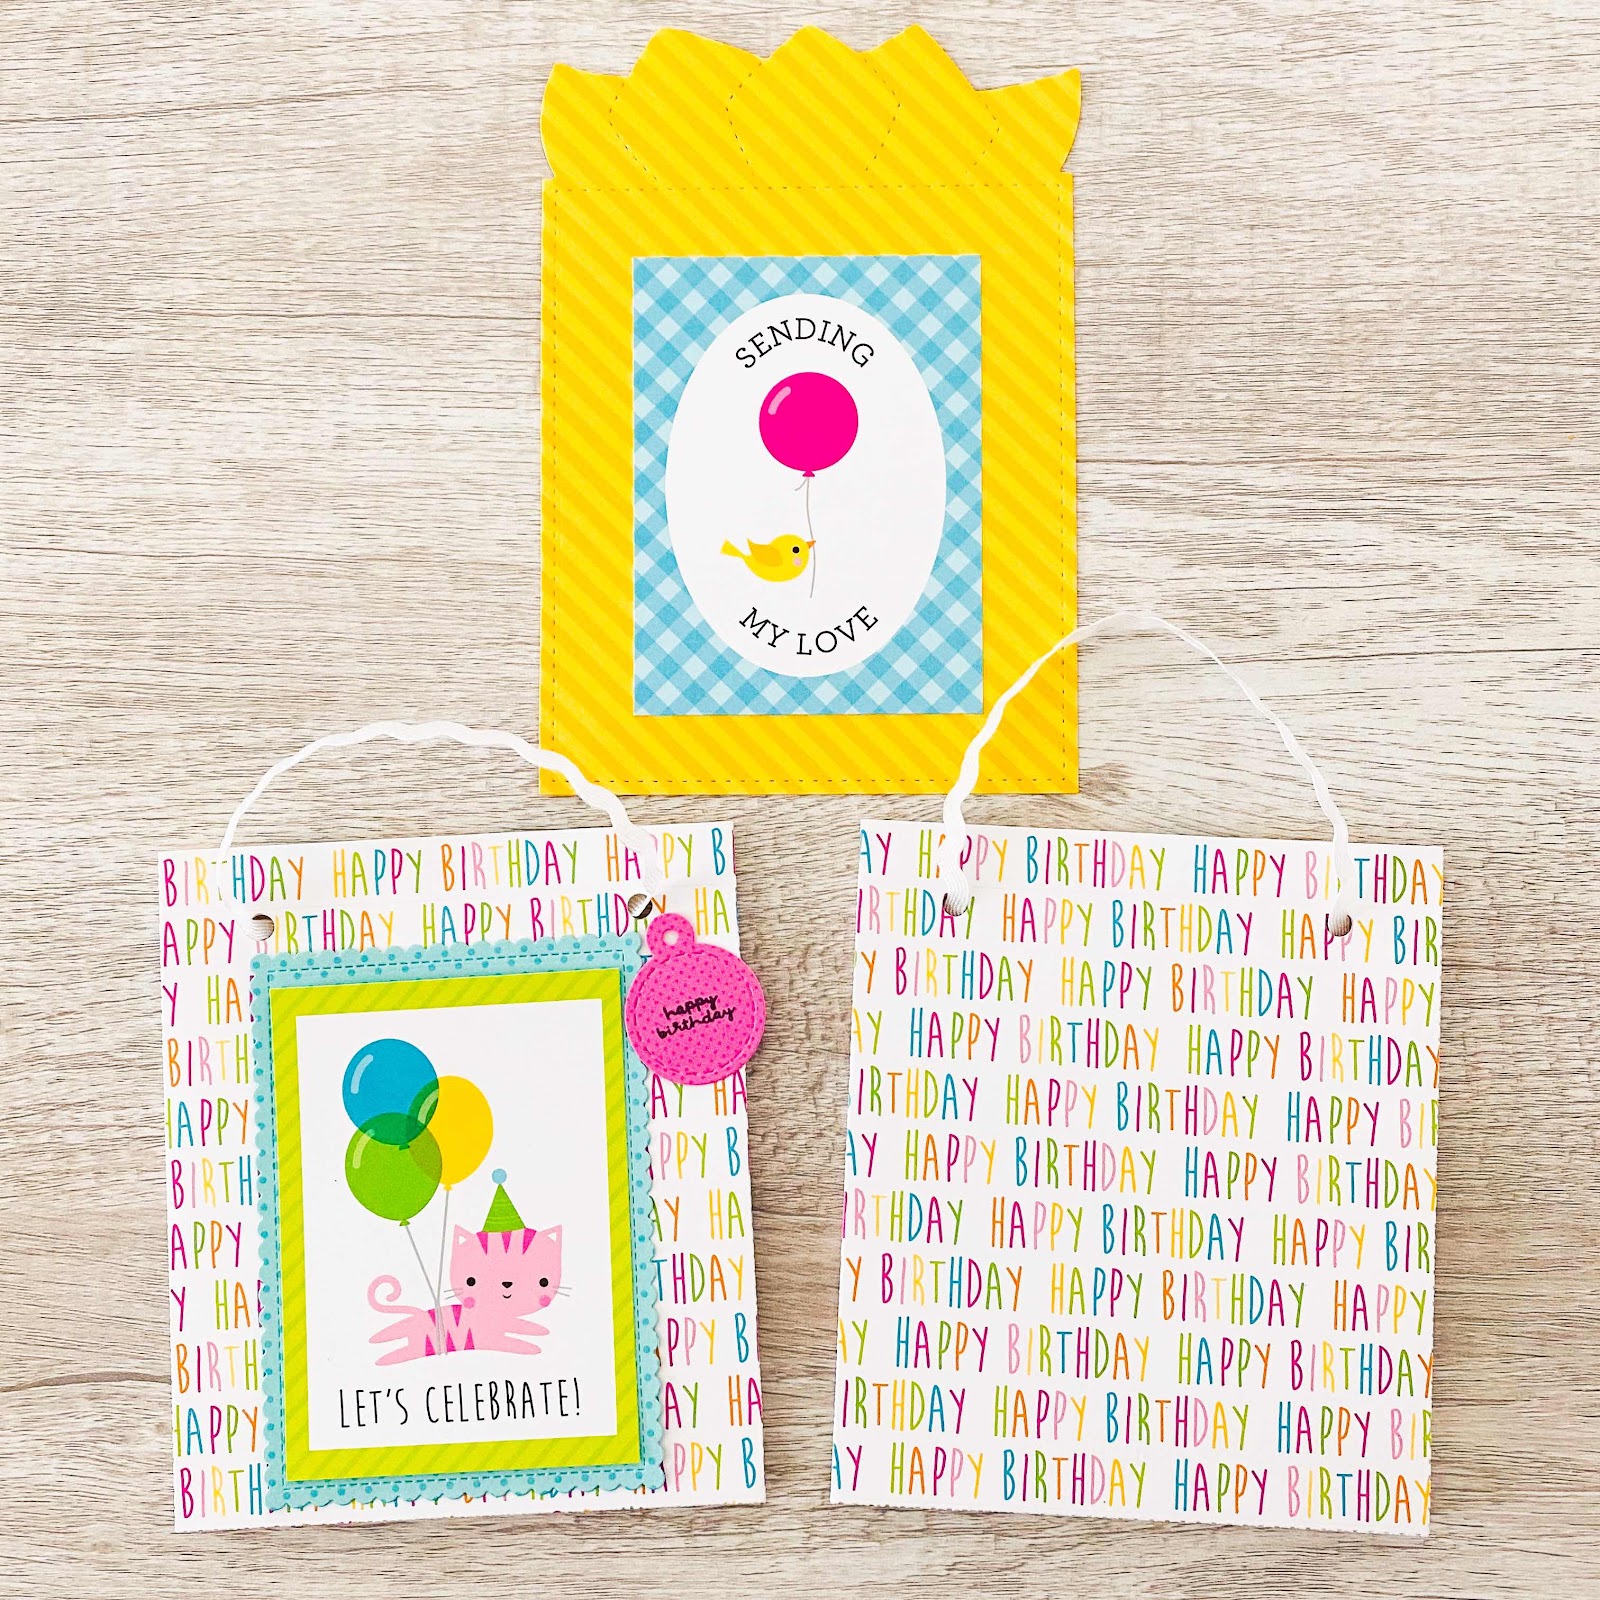
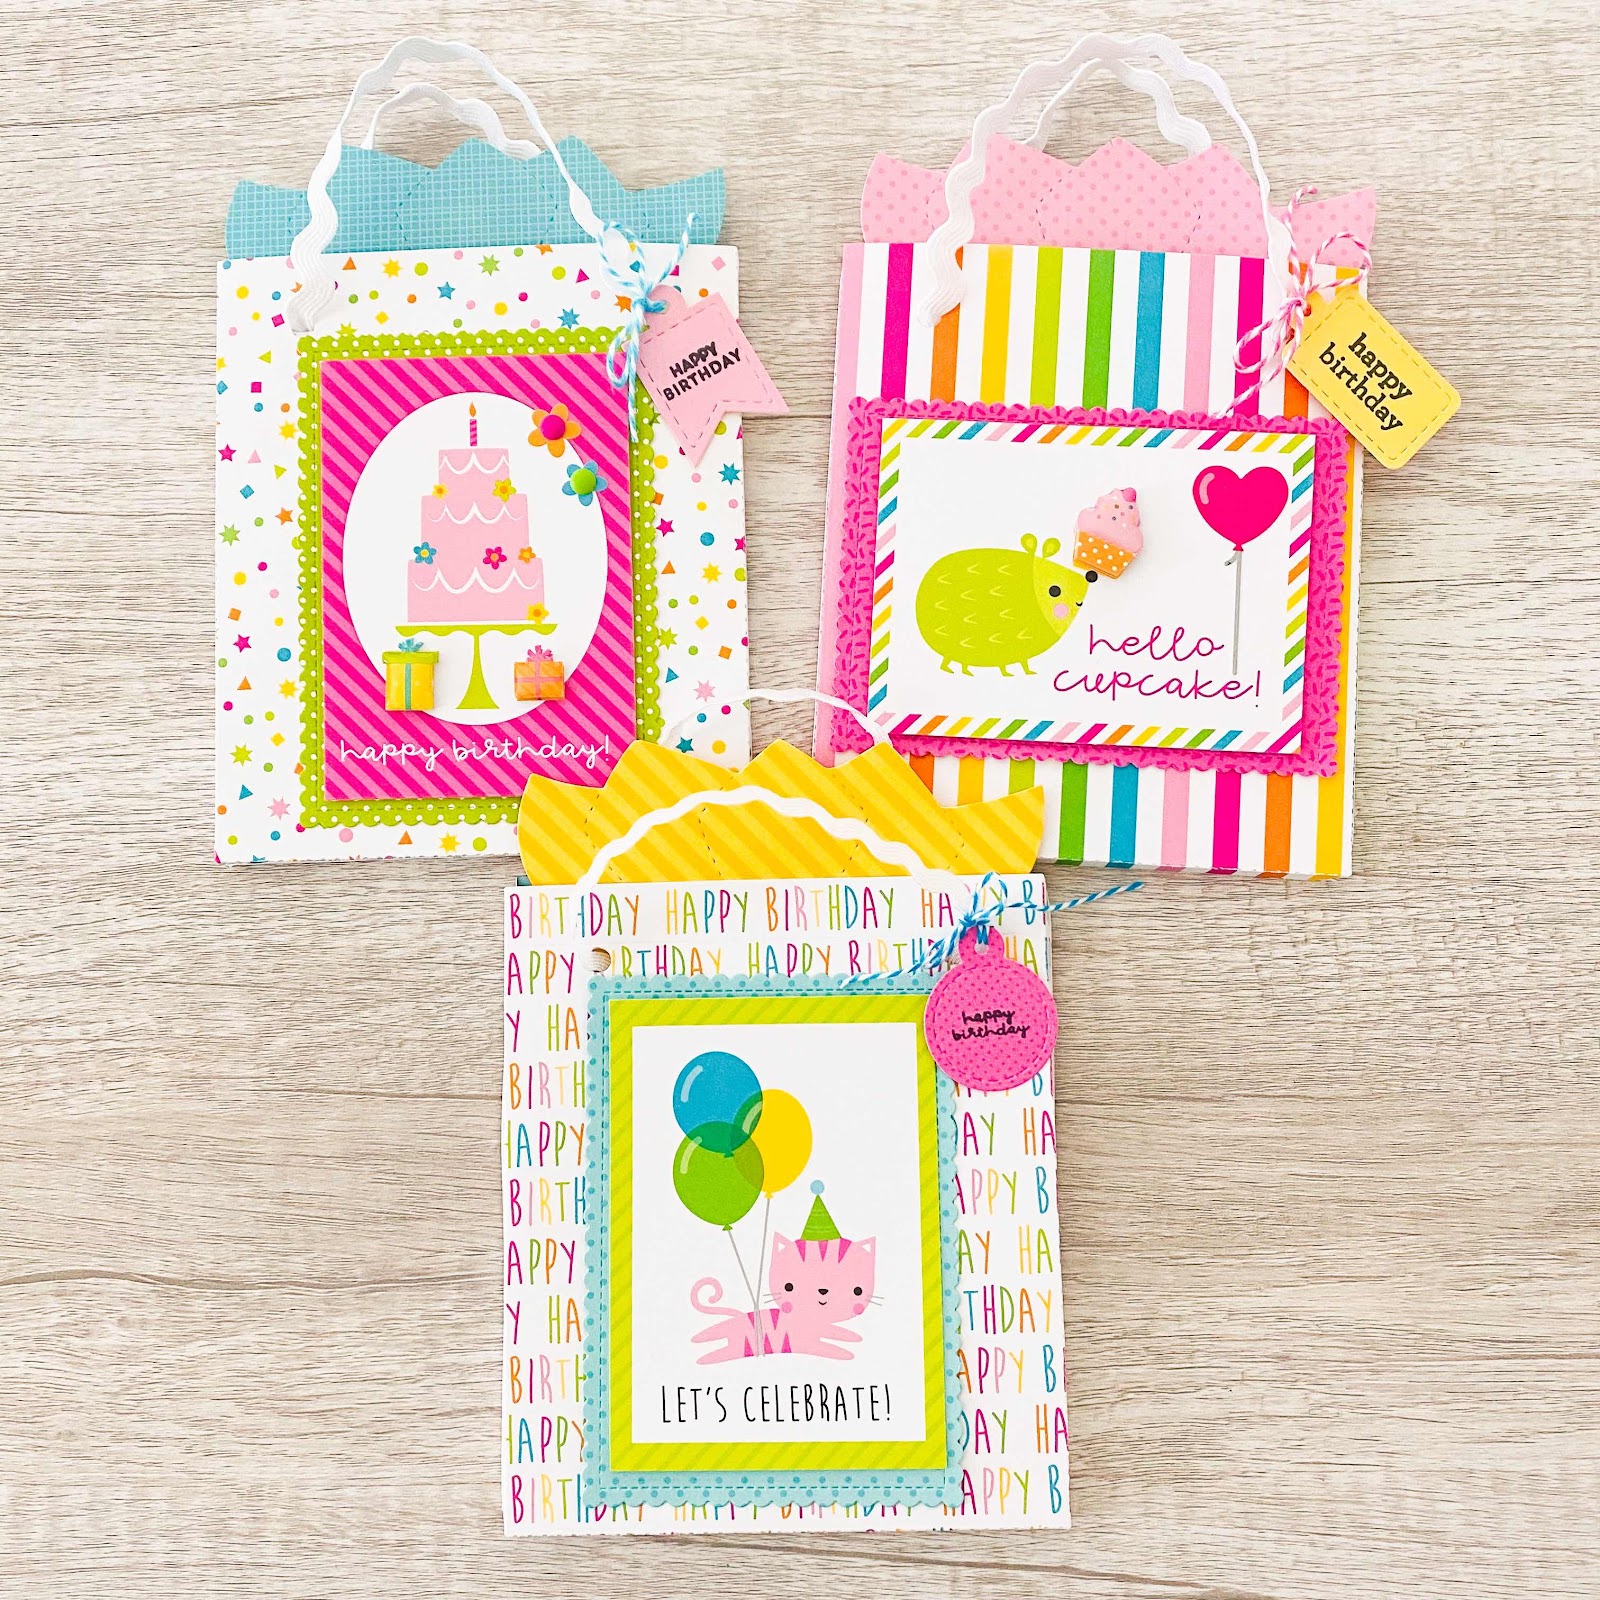
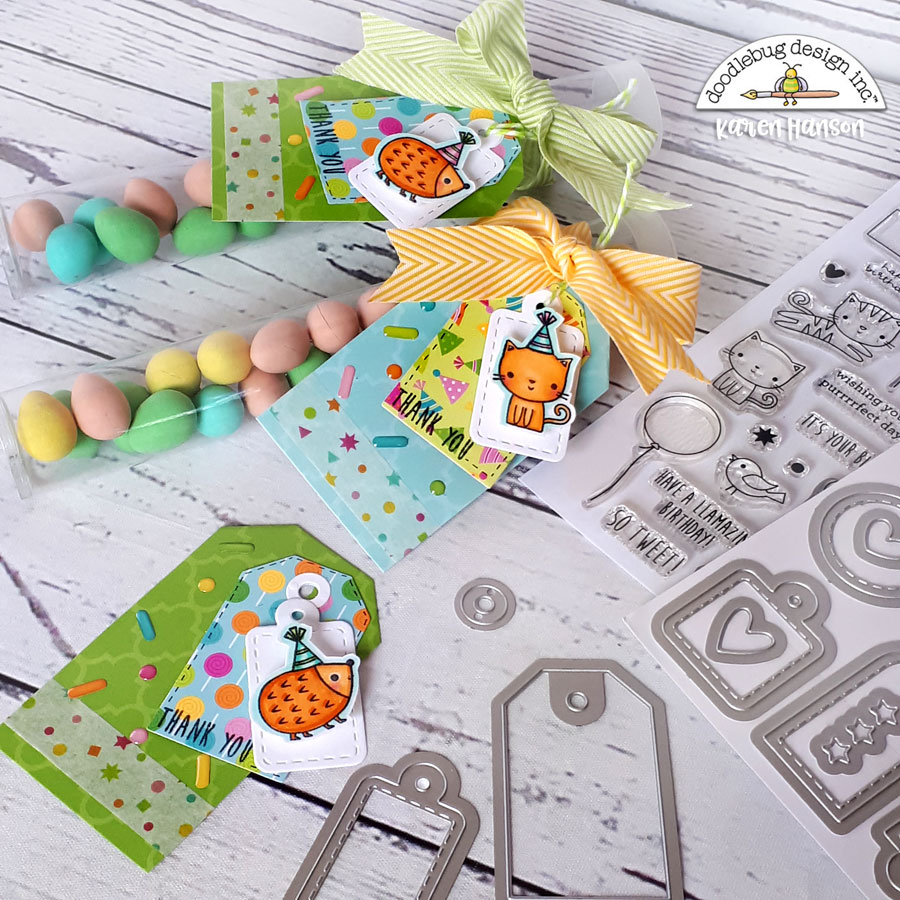
These little tags used to decorate the treat tube came together really easily with these new products. Using a combination of the Large Tag Doodle Cuts and the Mini Tag Doodle Cuts gave me a variety of tags that were easy to layer together to create dimension. 
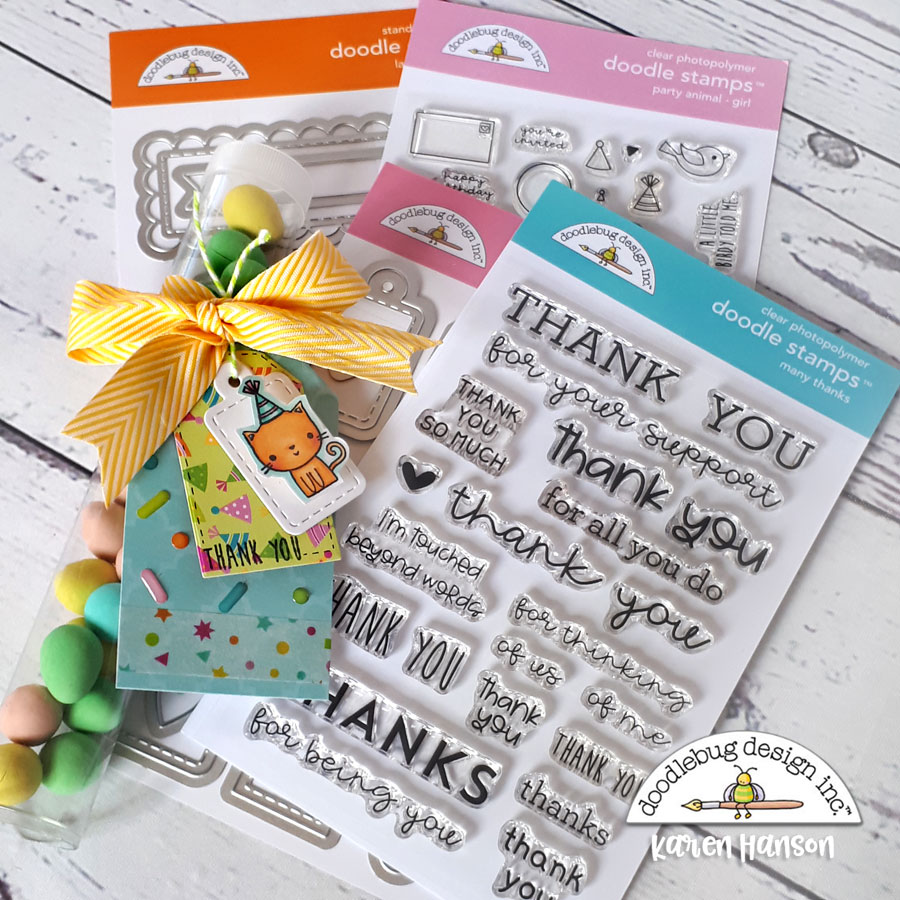
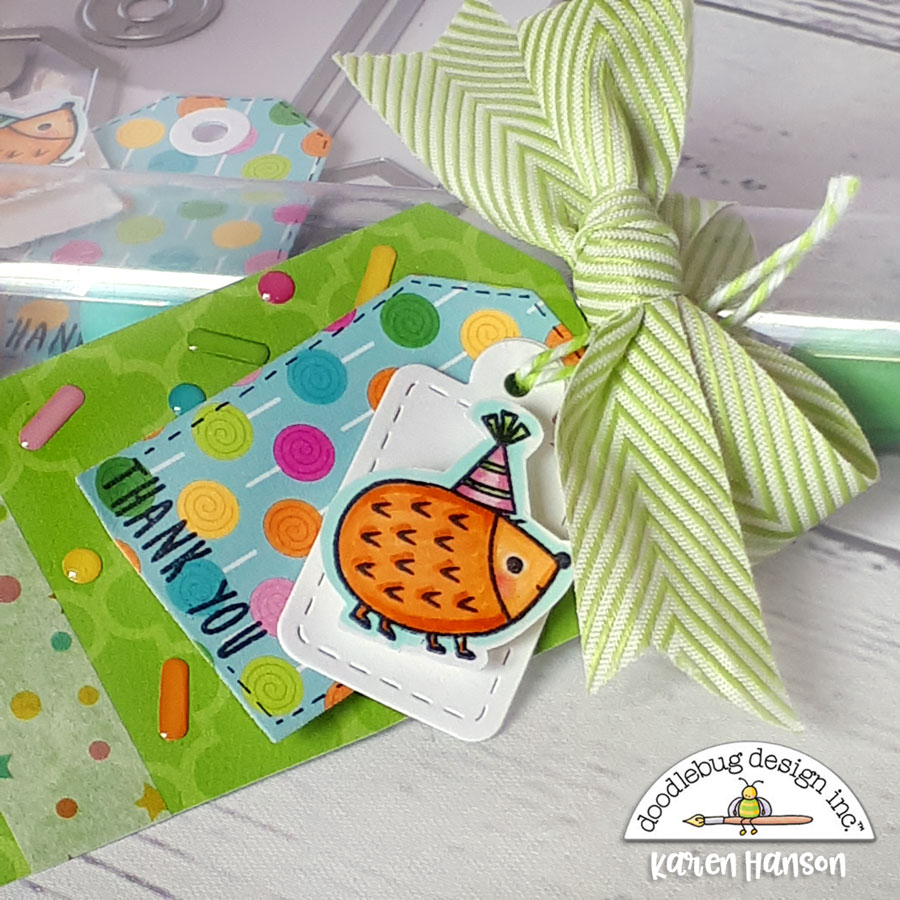
The Birthday Girl Stamp set has a number of cute little characters that are a perfect size for the mini tags. With a bit of masking to add a party hat, and a quick colour with some alcohol markers, the tags each took on a style of their own. And with some fun washi tape, a sentiment from the Occasions many Thanks Doodle stamps and and my new favourite Shape Sprinkles called...well...Sprinkles, these little little tags were everything I needed them to be! A simple way to say thank-you for helping to make a birthday special.
Thanks for stopping by!

Doodlebug Design Product:
Hey Cupcake Collection
Party Animals Doodle Stamps
Many Thanks Doodle Stamps
Doodle Cuts Large Tags
Doodle Cuts Mini Tags
Other Products:
White cardstock Alcohol markers Ink
Ribbon
Tube treat containers

Friday, May 22, 2020

HEY CUPCAKE - DRESSING UP GIFT CARDS | with Stephanie

Do you need a cute and quick way to give a gift card for an upcoming Birthday?  My project today is a fun way to dress up gift cards using elements from the Hey Cupcake Collection and resembles a gift bag with a tissue paper insert that holds the the gift card.    
Here are some things you will need.  First, choose a sentiment/focal point for the front of the bag as well as the pocket for the gift card insert from the 3x4 cut aparts (Birthday Bash Paper). Then choose some pattern paper for the top and bottom of the “bag” as well as the tissue paper insert, a layering piece for your cut apart, and the tag. You will need some ribbon for your handles and twine to tie the tag to the handle.  I also used various stickers and sprinkles to embelish.

Cut your top and bottom bag pieces approximately 5 3/4” high and 5 1/2” wide.  Snip all 4 corners of your square pieces.  Score 3 sides (bottom, right and left) about 1/4” from the edges. Punch two holes at the top for your handles about an inch from either side.  I used a die cut with stitching detail, for my insert, but if you have mad cutting skills (unlike me) you could free hand cut the tissue paper element at the top of your 4 1/2” wide and 6 1/2” high insert piece.  Adhere your cut aparts to the front of the bag and insert.  Helpful hint: on my first attempt I used too much adhesive and without thinking even glued the top of my pocket closed which made it impossible to put the gift card inside.  Haha don’t do that! :)

Next, fold your sides and bottom flaps down and glue them together.  Thread your ribbon through the holes, tying small knots on the inside to secure the handles.  If you are adding a tag, use some doodle twine to tie your tag to the handle.  And all that’s left to do is add some sprinkles and stickers!


Here’s a final look at three finished gift card holders. I think the little critters are the cutest! Thanks for taking a look today, have a good one! 
Doodlebug Products Used:
Hey Cupcake Collection
 Petite Prints Dot/Stripe - Linen/Gingham 
Doodle Pop Stickers
Sprinkles 
Doodle Twine
Mini Tags Doodle Cuts Dies

Other Products Used: 
Ribbon
Adhesive
Scallop Rectangle Die 

Pin It button on image hover