Showing posts with label Just Because Cards. Show all posts

Thursday, June 26, 2025

BEE HAPPY CUTE CARDS | with Karen

Sometimes I sit down at my crafty table and I just can't bee-lieve my luck. I mean, how many people get a chance to regularly work with the cutest products on the market? The new Bee Happy mini collection from Doodlebug is un-bee-lieaveably adorable. And if you are lucky like me and a get a chance to craft with it, you will bee smiling from ear to ear the whole time!

Okay, enough with the puns - let's get serious! :) For my first project, I decided to whip up some cards. Using some Doodlebug Cards and Envelopes for the base, I grabbed some of my favourite patterns from the 6x8 patterned paper to form a little frame.

Then I chose some adorable die cuts from the All the Things pack for the focal point on each. I couldn't resist featuring bees on each of these cards, but there are so many designs that you could try a number of different themes (but let's bee real - if you don't loves the bees as much as I do, we cannot be friends).

I also added a little sentiment from the same die cut pack. There a bunch of different ones to work with for a variety of occasions. A couple of mini paper clips and some coordinating sprinkles and these cards are ready for their debut.

I mean, come on - how cute is that face? Don't bee afraid to play with layers here. Some well placed foam adhesive and a little bend on the wings can really make the dies cute pop off of the card!

And that's it! A set of cards that can bee the reason someone smiles today - if you're willing to give them away, that is (I won't judge). Now I really am done with the puns! Thanks for stopping by! Hugs,


BLOG | INSTAGRAM

DOODLEBUG PRODUCTS USED

Bee Happy Collection
Cards and Envelopes
Mini Paper Clips

Tuesday, June 3, 2025

BERRY SWEET CARDS AND TAGS | with Tya

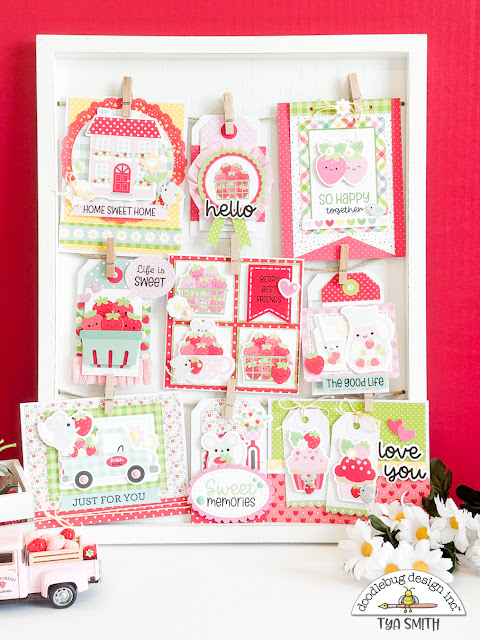
I had a great time crafting a set of handmade cards and tags using the Berry Sweet collection. With its bright colors, happy strawberries, and cheerful critters, this collection practically crafts itself. Let’s take a closer look at each piece and what I used to create it.

Card 1: Home Sweet Home:

This charming card features the cutest pink house die cut from the All the Things pack. I layered it over a red doily and a patterned circle from the 6x8 Paper Pad. A “Home Sweet Home” sentiment banner and a playful mouse from the Icon Stickers bring extra charm. I finished it off with a bow made from Doodle Twine and a few enamel dots for added texture.

Card 2: So Happy Together

I used layered rectangles of some of my favorite papers from the 6x8 Paper Pad to frame the adorable strawberry couple (from the All the Things ephemera). The “So Happy Together” card is actually a 3x4 cut-apart piece, and a little bird and daisy sticker from the Icon Stickers add sweet final touches.

Card 3: Love You Cupcake Tags

This card is actually two tags mounted onto a card base—each one featuring a cupcake topped with a strawberry and florals from the All the Things die cuts. I added a scalloped border sticker, from the This and That stickers, yellow Doodle Twine, and those irresistible mice from the Puffy Stickers. The “love you” sentiment is layered over a green polka dot paper and pink strawberry paper for extra sweetness.

Card 4: Just for You Berry Truck

The blue gingham berry truck from All the Things steals the show here! I used floral and red dot papers from the 6x8 Paper Pad, and the red polka dot strip grounds the design. A cute mouse reaches for a strawberry in the back of the truck, and a “Just for You” banner finishes it off. A bit of yellow Doodle Twine wraps it all up!

Card 5: Berry Best Friends Grid Card

I created a 4-square grid on a red polka dot background to showcase four different berry-themed scenes from the All the Things and Icon Stickers. There’s a berry basket, a teacup filled with fruit, and the sweetest little mouse. A “Berry Best Friends” banner and hearts from the All the Things complete this playful card. 

I also made 4 tags with some large white tags from my stash. I love making tags because I love playing with all the layers and all of the embellishments with the Berry Sweet collection. 


Here are some brief descriptions of each of  the tags:


Tag 1: Hello Berry Basket Prize Ribbon:

This tag features a crepe paper rosette base layered over a pink tag from the Tag Paper. I used crepe paper for added dimension, a green polka dot paper tail, and a “hello” sentiment from the All the Things. The smiling berry basket from the This and That stickers sits center stage.

Tag 2: Life is Sweet Basket Tag

A mint Berry Basket Doodle pop layered over bold strawberry patterned paper sets the tone here. I used a pink crepe paper ruffle along the bottom, layered hearts, and a “Life is Sweet” sentiment sticker. This tag screams summer!

Tag 3: The Good Life Lemonade Tag

Pink plaid and bright florals make this tag the perfect background for the adorable lemonade pitcher and glass from the All the Things.  I layered up one of the This and That stickers with the die cuts that matched for some added dimension. I added a “The Good Life” sentiment strip and a few hearts and strawberries for that fruity pop.

Tag 4: Sweet Memories Mouse Tag

This tag features a layered floral tag for the base with the cutest mouse holding a strawberry. I also added a front-facing bicycle die cut for some depth. The “Sweet Memories” oval sentiment finishes it off, with some enamel dots for a little shine.

Thank you so much for stopping by today! I hope these Berry Sweet cards and tags brightened your day and gave you a little inspiration to dive into this adorable collection. Whether you’re making tags, cards, or anything in between, this collection is full of juicy, joy-filled possibilities.

Go grab some strawberries (and maybe a few stickers) and get crafty! See you next time! 


DOODLEBUG PRODUCTS USED

Berry Sweet Collection
Bumblebee Doodle Twine

OTHER

White Tags
Pink Crepe Paper

Thursday, May 8, 2025

BUTTERFLY KISSES DOUBLE Z-FOLD CARDS | with Tya

Hello crafty friends! Today, I am sharing a fun design team project featuring the absolutely adorable Butterfly Kisses collection. I also feature 3 of my favorite things - fun fold cards, Doodle-pops, and the new Puffy Words stickers. Today, I will be showing you these six cute Double Z fold cards that were a breeze to put together! Let's Go!!!


I used the new 6x8 paper pad, some Textured Cardstock, then lots of Doodle-pops, twine, and like I said, the new Puffy Words stickers. These products are a card maker's dream come true, and make putting these together a breeze! 
Take a look at how cute the Puffy Word stickers fit perfectly on this little hidden sentiment section when you open up the front of the card! Too cute! 


Here are the six cards that I made. As you can see, each of the front panels is decorated a little differently based on the theme of the Doodle-pop. I also used two scallop rectangle dies to mount some of my Doodle-oops on, as well as the Puffy Words. 


I added a bit of yellow ink on some of my panels to make the Doodle-pops pop a bit more and not look so flat against the white panel. On these 2 cards, I did add some die cuts from the Bits and Pieces and Chit Chat ephemera.


On a couple of the cards, I also pulled in some of the 3x4 cut-apart cards found on the Color-Fetti pattern paper. I mounted the matching Doodle-pop on the card. Make sure to check out those cut-apart cards- a lot of times, they match the size of the Doodle-pop perfectly! 


 Thank you so much for stopping by today! I hope you're feeling inspired to create your own fun-filled cards using the adorable Butterfly Kisses collection. Don't be afraid to dig into those Doodlepops (I know we all hoard them lol! ) and use those Puffy Word stickers - they're seriously perfect for adding that extra bit of charm to your handmade cards.  Wishing you the happiest day, and I can't wait to see you all next time for more crafty fun! 


INSTAGRAM | YOUTUBE | BLOG

DOODLEBUG PRODUCTS USED

Butterfly Kisses Collection
 Butterfly Kisses Textured Cardstock
Doodle Twine

OTHER

Scallop Rectangle Die

Tuesday, April 29, 2025

BUTTERFLY KISSES CARDS | with Karen

When Doodlebug releases new product, I have been know to get pretty darn excited. And by excited, I mean gasping "ooooh" and "ahh" with a few squeals in there for good measure. I am always so excited by the new colour combinations and adorable icons that I just cannot help myself. Doodlebug makes great product!

The new Butterfly Kisses collection is no exception. So for my post today, I thought I would feature a couple of the products that got me squealing when I first saw them (and anyone on the design team can verify in case you don't believe me)!

This little card set is my first project up! As you can see, I am still a sucker for the Odds and Ends die cuts which so often make the primary focus of my cards.

But the first new product that had me squealing were the Puffy Words stickers. These sentiments are exactly what you would expect from Doodlebug - amazing fonts and colours - but PUFFY!!!! Yup - these are a card maker's dream but will also be perfect on other projects too!

Next up for the squeals were this round of Shakers. Now this isn't a brand new product type, but the particular designs for this collection knocked me over! While I didn't use them in a shaker design for these cards, I decided to glue them on individually on the front of the cards as an embellishment (actually, I glued a couple inside too). They are so easy to work with and I love the dimension they add. And those frogs and mushrooms - COME ON!!!! Adorable!

The last product I wanted to feature is the new 6X8 patterned paper. At first, I didn't notice the new size, but let me tell you how much I love it! I typically make standard A2 cards, so each sheet can get me two pieces of background paper now. The size also opens up the possibility of new embellishments like the tags that I cut out here to put the sentiments on. And this paper is going to be PERFECT for the new 6X8 albums we recently featured here on the blog. This is a HUGE winner for me.

You know, it might be silly to get as excited as I do with new product, but I think we could all use a little more joy in our lives right now. And Doodlebug always brightens my day. I hope these cards brighten yours! Thanks for stopping by! Hugs,


BLOG | INSTAGRAM

DOODLEBUG PRODUCTS USED

Butterfly Kisses Collection
Puffy Words Stickers
Shakers - Butterfly Kisses and Garden Party

OTHER

White cardstock
Adhesive

Monday, August 12, 2024

AT THE ZOO DOUBLE SLIDER CARDS | with Kathy

I was so excited to get to play with the At the Zoo Collection.  This is one of my all time favorite Doodlebug Collections!  I didn't have any zoo pics to scrap, so I thought it would be fun to create some cute slider cards using the Icon Stickers and Odds & Ends. As you probably know, I love a good interactive card!   Take a peek.


Here is a look at the cards before the slider is pulled....
And here is after....


I love the little critters popping up from behind the trees!!  Here are a couple of close-ups...


For this card, I used both Icon and Mini Icon Stickers.  The stamped sentiments are from the Happy Birthday Doodle Stamps set and also from the Party Animal - Boy Doodle Stamps.


The second card also uses Odds & Ends and Icon Stickers.  I added some Matte Sprinkles to make the Coconuts pop up a bit.  The sentiment is from the Snow Much Fun Doodle Stamps.  I just love how you can mix and match Doodlebug Collections!

And because interactive cards are always more fun when you can see them in action, I created a short video of the cards so you can see how they work!


That's it for me today, thanks for stopping by to peek!


BLOG | INSTAGRAM | YOUTUBE

DOODLEBUG PRODUCTS USED

At the Zoo Collection
Woodgrain Petite Prints
Happy Birthday Doodle Stamps
Snow Much Fun Doodle Stamps
Party Animal Boy Doodle Stamps

OTHER

Double Slider Surprise Dies
Stitched Rectangle Dies
Grassy Border Die
Distress Ink
Cloud Stencil
Black Ink

Tuesday, July 23, 2024

FUN AT THE PARK CARDS | with Karen

During the summer, my family loves to take in a fair or market. And while these fairs are nothing compared to the magical one we all know and love, there is one thing they have in common with some of the ones we visit up here in Canada - food! Food trucks have become a big part of summer up here for my hungry and adventurous teens so I thought I would celebrate all things "yummy" in this post today!

All-three-1

While the Fun in the Park collection is definitely fun, it is also YUMMY! This collection is filled with everything from hotdogs to cotton candy to ice cream! You will find them on the patterned papers and in all the embellishments, including the ones I pulled from the Odds and Ends collection. For each card, I selected a type of food and then created a little scene for each -featuring the ones I know my family likes the most.

Closeup-2

I added a bity of lettering onto some on the die cuts to theme the cards for a birthday celebration...

Closeup-1

... and then layered away with foam adhesive to get some dimension. In fact, don't be afraid to use different types of adhesive on each die cut. This little popcorn bucket pops more at the top then it does at the bottom because I used foam adhesive of different thickness.

All-three-2

I know that these cards are going to make my family smile and think of summer memories. And isn't that what paper crafting is all about?! Thanks for stopping by!


BLOG | INSTAGRAM

DOODLEBUG PRODUCTS USED

Fun at the Park Collection

OTHER

Adhesive
Cardstock

Tuesday, July 9, 2024

SEASIDE SUMMER - SUMMER CARDS | with Karen

Up here in Canada, school is finally out for the summer. So that means all sorts of fun in then sun and time at my craft table! So I was delighted to find out that my first assignment of the summer was to feature the adorable Seaside Summer Collection! This collection is filled with fun colours and adorable die cuts, and is sure to bring the sun into your day!

All-three-1b

So here's the thing - this collection has so many cute die cuts in the Odds and Ends pack that I couldn't help but feature them in some cute little scenes on a set of cards. And for these cards, it is all about the layers! Layers and layers of cute characters and shapes!

Closeup-2

For this card, I wanted to feature the "Let's Sail-ebrate" sentiment from the Chit Chat pack in this collection. I grabbed some of the tags from the Bits and Pieces pack to layer on top of the 12x12 patterned paper and then grabbed a few die cut shapes and characters that supported the theme (Hello Steven!!) to layer on top. I used some foam adhesive on these pieces to get some more dimension and to differentiate each piece from the others.

Closeup-1

Using a similar process on this card, I finished each of them off with some of the Mini Jewels - one of my favourite Doodlebug product. If you even have a project that just needs something a little "more", a few mini jewels surrounding your focal point will always do the trick!

All-three-2

These cards really are some of my favourites that I have created in awhile. This collection is really an absolute delight to work with! So if you have it hiding in your crafty stash somewhere or need to add it to the collection, don't hesitate. It will bring all sorts of sunshine into your life and the life of the people that you create for! Thanks for stopping by! Hugs,


BLOG | INSTAGRAM

DOODLEBUG PRODUCTS USED

Seaside Summer collection

OTHER

Adhesive
White Cardstock

Friday, April 5, 2024

DOODLEBUG SHAKERS MADE WITH LOVE ODDS & ENDS SHAKER CARDS | with Niella

Hi crafty crew! Let's SHAKE our way into April with the new Doodlebug Design product: Shaker fillers! These are so fun, you'll become addicted to collecting these! They come in all the fabulous colors you know and love from Doodlebug. And bonus, they come in storage tubes that will look amazing in your craft room! So let's get into my project! I've made some ephemera shaker greeting cards!

This idea will work with any of your ephemera pieces. Here I've used the Made With Love collection and selected the mixer, the grocery bag and the frosting bags! Firstly, using a blade, cut out a plain section on the ephemera piece. Choose a piece that has a promising area for an edge, this is so you can put a good width of foam tape on the sides to secure the shakers balls.


Once you cut the front section that will show the shaker balls, lay down some acetate and then the foam tape around the section where the filler will go. Encase cardstock over it to close in the shaker balls. Add to your card, then decorate!


With all the fun colors, you'll find so many ways to create with these. How about grabbing a couple colors and making a shaker mix, so darling! Another great idea is so use several as confetti! If you look carefully and zoom in on the Baked with Love card, you'll see I've glued several next to the sprinkles.


I've loved creating these! Doodlebug ephemera packs are so jam packed and generous, you are bound to have some left overs to create this project with!


If you made it all the way to the end of this post: here's a treat, a video showcase! ENJOY!


Thank you crafty crew for popping by today! I hope I gave you a crafty hit of inspiration! Don't forget to tag us in on your socials - we're looking forward to seeing your next Doodlebug Design project! Until next time; doodle dee!


DOODLEBUG PRODUCTS USED

Made With Love collection
Shaker Balls
Easter Assorted card pack
Puffy Heart Shapes
Sprinkles
Doilies
White Cardstock

OTHER

machine stitching
foam tape

Tuesday, February 27, 2024

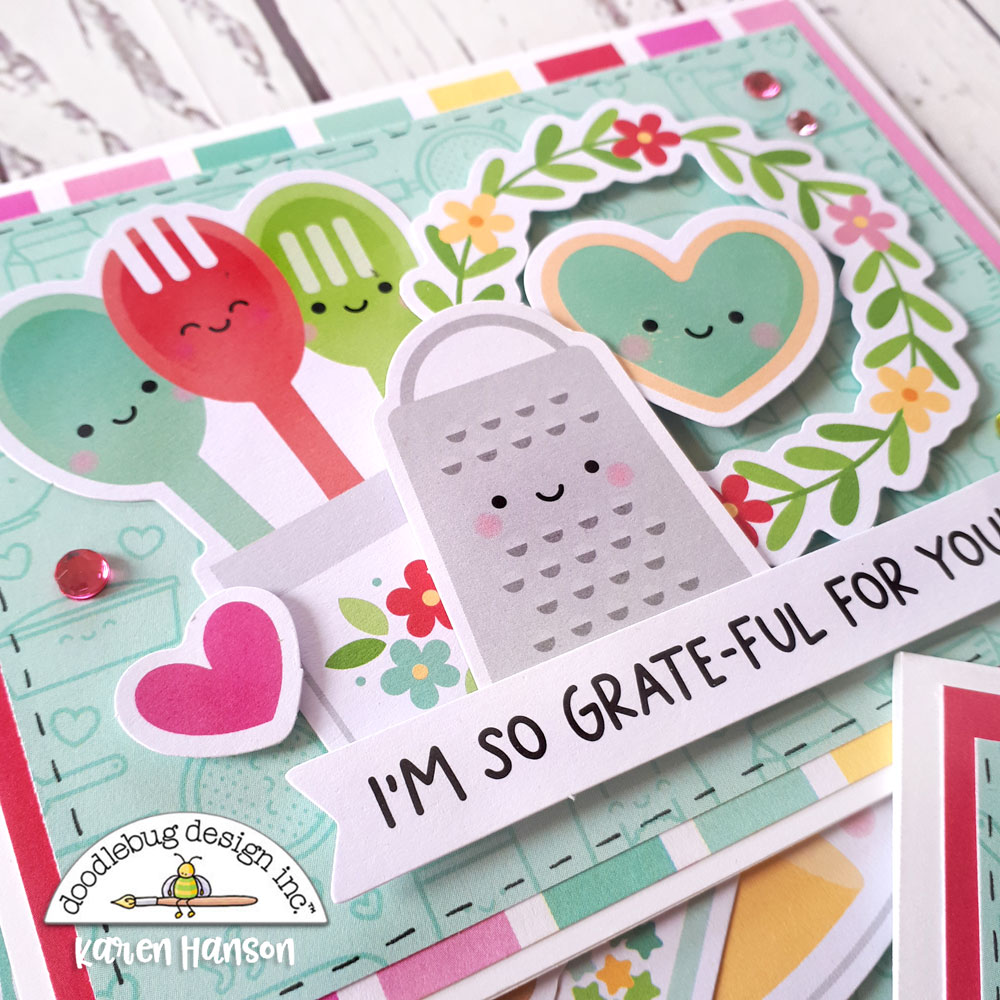
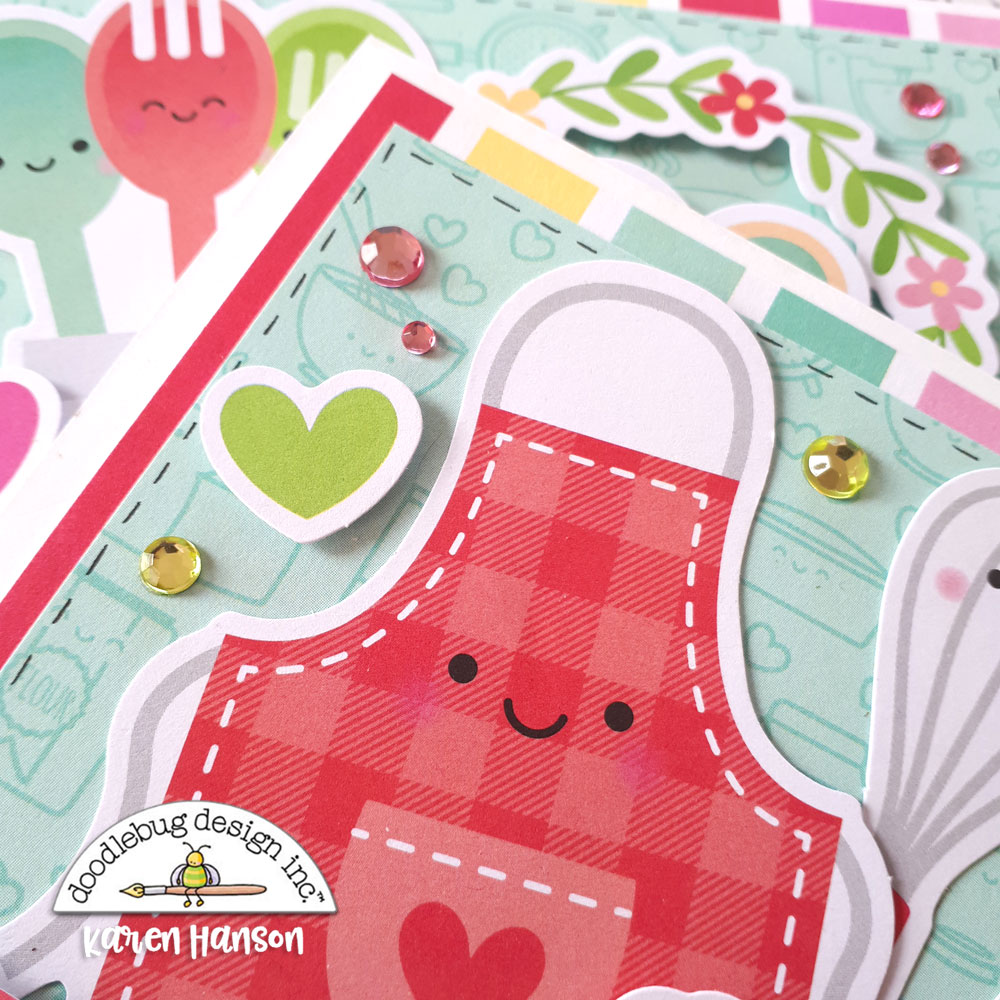
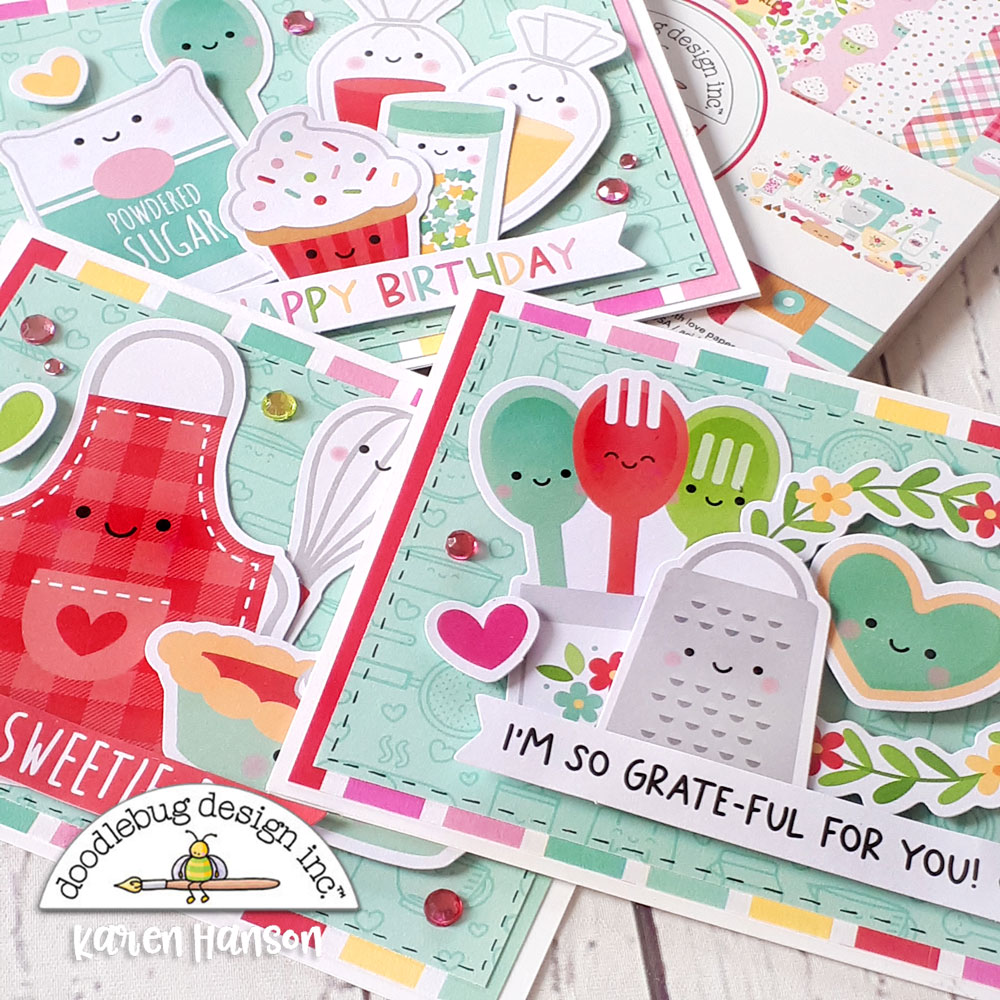
MADE WITH LOVE CARDS | with Karen

Sometimes there are collections that just speak to who we are as crafters and creators. Doodlebug's Made with Love collection is one of those collections for me. I spend equal time in my kitchen and crafty area - in fact, my crafty area shares a space with my kitchen. So every time I make a project with this collection, it really just feels like it is mine!

First-Photo

For today's project, I wanted to create some cards for some of the people closest to me that have birthdays coming up - people who I know will appreciate the adorable icons in this collection as much as I do. I started each card with layered paper from the 12x12 collection on regular A2 sized card bases that I cut from plain white cardstock.

Odds-and-Ends

And then they fun started - I laid out all of the Odds and Ends die cuts and selected the ones I wanted for each of my recipients, matching them to puns and sentiments from the Chit Chat packs. This part is always the most fun for me...while the cards have a similar shape and feel, the icon selection really sets each one apart for the recipient and can actually take me a long time to sort out. I always try different combinations and swap out shapes and sizes until things seem just right.

Mini-Jewels

Then I embellished with a some Mini Jewels for that extra sparkle and added a bit of hand-drawn stitching.

Final-photo

This playful collection is wonderful for so many reasons - for me, it's a way to share a bit of myself with those that I love. It's no wonder creating with this collection always makes me smile! Thanks for stopping by!


BLOG | INSTAGRAM

DOODLEBUG PRODUCTS USED

Made with Love Collection
Made with Love Doodle Stamps
Mini paper clips
Mini Jewels

OTHER

White cardstock
Alcohol markers
Ink

Pin It button on image hover