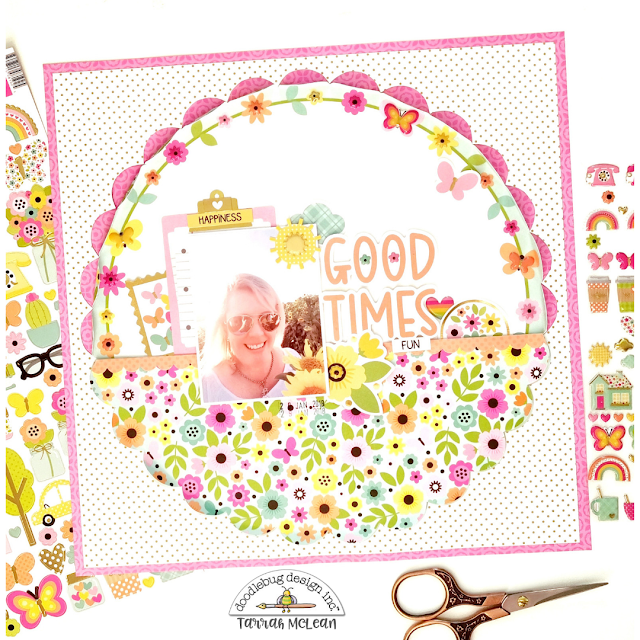
You can't go past a pretty round design on a scrapbook layout right? Especially when it comes to using the gorgeous Hello Again collection! All the florals and butterflies are so gorgeous! I just love them! The photo that I am documenting suited this collection perfectly!
I took 2 sheets of the Forever Flowers paper and completely fussy cut the scalloped circle. I then cut this piece in half and set it aside. I took the other sheet and using my craft knife, I carefully and partially cut the scallops out on the top only. I trimmed this whole piece to measure 11' x 11' and adhered it to the Pink Poppies paper. I then bent back the scallops that I had cut out to reveal some of the pink in the background paper. I then took the half piece I cut first, flipped it over and adhered this piece using craft foam, to the bottom half of the scalloped circle, I placed craft foam adhesive to the bottom parts of the circle only so that I could create a sort of pocket to tuck items in.
I took one of the scalloped border stickers from the This and That Cardstock Stickers and placed it along the straight edge of the pocket. I placed my photo on the left side of the page, layering a few Bits and Pieces cardstock pieces behind. I adhered a sun cardstock die-cut piece and a puffy sun on top in the top right corner of my photo. I adhered my title to the right of my photo using craft foam pieces to add some dimension to my page. I tucked in one of the round die-cuts and also placed a rainbow puffy heart. I love the small flowers that I added to the holes in the O's in the word 'Good'.
In the bottom corner of my photo, I layered one of the yellow die-cut flowers and added a small yellow puffy flower to the centre. I love how this looks here at it appears to be a continuation of the yellow flowers from the photo. I took a few more of the word and phrase stickers from the This and That Cardstock stickers and placed them around my layout to help tell the story.

On the flowers and butterflies in the wreath at the top, I layered each with a coordinating puffy shape suited to what was printed on the paper. I love how this just adds some more interest, texture and dimension to my layout. If you look closely at these close-up pictures, you can see where I have cut the scallops and folded them back to reveal the pink paper underneath. Lastly I stamped the date stamp and my layout was finished.


No comments:
Post a Comment