Showing posts with label Gift Card Holders. Show all posts

Friday, August 16, 2024

AT THE ZOO PAPER TOPPERS | with Niella

Hi crafty crew, so happy to see you visiting today! With the sun shining and the days outside plentiful with family and friends, have you been to visit the zoo lately! Or have an upcoming zoo themed event or even better, like planning ahead with handmade goodies, me too! Today I have a set of funtastic paper toppers for your gift giving, gift card holders, table nameplates or even bookmarks that are ready to mark your latest page! Multiple uses! And, I have a bonus video at the end of this post!


Warning: super cuteness coming up! You'll fall in love with all the cheeky and adorable animal faces ! You can almost feel them snuggle right up to you. It'll be hard to pick a fave!


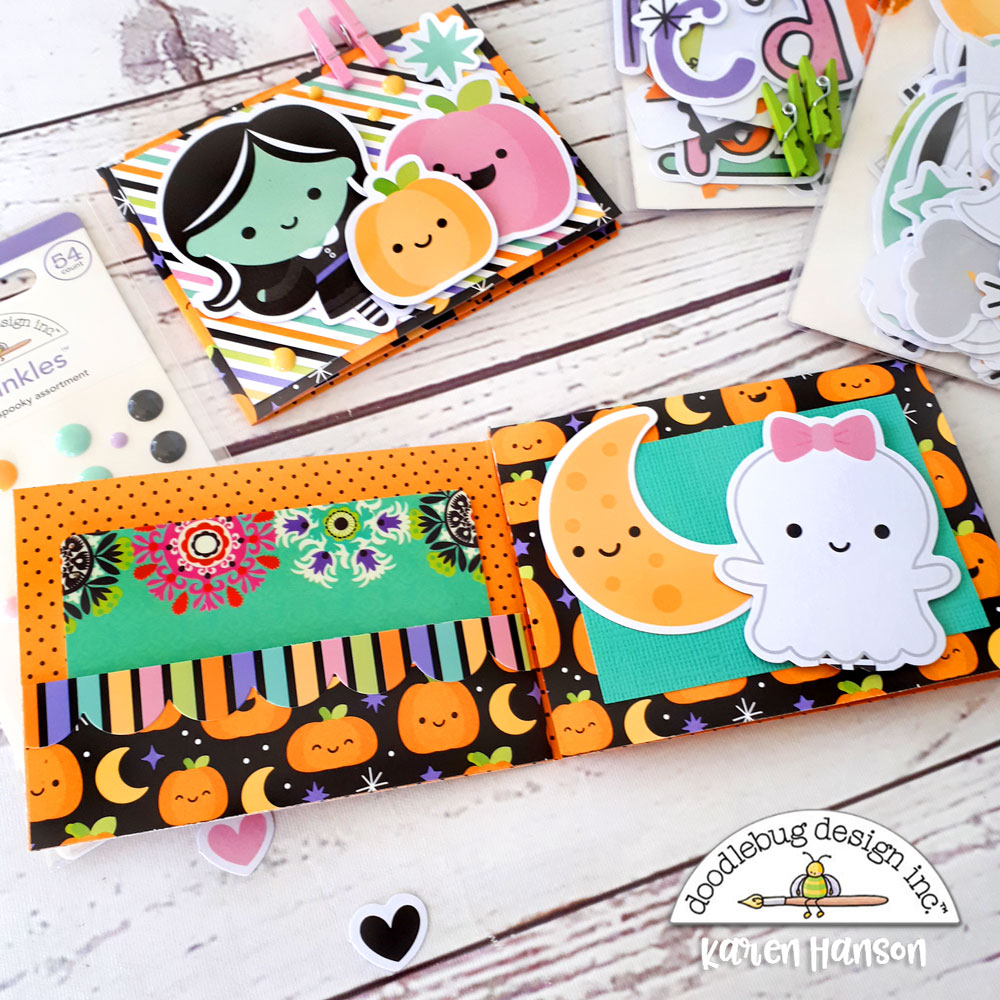
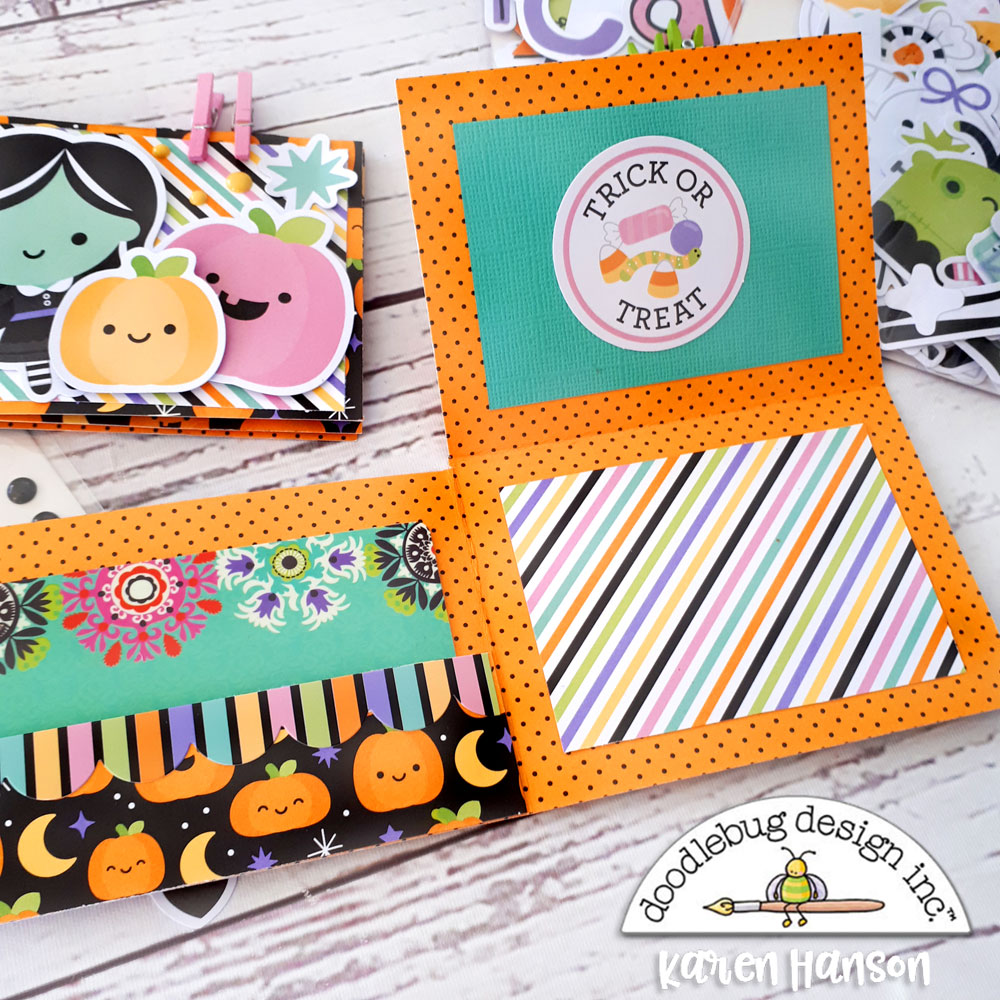
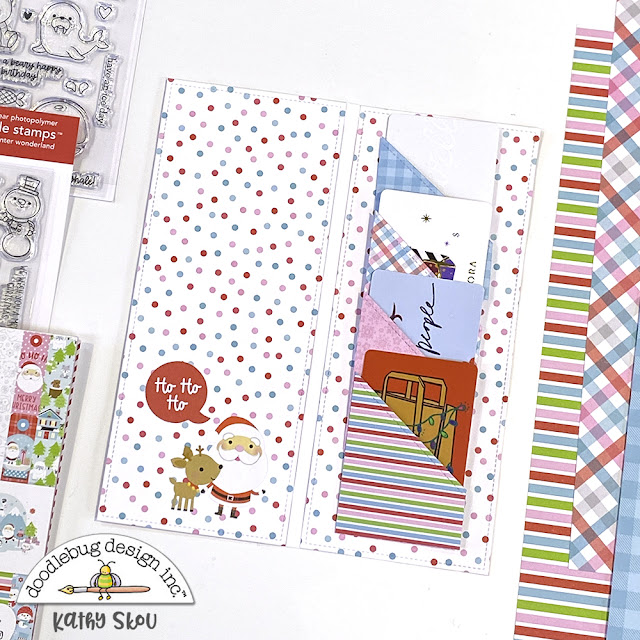
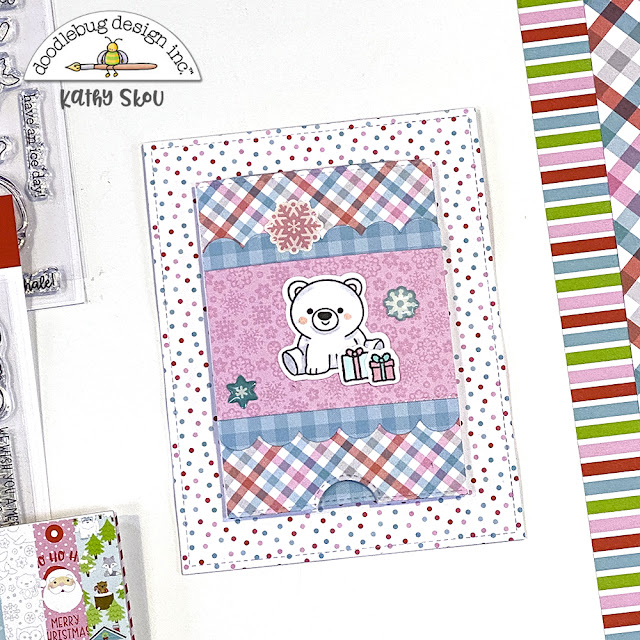
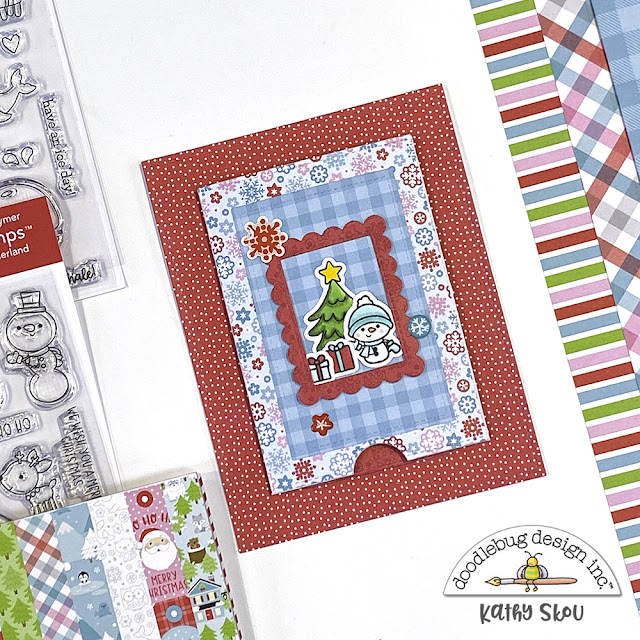
I started with the patterned papers! And cut these to 5x5" and then folded them over by 4 3/4" which leaves a slight lip under so you can see the contrasting pattern underneath. Here I chose Safari Plaid, Later Alligator, Jolly Giraffes, Elephant Parade, Lions & Tigers and Roly Poly Pandas! How roaringly sweet!


Next, I added matching cardstock from my stash as a front panel to add the Icon stickers to. Adding a background of solid color helps these elements pop! Then I dotted around the mat Sprinkles and also some glitter Sprinkles too! How snappy!


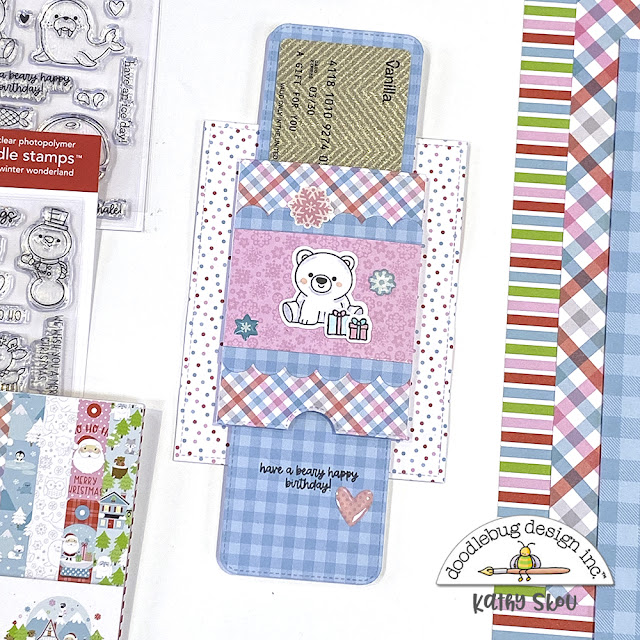
Once all decorated, I added a top stitched line using my sewing machine. This helps the folded card to stay secure for use as a bookmark over your page but can still be used as a gift card or table nameplate! There really are so many uses for these. Your ideas can be taken to new heights!


Thank you crafty crew for cruising by today! I hope I gave you a crafty hit of inspiration! Don't forget to tag us in on your socials - we're looking forward to seeing your next Doodlebug Design project! Until next time; doodle zoo!

BONUS: video flip through as promised!


DOODLEBUG PRODUCTS USED

At the Zoo collection
Glitter Sprinkles

OTHER

sewing machine
foam squares
cardstock

Friday, December 22, 2023

GINGERBREAD KISSES GIFT CARD MINI FILE FOLDERS | with Niella

Ho, ho, ho crafty crew! We are only a few sleeps away from the event of the year; Christmas! How fun to see you visit the blog today; we have the very sweet Gingerbread Kisses collection as today's inspiration station! I wanted to keep today's project quick, fun and easy in the sense of choose, cut and decorate. I've used a mini file folder die from my stash, but you can use a gift card template, turn card landscape and adhere a tab on the side for an instant mini file. Joy!


My favorite part of any project is going through a collection and picking and choosing the foundations which is the patterned papers! Gingerbread Kisses is yet another stunning Doodlebug Design collection with the sweetest faces, cutest icon stickers and the wondrous mugs and ornaments!


For the six mini file folders I've used papers that are great for background - meaning fewer patterns so whatever you decorate with can "pop" more. The papers I've used for the outside patterns are Berry Floral, Gingerbread Kisses, Cookies for Santa, Gift Wrap, Holiday Sprinkles and Sugarplums. So cute!


These mini file folders are going to be housing some gift cards! You could also create and use them for scrapbook pages, journaling, gifting or adding to the packaging of a present! Super darling.


For these mini folders I've used lotsa Sprinkles! I like how they add that extra fun and have the best effect on finishing off the project pieces. I've also used the Sprinkles Glitter Assorted in Ladybug and Limeade for bits of red + green sparkle! The icon sticker sheet is one of my favorite Doodlebug items; it has all the sweetness you could ever need. How cute is everything!


Thank you for this year of fun and inspiration giving (and receiving)! Here's to 2024 and all the crafty happiness we're sure to have! Remember to tag us in our your socials when you create with Doodlebug Design! We love seeing your creations. Merriest of Merry Christmas' to you and your loved ones crafty crew; until next time, doodle dee!


DOODLEBUG PRODUCTS USED
Gingerbread Kisses collection
Sprinkles - glitter assorted

OTHER

mini file folder die
foam dots


Tuesday, October 31, 2023

SWEET & SPOOKY GIFT CARD HOLDERS | with Karen

Happy Halloween everyone! Today is a day for tricks and treats - but not just for the kiddos. Us big kiddos needs some treats too, so I thought I would put together a little project that might work for the older folks in your life too!

   Gift-Card-holders 

And while chocolate and candy can definitely work, so can a fun gift card for a favourite place - coffee shop, craft store - anything you want! No judgement! So, with a little bit of paper from both the Sweet and Spooky 12x12 and 6x6 packs, some embellishments and adhesive, you can create some fun little gift card holders in no time!

  Gift-card-holder-open1 

I created these by simply cutting a 6x8" piece of paper and then folding it twice. I then trimmed off the one section about the gift card slot, using the left over piece to create a little pocket for the card.

  Gift-card-holder-open 

This left a little card-like side attached on the right. I embellished the top with some adorable die cuts from the Odds and Ends pack and a little sentiment from the Chit Chat pack. Now I have a little spot for a message or note.

Closeup 

Once it was all folded up again, I had some more fun placing some die cut characters from the Odds and Ends pack, a few Sprinkles, and then secured the whole thing with a couple of mini clothes pins. The part that took the longest was picking up the gift cards to put inside. I think I might slip a couple of these off to my daughters' teachers...heaven knows they might need a little something after dealing with the kiddos on Halloween! Thanks for stopping by! Hugs!

DOODLEBUG PRODUCTS USED
Sweet & Spooky collection
 
OTHER
Adhesive

Monday, December 5, 2022

CANDY CANE LANE GIFT CARD MITTENS | with Wanda

Hi crafty friends! Happy Holiday Season to you all! Wanda here today to share a project made with the brand new Candy Cane Lane Collection! It's so holly jolly and cute and fun! Everything you could want in a winter paper collection... I was smiling the entire time I was making this project to share with you. I am always looking for cute handmade gift items to give out to friends, neighbors, and coworkers this time of year. I decided to make some paper mitten ornaments that hold a coffee gift card tucked inside. After the recipient takes out the gift card, they can hang the ornament on their tree! I will put the date and name on the back of each one too.

I started by using the gorgeous 12x12 papers from the Candy Cane Lane collection. I die cut out two mittens in each color and then glued them together back to back. I die cut two cuffs and did the same, being careful not to glue the top shut. I used the Gingham 6x6 paper pad to make the cuffs. I tucked a little bit of tissue down inside the mitten to make it puff out just a little. 

I used silver brads on the cuffs and put some Chunky Twine through the brads to act as the ornament hanger part. Then the really fun part - decorating the mittens with stickers and ephemera! I tucked a bit of tissue, the coffee cards, and a small candy cane into the top opening. Super festive. I can't wait to give them away! I used an old mitten die that I've had for years. You could easily use a template from online, or an SVG file of a mitten. I thought this idea would also be cute with coffee mugs instead of mittens. I might try that!

Here are my three mittens...

10

 I used lots of stickers (Icons) and gems and all the good things from the Candy Cane Lane Collection. If you look closely, can you see those super cool clear acetate snowflakes? Love them!

10


12

I adore this happy jolly snowman! He's holding his Christmas tree, and I added lots of rhinestone ornaments to it! I do love the sparkle!

10


10


10


10

I hope I've given you some good ideas for your Christmas crafting today! December is going to go by fast and I'm hurrying around trying to get everything done. I wish you a joyous holiday season! I will see you soon with another project. Until then, happy crafting!


10

BLOG | INSTAGRAM

 DOODLEBUG PRODUCTS USED

Candy Cane Lane Collection
Chunky Twine
Gingham 6x6 Paper Pad

OTHER SUPPLIES

Mitten Die or template
Silver Eyelets and Eyelet Setter
Adhesives

Monday, December 27, 2021

LET IT SNOW GIFT CARD HOLDERS | with Kathy

Hi Everyone!  I hope everyone had a wonderful holiday and got to spend at least some time with friends and family!  We had a wonderful time, good food, good friends & family!  Of course there was some last minute crazy gift buying on my part... a few gift cards, which I decided to package up with the ADORABLE Let it Snow Collection.  Take a peek...


My first gift card holder was for my daughter.  Every year, I do a little gift card surprise to her favorite shops.  She's living on her own these days in NYC so it's always good to get some fun money to spend!  I made a slimline Gift Card wallet.  On the front, I used a circles die to cut fun windows and filled them some little scenes using the snowmen stickers from the Icon Sticker Sheet.


When you open the card, I added 4 pockets stacked on top of each other.  Each one holds a gift card.  And of course I had to add the adorable Santa and reindeer!


For my next two gift card holders, I created double slider cards.  I added some cute stamped images from the Arctic Friends Doodle Stamps on my first slider along with some Let it Snow Snowflake Sprinkles. The scallop edge was cut using a die from the All Occasion Borders and Edges Doodle Cuts. 


And when you pull the tab on the bottom, the gift card slides out of the top!  This was for my great niece who has a birthday right after Christmas!  I love how you can use Let it Snow for non-holiday projects!


For my second slider card I used the cute little snowman, tree and present stamps from the Winter Wonderland Doodle Stamps along with more snowflake sprinkles.


Again, pull the tab and the gift card pops out of the top and the sentiment on the bottom!

Have you created any projects using the Let it Snow Collection?  Be sure to tag Doodlebug Design on Facebook and Instagram, we always love to see what you make!  That's it for me today, thanks for stopping by to peek!

BLOG | INSTAGRAM

DOODLEBUG PRODUCTS USED
Let it Snow Collection
Arctic Friends Doodle Stamps & Doodle Cuts
Winter Wonderland Doodle Stamps & Doodle Cuts
All Occasion Borders and Edges Doodle Cuts

OTHER
Double Slider Dies 
Frames Dies 
Stitched Rectangle Dies
Slimline Stitched Dies
Slimline Circles Die


Wednesday, December 22, 2021

LET IT SNOW GIFT CARD HOLDERS | with Karen

I don't know about you, but getting ready for the Christmas season this year has been a challenge. Every year I tell myself that I am going to be ready, and every year, I find myself scrambling with those few last minute gifts. But you know what always saves me? Gift cards and Doodlebug! Together, they can turn any last minute gift into a cheer! Cue the cute Doodlebug gift card holders:

All-three-1

These gift card holders were created with the new "Let it Snow" collection. Featuring the awesome patterns in the 12x12 collection and some of the die cuts from the Odds and Ends collection, they create cute little packaging for gift cards galore!

Closeup-Odds-and-Ends

Closeup-Tags

And while you could just pop the gift card right inside the pocket, I thought it would be cute to add another little tag inside for a message. The 12x12 "To & From" paper already has pre-patterned tags that you can just cut out. I added a little bow and left the blank side on the back for a little message.

All-three-2

And the best part it is that these work just as well for a winter-themed birthday or even just a little "pick-me-up" for a colleague in the new year. It is such a versatile collection!

So, if you are anything like me scrambling at the last minute, whip yourself up a few of these to save the day. And if you are not, whip yourself up some anyway so you are ready for next year! Perhaps I should do that too! :)

Thanks for stopping by!
Hugs,


BLOG | INSTAGRAM

Doodlebug Design Product:
Let It Snow Collection
Winter Wonderland Doodle Stamps and Doodle Cuts

Other Products:
Adhesive
White Cardstock

Monday, June 3, 2019

COMBINING COLLECTIONS WITH UNEXPECTED RESULTS | with Brigit

The hats off collection along with the pocket card from the dragon tails really came in handy for a bunch of gift card holders I had to make for an upcoming party. These definitely were a super easy and fun project to put together.


 I adjusted the size of the pocket card and added two notches on the inside card to hold the gift card securely.


I added the bookworm to the congrats ribbon and print and cut the fronts out, this made it quick and easy to then assemble the pieces together.


Adding the crushed velvet belly band with some chunky twine dressed up these gift card holders. I used pop dots to adhere the ribbon to the pocket which holds down the flap along with the graduation clip.
Doodlebug Products Used:
hats off party hearty double-sided cardstock
hats off shutterbug double-sided cardstock
hats off graduation cute clips
beetle black crushed velvet 12x12 cardstock
stone gray dot-stripe petite prints
lily white textured cardstock
beetle black chunky twine
hats off congrats ribbon (svg, silhouette)
hats off bookworm, (svg, silhouette)
dragon tails pocket card, (svg, silhouette)

Thanks for stopping by and have a wonderful day!
Pin It button on image hover