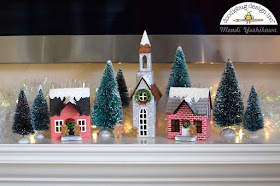
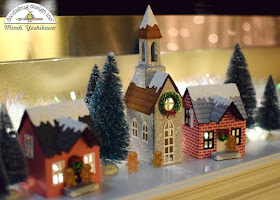
I have been wanting to create a Christmas village ever since I received these sweet Sizzix Village dies earlier this year. I knew if I didn't do something with them now they might become buried under a pile of other things on my rapidly growing "someday" list.
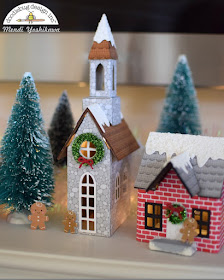
Knowing these would take some a bit of time to create and wanting them to last year after year, I started by first cutting my houses from some heavy weight chipboard. I then cut them again from some of my favorite Doodlebug Petite prints and other small prints from various 6x6 paper pads. Because of the thickness of the chipboard, I needed to cut my patterned papers apart at the corner seams so that the windows and other openings would line up properly on all four sides. To get around this, I matched the patterns with a corner piece that I created for each corner using a small piece of paper, scored and folded in half.
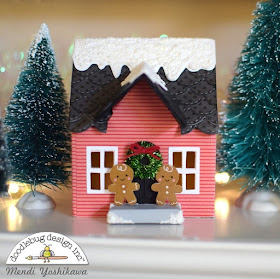
To add a fun detail to my roofs, I turned to various scalloped border dies in my stash, cutting them from 1/2" wide strips of patterned paper. To keep the layers from blending together, I inked each edge with a bit of distress ink using a foam applicator.
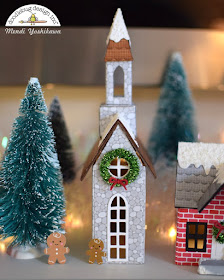
One of the die sets come with the pieces to cut the snowy rooftops. I started by cutting them all from white cardstock and then coated them with a Marvy Uchida Snow Marker. Before heating them with my heat gun to puff them up and make them look real, I sprinkled them with Doodlebug's Lily White Sugar Coating Glitter. When heated, the glitter becomes permanently adhered and it left them looking so sparkly and pretty! I completed my houses, with simple wreaths created with a couple metallic pipe cleaners wrapped around a pencil and adhered with a little liquid glue. I love how they added a touch of green and added even more sparkle to my scene!
To complete my scene I picked up some miniature trees and an iridescent garland at my local craft store to act as a filler in the background, while hiding my miniature strand of battery powered lights.
I hope I've inspired you to think outside the box and mix papers from different Doodlebug collections on your next project. ;) To create my village I mixed the following papers:
- Dragon Tails 6x6 pad (stone print)
- Milk & Cookies 6x6 pad (brick print)
- Ladybug Daisy-Stripe Petite Prints
- Beetle Black Dot-Grid Petite Prints
- Bon Bon gingham-linen petite prints
- Stone Gray gingham-linen petite prints



Love this village!! Absolutely fabulous! I’ll miss you!!!!
ReplyDeleteThank you Kathy! I'll REALLY miss you too. <3
DeleteWOW WOW WOW, those buildings are great!
ReplyDeleteThank you Sharon. I hope you have a very Merry Christmas! :)
DeleteThis village is spectacular! Every detail is just so wonderfully done. I will really miss seeing your amazing projects here on the Doodlebug blog. I greatly admire your work. Wishing you the very best Mendi in whatever new crafty adventures are coming your way!
ReplyDeleteThank you for your sweet comment. It's so appreciated. :)
Delete